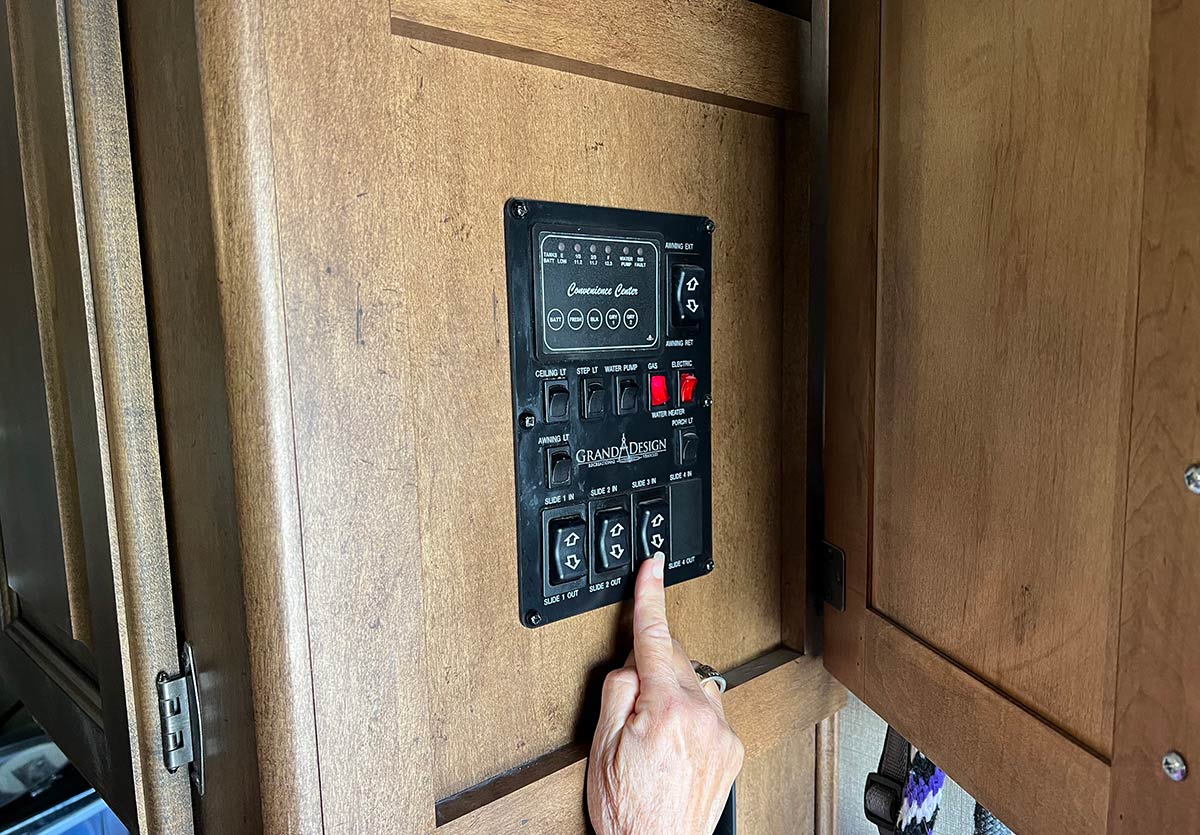
Like most systems in an RV, when you push a button you expect things to work. When that button controls a slideout room and nothing happens, whatever is preventing its operation can usually be rectified — carefully — by the owner with time, patience and knowledge.
Slideout rooms improve livability by leaps and bounds — but they seem to always refuse to extend or retract at the most inopportune times. The Schwintek system, found on many RVs, can be repaired in the field with a little knowledge and right parts on hand.
here’s no denying that RVs are complex and require a certain amount of understanding of how systems work as well as a commitment to perform necessary maintenance procedures to assure longevity and trouble-free function. Avoiding slideout-room failure is especially important when on the road — pushing the slideout retract/extend button when nothing happens is one of those sinking-stomach situations that all owners dread.
There’s nothing worse than trying to vacate an RV site only to find that the slide-out will not retract and the park manager is grinding on you to leave to make way for the next renter. While most slideouts have override provisions to manually retract the room, the Schwintek is a different animal, requiring more basic measures: pushing by hand. And, of course, Murphy’s Law dictates that the slide failure occurs where there are obstructions that can prevent you from physically pushing in the slide out — which in the best circumstances can take two or three strong people. Trying to push in bedroom slides that are out of reach can be even more problematic.
Schwintek slideout systems can be found on many RVs and generally are very reliable — but, like all mechanical components, they are not immune to failure. Fortunately, these systems are not complicated and can be diagnosed without special equipment. Motor synchronization will help eliminate many of the common problems if you refrain from extending or retracting the slideout part way followed by stopping and reversing the direction, which can confuse the motor sensors. Also, this system can make loud noises while moving in and out, which generally is not something to be overly concerned about.
Troubleshooting the Schwintek
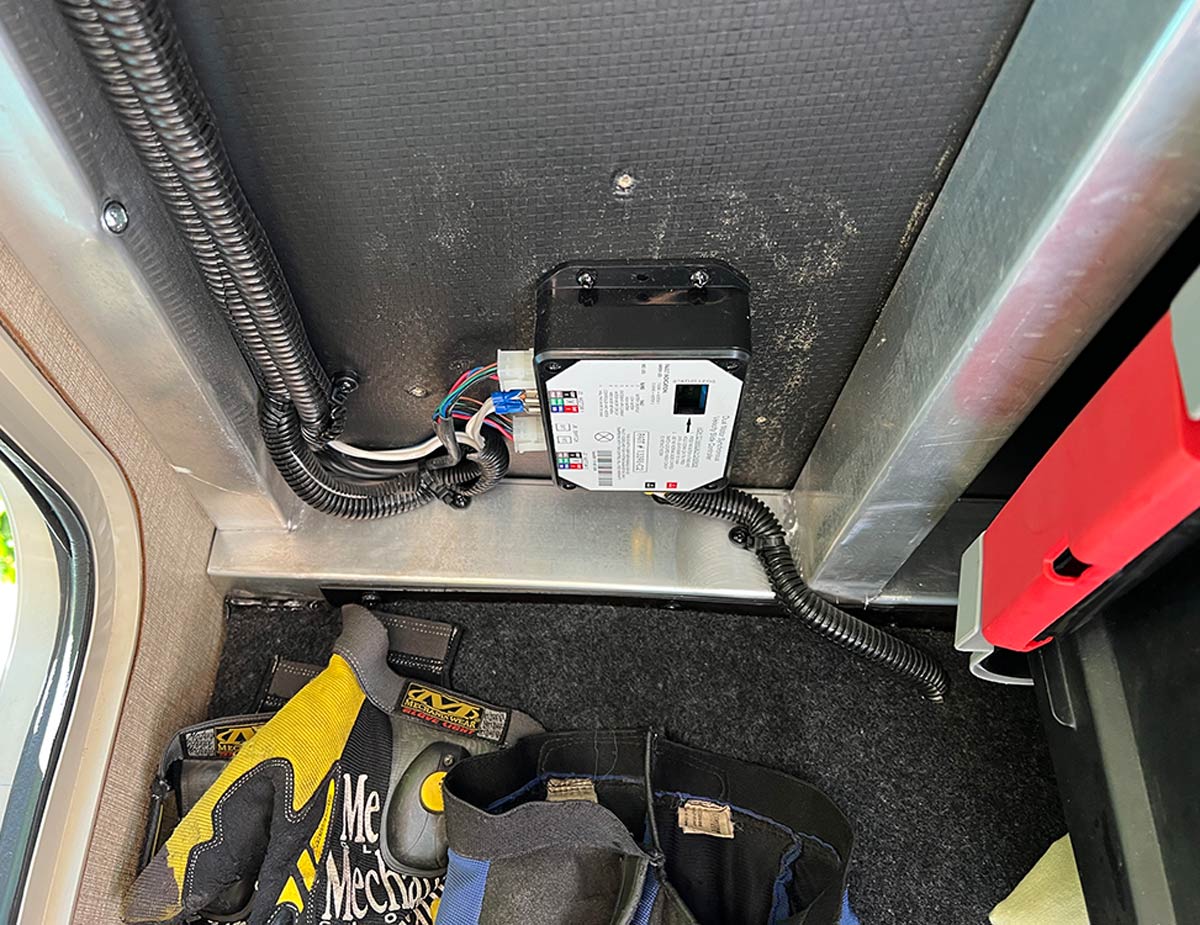
If something goes wrong, the first step is to locate the controller. Most manufacturers mount the controller in a nearby exterior compartment (although it can also be mounted inside the rig, behind a trap door inside a storage cabinet). Generally, these control boxes are mounted near other 12-volt DC equipment or a breaker panel. In some cases, these control boxes are hard to locate; you may be able to hear a clicking noise and follow the sound to where the box is mounted.
Once you locate the controller, the number of flashing lights will correlate to the codes printed on the box faceplate. In my experience, the most common problem is motor failure. Try resetting the system first if motor failure is detected. To do this, you’ll need a screwdriver with a small tip. Locate the reset button to the right of the flashing light and push/release it six times, then push the button one more time and hold it down until the light stops flashing. Then, try retracting/extending the slideout again; if doesn’t move — or if you only hear one motor moving — the control board will go back into lockout mode and you’ll see the flashing light again. At this point, unplug the suspected problem motor, reset the controller again and move on to the following step in diagnosing the problem.
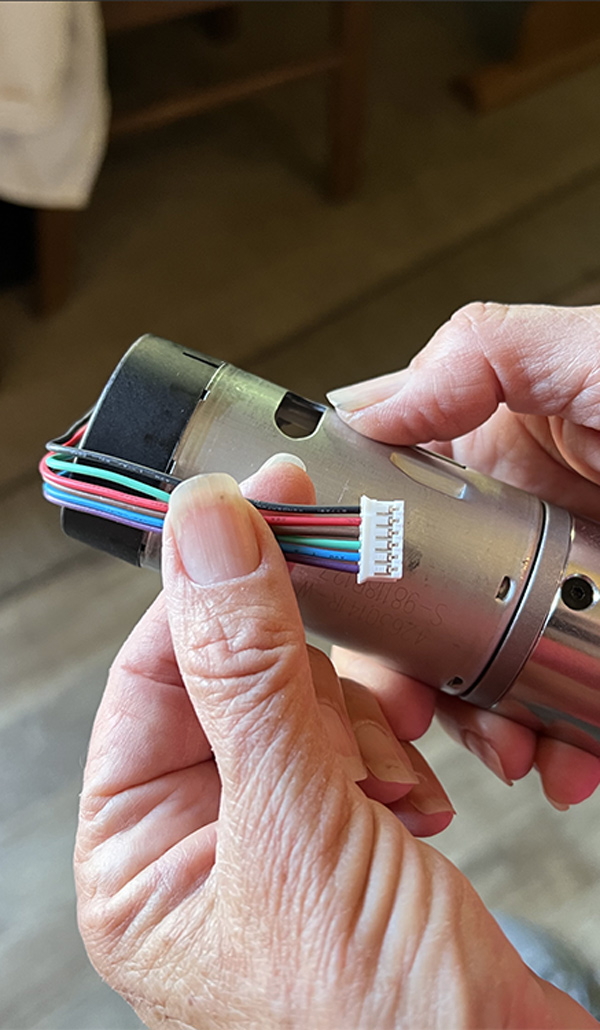
Rather than assume that the motor is defective, use 12-volt DC jumper wires to bypass the system and power the motor independently after disconnecting the harness/plug. At first, just tap one set of leads in case the motor runs; if the slideout is all the way in or out, the motor will shut off quickly. The motors have a wheel on top with sensor wires that signal the control board to determine if they are functioning properly. If one or both motors fail to turn, there may be an issue with the wiring harness or the motor(s) itself.
At this point, you’ll want to confirm whether the motor(s) is not working. This can be done without removing the motors — but you’ll have to be careful not to spin the motor(s) for more than an instant or you’ll throw it out of sync. Separate the connector at the motor and apply 12-volt DC power to the red and black leads (positive and negative, respectively). If the motor turns for a quick moment, plug the connector back in and go back to the control board; separate the connector there and apply 12-volt DC power to the red and black leads going to the motor (not the control board). Ask someone to listen to the motor inside while you touch the 12-volt DC power leads to the red and black wires. If the motor turns, then the problem is with the control board; if it doesn’t, the problem can usually be traced to the harness or the connectors at the control board or the motor. Preferably, this procedure should be done with the motors removed with the slideout partially open, but that will require quite a bit more work.
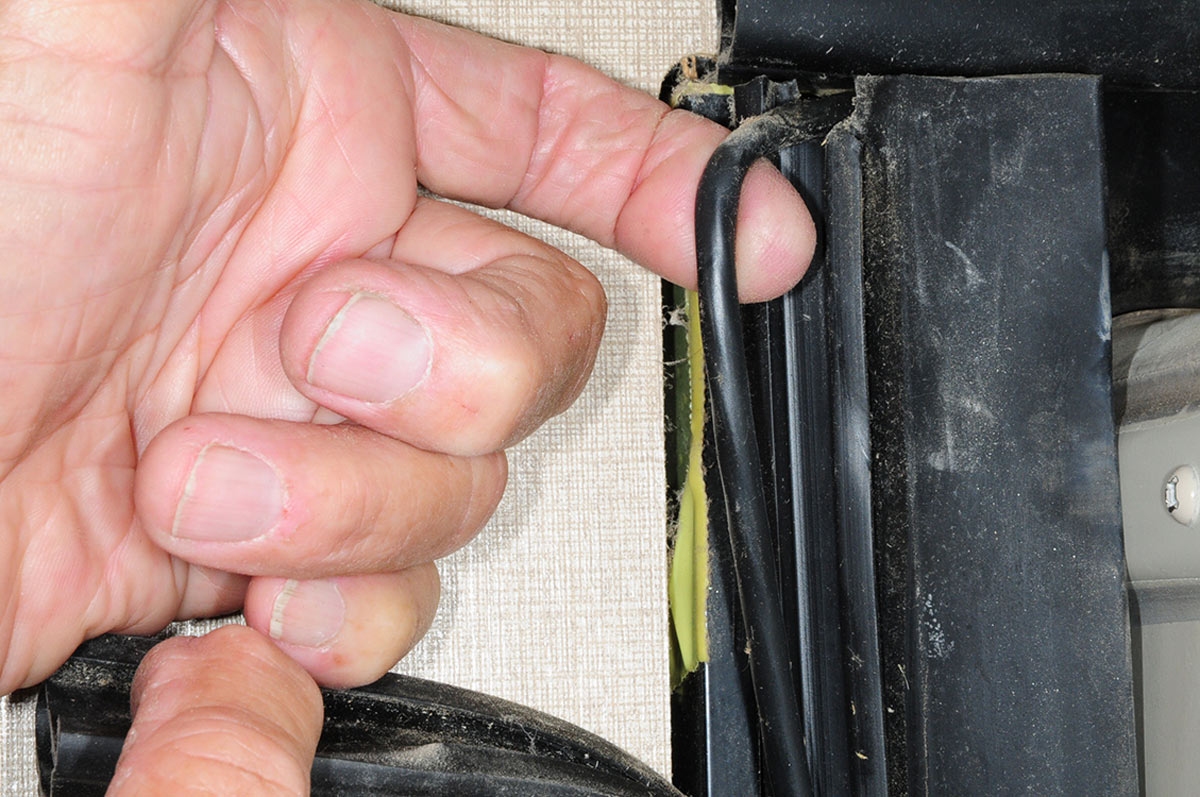
Above all, be careful: The wires that connect to the motors are rather delicate and can be separated and/or broken when the connectors release or if the retention screw that holds the motor in place dislodges and allows it to spin while the gear is seated. In this scenario, the wire will wrap around the motor and eventually pull apart. This will be evident if you pull the inside seal back and look at the wires and connector. In most cases, the wires cannot be repaired (unless there’s adequate room). The wires are light gauge and the connector is fragile, so it may be necessary to replace the motor. If there’s enough room to work — and you don’t have a replacement motor handy — you may be able to solder the wires and protect them with shrink tubing or use small butt connecters; in either case, you’ll end up with a permanent installation and you will need to cut these apart should the motor need replacing down the road. It’s best to carry a spare motor because it may be hard to locate one quickly. These motors are available from Amazon and Lippert Components (store.lci1.com).
If the control board lights identify an out-of-sync situation, you will need to sync the motors. There’s no particular reason (other than the scenario mentioned earlier) why the motor can become out of sync. Once the motors are out of sync and the sensor wheel on top of the motor tries to rectify the situation a few times, a signal will be sent to the control board and go into lockout. At this point, you will need to reset the board and sync the motors.
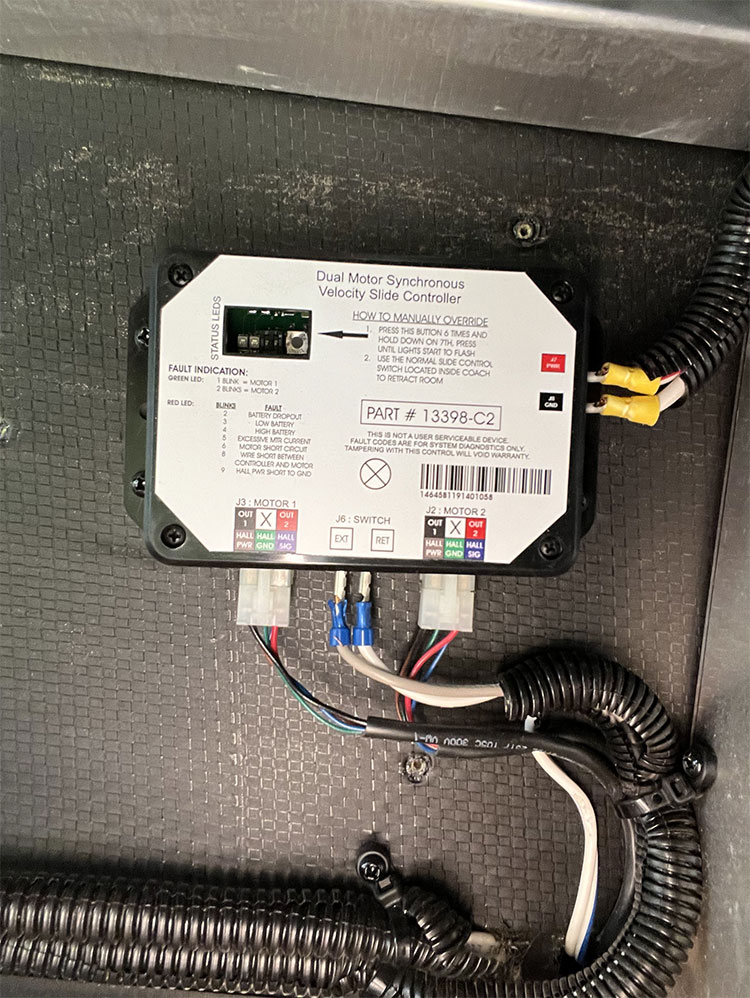
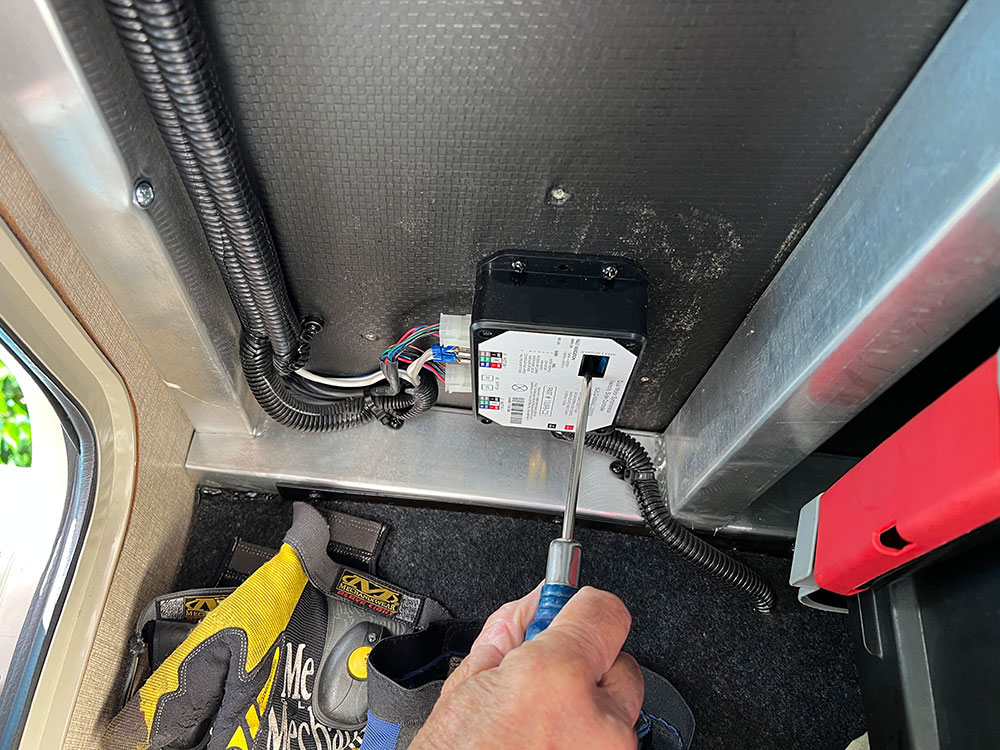
If the slideout refuses to move out or in, the first step is to reset the controller. There’s a recessed button that needs to be pushed with a small object, like an ink pen. You’ll need to hold the button down until the light starts to flash. Here an awl is used to push the button. If the reset doesn’t solve the problem, you’ll have to dive deeper.
There are a couple of ways to do this. If the slide out is extended, bring it in about 2 or 3 inches and then extend it by holding the button down until the motors stop making the familiar sound. You will need to do this seven times until the motors send a signal to the control board that all is good. If the slideout is retracted, perform the same process in reverse. During this process you may need to reset the control board a few times, since it may get signals to go into lockout.
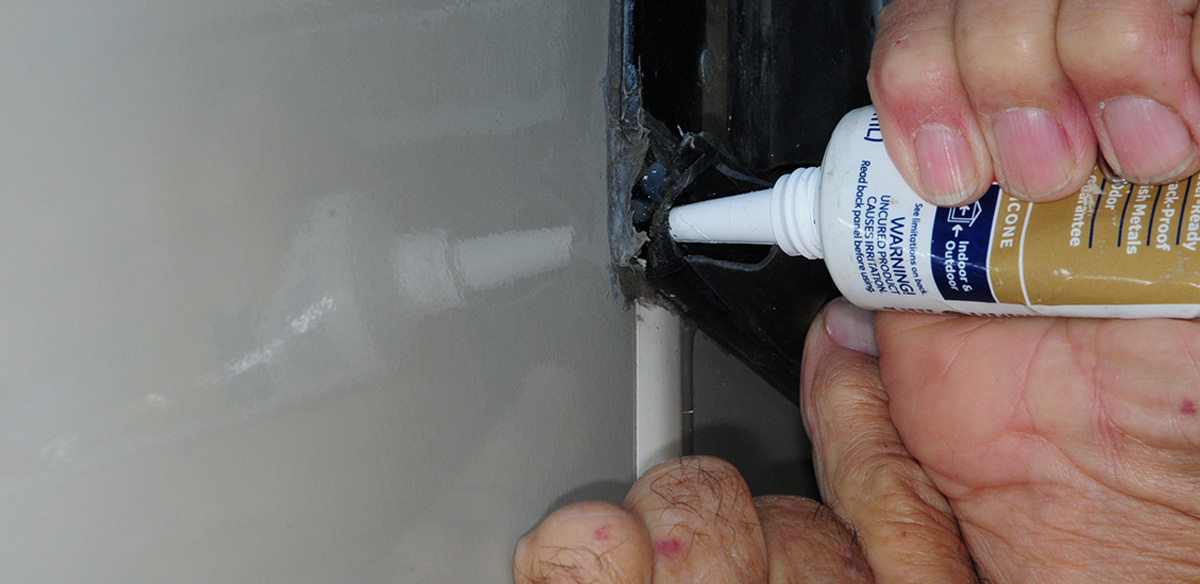
Replacing the motor does not require a heavy mechanical aptitude, but — depending on where the access points are located in relation to adjacent obstructions — it may be difficult to reach. It’s not uncommon for one side or the other to be up against the wall or a cabinet, which will restrict access and make it more difficult to remove the motor. When working inside the RV, the slideout needs to be about 3/4 of the way in, which will level it out a little bit more and take some of the pressure off the motor that’s connected to the gear block. Next, you will need to go outside and peel the D seal on each side of the slideout away from its H-column; normally the seal is snapped or slid in place and not usually glued. However, some manufacturers may put another screw to hold the D seal in place or apply a dab of sealant at the ends.
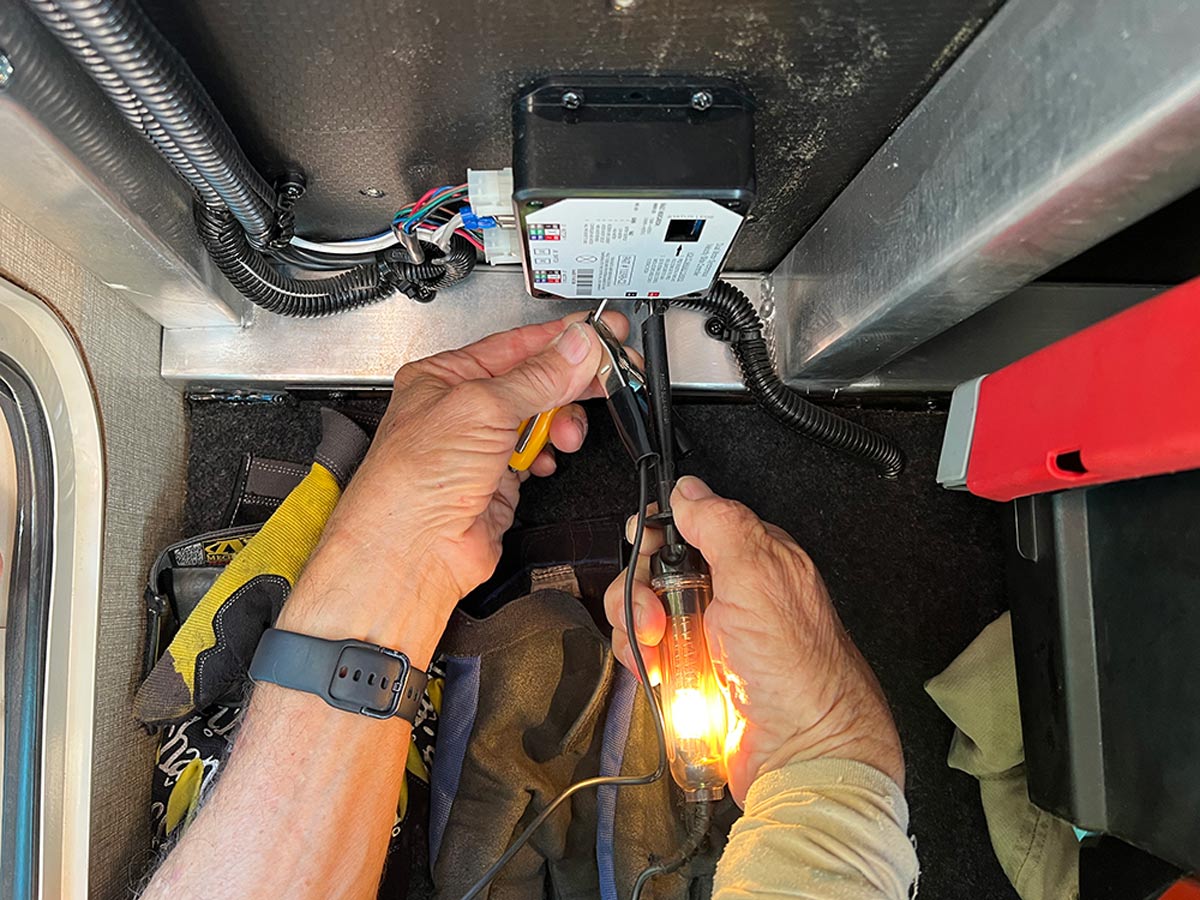
A test light can be used to check for 12-volt DC power to the control box. If there is no power, start looking for a blown fuse.
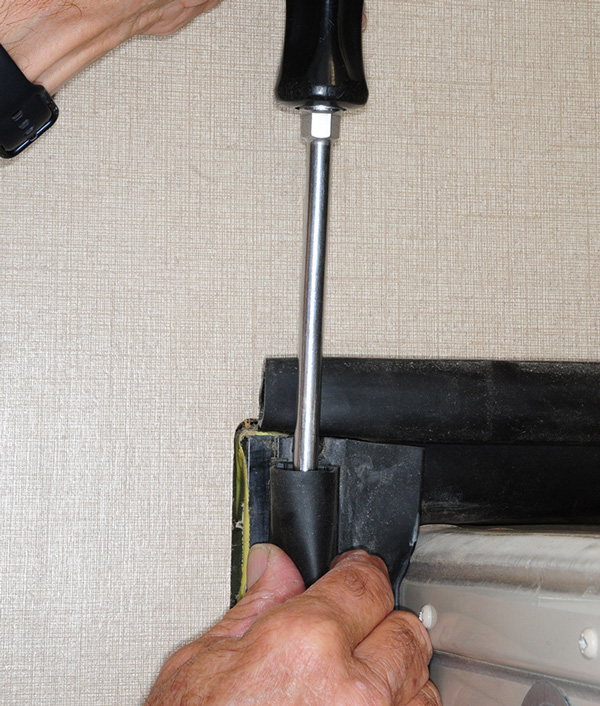
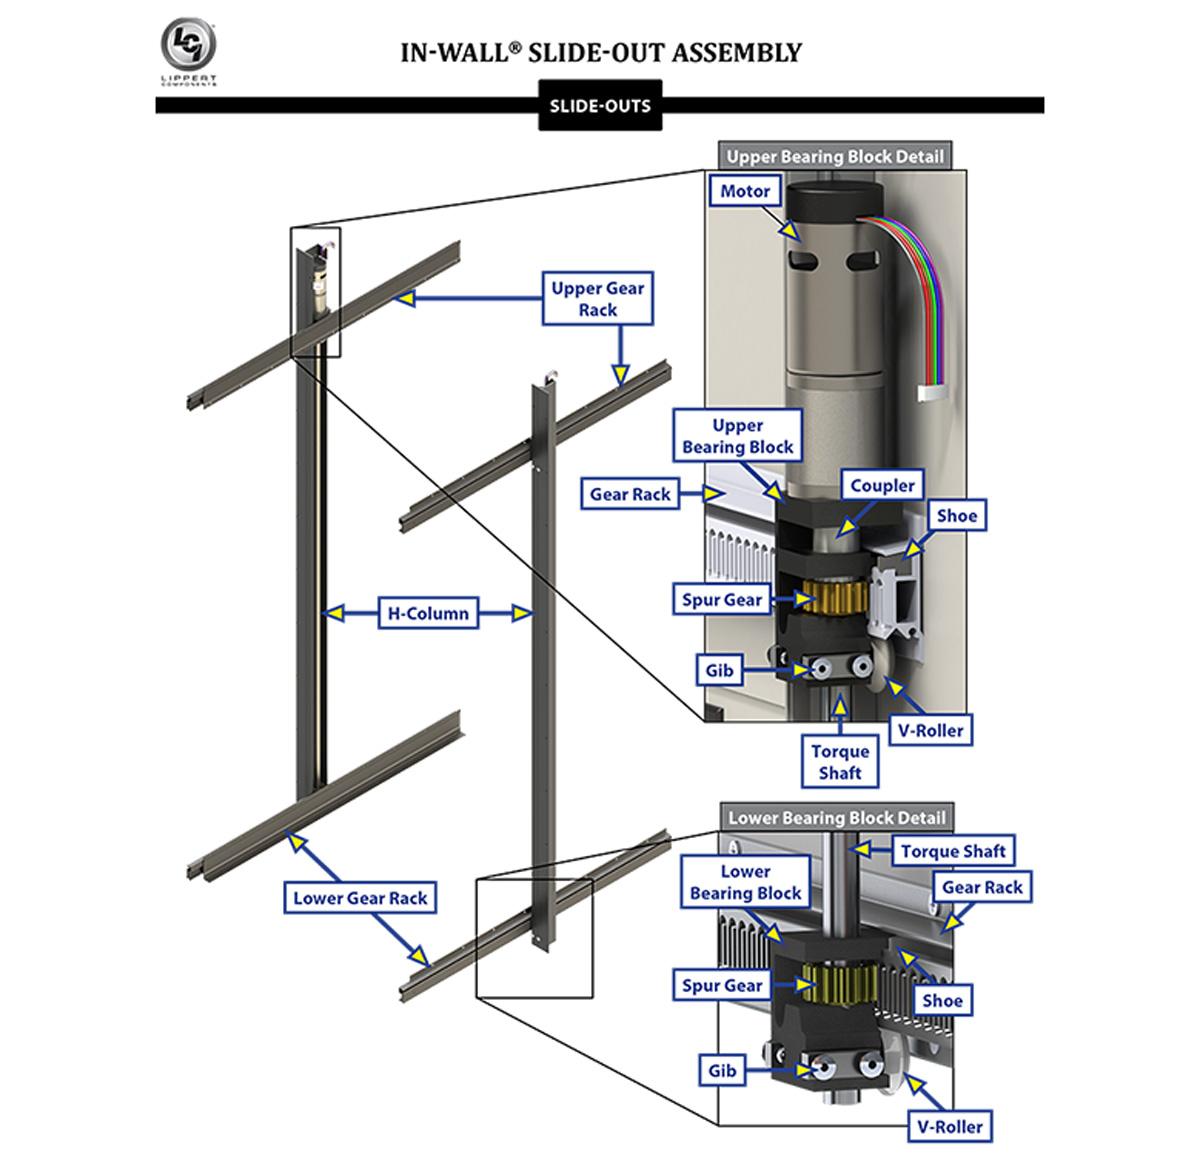
Peel the D seal back about 8 or 12 inches and you should see the screw that goes through the H-column through a slot in the motor; remove this screw and save it for reinstallation. Next, go back inside and disconnect the plastic connector for the wire harness going to the motor. Using a small thin-bladed screwdriver, pry the motor upward away from the gear block; at some point the motor will let go and can be pulled out freely. Keep in mind that there are different motors, depending on the slideout, and must be matched properly when replacing. Typically, the motors will have a 300:1 or 500:1 gear ratio — mixing the two types will create a serious problem.
With the motor in hand, simply reverse the removal process. Of course, Murphy being the guy he is, the D-shaped gear on the motor will probably not line up so you will need to plug it in to the harness and have somebody bump the switch until the flat part of the gear on the motor lines up with a flat part in the gear block — at which time the motor should drop right in. The gear block and the gear on the motor do not need any lubrication, but I do like to spray a little bit of silicone in this area to protect against rust. Once the motor(s) is installed you will need to sync it with the control board.
If the motor is not accessible from the inside, the procedure can be done from the outside, but you’ll have almost no room to pull the motor out. You may need to remove the D-seal and the H-column to remove the motor from the outside.
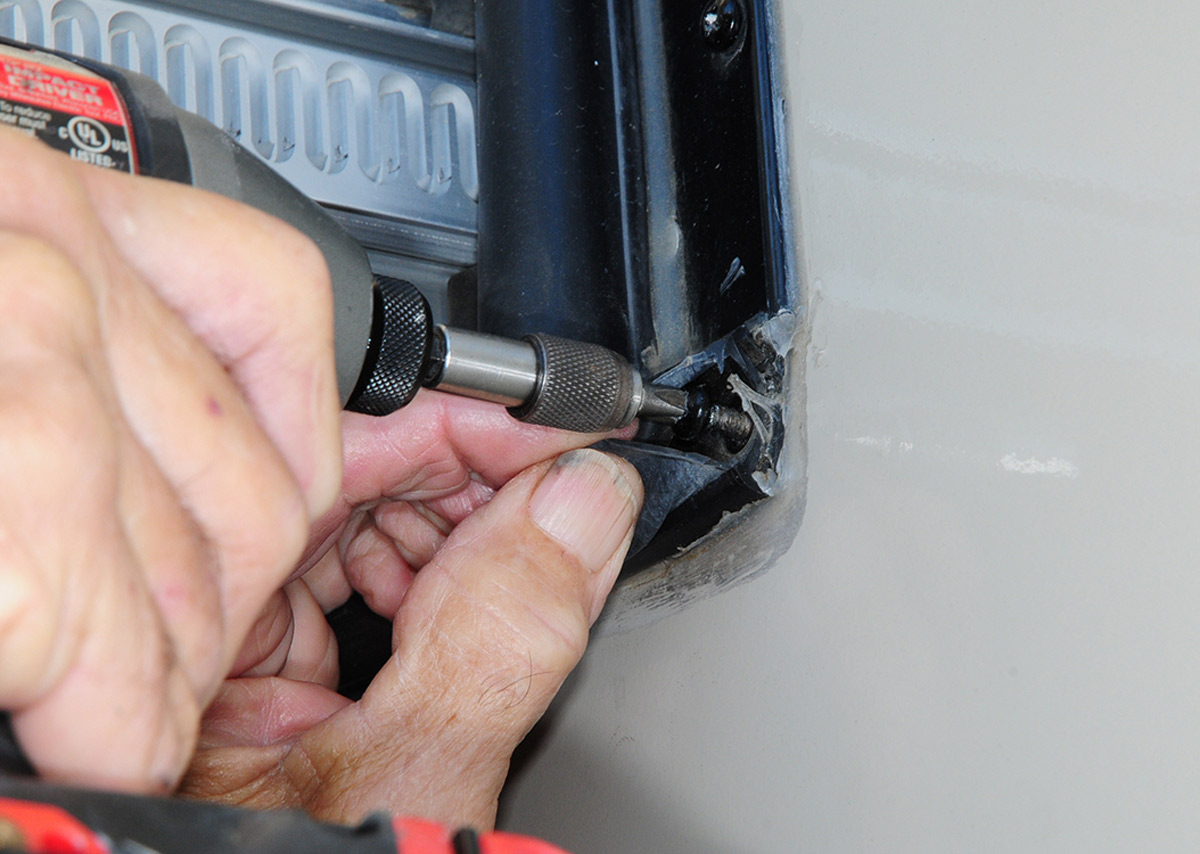
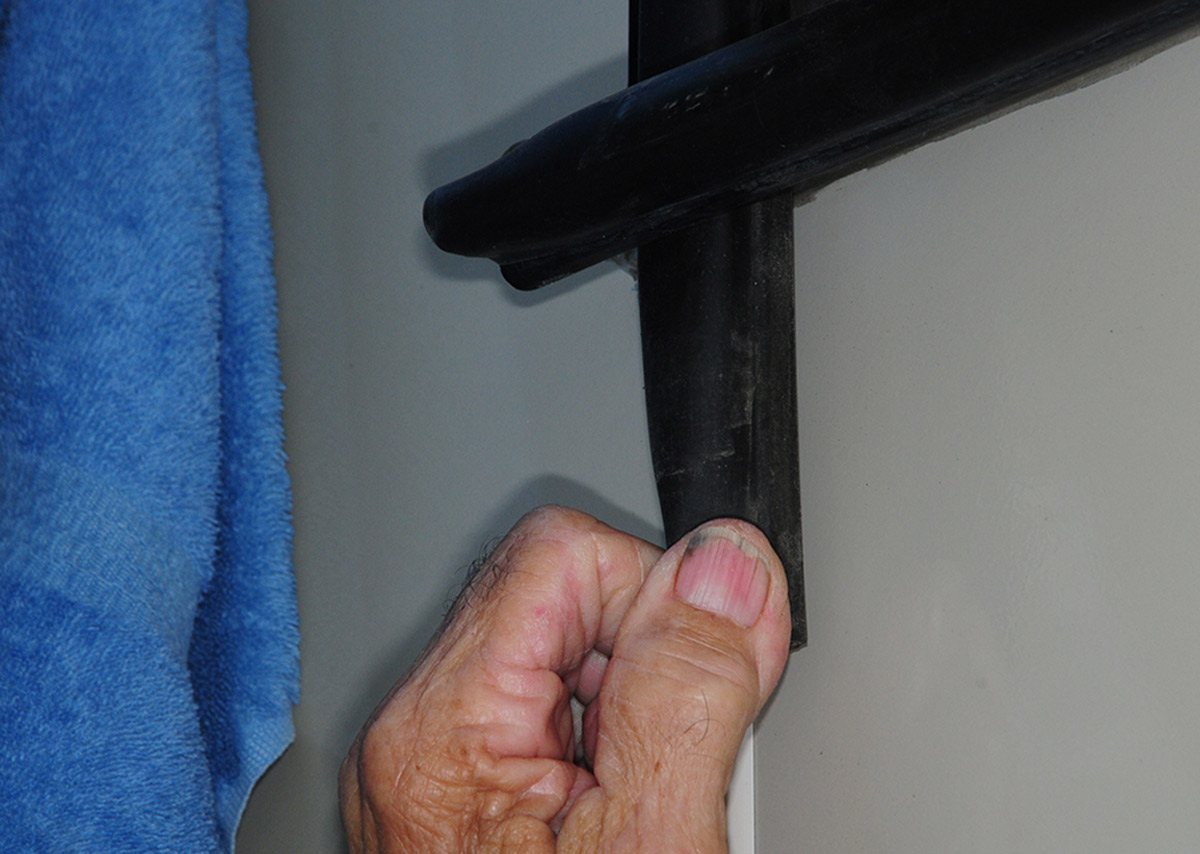
Many manufacturers use a screw to hold the D-seal in place. Once the screw is removed, the D-seal can be encouraged to slide over to make way for pulling down the D-seal (where the screw for each motor is located).
Push Hard
While repairing the system is the best remedy, it may be necessary to close the slideout manually in an emergency. The alternative — to get you out of a jam — is to ask a couple of people to help push. Normally, only one motor will fail — and once it’s removed, one or two people can push on that side while another person bumps the switch so the good motor does half the work. During this process, however, the control board may go into lockout and need to be reset. The other method is to remove both motors and push on the slideout. Again, it may be difficult to push the bedroom slide on a fifth wheel that’s 8 or 10 feet off the ground.
It almost goes without saying, but I’ll say it anyway: The slideout must be secured if the motors are left out while traveling to a repair center. This can be done by cutting 2 x 4-inch blocks of wood and mounting them to either side of the slideout to prevent it from moving outward. I suppose you could tape the perimeter of the molding with duct tape if you’re going only a short distance, but then you’ll undoubtedly wind up cleaning up a big mess later. It’s not a bad idea to keep a couple of these pre-cut blocks of wood stashed away in your storage bin in case you run into trouble down the road.
Slideout Maintenance
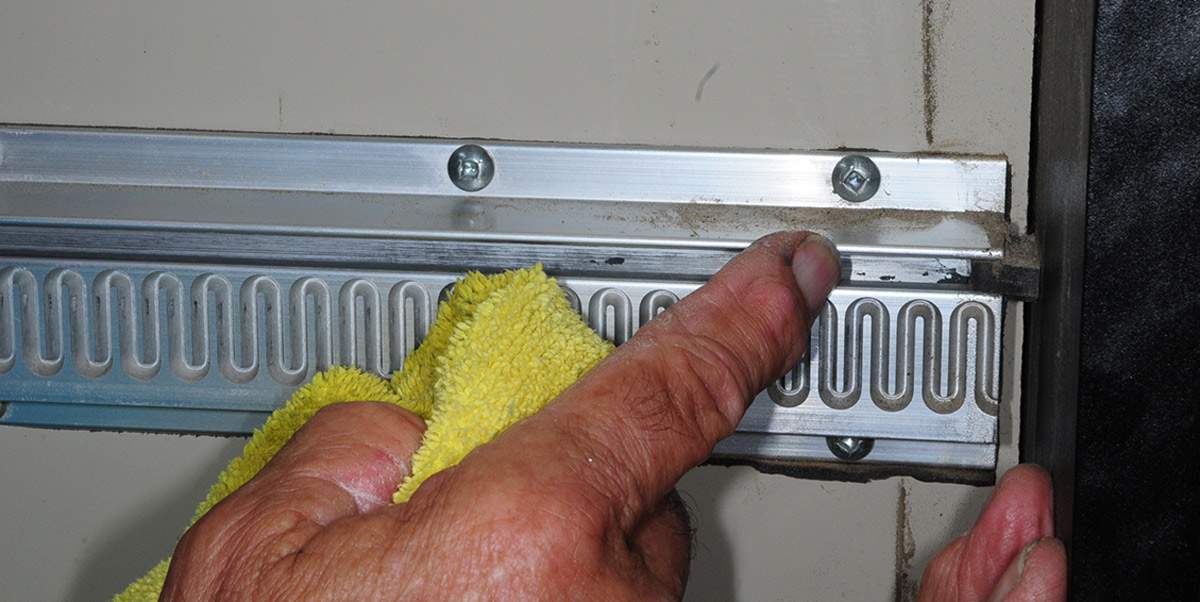
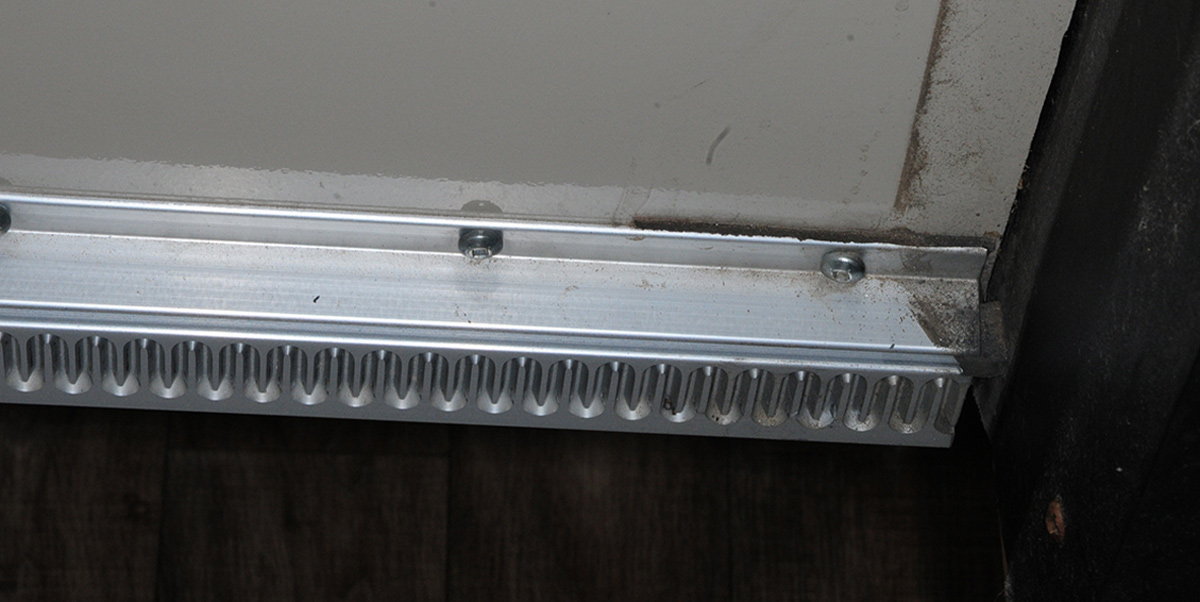
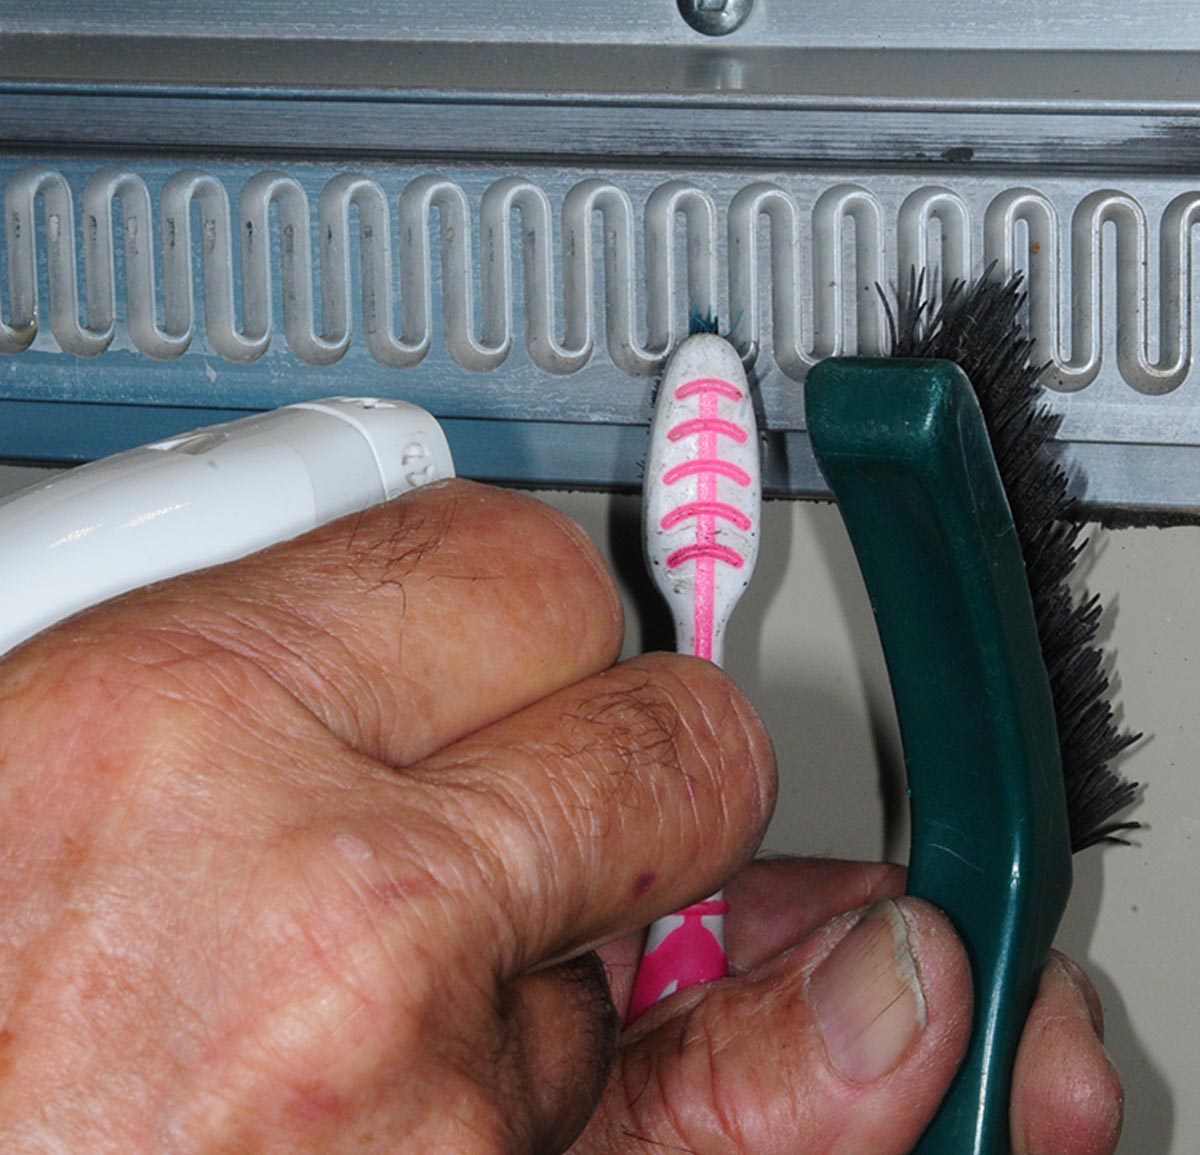
One of the good things about a Schwintek slideout system is that, unlike a rack-and-pinion system, there is not much needed maintenance. The main focus is keeping the upper and lower gear racks on both sides of the slideout room free of dirt, grease, oil or any other type of contamination. They do not need to be lubricated because the gears mesh precisely with the gear racks. It’s possible that a little bit of dry lube could help if the noise is driving you crazy, but be careful that it does not collect dust or dirt. The only other maintenance procedure is to use a silicone-free protectant on the seals around the slideout rooms; this will help D seals last longer and protect some of the wiring running up through the H-columns. Replace the D seals at the first sign of deterioration, which will likely show cracking and ripping at that time.
Obviously, there are many videos showing this process online, but not all are accurate. My best advice is to log on to Lippert’s website (www.lci1.com) and check out the recommendations provided by the company’ support team. Being prepared will take the sting out of any Schwintek hiccup and keep the mechanism working smoothly for years.
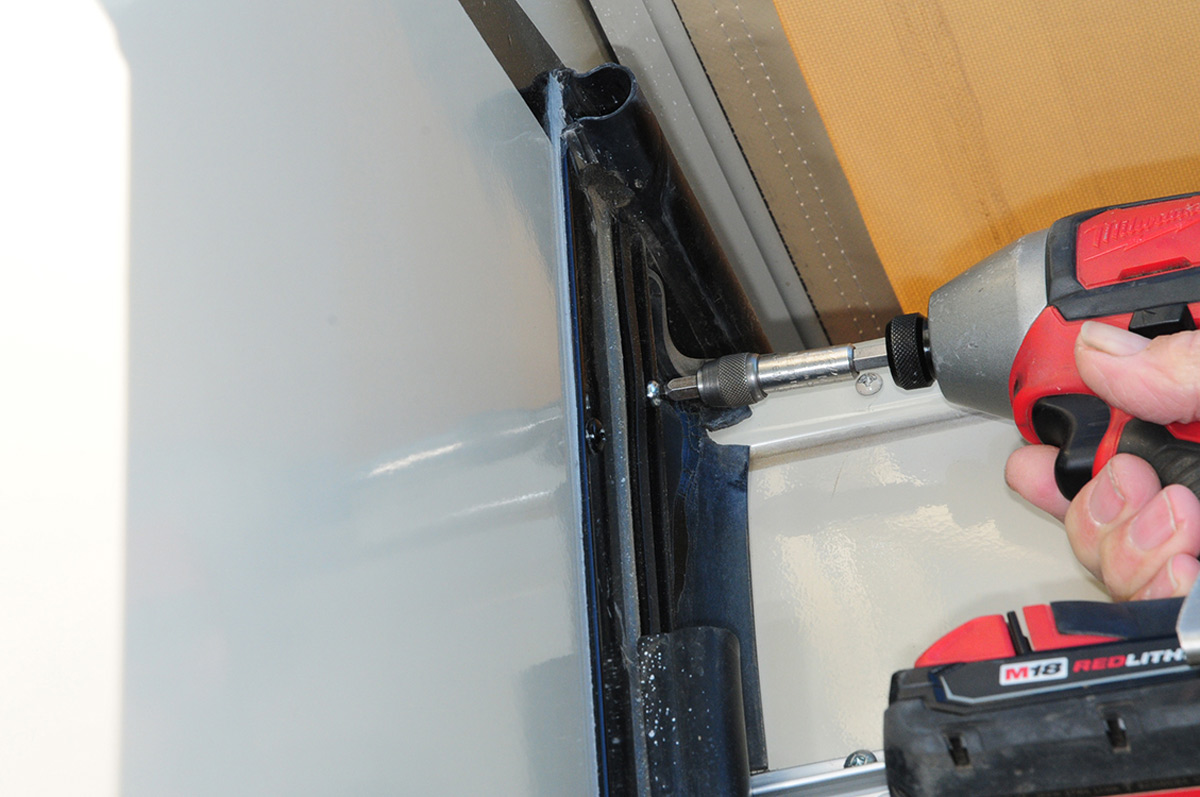
The screw that holds the motor in place on each side was removed through the H-channel. The motor cannot be released from the gear block without removing the screw on each side of the slideout.
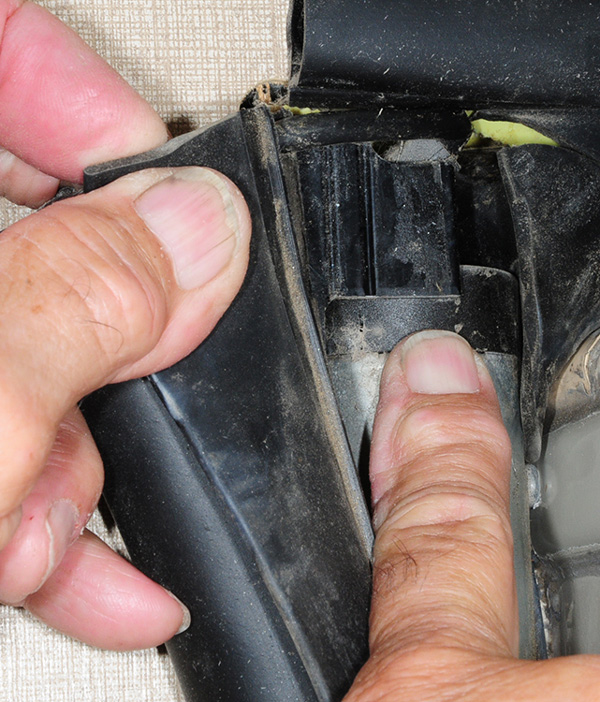
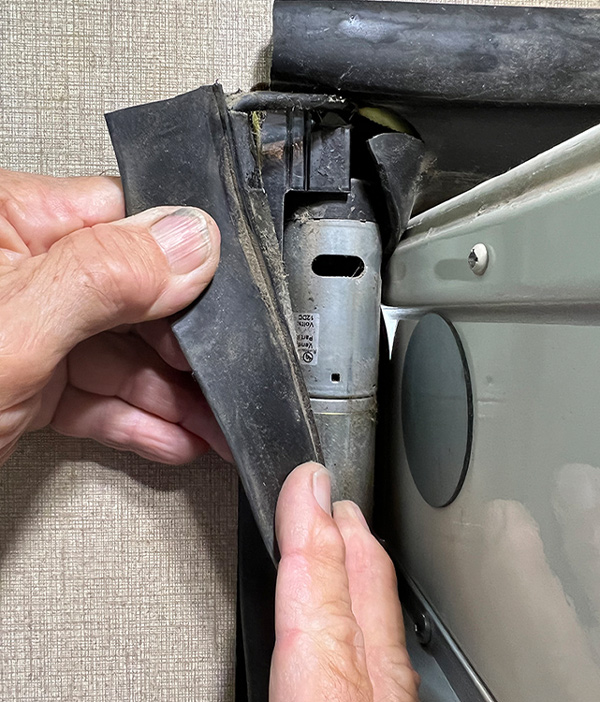
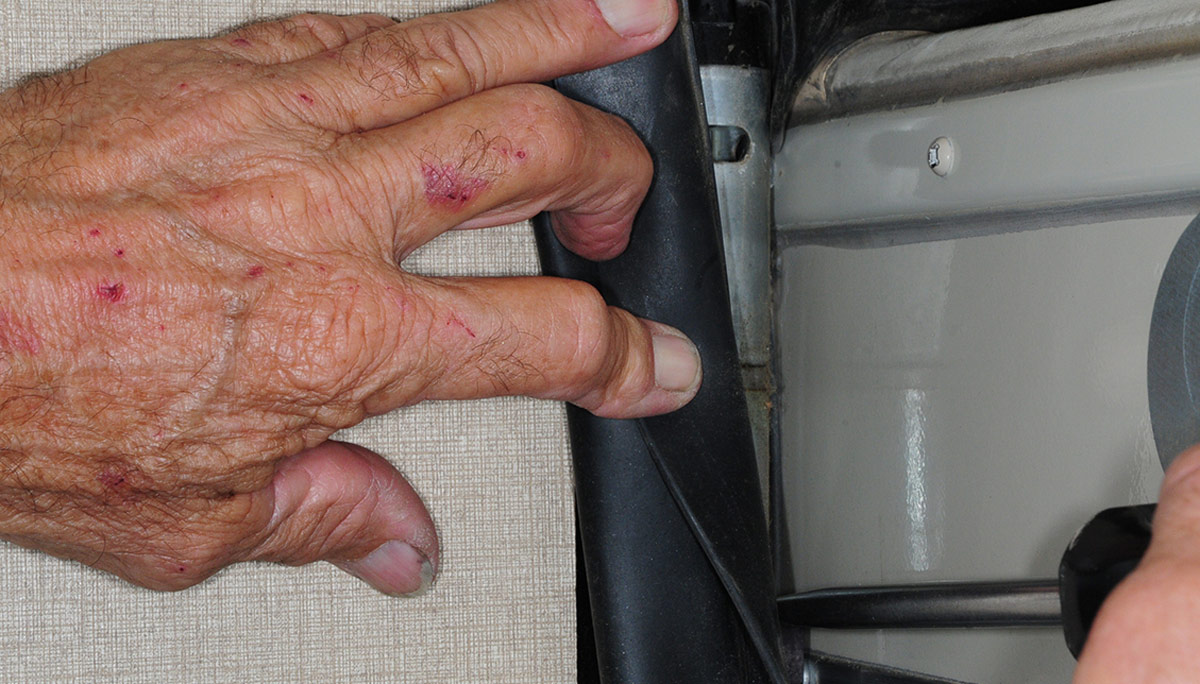
Pulling back the dust seal on the upper outside corners of the slideout will expose the motor. This will provide the access needed to pull the motor out from the gear block. This could be difficult, depending on access and working room next to the slide-out.
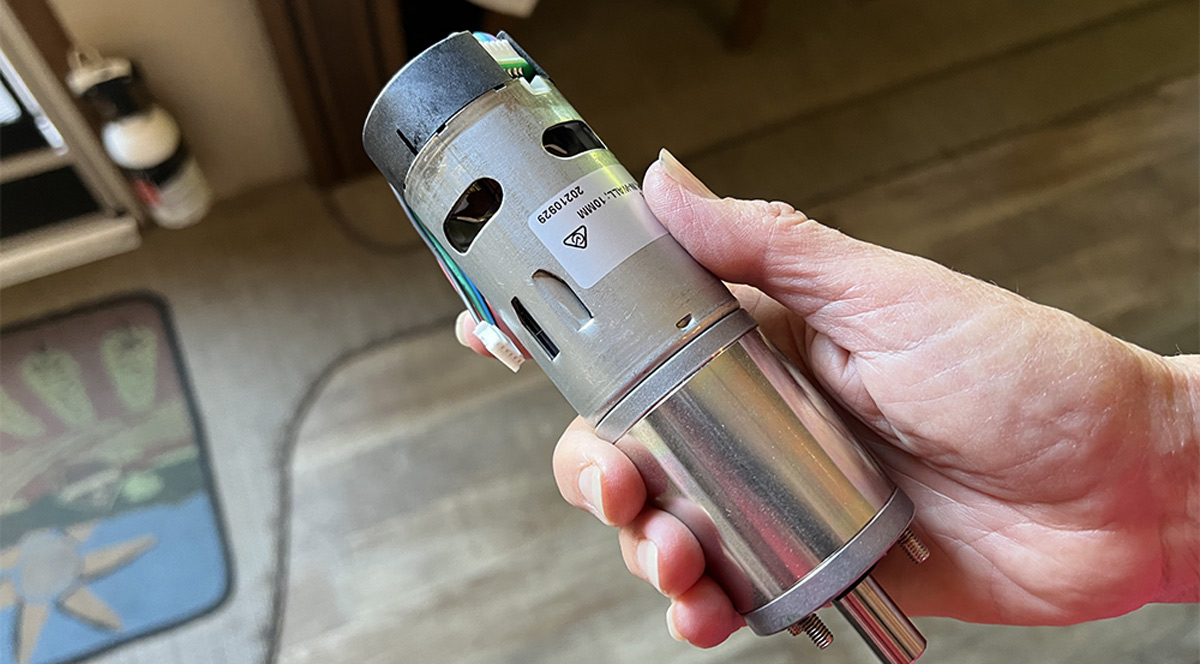
The motors that control slideout movement are surprisingly compact but powerful. It’s best to keep a spare motor in your storage compartment. While the system can field repaired, the biggest problem is often finding a replacement quickly.
The motors that control slideout movement are surprisingly compact but powerful. It’s best to keep a spare motor in your storage compartment. While the system can field repaired, the biggest problem is often finding a replacement quickly.