
key element for any RV to enjoy true self-contained status is, of course, a refrigerator — and for many years, an absorption process to keep food cold and frozen has been an industry staple. These refrigerators are designed to promote self-containment and the associated freedom of operating RVs off the grid. Over the years, the industry has moved toward compressor-style refrigerators in 12-volt DC and 120-volt AC (residential) configurations, which is becoming more popular every day, but with a universe of 15 million RV owners, it’s no surprise that absorption refrigerators that run on 120-volt AC power or LP-gas are found in millions of RVs — and are still commonly used in new models.
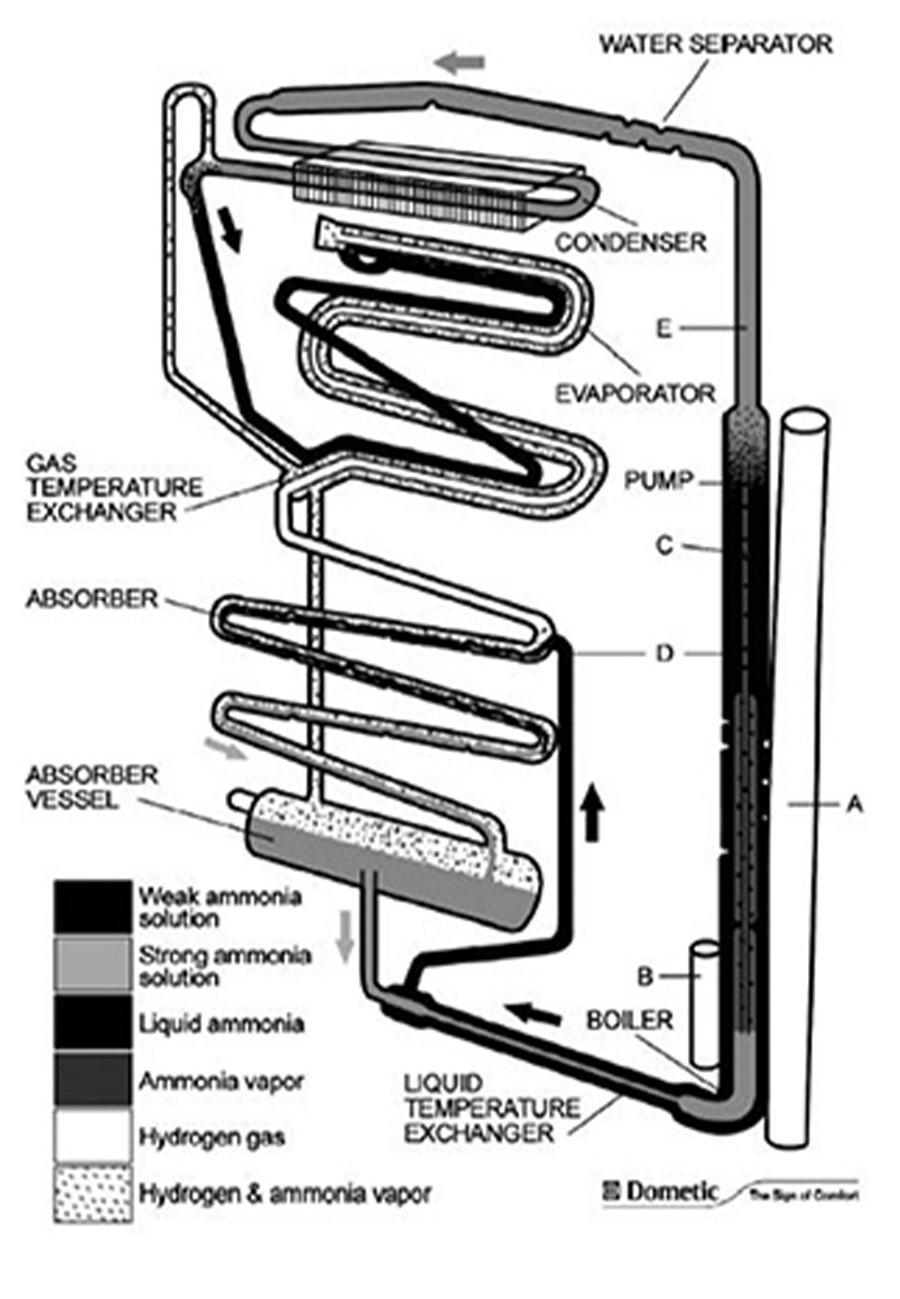
For some, it’s hard to understand how cold is made from heat, but the concept of using ammonia and hydrogen compression systems for refrigeration has been around since late 1800s. Absorption refrigerators for RVs were developed somewhere around 1956 by Electrolux of Sweden, and although the systems have been refined over the years, the concept remains the same — and they still make sense for RVers who like to spend time off the grid and don’t have the battery capacity (or don’t want to make the investment in an expensive solar array, large battery bank and an inverter) to keep a compressor working without running out of power.
Although it can be argued that running a refrigerator on LP-gas while on the road can be dangerous — especially if the owner fails to turn it off while refueling a vehicle at a service station — absorption refrigerators have a strong safety record. The only substantial exception to safety was a period of time between the late 1990’s and 2010 when the major manufacturers of absorption refrigerators issued recalls to prevent hydrogen leaks, which resulted in fires. Fortunately, the overwhelming majority of these units have operated safely at specs for many years.

Like any RV appliance, there are certain maintenance procedures that must be followed to keep an absorption refrigerator from failing — and most of them are not very complicated. First off, too many people ignored the recalls, so if you fall into that category, reach out to your specific refrigerator manufacturer to make sure your unit is not subject to a recall.
Plan on putting refrigerator service on an annual schedule. If you live in your RV full time, maintenance projects will be needed more often. The most basic requirement is to check inside the upper and lower vents for debris that has built up from trees, especially those that flower. Debris will find its way through the vent openings in short order. Simply pull the vents and remove any debris. Once that’s done, start your maintenance procedures in the interior of the refrigerator.
Inspect the door seals for sticky food or liquid and damage to the material. The dollar-bill trick has been around for years, but it works: Place the dollar bill between the opening and door; if friction restricts movement, you’re good. If there are gaps, cooling performance will suffer and moisture build up inside the box and freezer will be an issue. Repair is difficult because seal kits are usually not available. Instead, new seals come with new doors, which are expensive, if even available. That alone should be incentive to keep the seals clean. When in storage, prop open the doors to allow for ventilation.
Keep the ice that builds up in your refrigerator to a minimum; absorption refrigerators are not frost-free, although there is an auto defrost mode for the metal fins in the back of the refrigerator box. If the interior fins frost up, the auto defrost mode is not working properly. Typically, the ice builds up on the side where the thermistor located. This is the device that signals the circuit board when the refrigerator is up to temperature. Make sure the thermistor, which is mounted to one of the fins (usually from the third fin inward), is in the correct position; different models have specific requirements. You can usually find the thermistor location for your model refrigerator online. When the thermistor is in the wrong position, it throws an erroneous signal to the control board.


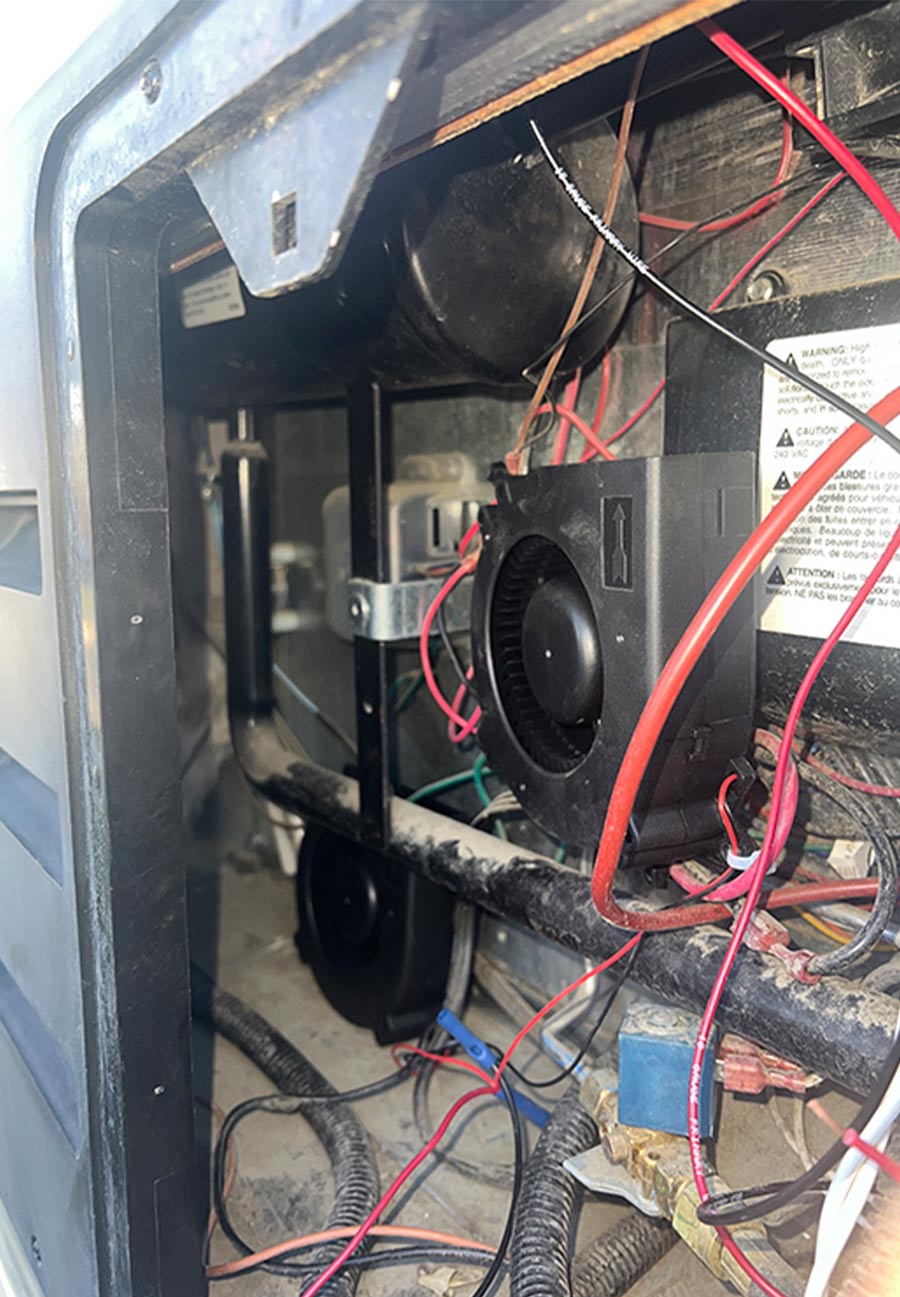
Mounting small fans toward the fins (see “Another Layer of Defense” in this issue) on the plastic liner will help keep the fins free of ice.
An easy way of defrosting the freezer — which can be a daunting task if you don’t know this “insider’s tip” — is to purchase a thin plastic cutting board, cut it to size (it may take more than one) and place it against the back of your freezer. When the ice builds up, simply peel off the plastic cutting board(s), shake off the ice and you’re done, except for maybe residual ice that can be scraped off easily.
Inspect the plastic box liner in both the refrigerator and freezer to make sure that there are no large cracks, which will allow moisture to penetrate over time. Refrigerator liner repair kits can be found on Amazon.
Exterior maintenance starts by removing the access vents. All absorption refrigerators require two vents to circulate air properly. Refrigerators mounted in a slideout will have both vents in the sidewall; those mounted in a stationary wall will have a vent on the roof and one vent on the sidewall. The top vent cap can be pulled by removing four screws. Unfortunately, you can’t get an unobstructed view of the cooling unit and upper fins on some models, but do the best you can to remove bird nests, leaves and other debris that somehow find their way through the vents. Most of the roof vents have a screen under the cap that restricts access to the debris. Usually, the leaves will not get through the screen, but mice or rats can build nests over time that can be a fire hazard. You can cut the screen loose for access, but make sure you install a new piece of screen that is fireproof.


Check the drain tube routed from the pan under the fins inside the refrigerator to the back compartment; this tube can become plugged over time with mold and mildew, causing it to plug up and back up moisture into the refrigerator. This drain tube is usually routed along the insulated boiler section of the refrigerator to either a plastic or a metal pan that’s located up against the boiler area where the heat can evaporate the water. We’ve found this to be ineffective and prefer to extend the drain tube out through the side vent so that water drips out on the ground. You can easily do this by purchasing tubing from a hardware store and extending the factory tube to reach through the lower vent.
Removing the burner assembly cover will give you a look at the burner and the flue where the flame goes up and through the baffle that retains heat. Contrary to common belief, the electric element(s) produce more heat and are more efficient than the gas flame, especially if the BTU output has been diminished due to a dirty orifice or burner. Cleaning out the burner with compressed air is the key, but pressure must be regulated at 90 to 100 PSI. Excessive air pressure could damage or dislodge the baffle creating a serious problem.
If the burner assembly has excessive rust and the slots in the burner have rusted to a point where they are larger than the original burner slots, it should be replaced. Do not attempt to remove the orifice unless you know what you’re doing. If it becomes compromised, the flame can be dangerously high and hot. We recommend cleaning the burner and orifice annually and the LP-gas pressure should also be checked at the pressure tap near the burner — gas pressure correlates directly to the BTU output from the orifice and burner. Pressure must be maintained at 11 inches of water column, measured with a manometer. If the gas pressure is too high or too low the BTUs go up or down accordingly, affecting the proper operation of the hydrogen, ammonia and water.
One more note: If there is a lot of excess rust on the cooling unit pipes, absorber coils, the burner and other components, it may be time for a new refrigerator.


Heat is the enemy of any RV refrigerator. Extreme boiler temperatures wreak havoc on the system. High ambient operating temperatures play critical roles in refrigerator performance, as does proper installation by RV manufacturers. As noted earlier, refrigerators mounted in slideouts have no roof vent, relying on proper airflow through sidewall vents only. This can be problematic, especially if the RV manufacturer failed to follow precise mounting and clearance requirements. Strategically placed 12-volt DC fans can help circulate air. Service technicians can easily determine whether the fans are placed correctly, are working effectively, and if they are not part of the original installation, new fans can be installed with little effort and cost (see “Cooling Trend,” RV Enthusiast November/December 2023 issue).
Running an absorption refrigerator off level is probably the largest contributor to cooling unit failures. This includes parking on a steep driveway or on a campground site that’s off level or simply driving up and down long steep grades. Technically, you can circumvent off-level issues while traveling by turning the refrigerator off when on the road, but some experts will argue that the jostling from the road helps prevent tubing blockage and the related heat build-up.
Another factor is the sodium chromate that coats the insides of the pipes to prevent the water from rusting the walls. When the refrigerator is operated off-level continuously, the sodium chromate is baked off of the inside of the boiler and eventually leads to complete failure as the rust works its way through the steel tubing. There are actually off-level specifications for compressor-type refrigerators, as well, so parking on sites not suitable for RVs can be problematic and should be avoided if you want a cool one after a long day.


