hade is important to many campers. Just ask RV park operators who constantly hear, “Are there shade trees on or adjacent to the site?” when travelers are looking to book a site. That’s why awnings are so popular — if the campsite isn’t shaded with trees, you can bring along your own shelter from the sun.
Not all awnings are created equal, however. While summertime weather — prime camping season — is somewhat more predictable, the wind can still be a menace, causing substantial damage to the awning fabric and hardware if left out during a hard blow. Leaving the awning open while away from camp can present a whole new set of problems if the wind comes up unexpectedly. In my 50 years of working on RVs, I can’t even count the number of customers who came into my shop with awnings that did not fare well during a windstorm that came up unexpectedly while they were out hiking or boating. Returning to the camp and seeing a shredded awning and mangled hardware, along with a surprising amount of collateral damage, is always disheartening. Insurance will typically cover the repairs, but there’s still a deductible and the prospect of a ruined trip — or, at the very least, experiencing a lot of difficulty jury-rigging the leftover parts in order to get back on the road and to a service center.
While just about every RV built these days has a patio awning, some are equipped with sensors that will automatically put away the awning in strong winds. Heck, my own awning put itself away dozens of times during the last 12 years of full time living. Unfortunately, those without such protection are vulnerable to weather that can sometimes change on a dime — which is why Dometic’s Power Awning Pro Kit is a game-changer.
Closing in the Wind
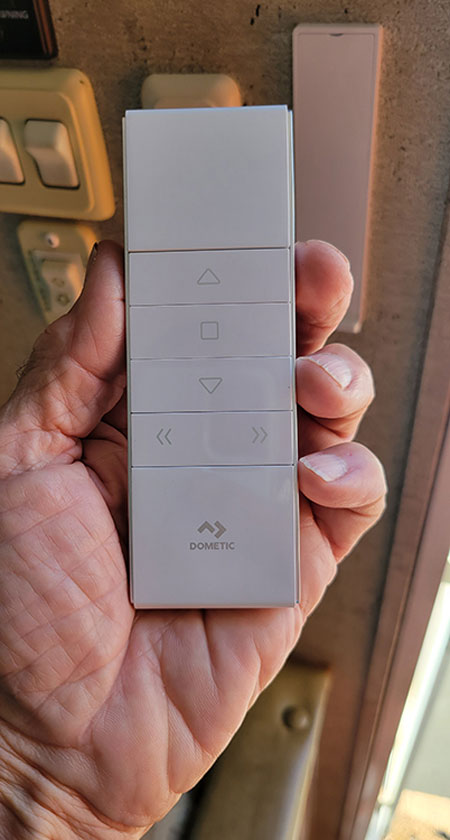
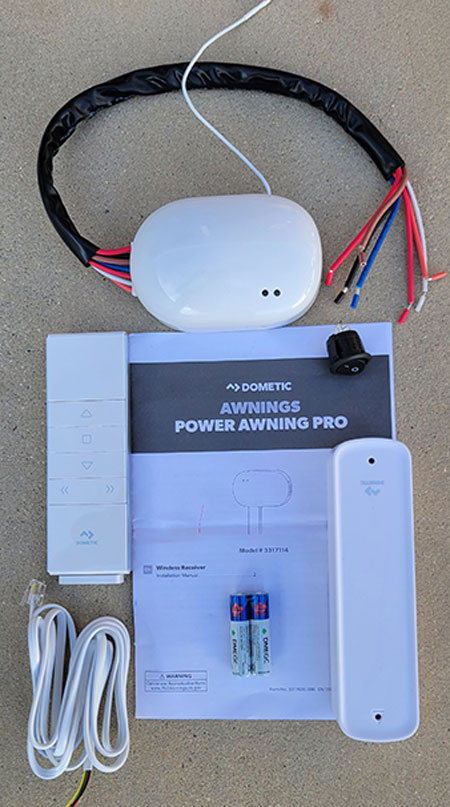
Not long ago, adding sensors that automatically put away an awning was a complicated project. Dometic’s Power Awning Pro Kit (www.dometic.com) can be added with minimal effort and at a relatively low ($130) cost. Thanks to modern technology, the Dometic Pro Kit wind/motion sensor can now be installed on a power awning without much fanfare. The kit incorporporates an advanced, wireless motion sensor that mounts easily to an existing bolt on most awnings. Included in the kit is a remote control, capable of operating the awning up to 100 feet away as well as being able to turn on/off and dim your LED strip lights, and sensitivity can be adjusted to customize your needs when parked in areas where the wind is not quite as strong. The control module has an ignition lockout for motorhomes to prevent accidental opening during travel, which complicates the installation a bit, and the kit comes with an On/Off switch so that the awning can be disabled when on the road. The kit is available on Amazon and at RV supply stores.
Another Element of Protection
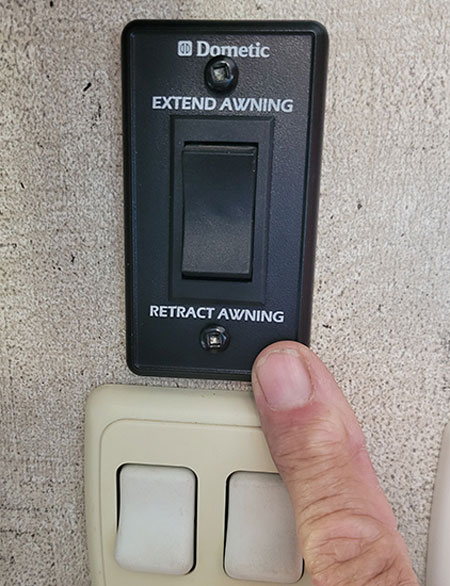
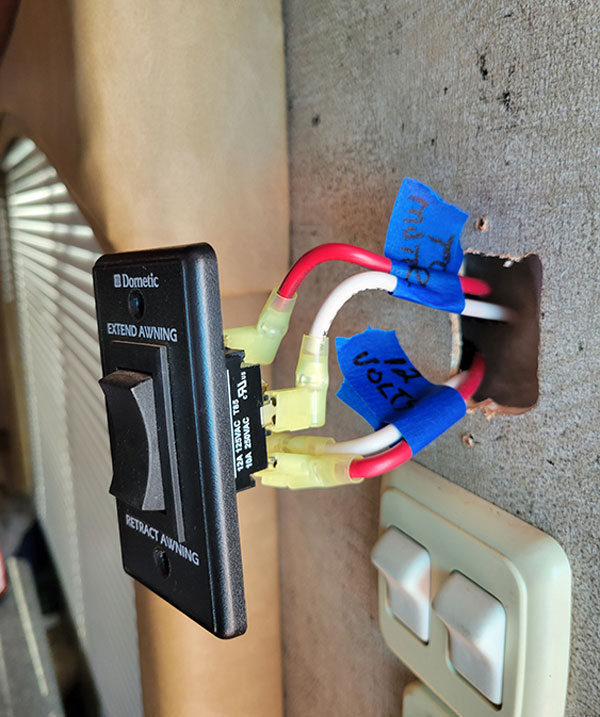
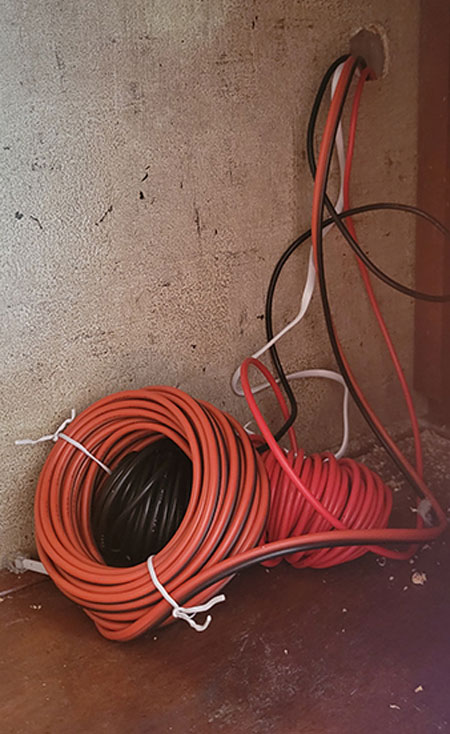
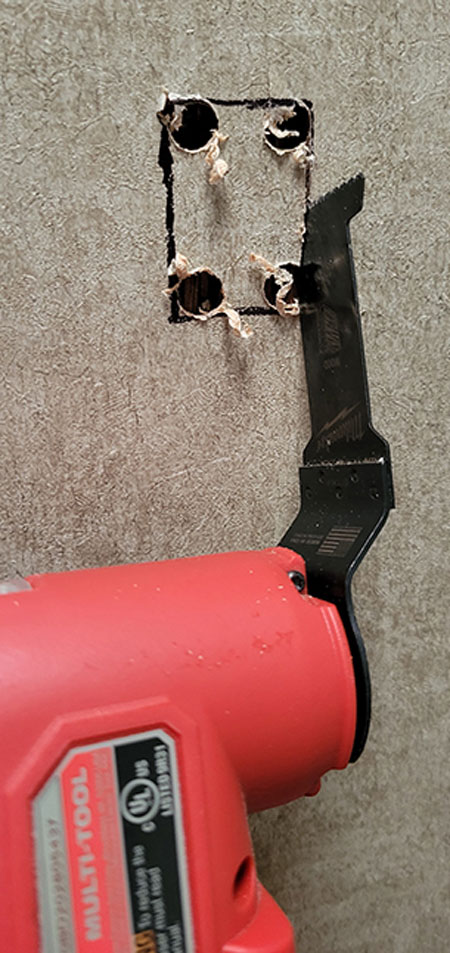
All the wiring for this project trailer equipped with a Dometic 9100 series power awning was accomplished inside, near the existing awning control switch. The installation requires that wires be removed from this switch and connected to a harness that plugs into the new control module; a phone-cord-type cable must also be connected so that the original switch can used in case there’s a sensor and/or control module failure. Some RVs have the “extend and retract” switch in a cabinet that would allow you to mount the control module nearby, which will make the installation easier. Unfortunately, the project trailer had the switch built into an interior wall so a fish tape was necessary to pull wires up into a nearby cabinet (where the module was mounted) and also install the On/Off switch in the same vicinity.
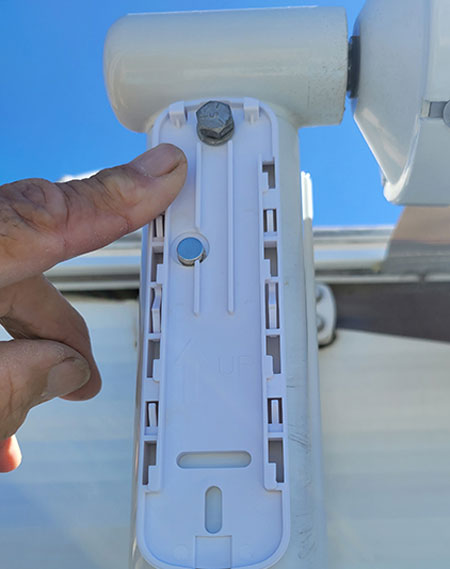
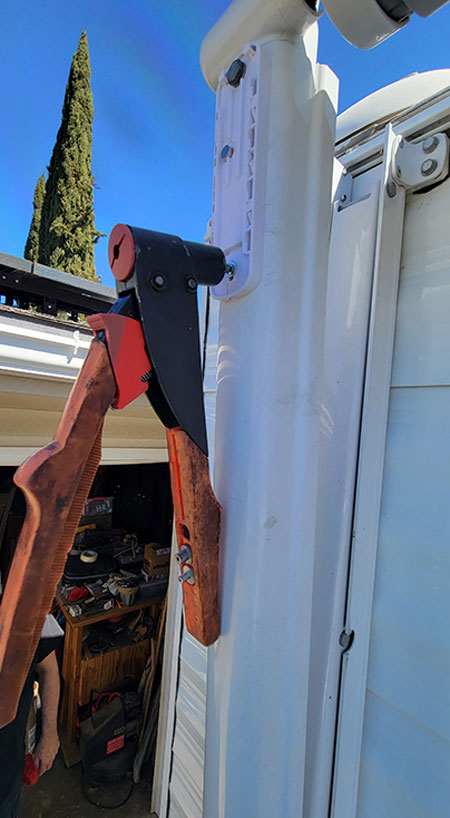
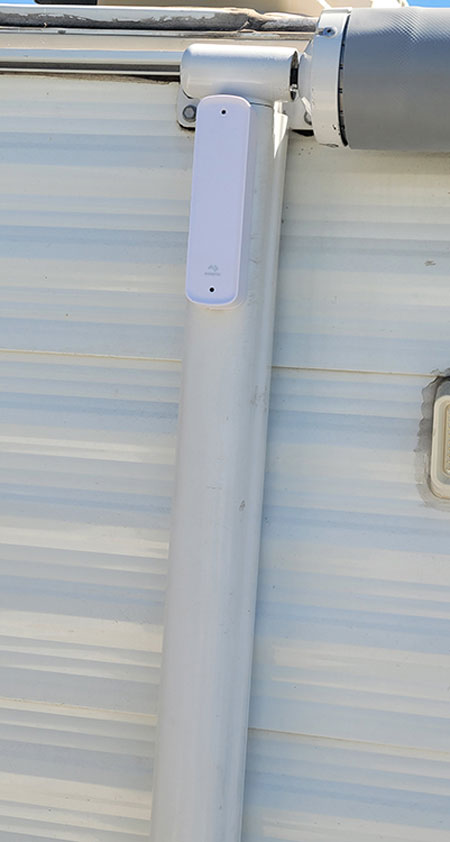
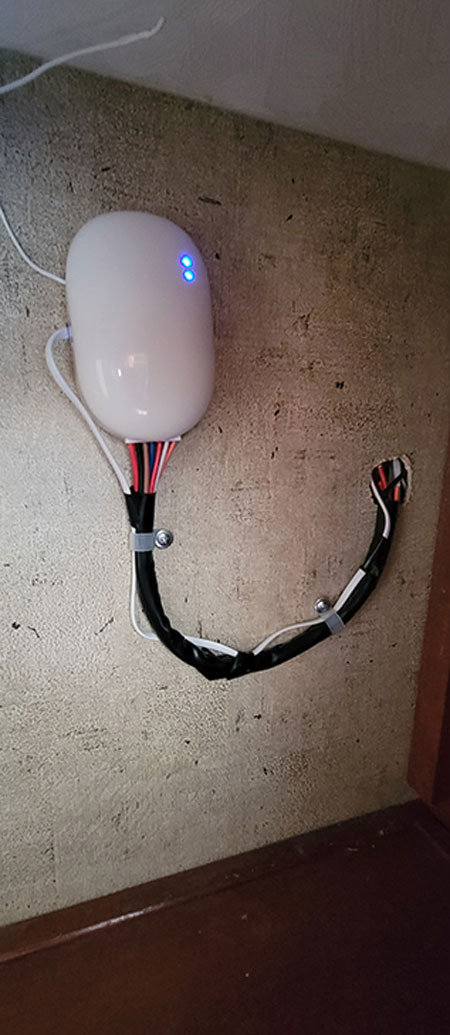
The installation process starts by extending the awning about 12 inches in order to mount the wireless sensor/receiver bracket on either end of the awning, using the existing ¼-inch bolt that holds the roller tube assembly in the hardware. You’ll need a helper to make sure the awning tube doesn’t jump out of position when the bolt is removed; if no one’s available, you might be able to stabilize the awning arm with cable ties or straps to ensure that the hardware doesn’t let loose. A rivet is then added to make sure the bracket is secured to the arm; a 3/16-inch hole will need to be drilled to install the rivet. Be sure you do not over tighten the ¼-inch bolt as it will break the bracket that holds the sensor in place.
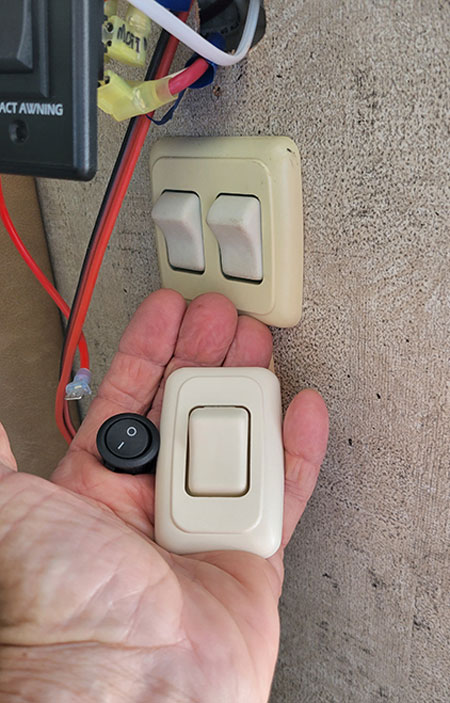
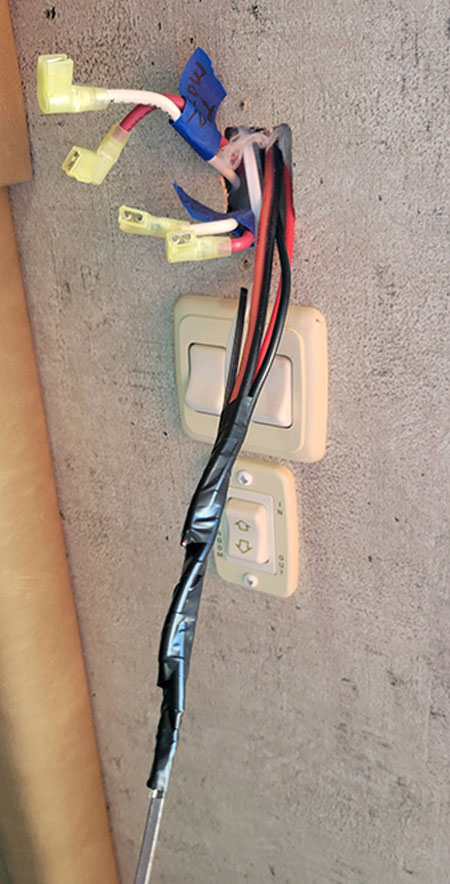
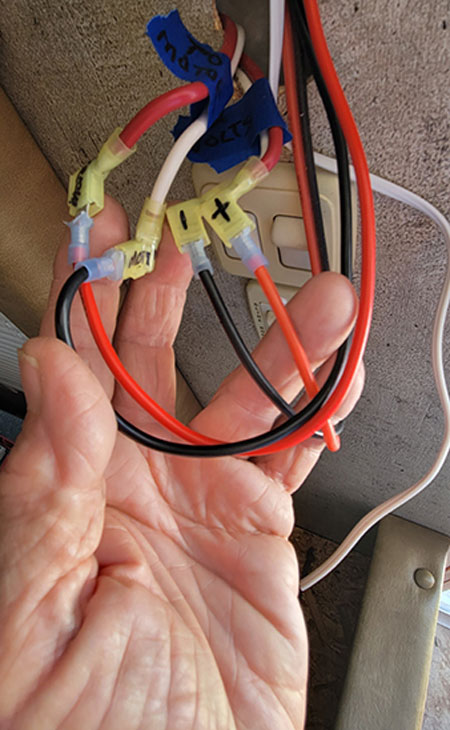
Back inside, the extend/retract switch was removed from its location and, using a voltmeter, all wires were tested to identify the positive, negative, extend and retract leads. It may be necessary to lengthen these wires, depending on where the control module is placed. Speed terminals were employed to attach the new wires to the female spade terminals originally slipped onto the lugs in back of the switch; electrical tape was then wrapped around the connections to make sure they won’t come apart or touch each other. The supplied On/Off switch can be installed on either the negative or the positive wire that is routed to the control module; this allows you to disable the system during storage or travel. A small On/Off rocker switch is supplied with the kit for this purpose, but the trailer owner opted to use a switch (easily procured on Amazon) that matched the others on the wall.
You will need to attach the extend and the retract wires to the brown and blue wires from the control module. Unfortunately, they are not marked for direction so you will have to experiment to make sure that you get them correct; it won’t hurt anything if they are hooked up backwards by mistake. If the wires are reversed, the awning will try to retract instead of extend and vise-versa. If this happens, simply switch the two wires. Carefully follow the wiring instructions when hooking up the positive, negative, extend and retract wires. I recommend retaining the existing control switch in case there is a failure with one of the parts down the road.
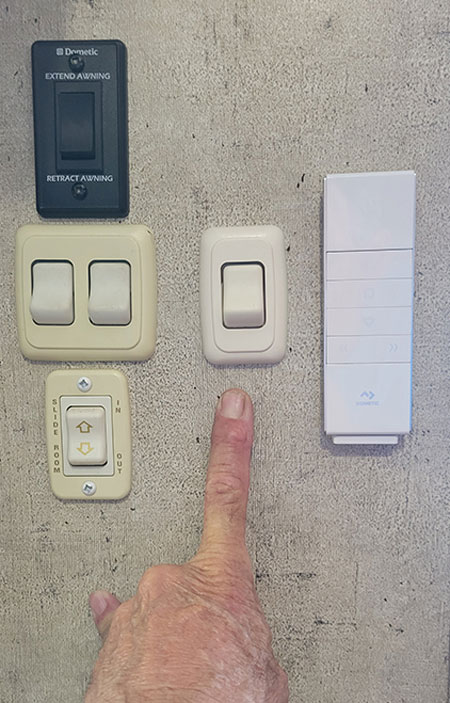
Using the supplied phone cord, follow the instructions for hooking up three specific wires to the original switch; you may need to do a little experimenting to get them correct. We mounted the On/Off switch near the existing control switch, which made for a nice installation right by the entry door allowing access for those entering and exiting the trailer. The included remote control comes with a magnetic base which can be mounted on a wall, inside a cabinet or another convenient location. For this installation, the remote was placed next to the switch by the entry door for easy access.
If this product is being installed in a motorhome, it’s highly recommend to use the ignition lockout, if possible; this brings a secondary measure of safety while driving should you forget to disable the system with the On/Off switch. This process will not be easy, because the ignition switch is obviously nowhere near the awning. If you install the sensor at the front of the awning, you could run the ignition lockout wires down through the post between the windshield and a side window where there is always a trim on the inside. If you are unable to hook up the ignition lockout, use some kind of a clip or a notepad attached to the steering wheel as a reminder to shut the awning power off before you travel.
Talk to Me
Pairing the remote control was a little bit tricky. Unfortunately, you only get four seconds between each of eight moves required to set-up the system. Unless you’re a whiz with electronic devices and are adept to pairing procedures, you’ll likely get frustrated; it definitely helps to have small dexterous fingers. Here’s a tip: Ask a helper to read the instructions and call out the steps while using both hands and eyes on the controller without having to go back-and-forth from the manual to the remote. Before paring the wind sensor, verify that the remote control is functioning properly; it also requires eight steps and has the same short time limits.
One thing to keep in mind: The awning will do a small amount of extending and retracting while pairing the wind sensor. Once the pairing is complete, the awning will extend and retract properly. To verify that the auto retract feature is working, climb on a ladder and, with the palm of your hand, shake the hardware near the sensor. In about 5-10 seconds, the awning will start to put itself away. When testing the motion sensor on the project trailer it worked flawlessly every time.
The only tools needed were a sufficient ladder to reach the top of the hardware, a voltmeter, miscellaneous terminals, screwdrivers, drill and bits, rivet gun, electrical tape and a scratch pad. You might want to take copious notes so as not to lose track of the wires. Also, you’ll need a fish tape if you end up pulling wires.
Installation time will vary widely, depending on where the original extend/retract switch is located. Having to route the wires from a cabinet and through the wall, we spent the better part of a day trying to complete the installation. In the end, though, the peace of mind afforded knowing the awning will be protected from unexpected wind events was worth the time and expense.