Power Trip
man plugging air fryer into outlet
Power Trip title; electrical outlet
After learning that all the galley-area 120-volt AC outlets and microwave in my fifth wheel were tied to a single 15-amp circuit, it was time to pull more power to the area. Adding a new outlet to a separate circuit did the trick — now I can run my air fryer and microwave at the same time.
By Bill Gehr / Photos by author
O

ver the years, RV owners have become spoiled with the proliferation of electric appliances. From the health benefits of cooking in an air fryer to baking a Thanksgiving turkey or using a portable electric heater, RVers have become reliant on 120-volt AC powered appliances — and the industry has responded with a greater selection of all-electric RVs.

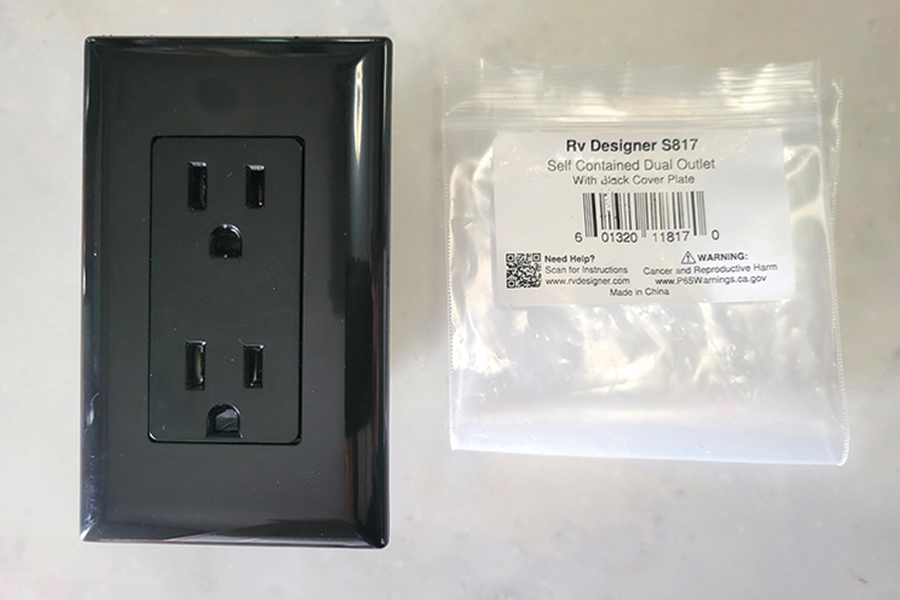
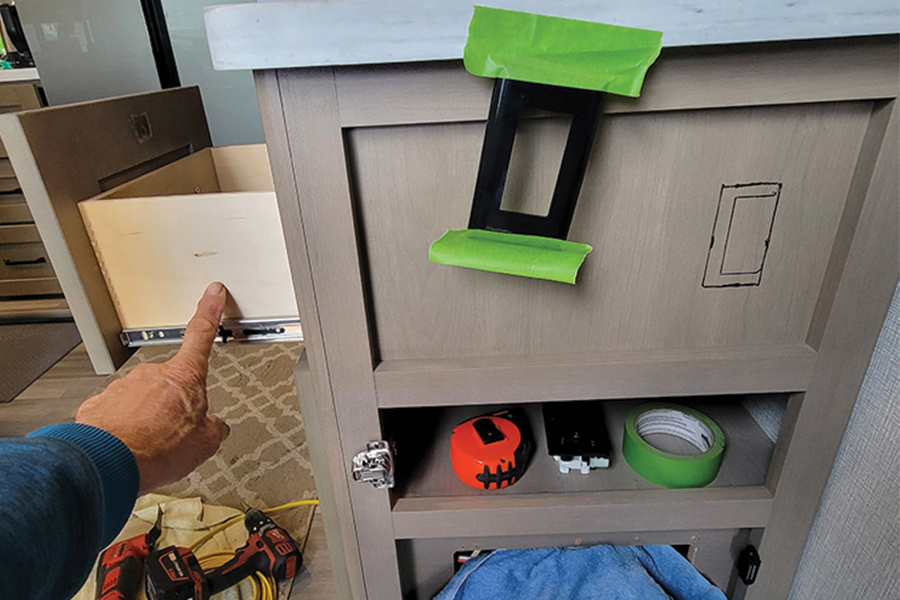
For those of us without an all-electric RV, however, ganging 120-volt AC outlets can make it difficult to operate multiple appliances at the same time. For example, in my fifth wheel, the electric supply in the kitchen and the hutch was totally inadequate. All the outlets were tied into a single 15-amp breaker, which made it difficult to run two appliances at the same — unless power consumption was limited to maybe 700-800 watts. It didn’t take long to realize that I needed to add another circuit in the hutch area.

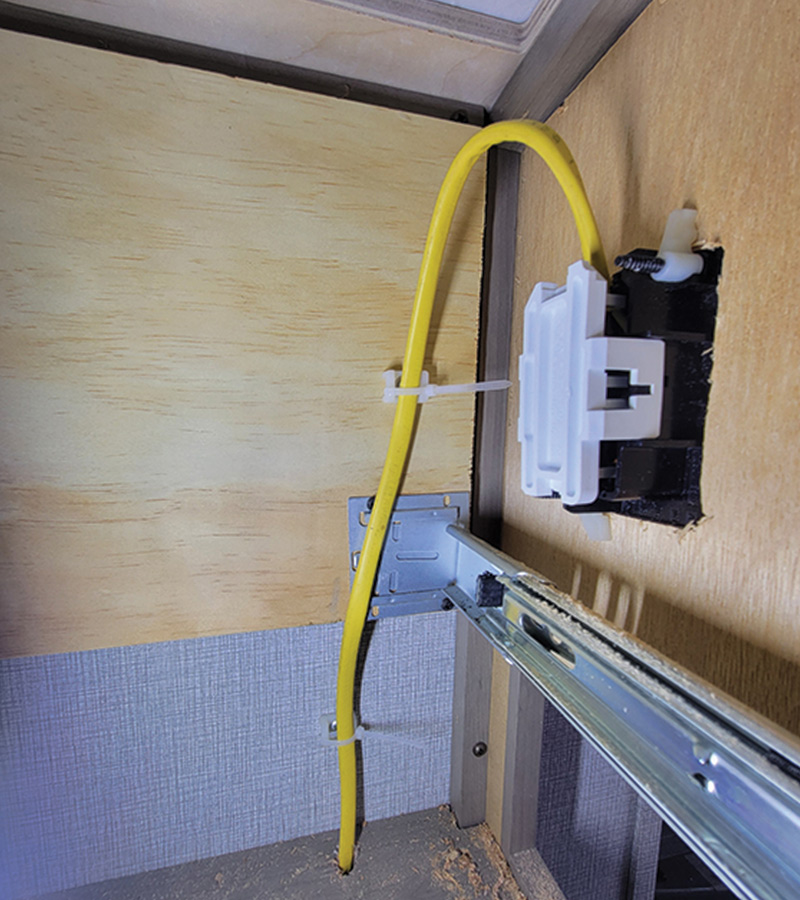
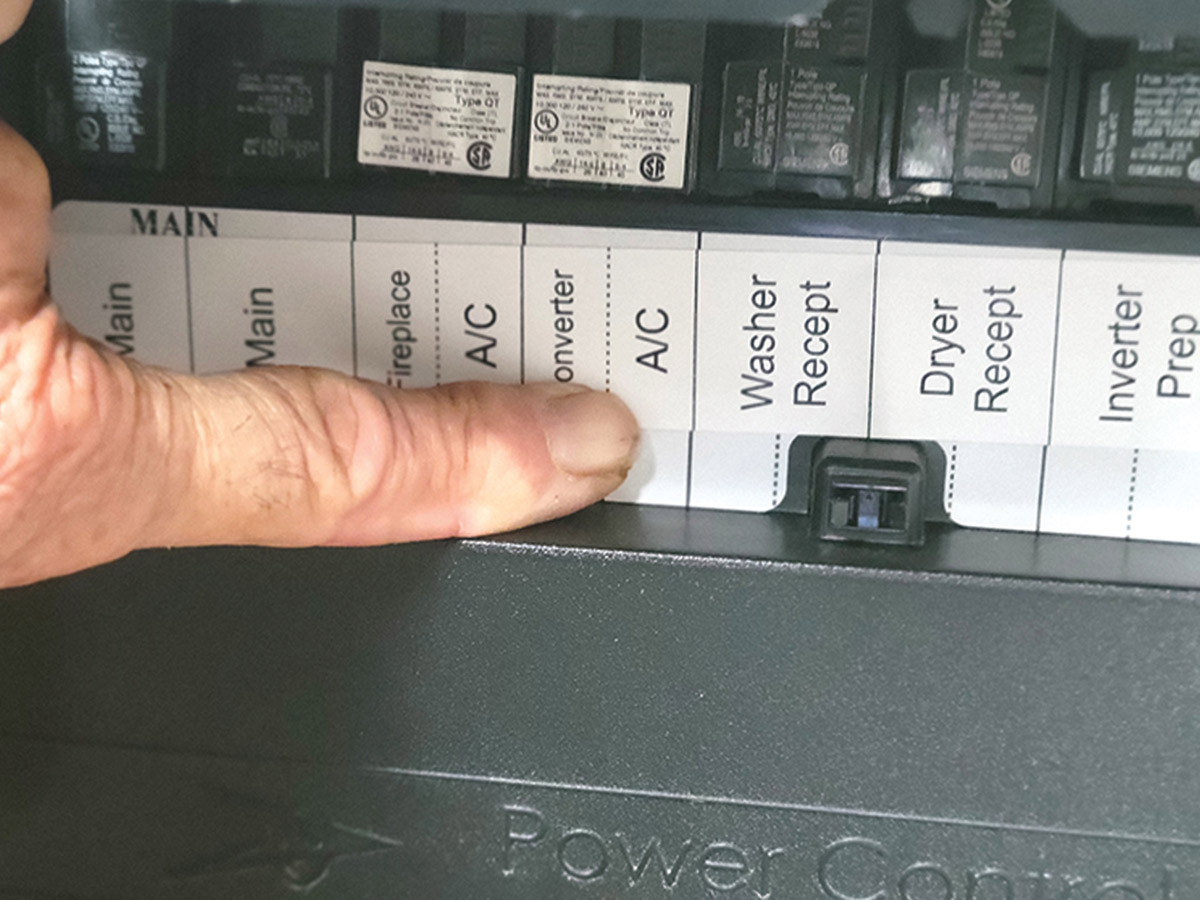
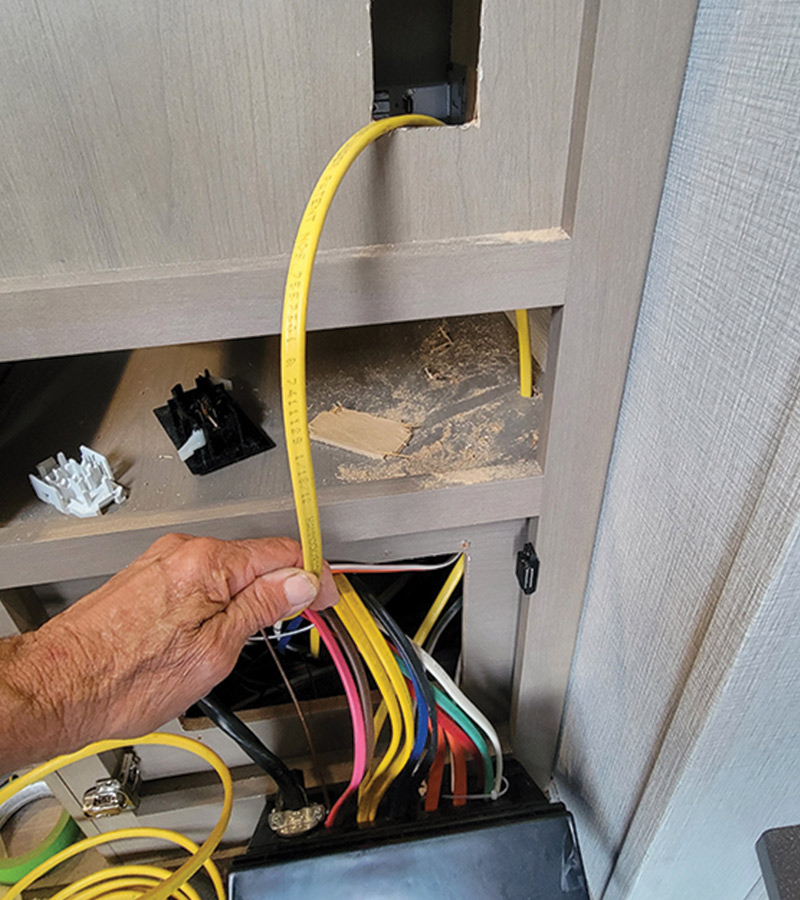
In my fifth wheel, the power distribution center was on the end of the hutch where I keep the air fryer, laptop computer and printer. Adding a 120-volt AC outlet in the wall right above the distribution panel made the most sense, since routing the wiring was not going to be complicated. There’s no front air-conditioner in my fifth wheel (I ordered it that way to allow for a fan in the bedroom for boondocking jaunts), which made it easy to use the 20-amp circuit that was already in the panel. If the panel is filled — usually with circuits dedicated to the second air-conditioner and/or washer/dryer —you can replace one of the other breakers with a tandem-style counterpart. Tandem breakers are available at hardware and home improvement stores.

drill removing door of hutch
The distribution panel was located in the end of the hutch, behind a door that was removed for better access. After removing the four screws holding the panel door and trim, the entire distribution panel was pulled out, only limited by the wiring on the backside.
The blank wall near the distribution panel was the perfect place for mounting the new outlet. I located the outlet as far to the right as possible to keep the additional blank space open for possibly mounting other monitors down the road. The only potential issue was allowing enough room to clear the drawer and slide on the other side of the wall. To accommodate the available space, I used the same type of electric outlet that’s found in most RVs, which is a one-piece unit that occupies less space. These outlets are available at RV parts stores or on Amazon (“RV Designer S817, Self Contained Dual Outlet with Cover Plate, Black, AC Electrical”) for $13.74. You’ll need GFCI protection if the new outlet is installed in a wet environment. You’ll also need 3-4 feet of Romex wire. I carry a coil of it for emergency repairs; if you don’t have any handy, it’s available at any home-improvement store or online.
finger pointing breaker labeled AC
Since the fifth wheel was ordered without a front air-conditioner, the breaker in the panel was available and used for wiring the new outlet. (Having your breakers identified always makes working with them easier.)
The first thing that you will need to do is disconnect the RV from electricity and make sure the inverter is Off before removing the distribution panel — never perform any repairs or modifications to your RV’s electrical system without first ensuring all power is off. Then, I held the new electrical outlet plate against the wall where it was going to be mounted and made a rough outline for the cutout. A step-type drill bit was used put holes in each corner of the markings and an oscillating-tool blade made short work of cutting a rectangle opening for the outlet. I allowed extra space beyond the markings for a little more clearance.

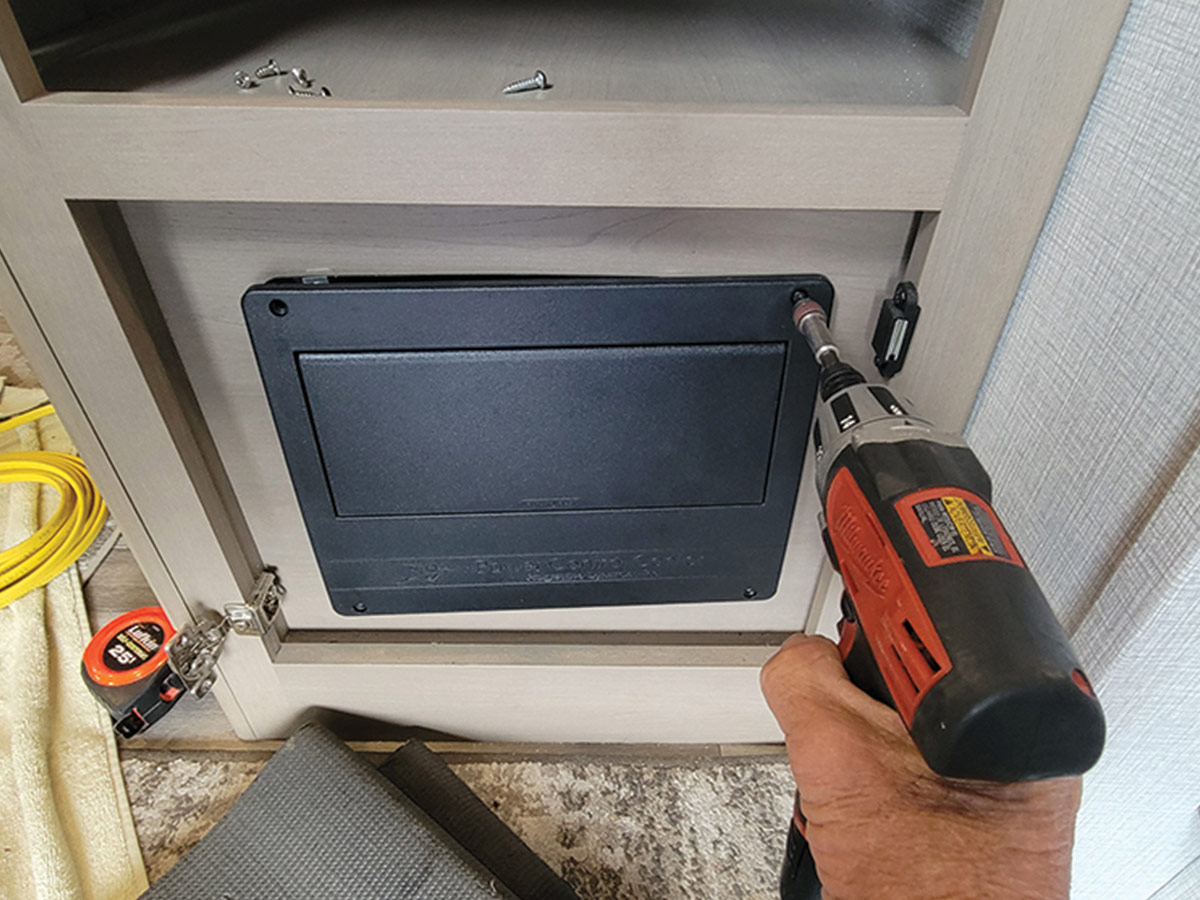
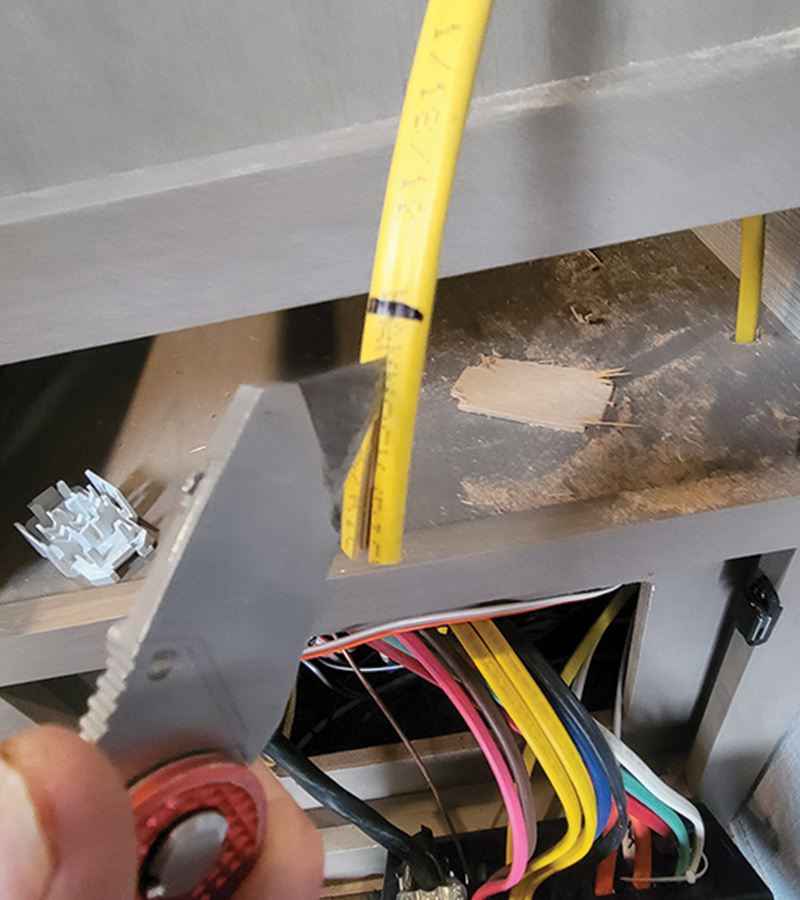
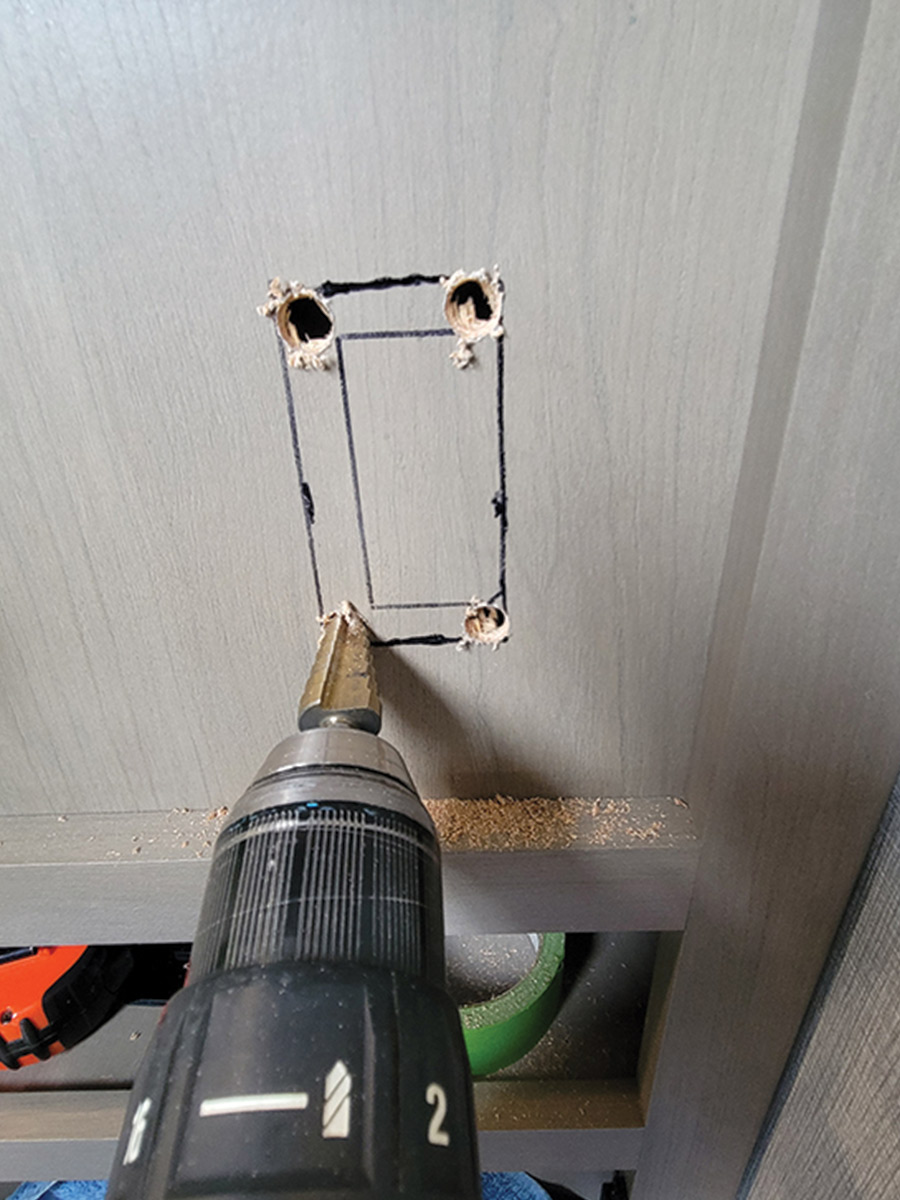
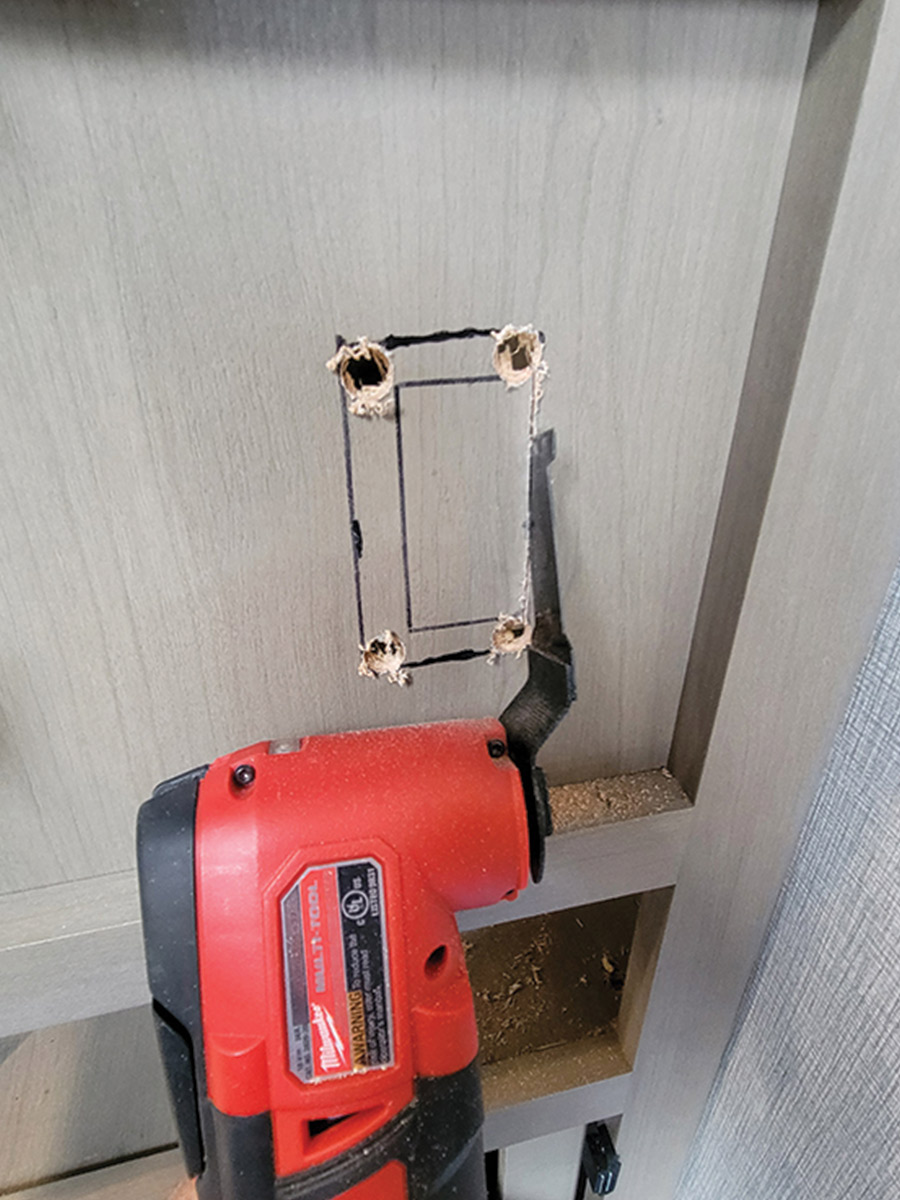
The next process was to drill a hole in the shelf above the distribution panel — also with the step-bit — and run the Romex to the back of the distribution panel. Fortunately, there was an extra inlet with a set of jaws to provide stress relief for the Romex should the distribution panel need to be pulled out in the future.

Black cover plate for outlet
hand pointing to an open drawer
I ordered a one-piece RV-type 120-volt AC outlet because it doesn’t require a junction box and was able to clear the adjacent drawer and slide. The new outlet was marked for installation to the far right of the blank space in the structure to allow for future instrumentation/monitors. This outlet is available at RV supply stores or from Amazon.
tool cutting a rectangle into wall
Once the position for the new outlet was established, the corners were drilled with a step-bit and the opening cut with an oscillating-tool blade.
hand using drill to drill a hole in a shelf
hand holding yellow wire through hole cut in wall
A hole was drilled in the shelf above the distribution center to make way for the Romex from the new outlet. As you can see, the location for the new outlet was very close to the back of the distribution panel. The Romex was cut from the wire roll once enough length was provided to work in the back of the panel without creating undue stress on the connection points.
With the Romex routed, a portion of the yellow exterior casing was removed, exposing the cooper, white and black wires for connection into their designated places in the new outlet, which was tricky without the $160 tool that compresses the wires into the slots. This tool assures the wires will not come out, even on bumpy roads — but my tool was forfeited when I sold my RV repair business, so I had to improvise. I needed a solid surface where I could lay the outlet flat and try to drive the wires with a screwdriver. A 2-foot-long piece of 4 x 6 lumber fit the bill, but the wide-blade screwdriver was not capable of driving the wires into their respective slots (which are marked); if you get the white and the black reversed some appliances may not function.

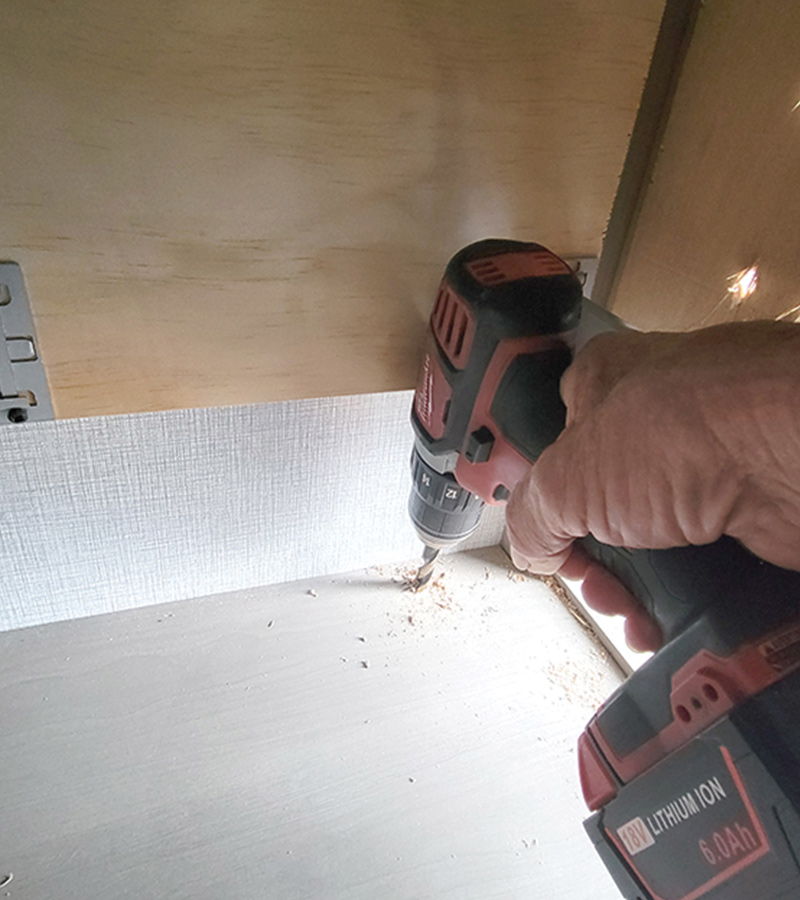
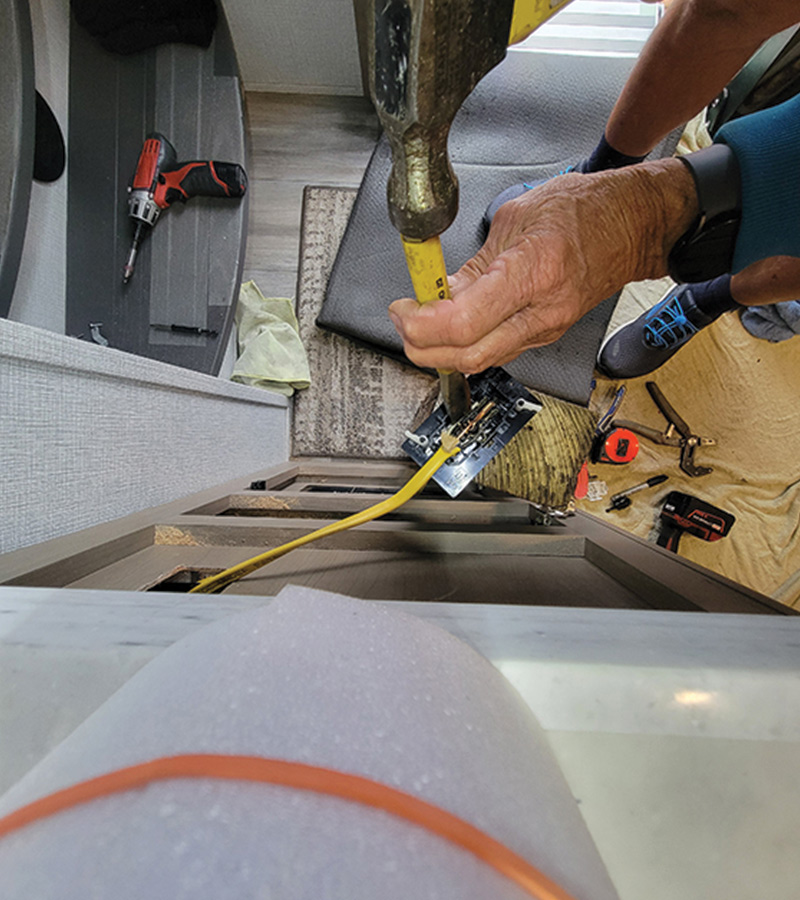
Thinking outside the box, I rummaged through my tools and found a small chisel that worked. All it took was one whack of the hammer for each wire. Now it was just a matter of clamping the cover on the back; again, my makeshift lumber work top — covered with a cloth to prevent damaging the outlet — came in handy.

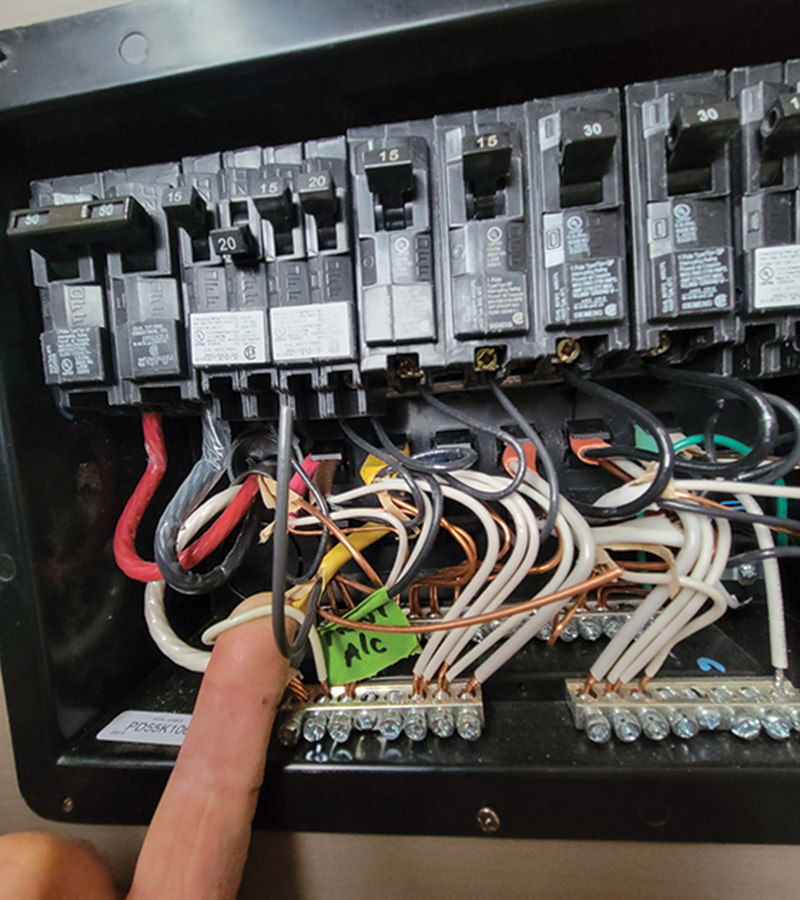
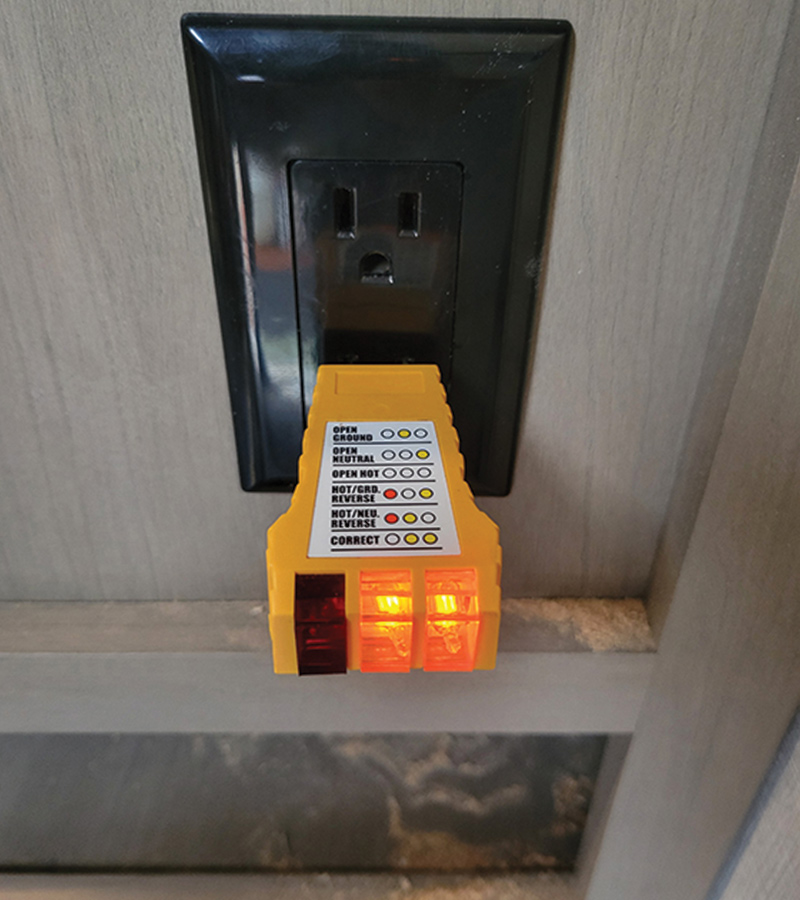
After double checking all of the connections, I restored power and tested the outlet for polarity. Keep in mind that this project assumes you have 50-amp service, which is the case if the RV is equipped with two air-conditioners. Now I have plenty of power to run my air fryer and microwave at the same time without overloading the circuit.

a blade cutting insulation wire
Proper wire length was necessary to make sure the connections in the outlet were clean and tight. A section of insulation was cut away with a utility knife.
hand using hammer and chisel
Without the use of an expensive tool for seating the wires in the outlet, it was time to improvise. Ultimately, an old blunt, 7/8-inch chisel made short work out of seating the wires properly.
hand adding back cover to outlet
The back cover snaps on the outlet to protect the wires from being exposed. It takes quite a bit of pressure to do this, but it’s important that both sides are snapped in securely.
cable ties securing wire against wall
Once the new outlet was installed, the Romex was secured tightly against the wall using small clamps and cable ties to make sure there’s no contact with the drawer or slide.
a finger pointing out a white wire
The existing wire for the front air-conditioner was marked and pulled from the breaker and the new black (hot wire) was connected to the breaker, which must be very tight. The white and copper wires were connected to their respective bus bars.
tool testing polarity of outlet
Finally, the new outlet was tested for proper polarity, making it ready for the air fryer and other accessories. If the new outlet is installed in a wet environment, it needs to have GFCI protection.