Painless Propane
Painless Propane
Connect to the RV’s LP-gas supply to fuel your grill, firepit or other device and say goodbye to disposable propane cannisters
By Chris Hemer and Chris Dougherty / Photos by Chris Hemer
P

ropane, also known as LP-gas, is the fuel of the RV lifestyle. It oftentimes provides us with conveniences like hot water, a stove, a refrigerator and a furnace and also can fuel exterior appliances like grills, barbecues and fire pits. The popularity of factory-installed exterior propane connections and even complete exterior kitchens provide additional convenience for those who enjoy cooking and entertaining outdoors — but what if your RV has neither?

Of course, you can still fuel your outdoor gas appliance(s) with disposable propane cannisters, but these take up space in the exterior storage compartments — and if you run out, you’ll have to take the party back indoors, take a trip to the local store or borrow a cannister from a friendly neighbor.

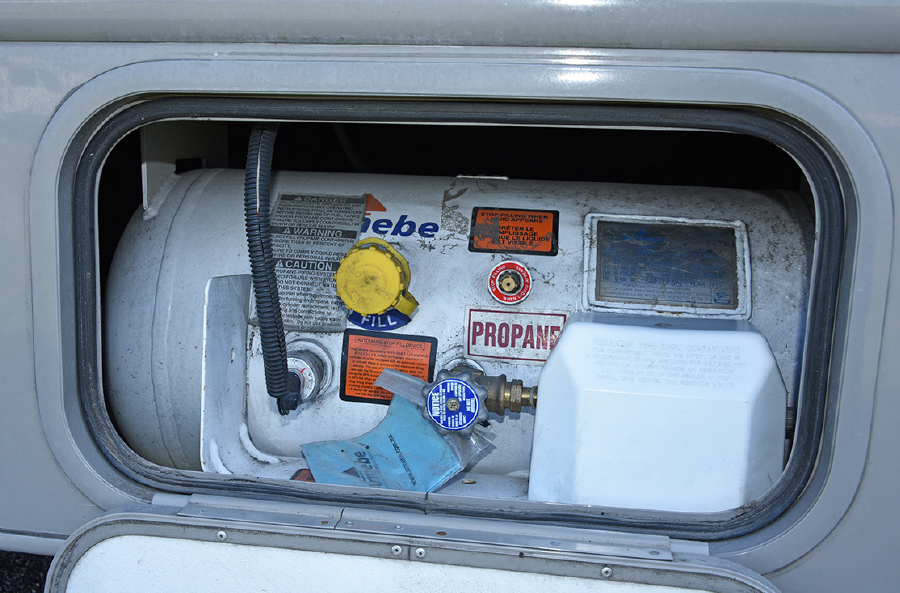
If any of these scenarios are familiar, you’ve probably longed for an exterior propane connection that allows you to use gas from the RV’s main supply — either the propane tank in a motorhome or the propane cylinders in a travel trailer or fifth wheel. Stop wishing. If your RV didn’t come so equipped from the factory, you can install an exterior connection yourself in a few minutes with the right parts and a few simple hand tools. Cost for this project was a little more than $100.

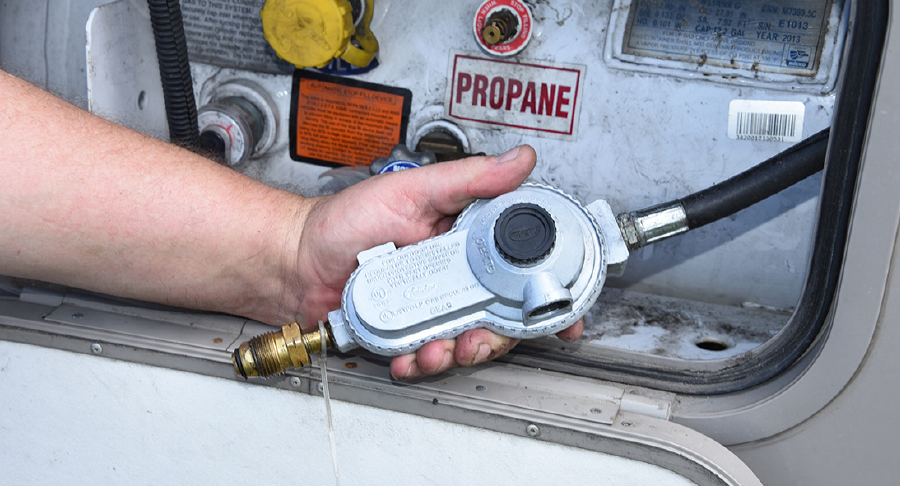
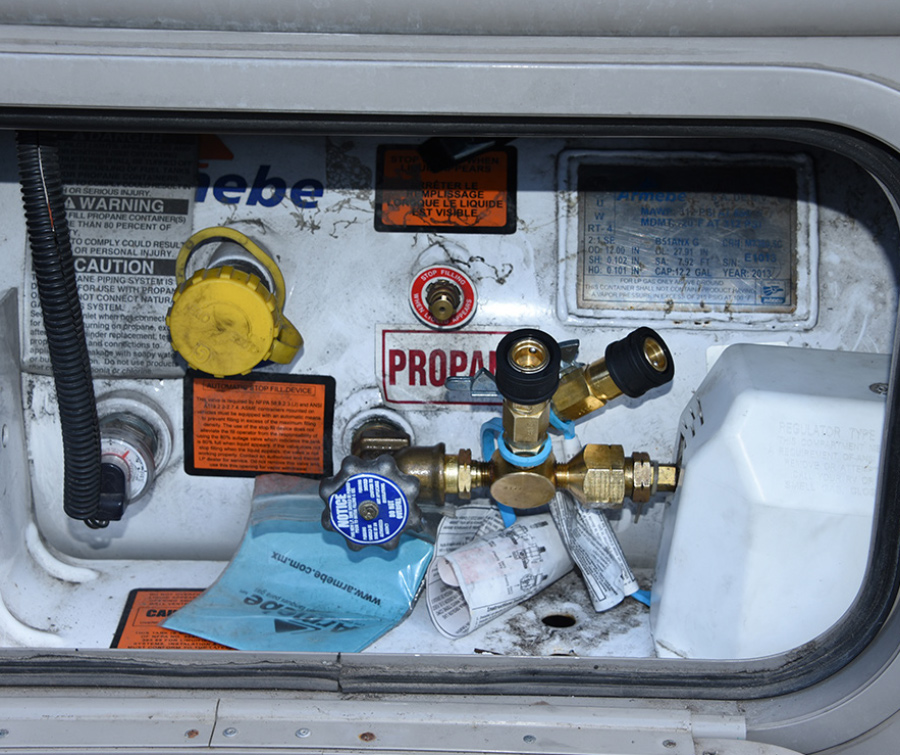
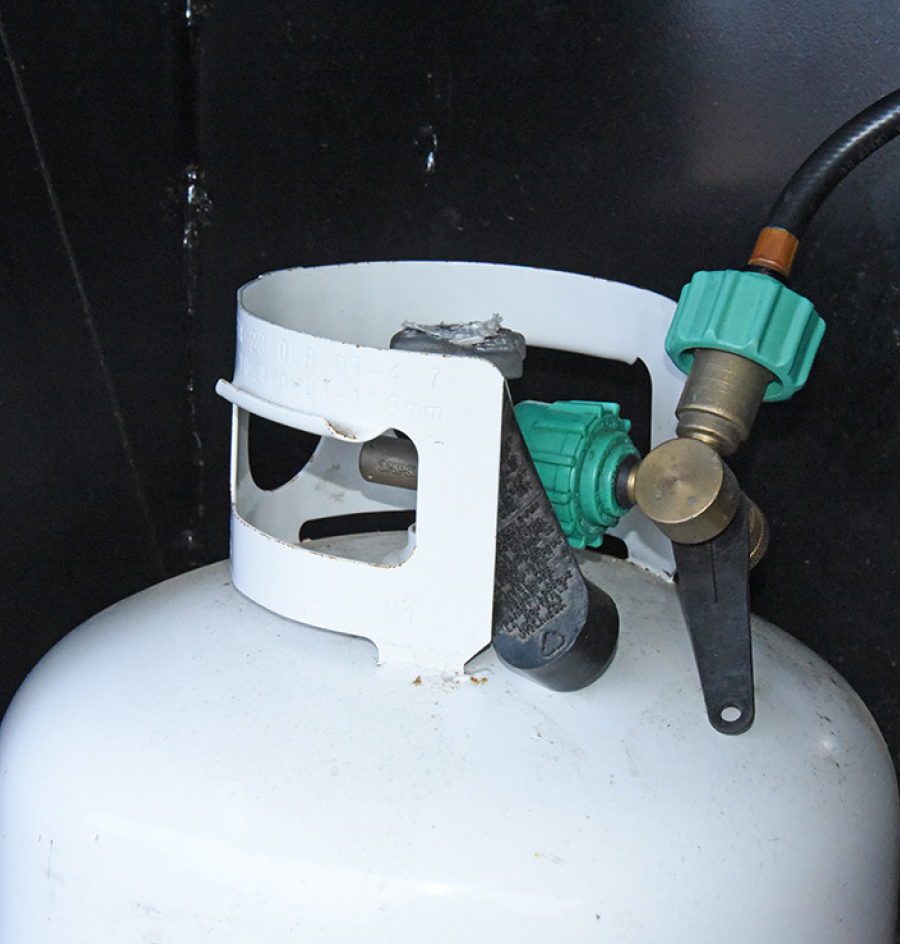
But first, a little primer on propane connections. There are two different types: High pressure and low pressure. High-pressure connections are used when you’re tapping directly off the tank or cylinder before the regulator. A low-pressure connection is used after the regulator. When using the latter, you can connect directly to a device or appliance without using a regulator on the device itself, because the gas pressure is already regulated to 11 inches of water column. A high-pressure connection comes from the RV’s tank or cylinder and goes directly to the regulator on the device or appliance.

MB Sturgis Sturgi-Stay T fitting
Tapping into the main propane supply in the project motorhome required an MB Sturgis Sturgi-Stay T fitting (model 250). We also selected a 10-foot hose for small appliances and a 6-foot propane “fill” hose to run off an external cylinder.
Propane tank in motorhome
Propane tanks in motorhomes are different from cylinders in trailers, in that they are horizontal and permanently mounted, like this 5-gallon tank in our project 2014 Class C motorhome. Propane tanks are regulated by the American Society of Mechanical Engineers (ASME), while propane cylinders found on trailers are removable and are regulated by the DOT (Department of Transportation). Though propane tanks are not as accessible as cylinders and cannot be removed, you can still tap into them to fuel stoves, grilles, etc.
On our project motorhome, we installed an MB Sturgis Sturgi-Stay T fitting, model 250, which retails for $120.82 but is available on etrailer.com for just $52.87. To this we added a quick disconnect 10-foot hose for small appliances ($30.27) and a 6-foot propane “fill” hose ($23.90), which is used to feed the RV propane system from a stand-alone cylinder. All of these components are available online, and if you need a longer fill hose, they are available for an additional cost.

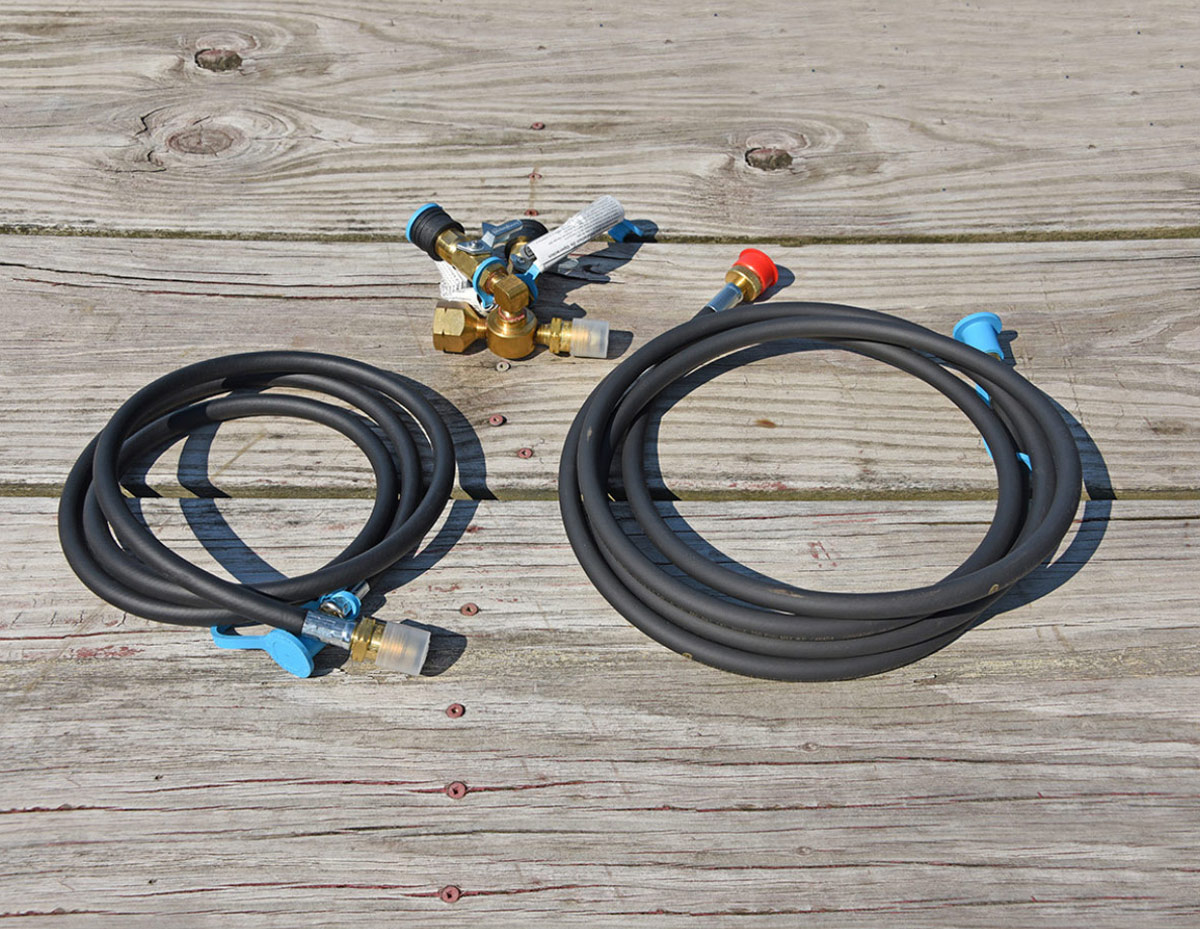
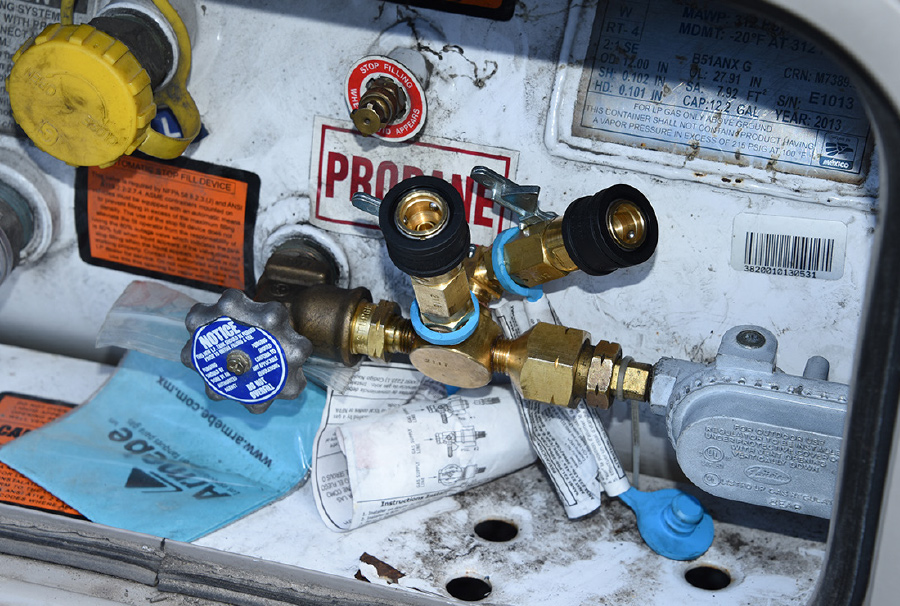
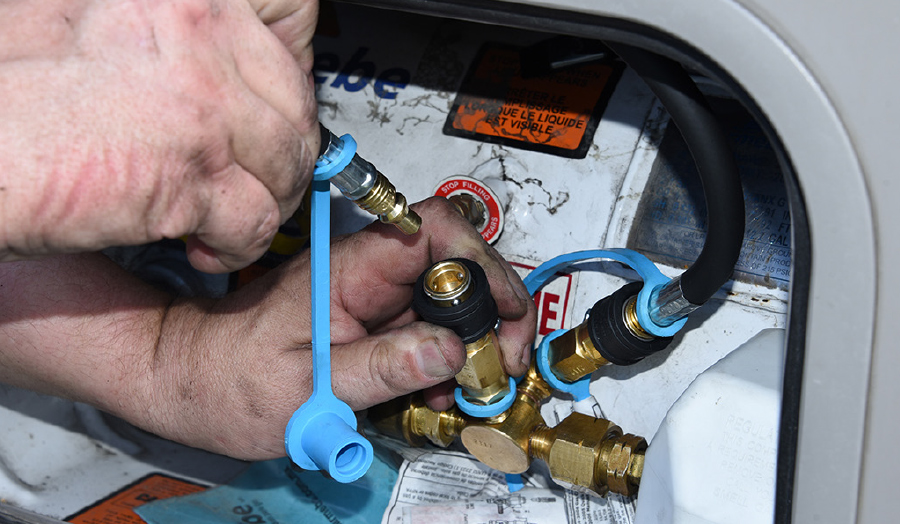
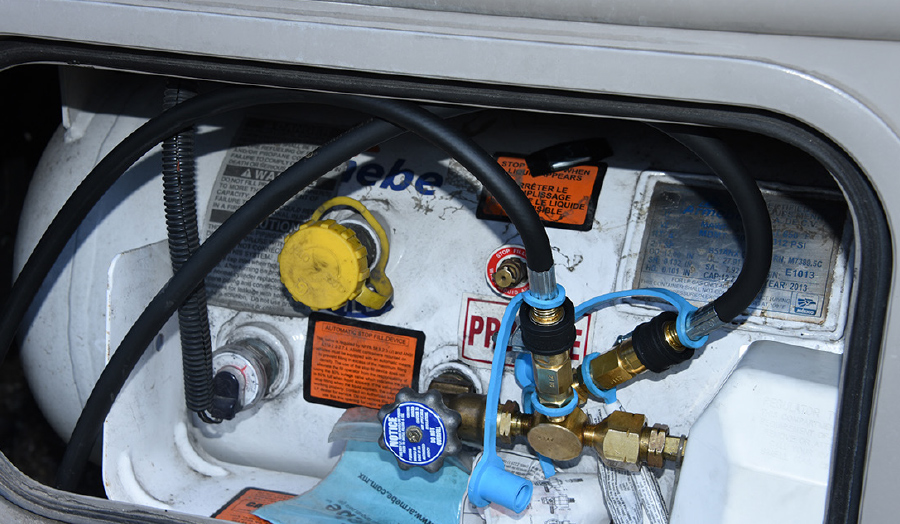
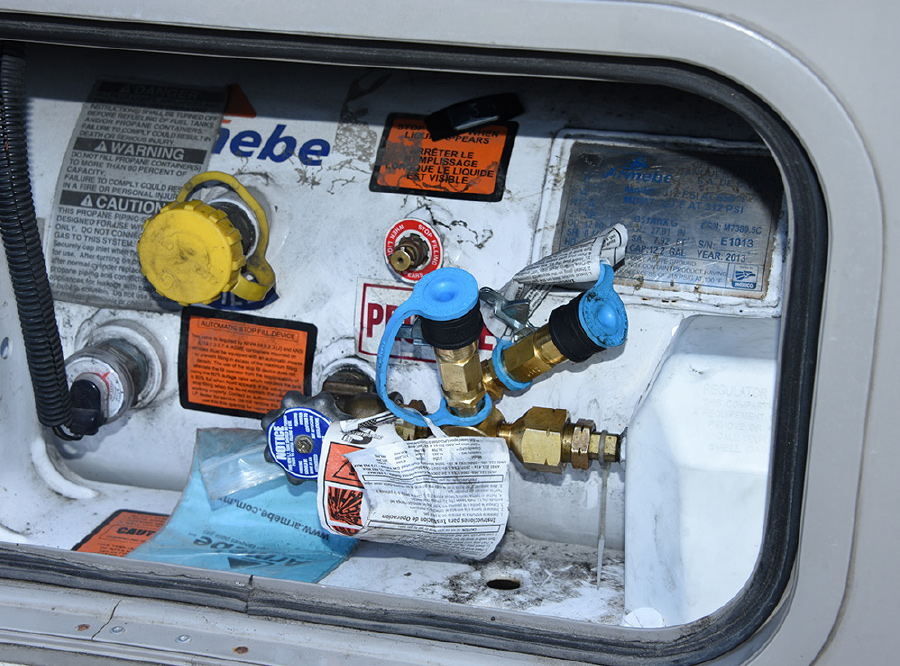
The Sturgi-Stay T-fitting is beneficial because it provides you with two high-pressure ports, which can serve as inlets or outlets. For example, if you’re operating off the motorhome’s tank, both of the hoses can serve as outlets to fuel a barbecue grill and a griddle. If you don’t want to use the RV’s propane supply or the on-board tank runs empty, you can simply turn off the tank valve and one of the ports on the T-fitting can be routed to an exterior propane cylinder with the aforementioned “fill” hose. It’s nice to have options.

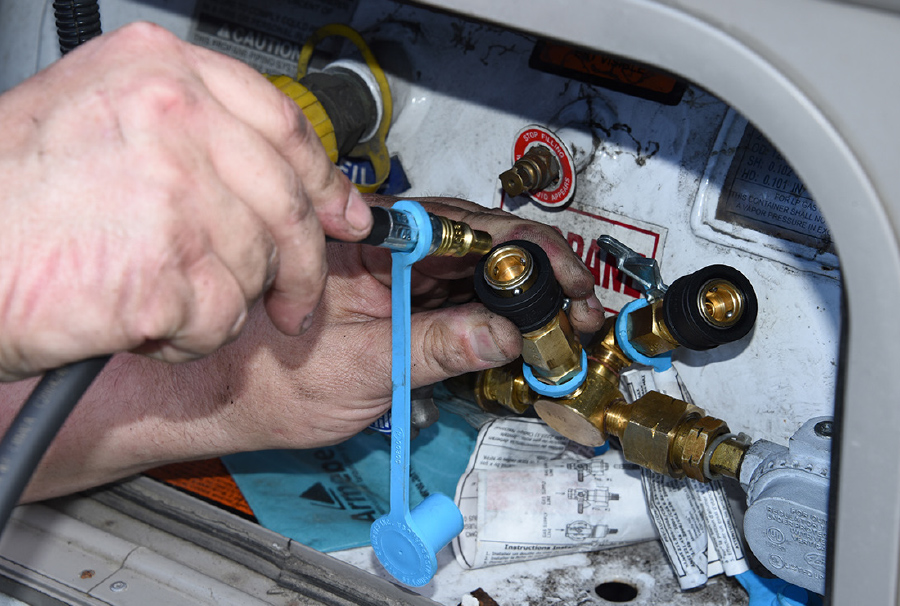
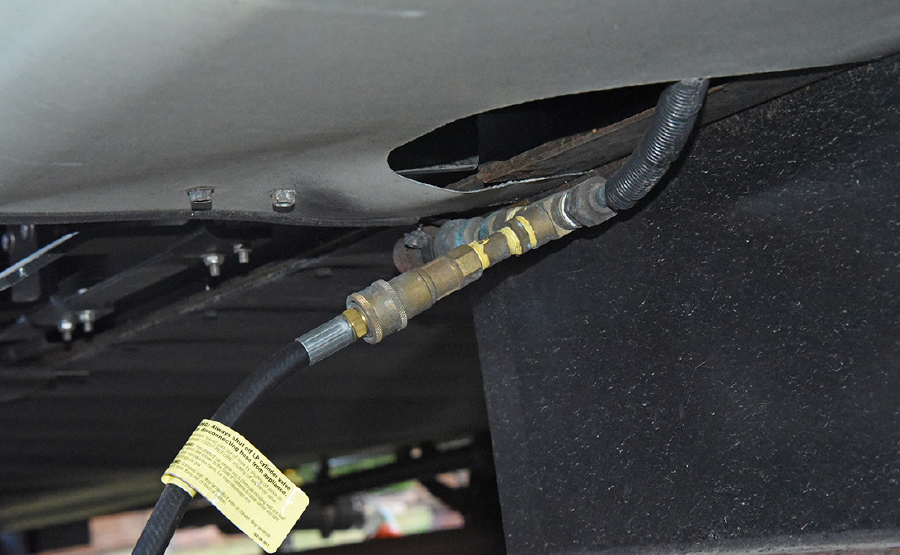
We should note that while this installation provides you with a couple of “whips” to connect a propane-fueled device or appliance to the RV’s propane tank/cylinder, it does not mimic a factory-installed system that runs beneath the RV with a quick-disconnect on the passenger side. While such an upgrade is possible, you would have to use components and procedures outlined in the National Fire Protection Association (NFPA) 1192 standard for recreational vehicles. It is fairly complex with specific language, so if you would like to have this sort of work done, it is best to seek a RVIA-certified technician to make sure you conform to the 1192 standard. Note also that the “fill” hose is just a gas hose, not a liquid propane hose, and as such, can’t be used to pressure fill the onboard tank.

accessing the regulator assembly
regulator protected by a plastic cover secured by one or more plastic fasteners
The first step is to access the regulator assembly, which is typically protected by a plastic cover secured by one or more plastic fasteners. A tool designed specifically to remove these fasteners (Google “plastic fastener remover”) is used to pry the fastener(s) free, then the cover is removed.
closing the gas supply at the main valve
Before work commences, be sure to close the gas supply at the main valve.
adjustable wrench
removing the regulator from the tank
You can use an adjustable wrench to remove the regulator from the tank.
T-fitting being threaded
The T-fitting is then threaded into the regulator assembly and the tank, and the fittings tightened. Be careful not to over-tighten; the fittings only need to be snug enough to keep from leaking.
fittings being placed
Here, the fittings are in place. It may be necessary to rotate them upwards slightly (as shown) so they clear the door when it is closed.
opening the supply valve and spraying the fittings with a gas leak detector solution
Once the fittings are tightened, open the supply valve and spray the fittings with a gas leak detector solution. If there are any leaks, the solution will bubble. You can also use a dishwashing detergent/water solution for this purpose, but do not use Windex glass cleaner or a similar product — the soapy water’s surface tension is what allows the bubbles to form and Windex doesn’t create the surface tension.
collar on the fitting being pulled back
When it’s time to use an exterior appliance like a gas grill, the collar on the fitting is pulled back and the hose inserted.
completed installation, with the regulator cover re-installed
The completed installation, with the regulator cover re-installed.
the second line being attached to supply gas to fuel another appliance
closeup of the second line attached
If needed, the second line can be attached to supply gas to fuel another appliance.
installing the protective plugs to prevent dirt from getting into the fittings
When finished using the hoses, always remember to install the protective plugs to prevent dirt from getting into the fittings.
Extend-A-Stay T-fitting on a DOT cylinder on a fifth wheel
As a way of comparison, here, an Extend-A-Stay T-fitting has been fitted to a DOT cylinder on a fifth wheel, (which would attach the same way on a truck camper or travel trailer), allowing a high-pressure connection to an outside appliance.
low pressure quick disconnect
A low pressure quick disconnect can be found on many of today’s RVs. Be sure to identify high vs low pressure connections on your RV.