A Lightweight Powerhouse
A Lightweight Powerhouse title
A metal wand with a hook on the end is used to release the mechanism that locks the ball in the funnel. It’s long enough to allow the operator to release the latch while standing at the rear of the truck bed.
Most fifth-wheel hitches are heavy and bulky, which makes removal impractical between trips unless you have a forklift, hoist or a neighbor willing to help. PullRite’s 50-pound SuperLite hitch not only streamlines the process but makes hooking up a breeze.
By Bill Gehr / Photos by the author
T

owing fifth-wheel trailers is popular for several reasons — not the least of which is the inherent stability when on the road. Then, too, there’s the ease of hooking up without having to handle/store heavy pieces of hitch equipment. To reap the benefits, however, a fifth wheel hitch must be installed in the bed of the truck and usually occupies a big chunk of the bed space. It’s also a heavy and bulky piece of equipment, making it difficult to remove when additional bed space is needed.

Fifth wheel hitches typically have a saddle with a latching mechanism that accepts (and locks) the kingpin built into a box mounted on the front of the trailer. While this approach is certainly tried and true, PullRite (pullrite.com), a builder of high-quality conventional saddle-style fifth wheel hitches, also offers an alternative, the SuperLite, which takes the sting out of removing and installing heavy, bulky hardware while focusing a completely different approach to hooking up.

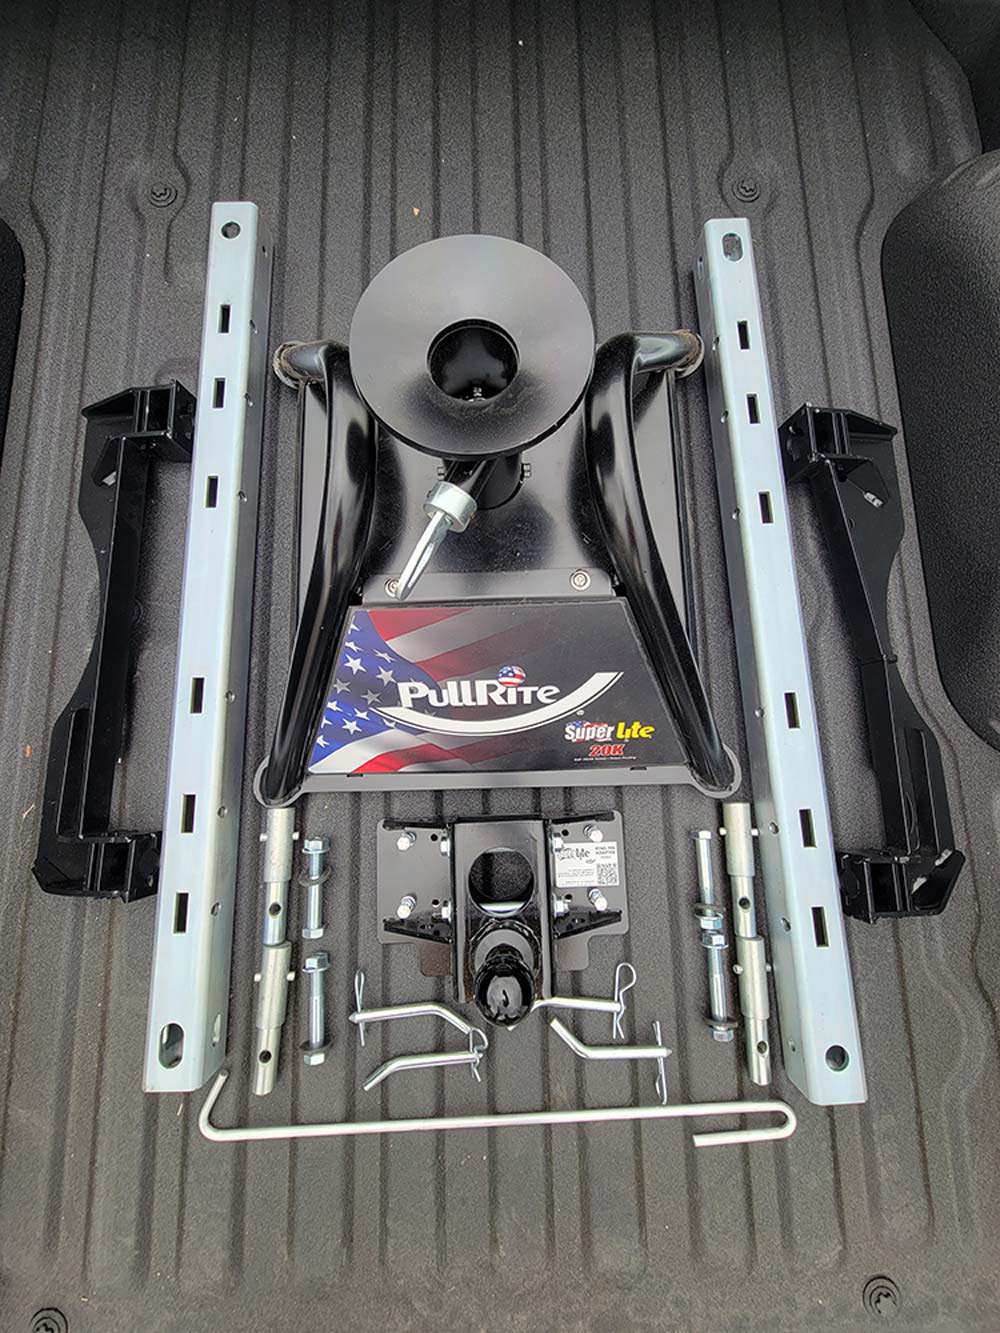
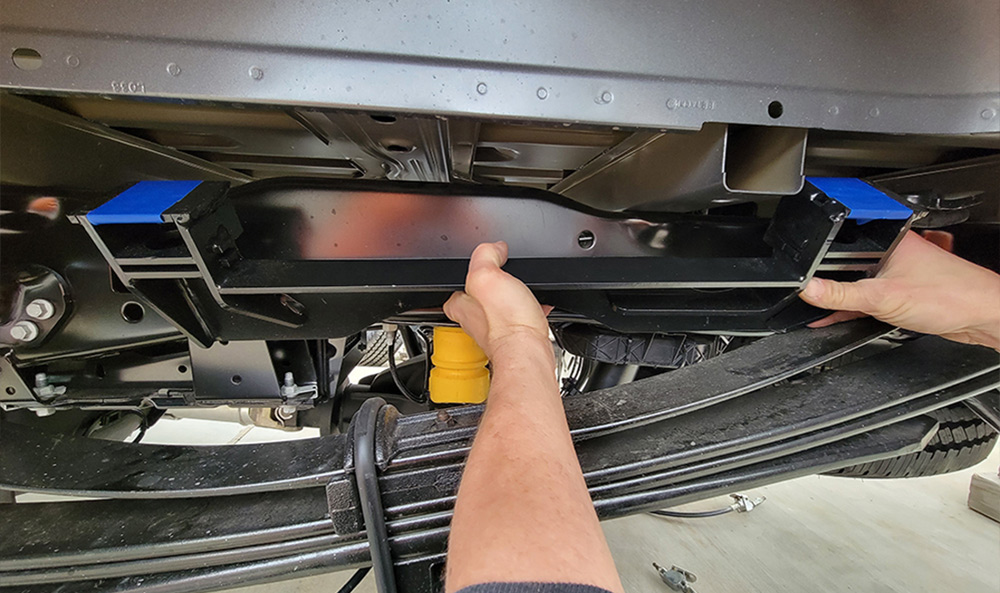
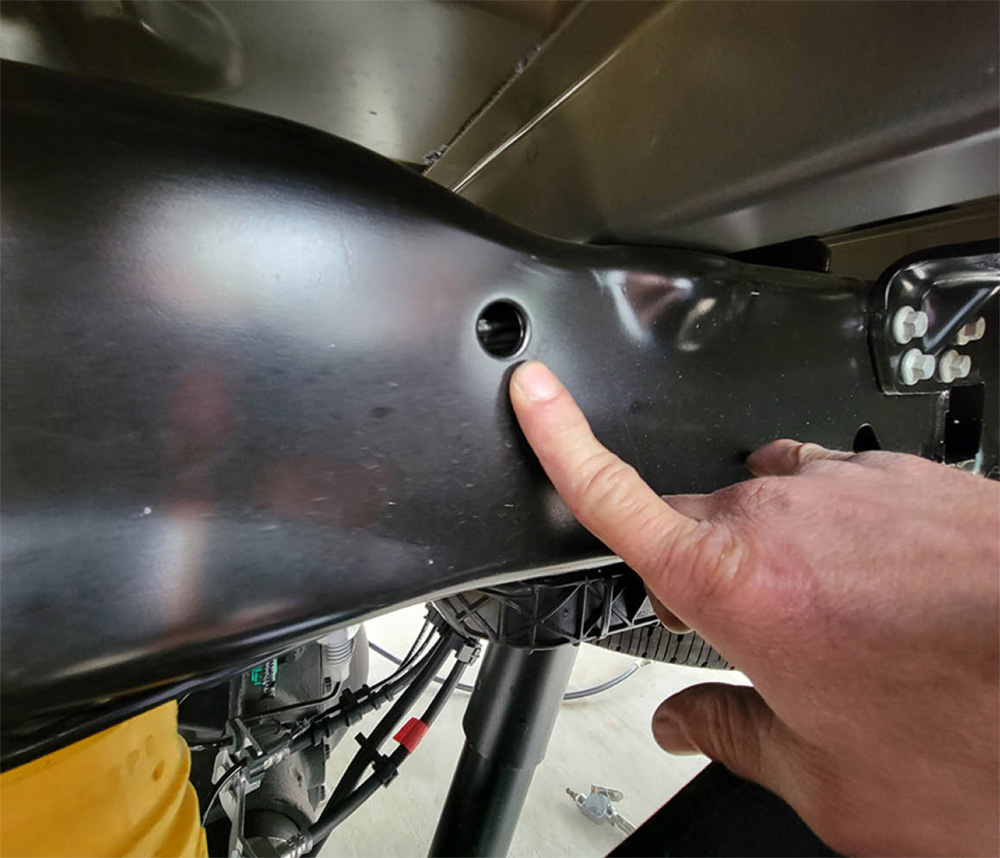
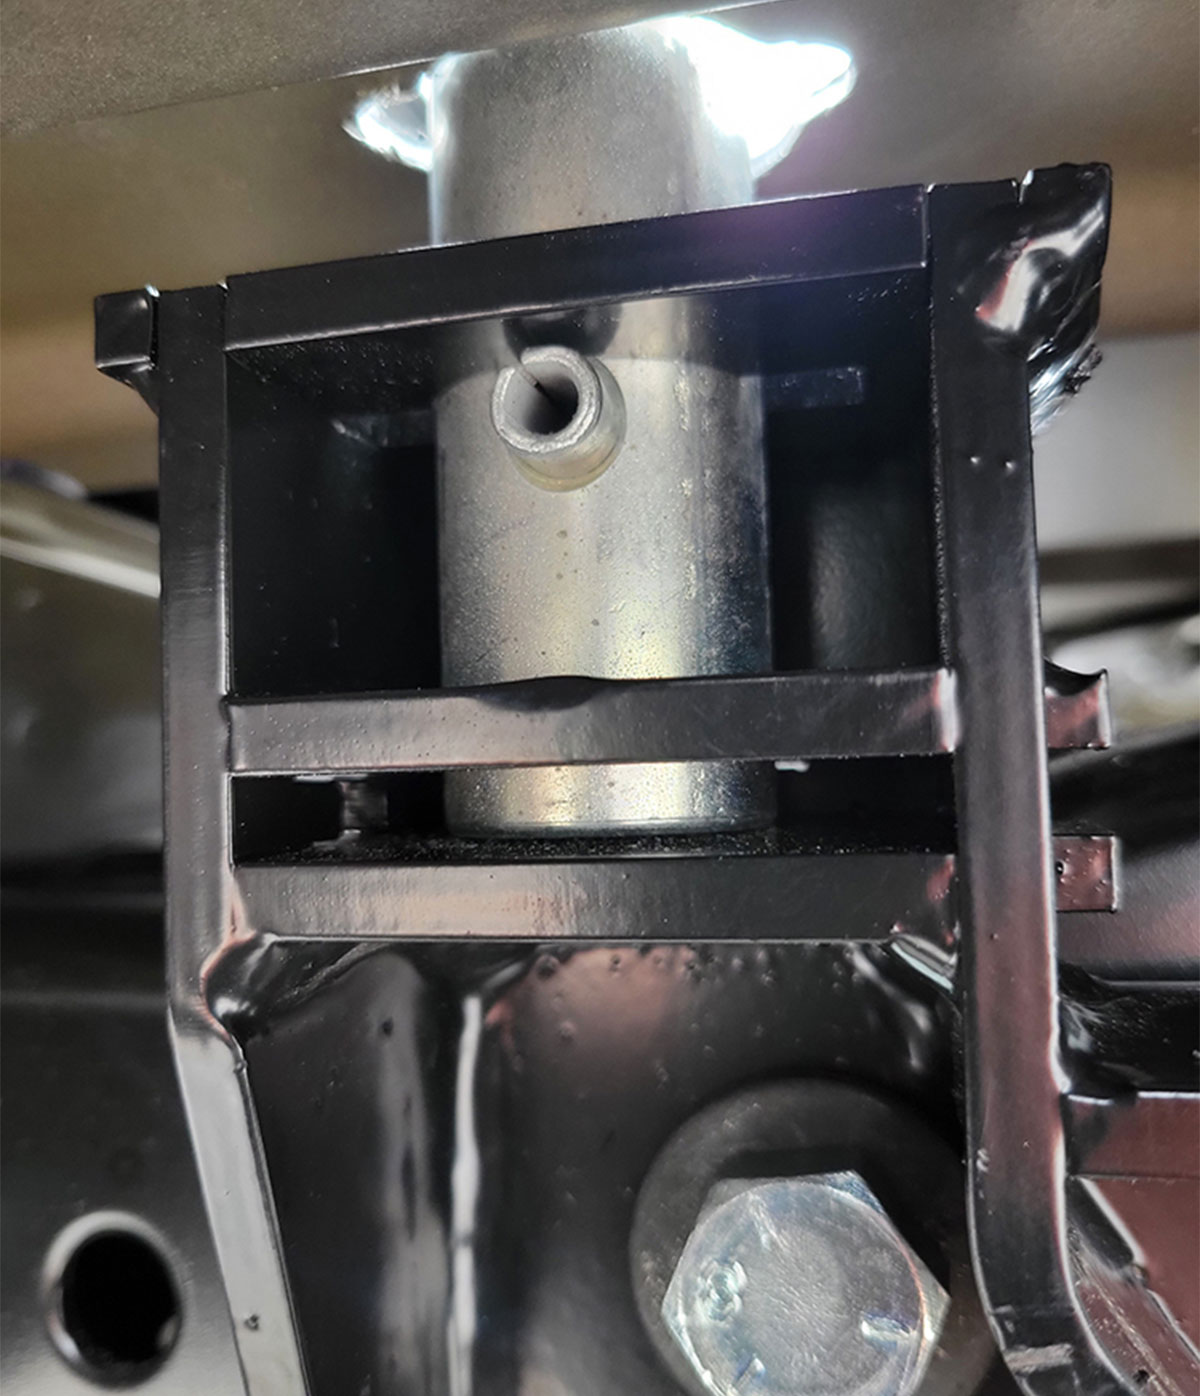
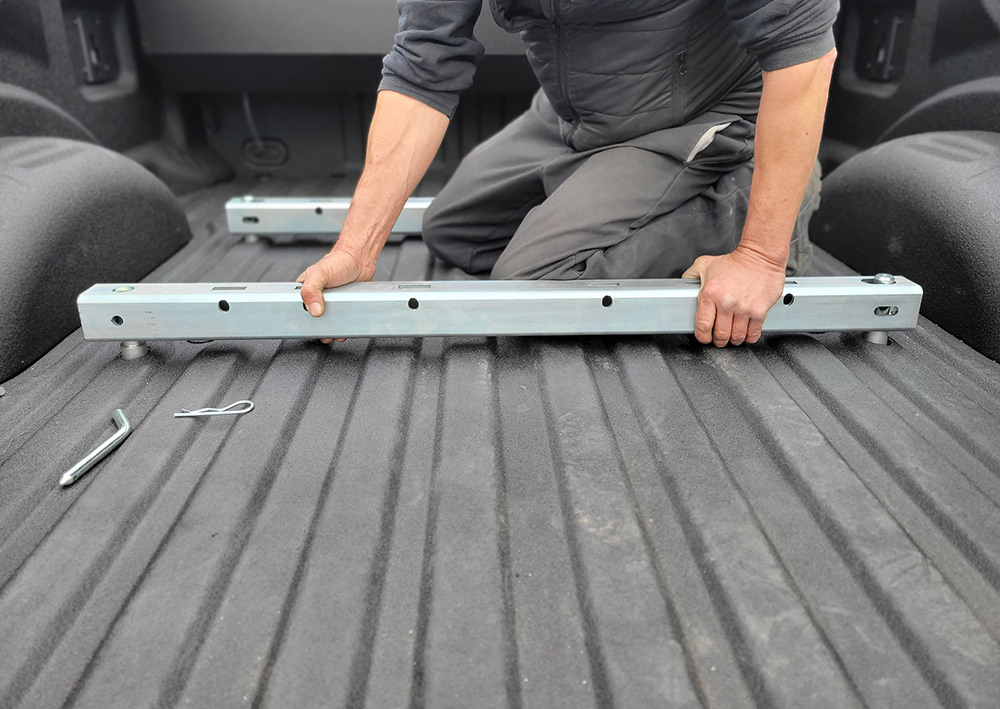
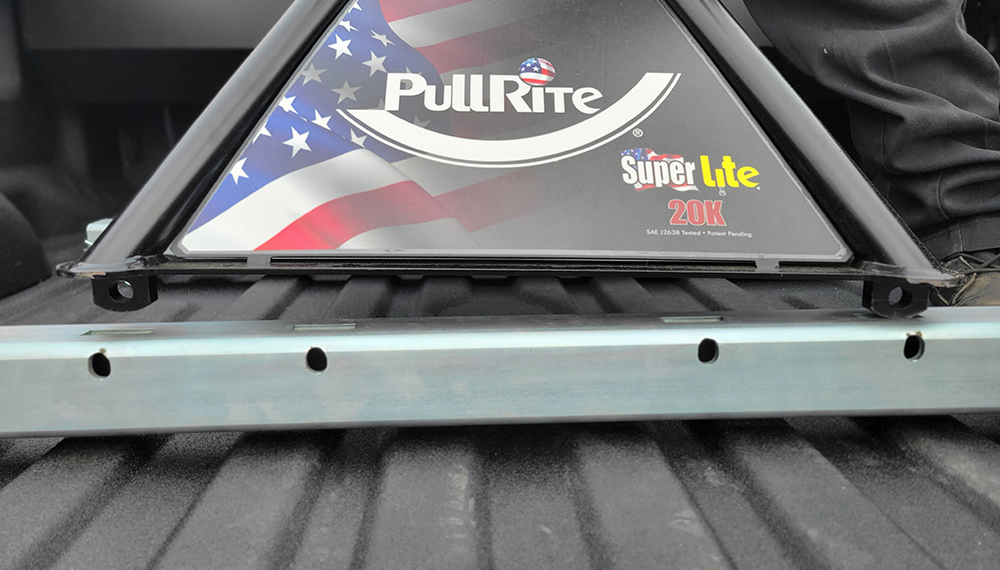
To fully appreciate the system, I assisted during the installation of a PullRite SuperLite (model #2400; $800 street price) on a 2023 Ford F-250 using the company’s proprietary SuperRail Clean Bed Technology mounting system ($750-850 street price). This rail kit (part #2332) is comprised of custom frame brackets that are designed to bolt into existing holes in the Ford frame. Custom rails are then pinned to these brackets through the floor of the bed. When the pins are released, the rails can be removed completely from the bed, leaving the entire surface free to haul stuff; the SuperLite hitch, which only weighs 50 pounds, can be quickly installed and removed from the rails — a simple one-person operation.

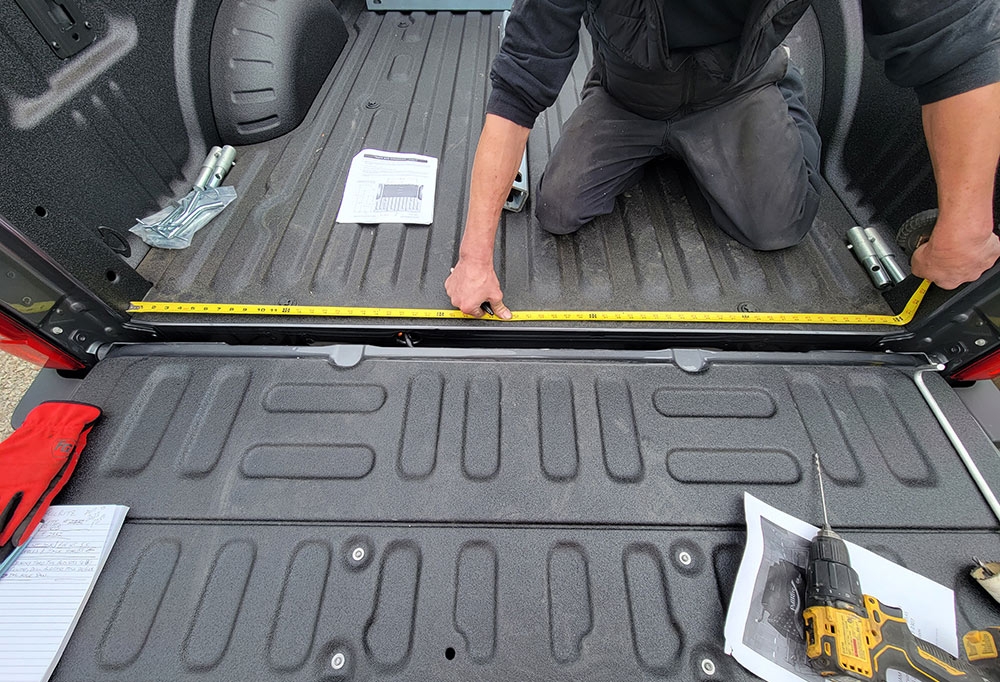
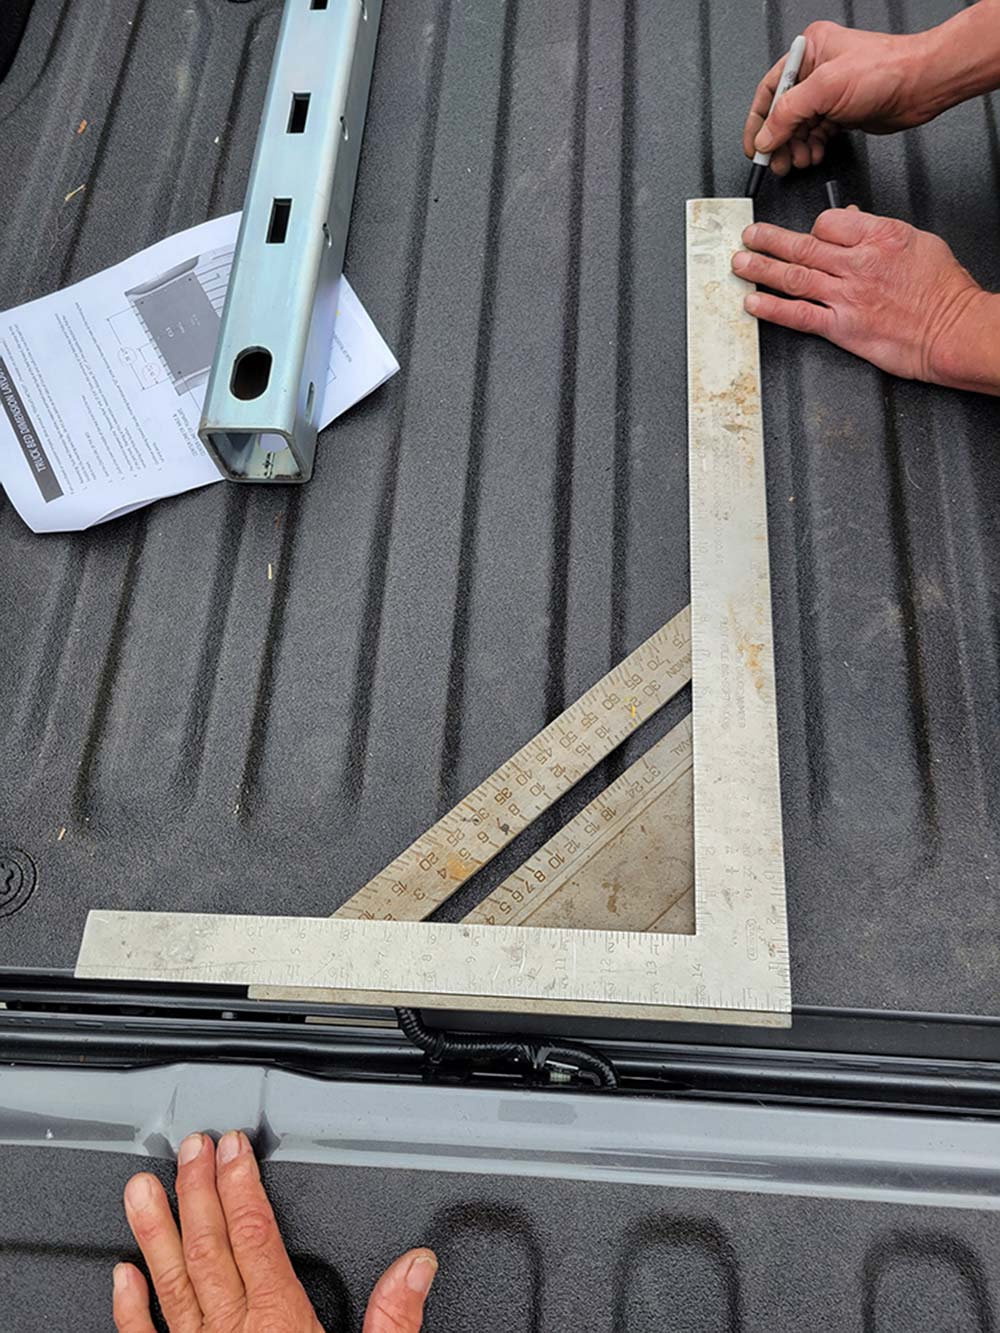
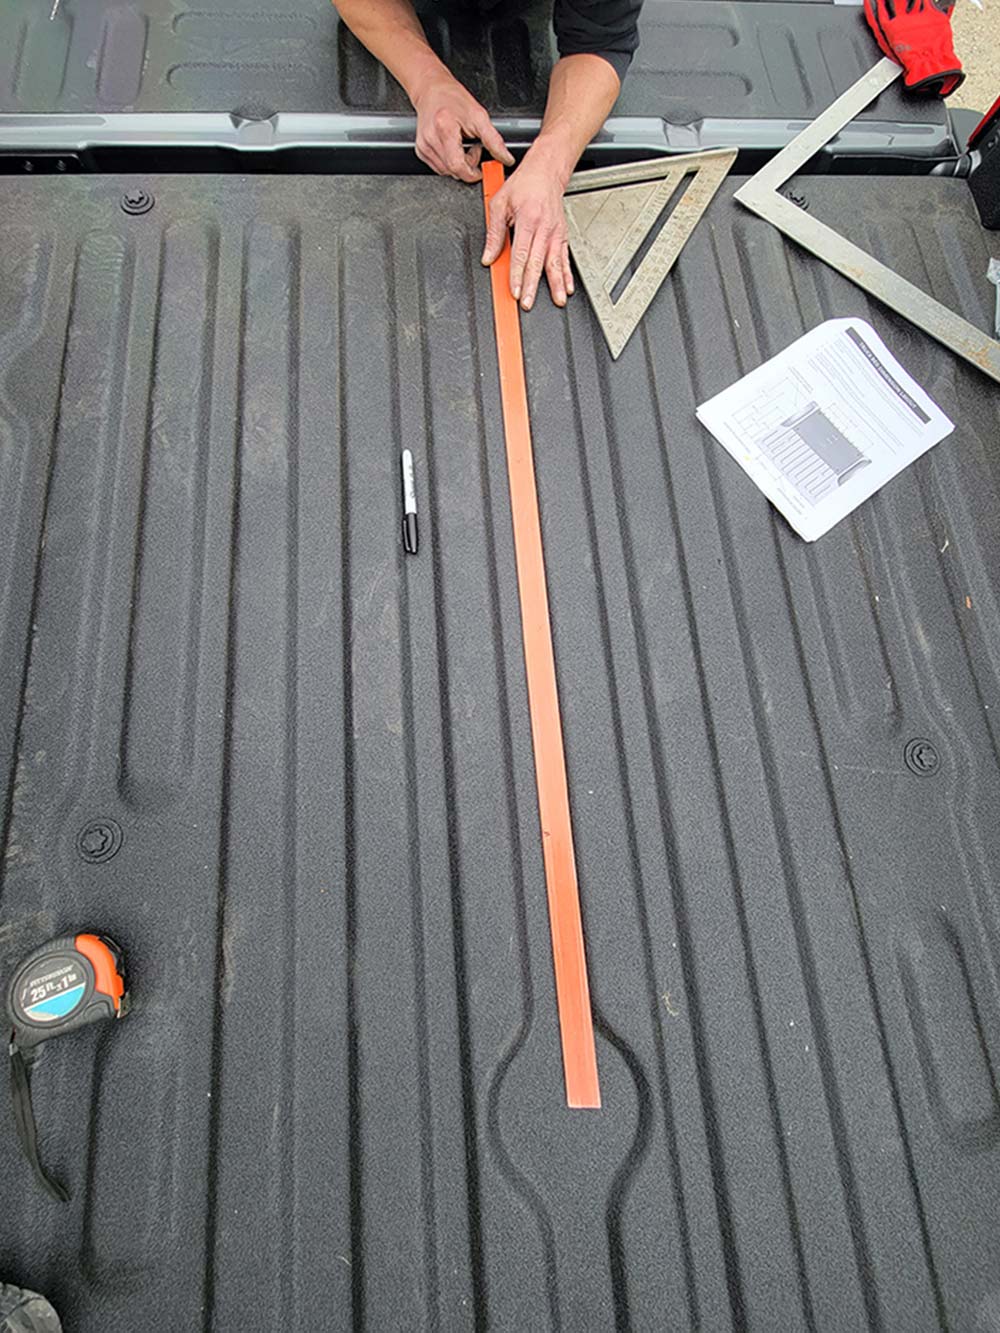
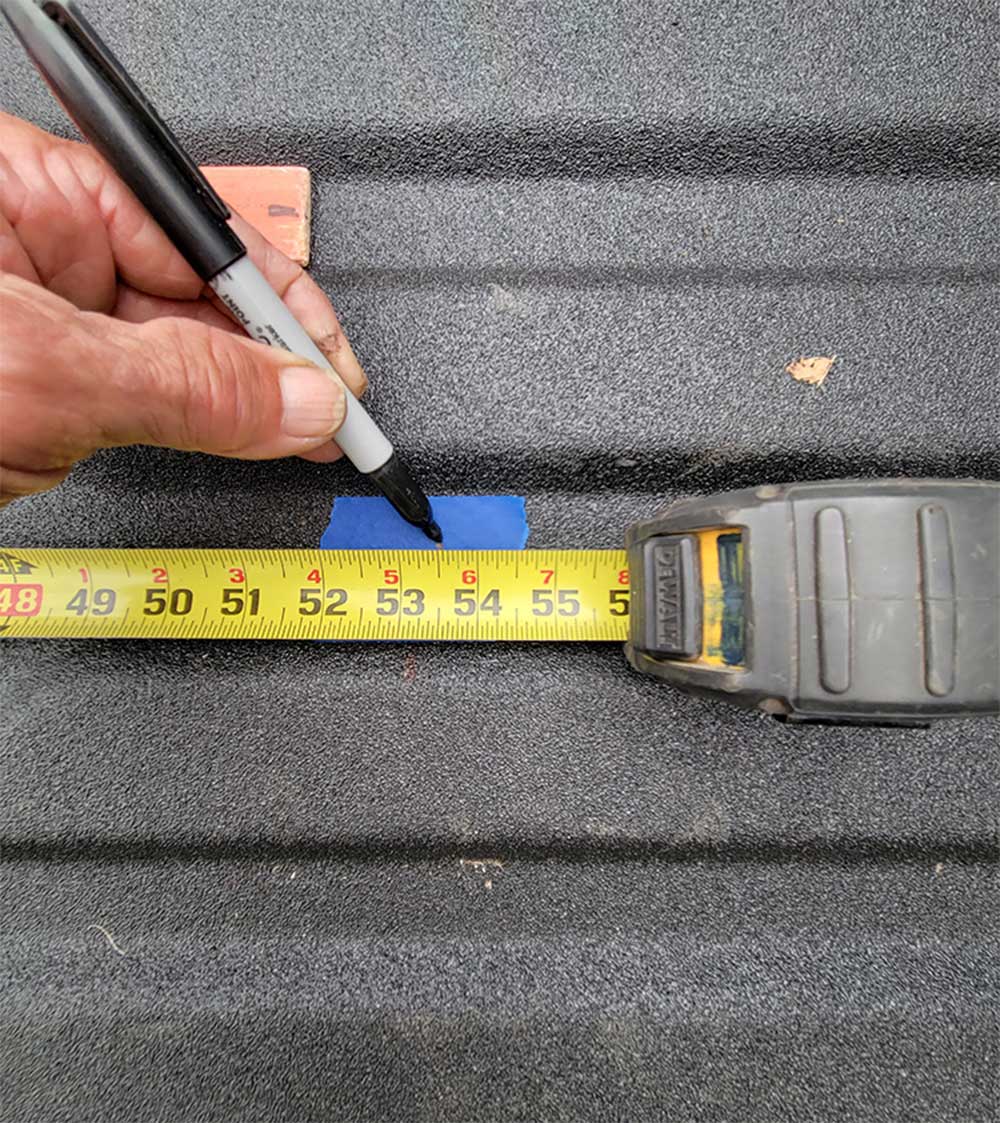
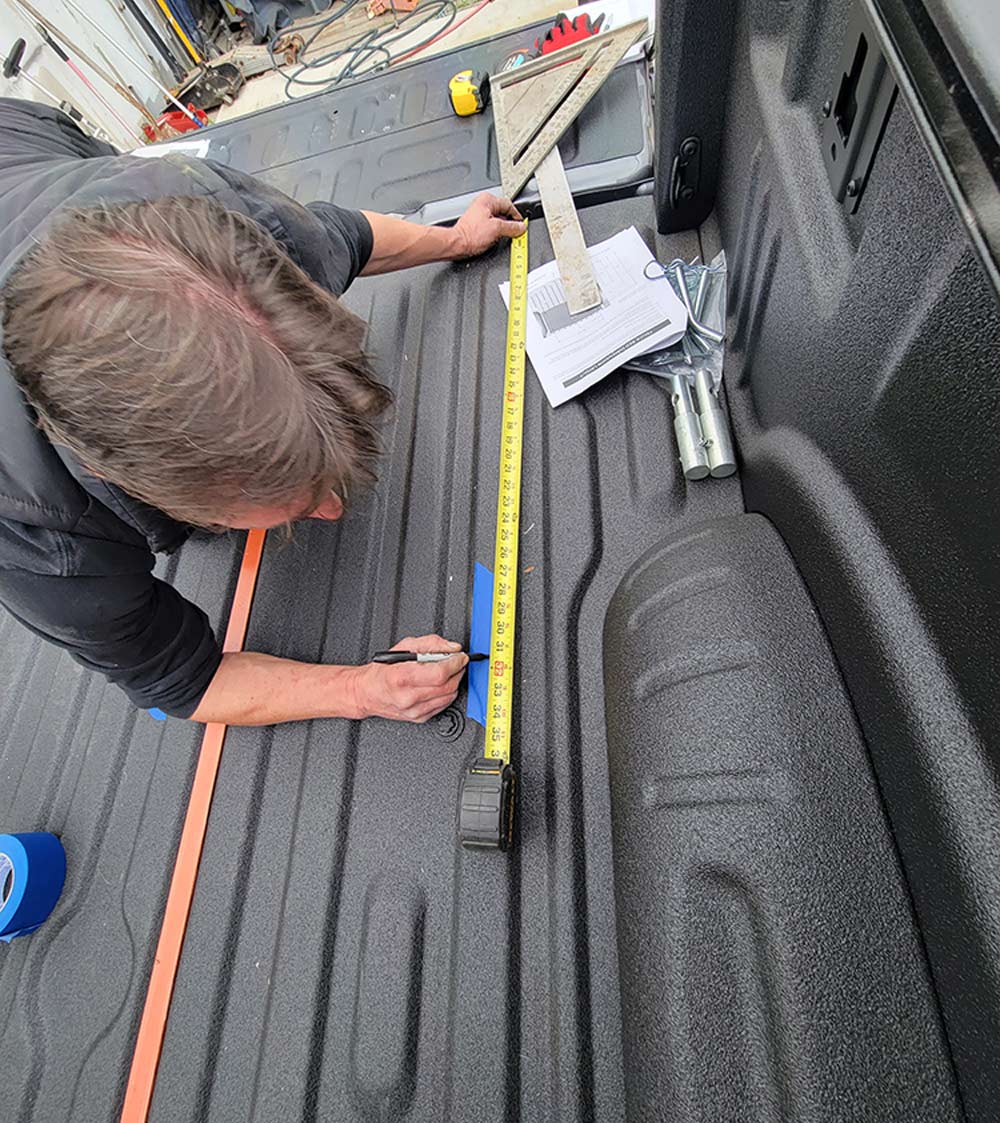
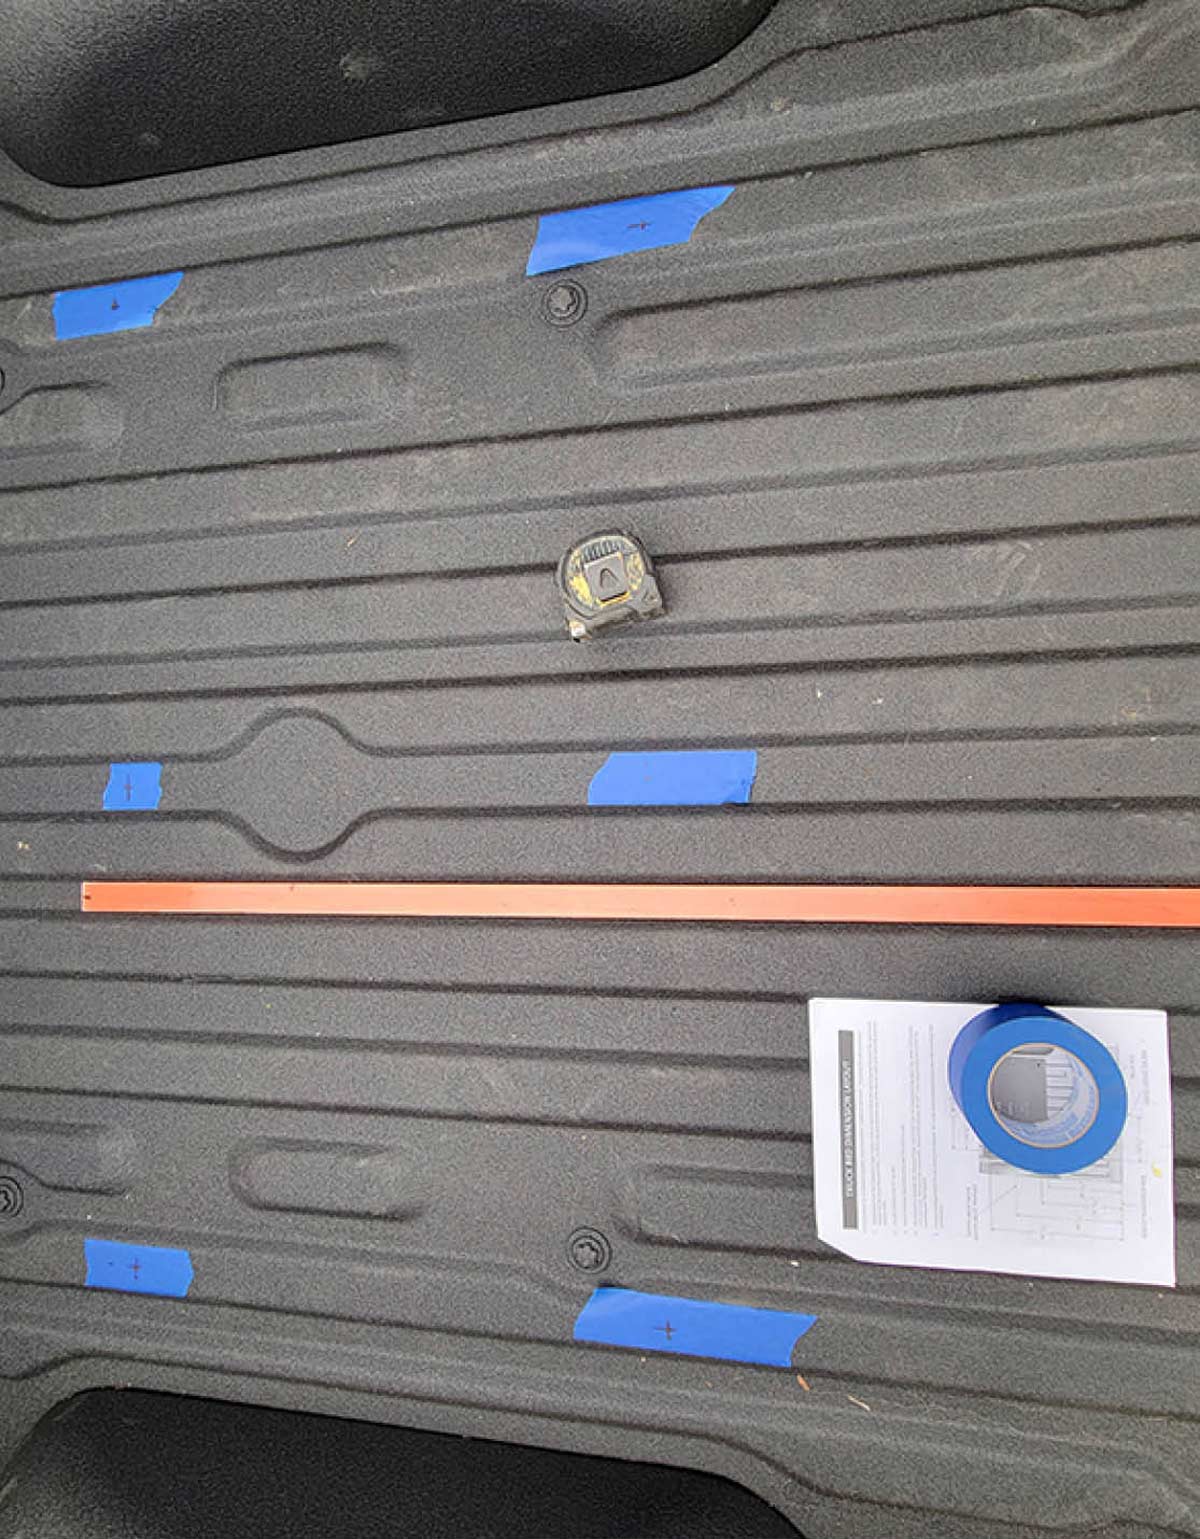
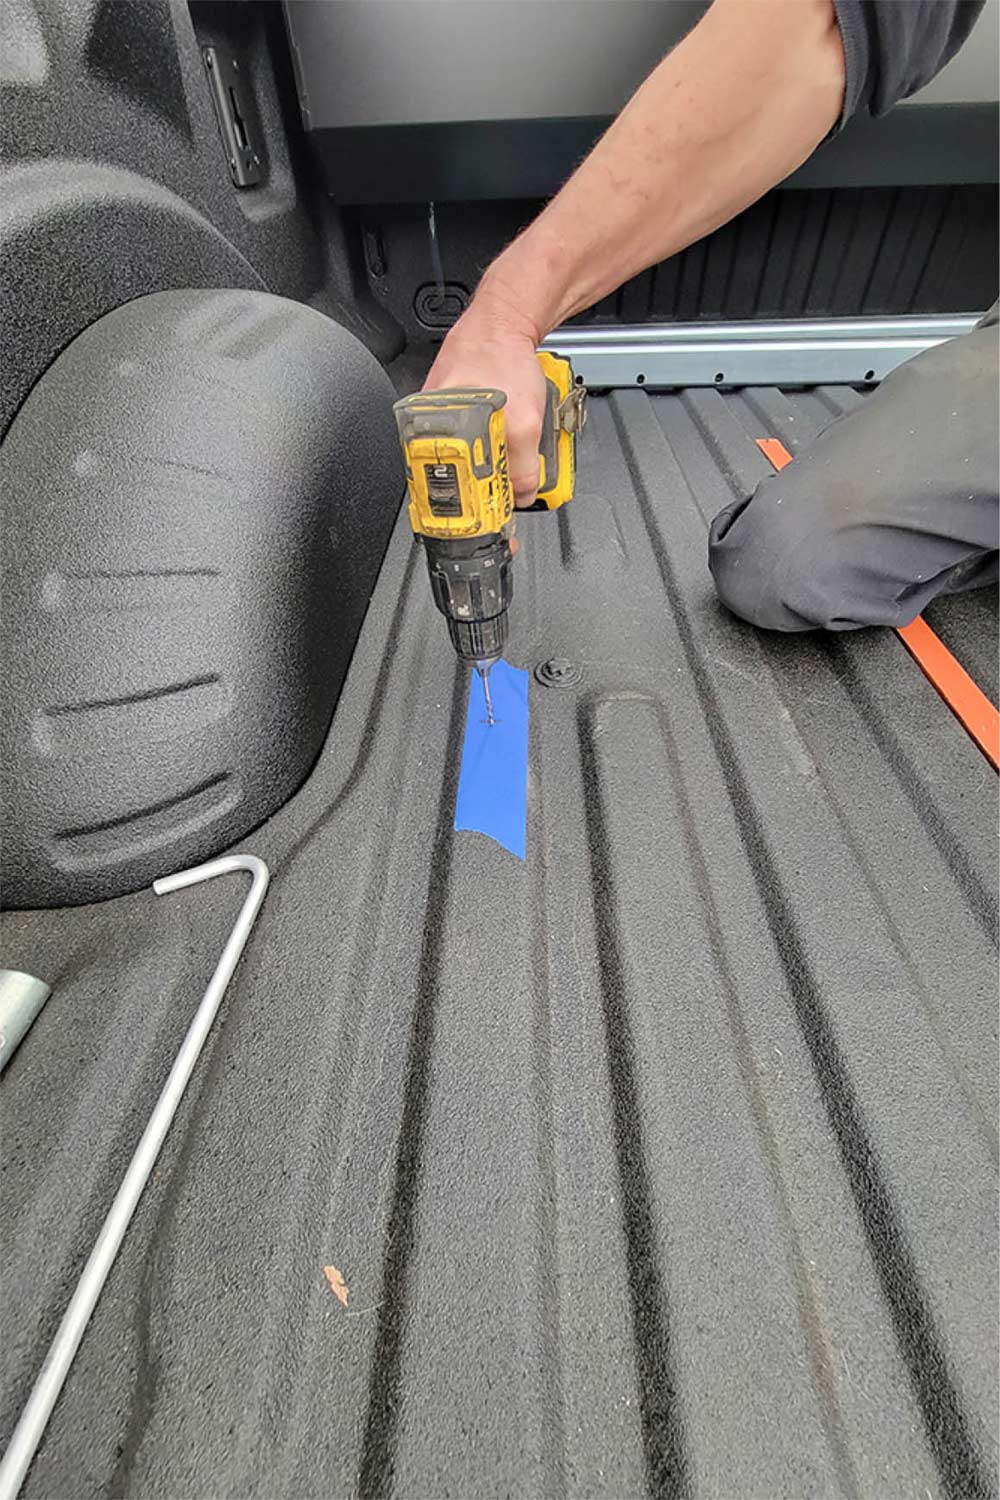
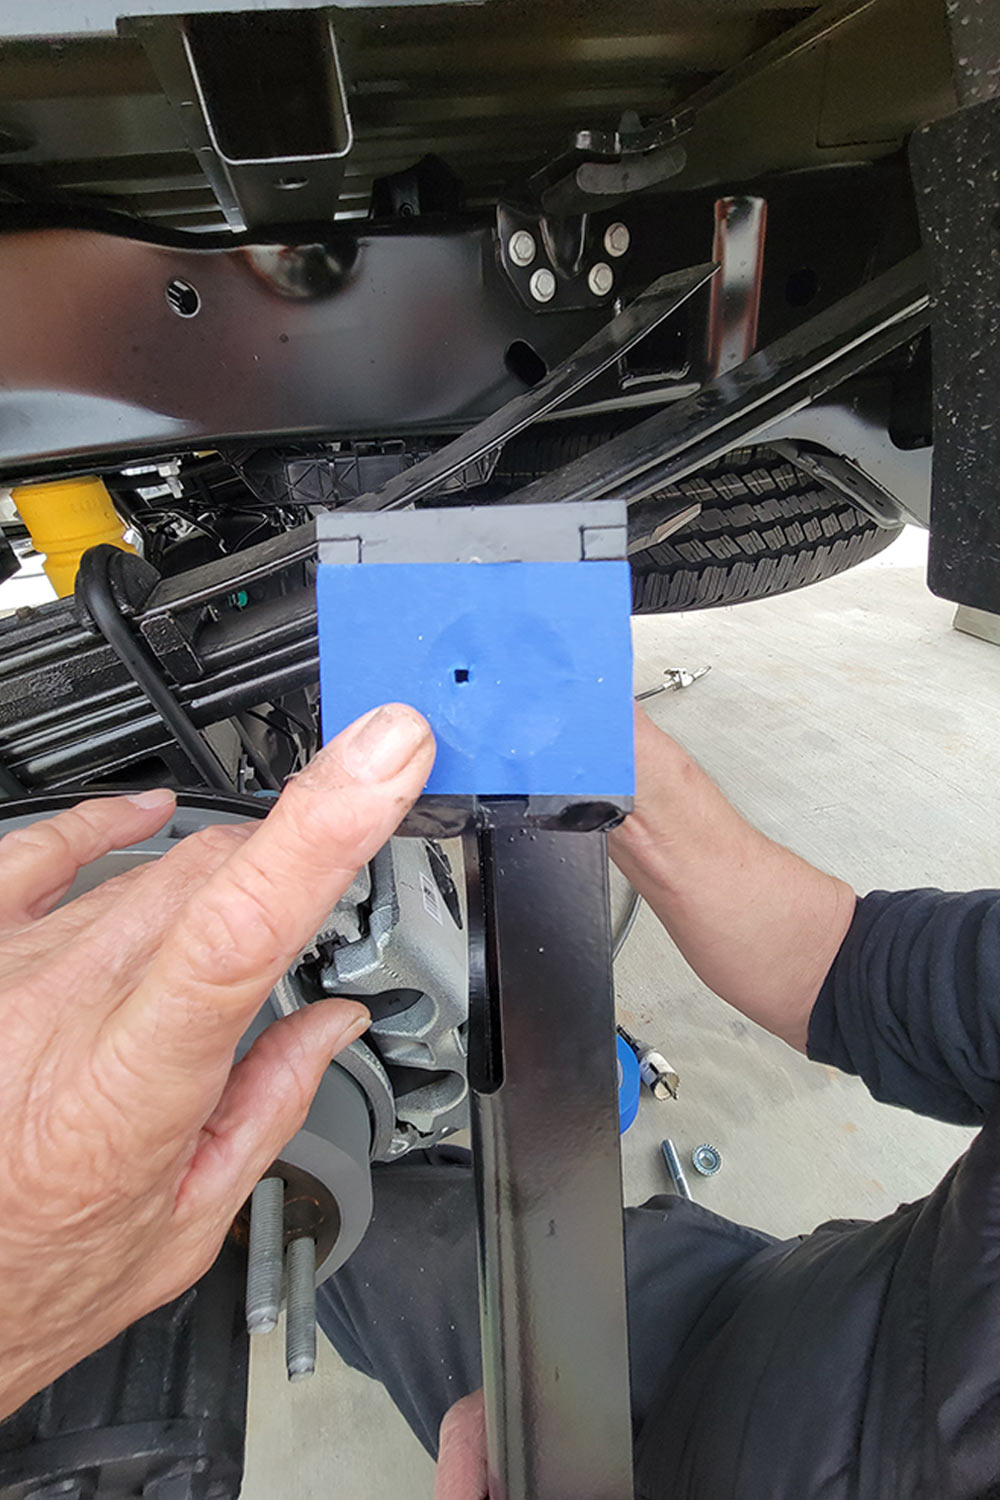
Installing the brackets below the truck bed seemed like a straightforward task, based on the clearly presented instructions. Taking accurate measurements and marking hole locations in the bed is paramount, especially considering the new truck rolled off the dealer’s lot only a few hours before the installation. The bed was lined with a rubberized material and there was very little room for mistakes when drilling through the aluminum bed. We used blue masking tape to mark where the holes should be drilled through the bed in order to line up with the holes (for the locking pins) in the frame brackets. Following instructions very carefully, we measured three times to make sure that we had the holes in the right locations — there’s little room for error as the pins for the rails need to be pushed down into a slot without resistance and allow for a quarter turn to lock them in place. In other words, if the hole was slightly off, the pin was not going to fit properly.

Close up of hitch ball
An adapter with an inverter hitch ball is bolted to the pin box. The existing kingpin must be butted up against the adapter plate. This is accomplished by adjusting the bolts in the bottom of the plate.
After marking the locations for the holes, I was a little bit leery about drilling the first one — all it takes to squirrel the install is for the bed to be ¼-inch off one way or the other, which can easily happen during the assembly process. The frame brackets were mounted leaving the bolts finger tight, figuring we had some wiggle room to make sure the hole through the bed of the truck would match. Because the frame bracket was up against the bottom side of the bed, we could not see if the 1/8-inch hole was centered. We then put a piece of blue masking tape across each pin hole in the frame brackets, repositioned frame brackets and drilled the first pilot hole through the top of the bed. At this point we could tell that the small hole did not line up, but we were able to measure from the edge of the hole visible through the masking tape to the center of the hole and transfer those measurements to the inside of the bed. The new holes lined up close enough for us to drill the big 1 5/8-inch holes through the bed without having a serious problem. (I’d recommend that PullRite consider adding pilot holes in the brackets so that it’s possible to simply drill up through the bed of the truck and then center a hole saw to cut through the bed.)

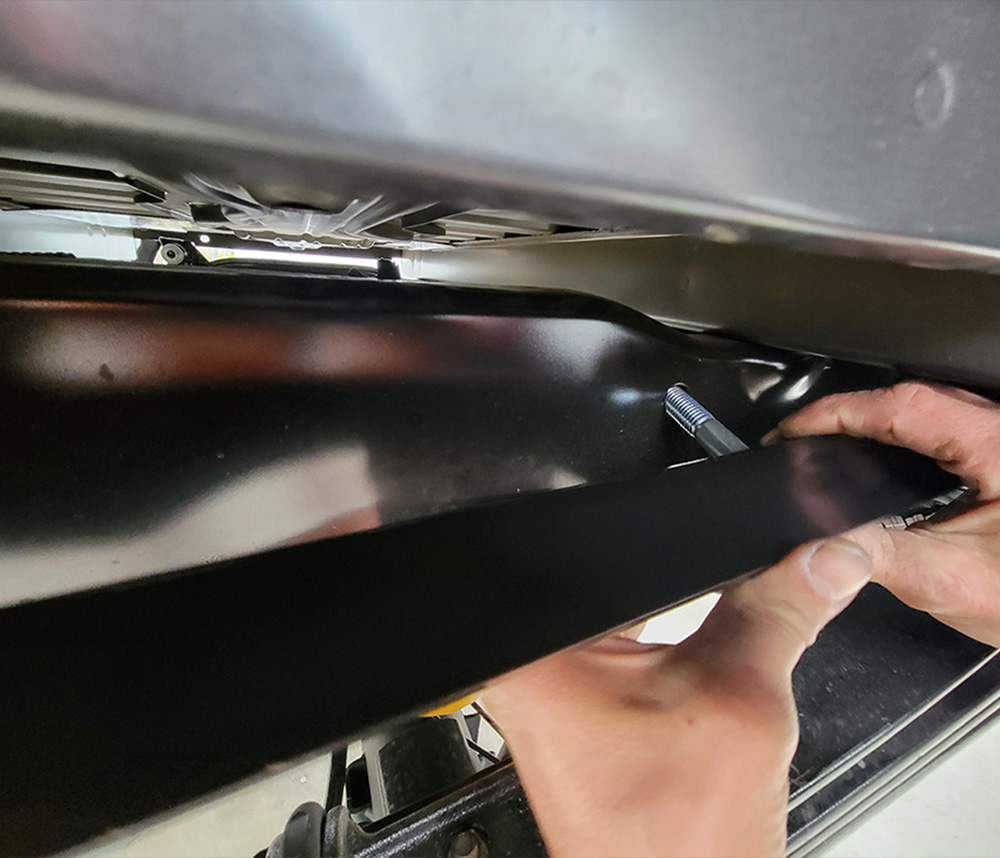
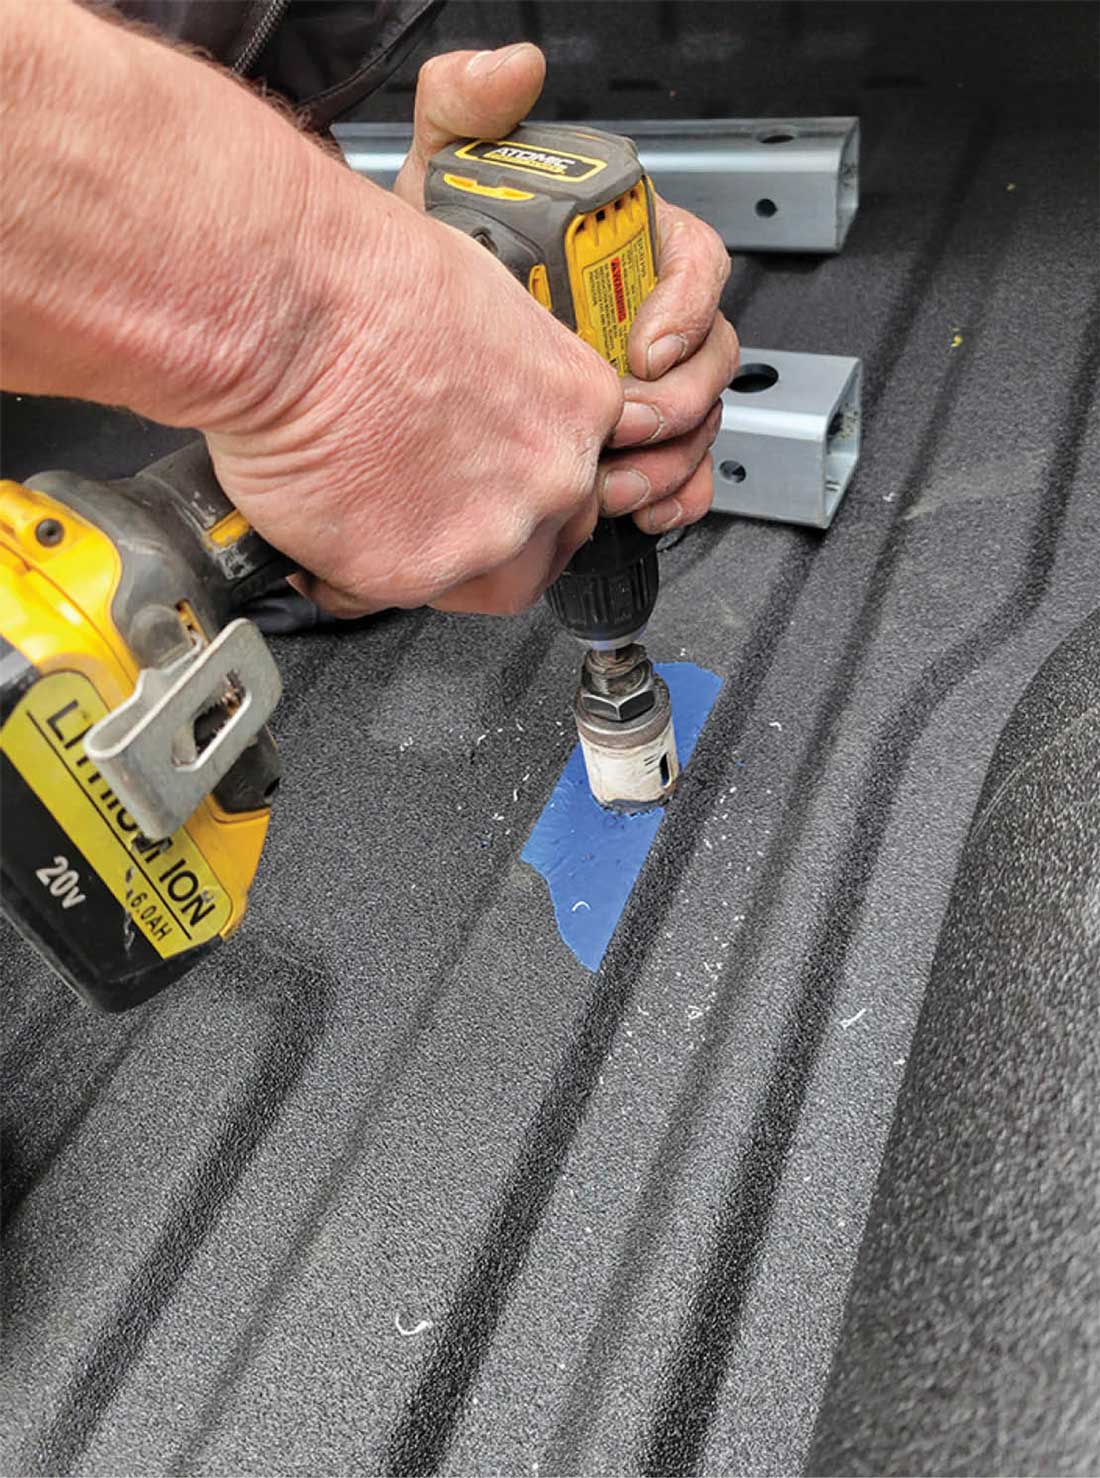
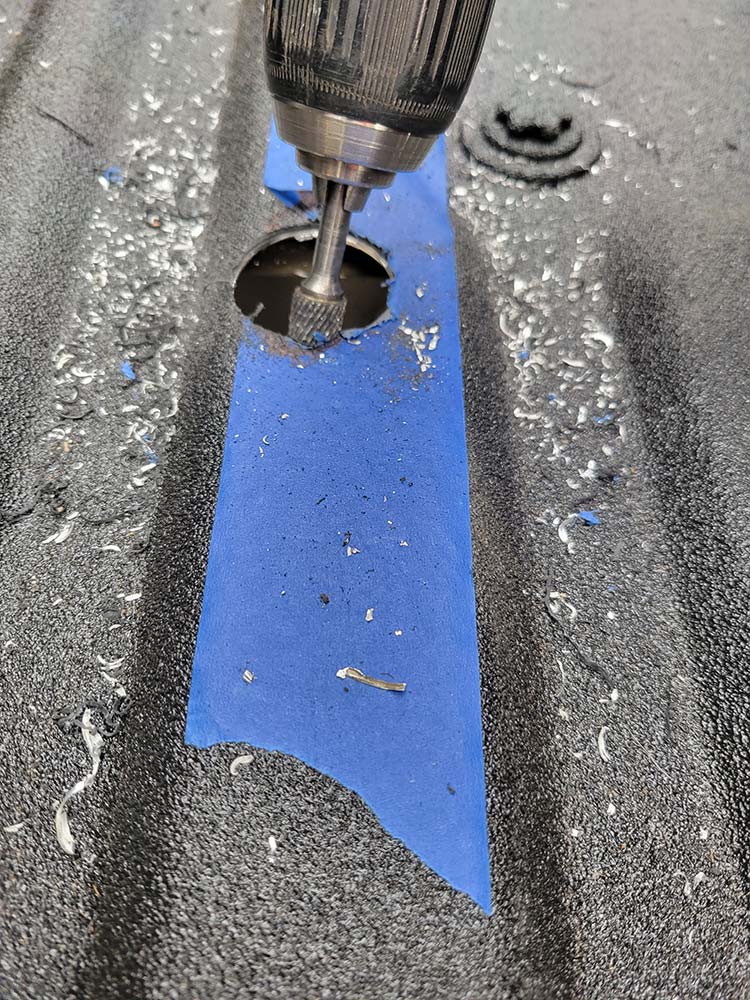
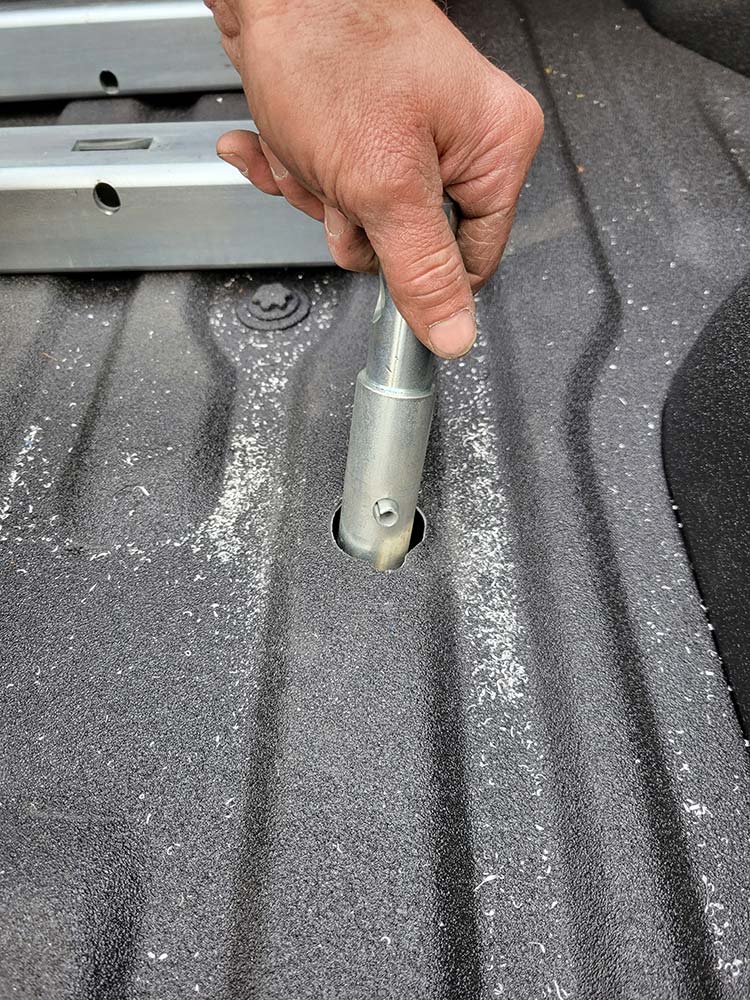
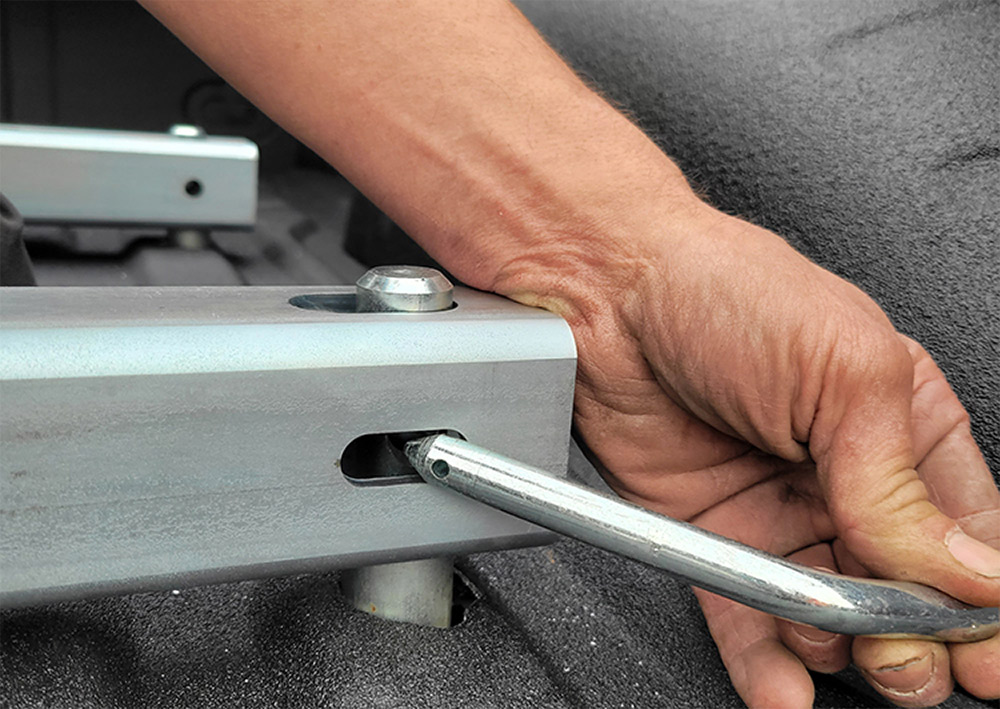
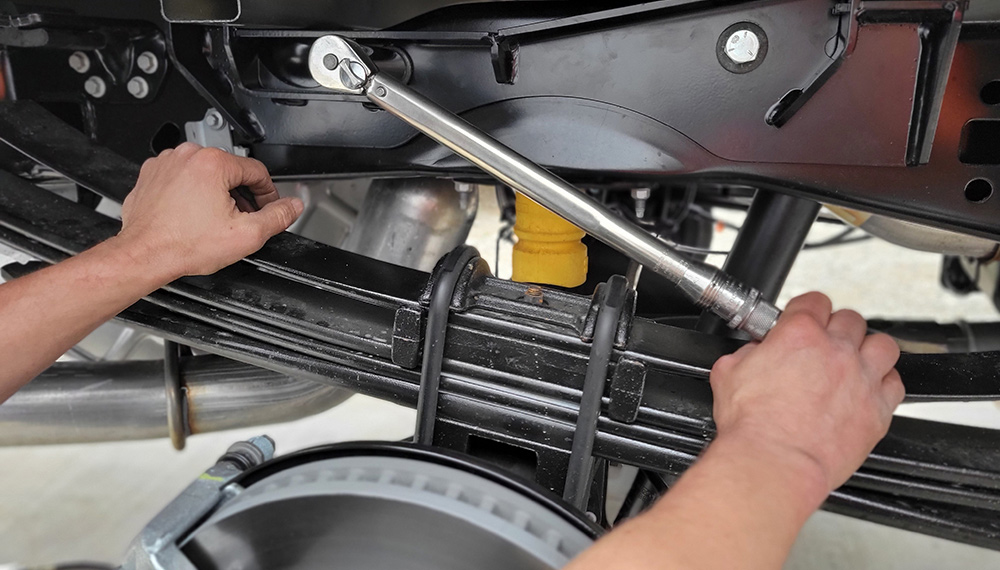
Once the 1 5/8 holes were drilled through the bed, the rest of the process went without hiccups, torquing the frame bracket bolts to 150 ft.-lb., according to the instructions. With the brackets in place, the pins were inserted through bed and the SuperRails were secured before setting the SuperLite hitch on the rails and locking in place with four additional pins. Since the hitch is so light, the process to line up its tabs with the rails requires little effort — and goes smoothly without any resistance.

Fifth wheel's latching mechanisms
Once the inverted ball is anywhere near the funnel, it can be lowered into the locking jaws. Hitching the fifth wheel to the truck is really simple, and completely visible from the driver’s seat (unless there is an obstruction in the bed). The inverted ball on the adapter plate mounted to the kingpin box will seek the latching mechanism once it’s over the funnel area and lowered into position.
Not only is there a scant 50 pounds of hitch hardware mounted in the bed, but the process for connecting the fifth wheel is also simple and fast. A special adapter is mounted to the kingpin box, to which an inverted ball (like a standard travel trailer hitch ball) is attached. The ball locks into a funnel-shaped coupler to make hitching a fifth wheel about as easy as it can get. Even if the terrain is uneven or the truck is out of alignment when backing up, the funnel target is easy to hit, circumventing any issues related to locking a kingpin in place with a standard saddle and coupler jaws. All you need to do is just back the truck to the fifth wheel while aiming the ball over the funnel; if it’s close, it will seat itself.

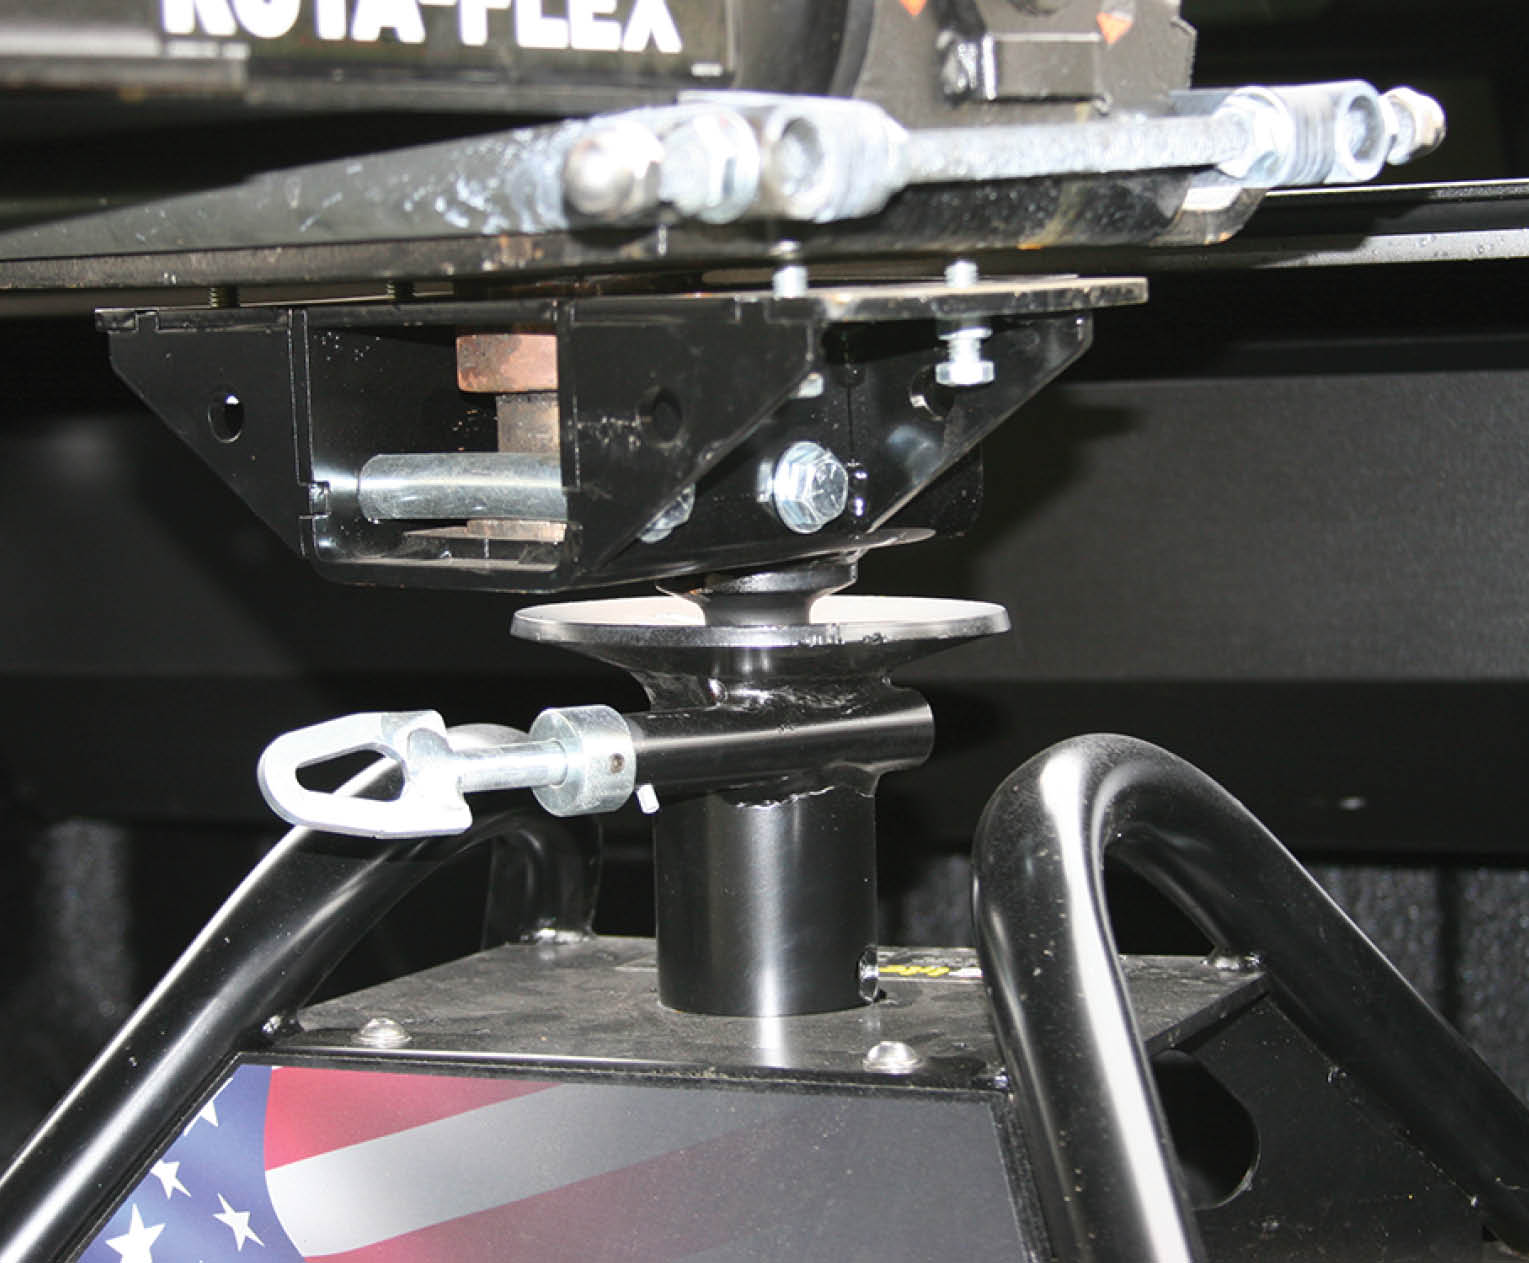
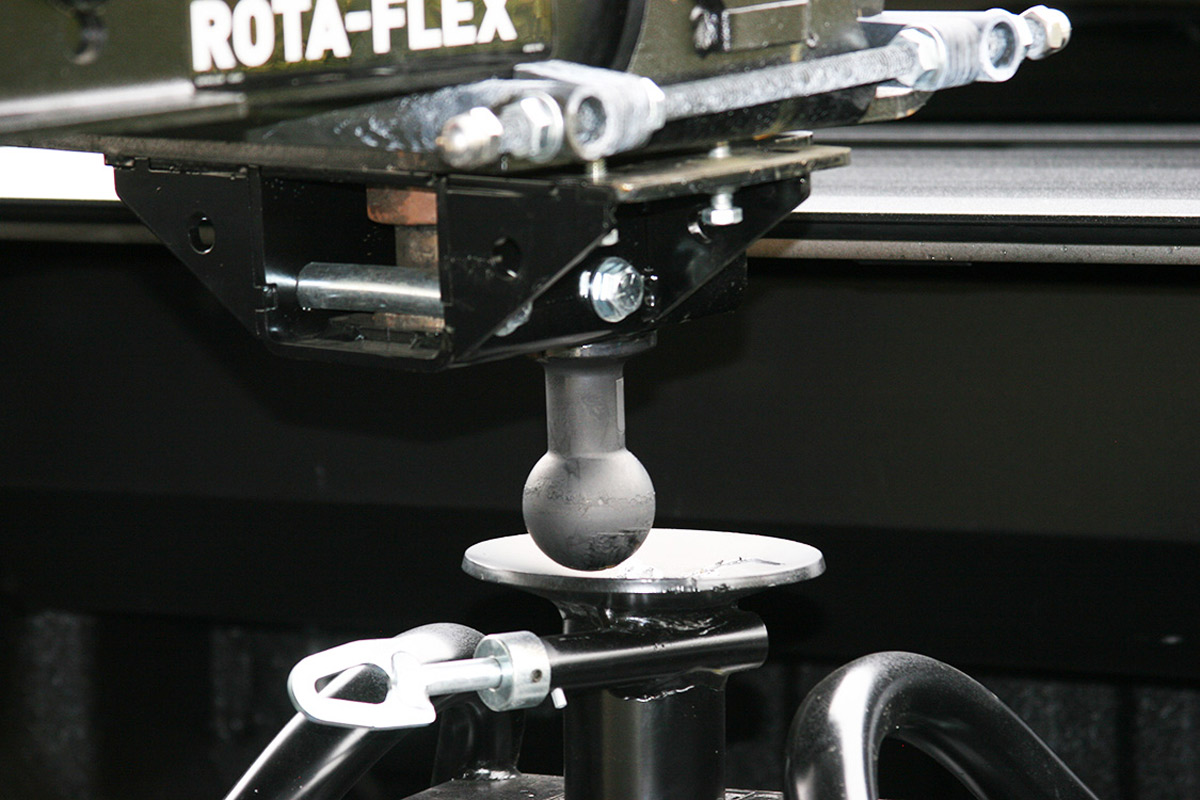
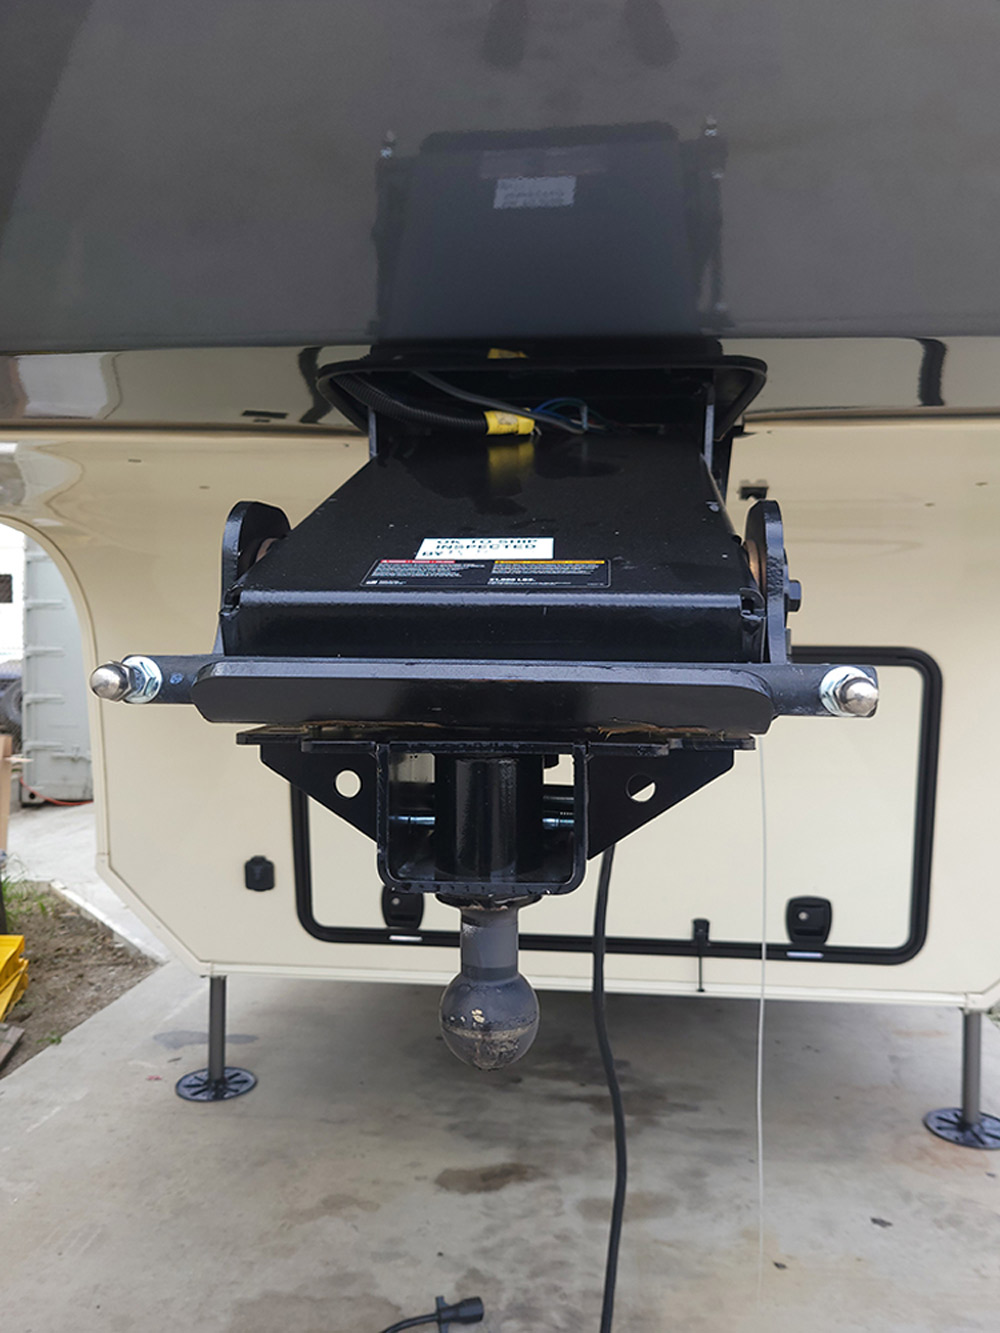
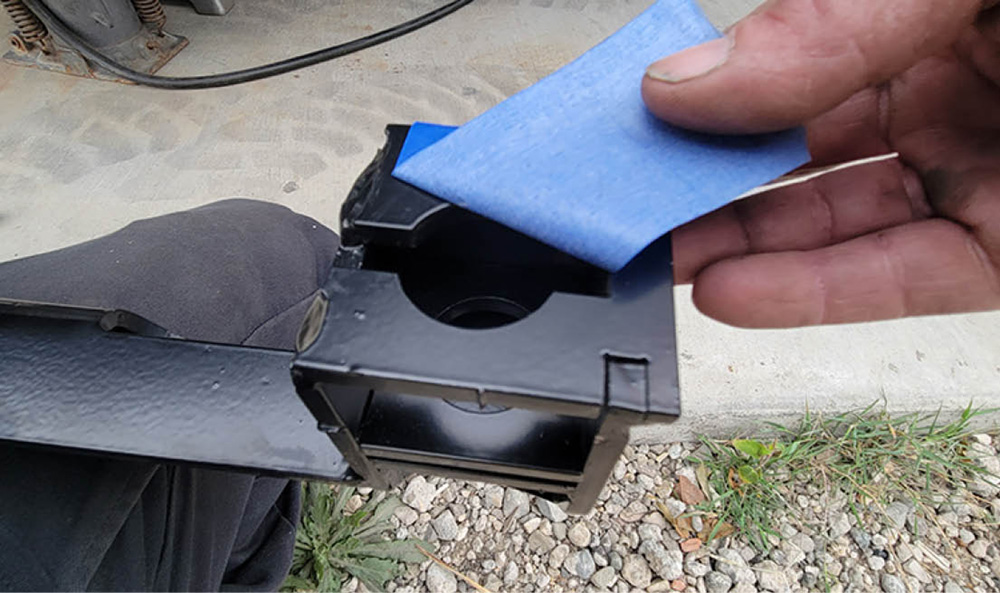
An adapter must be bolted to the kingpin box which, in effect, moves the bulk of the hardware from the truck bed to the fifth wheel. In this case, the fifth wheel was factory-fitted with a Curt Rota-Flex pin box, requiring the use of a different type of an adapter that can be ordered with the hitch. This adapter (part #4446; $90) can be installed in about 30 minutes, requiring no modifications. It’s designed to isolate movement of the Rota-Flex pin box, which is necessary to allow the SuperLite hitch to function properly. The low-profile design of the adapter functions like a gooseneck hitch — without the additional leverage placed the front of the fifth wheel, which can lead to breaks in the steel infrastructure.

The adapter was simply positioned over the stock kingpin using two bolts to hold it in place. The one on right went in first and was held in place with a 1/2-inch flange nut, which was only hand tightened at first. The second bolt followed after sliding in a reinforcement tube through a larger hole on the left; the flange nut was then snugged by hand. Four set screws were then adjusted to provide a level attitude for the adapter and to make sure it was positioned tightly against the kingpin box. By the way: The ball can be offset toward the front to allow for additional clearance between the fifth wheel and back of the cab in short-bed trucks. The bolts and setscrews are torqued to specifications to complete the fifth wheel part of the installation.

Hitch height can be set at three levels for proper top-of-bed clearance and PullRite recommends that at least 8 inches be maintained; the funnel coupler height can be adjusted by loosening three jam nuts and backing out the bolts. Once the coupler is loose from the base, the clevis pin is removed and the coupler can be lined up in the base using one of the three holes. The bolts and jam nuts are torqued to 45 ft.-lb.

Hitch special adapter
A special adapter, part #4446, must be ordered with the hitch for fifth wheels fitted with a Rota-Flex pin box. Installing this bracket will isolate the movement of the pin box, which is necessary when using the SuperLite hitch.
Unassembled hitch and hardware in truck bed
PullRite’s SuperRail Clean Bed Technology mounting system was ordered with the SuperLite model hitch for the 2023 Ford F-250. The rails bolt into existing holes in the frame and can be removed between trips to free up the truck bed for hauling. One person can usually lift out the 50-pound SuperLite, which is strong enough to tow fifth wheels up to 20,000 pounds.
This is definitely a friendly do-it-yourself project for those who have a moderate to strong mechanical aptitude. The job is much less complicated since the brackets can be bolted through existing holes from the Ford factory; drilling additional holes in a frame with limited clearance is a whole other skillset. Considering the extra caution taken before and while drilling the holes through the bed of the truck, the install time reached roughly three hours, but we did not want to “break in” an expensive new truck. Those who do this job all time can probably reduce the install time to a couple of hours.

The ability to tow fifth wheels up to 20,000 pounds (5,000-pound pin weight limit) with a hitch that weighs only 50 pounds seems incongruent, but PullRite’s expertise in creating products with exceptional quality and build tolerances makes it possible to change the paradigm when it comes to the utmost in safe fifth wheel towing.

Jacks placed underneath truck axles
To install the frame brackets, first solidly chock the wheels then use a hydraulic jack to lift the rear axle and gain access under the truck. Heavy-duty jack stands were then placed to support the axle. Although a lift would provide more room to move around under the truck, we had no problem working on our backs.
Removing rear wheels for better access
Rear wheels and tires were removed to provide better access to the frame rails. Existing holes in the truck frame made it easy to line-up the brackets and bolt them in place. No drilling in the frame is required.
Using tape measure in truck bed
Start the measurements for locating the holes for the bed rail pins by finding the center of the bed near the tailgate.
Using square to mark straight line in truck bed
Using long straightedge to extend line
A Speed Square was positioned against the lip of the bed, which held the larger carpenter’s square in place to draw a longer line up the center of the bed. A fiberglass straight edge was used to continue the center line in the bed moving toward the cab.
Marking hole placements with tape
Making further measurements and marks
A measurement was taken from the back edge of the bed to the location where the forward bed rail will be mounted. The next measurement from the center line toward the side of the bed will determine where the pilot hole will be drilled. A measurement was also taken from the rear of the bed.
Pieces of tape in bed marking drill holes
The four outside pieces of blue masking tape were marked for drilling the pilot holes. The tape in the middle showed the centerline locations.
Placing tape on mounting brackets
Placing brackets underneath truck frame
Masking tape was placed over the pin holes in the brackets before mounting to the truck frame. Drilling the pilot holes through the bed and into this tape confirmed whether the holes were centered in the brackets, which they were not. Many times the truck beds can be out of alignment slightly during factory assembly, which can throw off all the measurements.
Hole in frame for hitch bolts
Installing bolts
Ford provides reinforced holes in the frame’s box tubing for installation of its own hitch system. The same holes are utilized for mounting the PullRite frame brackets, so no drilling is required. At first the bolts were just finger-tight so the brackets could be checked against the pilot holes.
Drilling pilot holes in bed
Checking hole in tape on bracket
Pilot holes were drilled through the bed using a 1/8-inch bit. It was obvious that the holes in the frame brackets would not line up properly, so adjustments were necessary.
Drilling final holes in bed
Once the centering adjustments were made, the 1 5/8-inch holes were drilled through the bed.
Grinding hole to larger diameter
Pushing bracket pin through bed hole
Even with all the measuring, the pins would not go through the holes into the bracket smoothly, which made it difficult to lock the pin in place. A grinder was used open the hole enough to allow the pin to move freely and be seated properly.
Pin in bracket
The pins that secure the SuperRails in place lock into the specially designed brackets with a quarter turn.
Placing rails onto bedfloor
Inserting clips into rail pins
Once the pins are in place, the SuperRails are positioned front and back and secured with pins with clips. The process takes only a few minutes, making it easy to remove the rails when the entire bed is needed for hauling.
Placing hitch on rails
Tightening frame bracket bolts
Before the frame brackets were tightened the hitch was placed on the rails and pinned in place. The frame bracket bolts were then tightened to 150 ft.-lb. with a torque wrench. The hitch only weighs 50 pounds, making it a one-person job to remove and reinstall.
Making the Electrical Connection
Curt #57008 7-way plug-and-play wiring harness
The Curt #57008 7-way plug-and-play wiring harness made it possible to install a receptacle for the fifth wheel power cord without splicing multiple wires. This reduced the installation time in half — and a novice can do the job.
Plug-and-play systems take most of the guesswork and tedium out of wiring up the lights and trailer brakes
All trailers have an umbilical cord that synchs the brake, clearance- and back-up lights and provides power for electric trailer brake actuation in concert with the tow vehicle. Most receptacles for the standard 7-way plugs are integrated into the tow vehicle’s rear bumper, but towing a fifth wheel requires that a duplicate receptacle be mounted in the bed wall near the tailgate. If this option is not ordered from the factory, it’s necessary to wire another receptacle into the system.

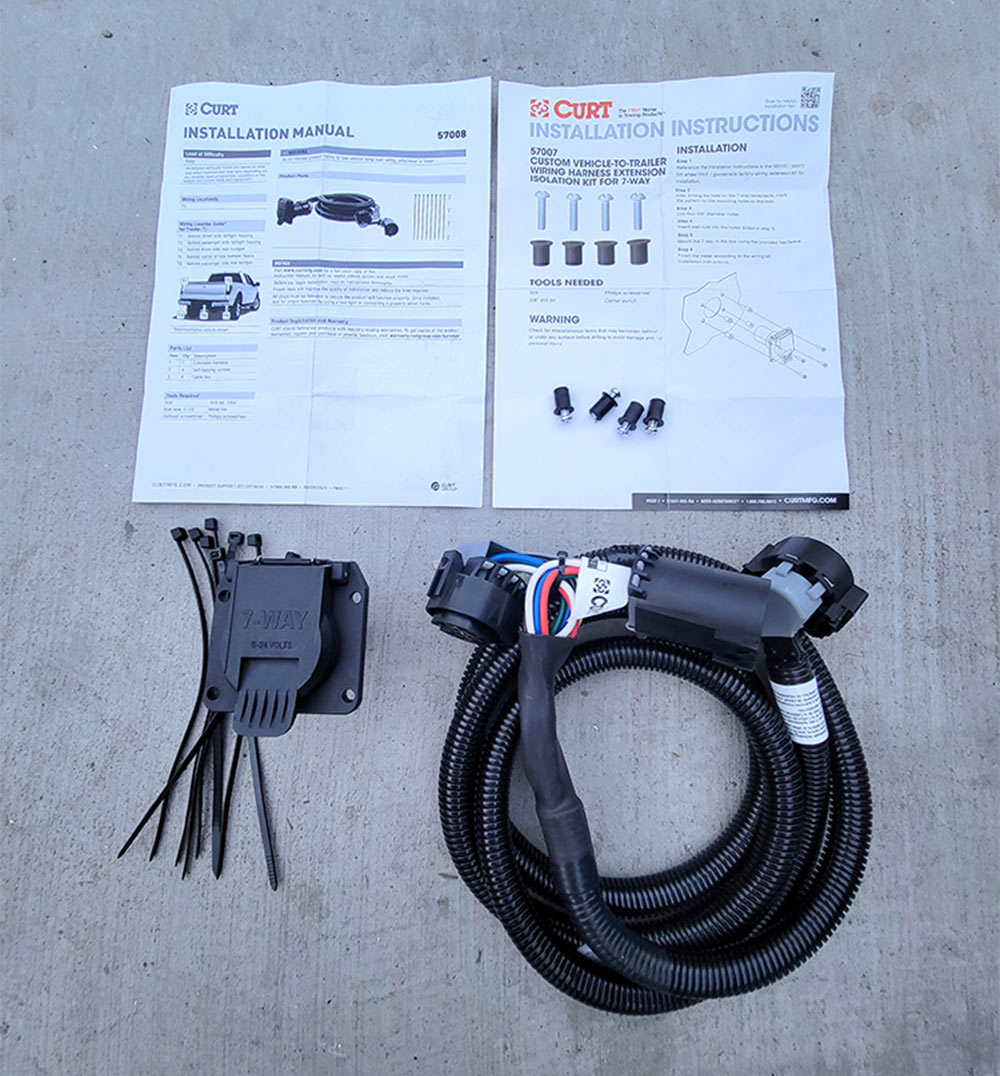
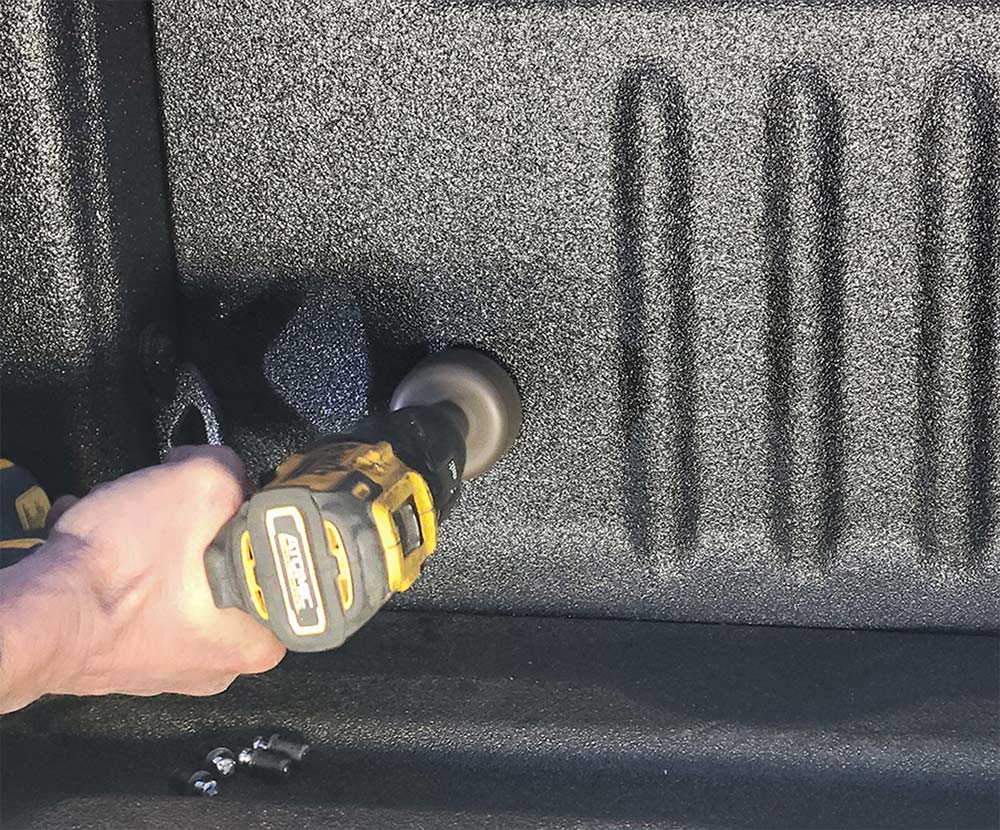
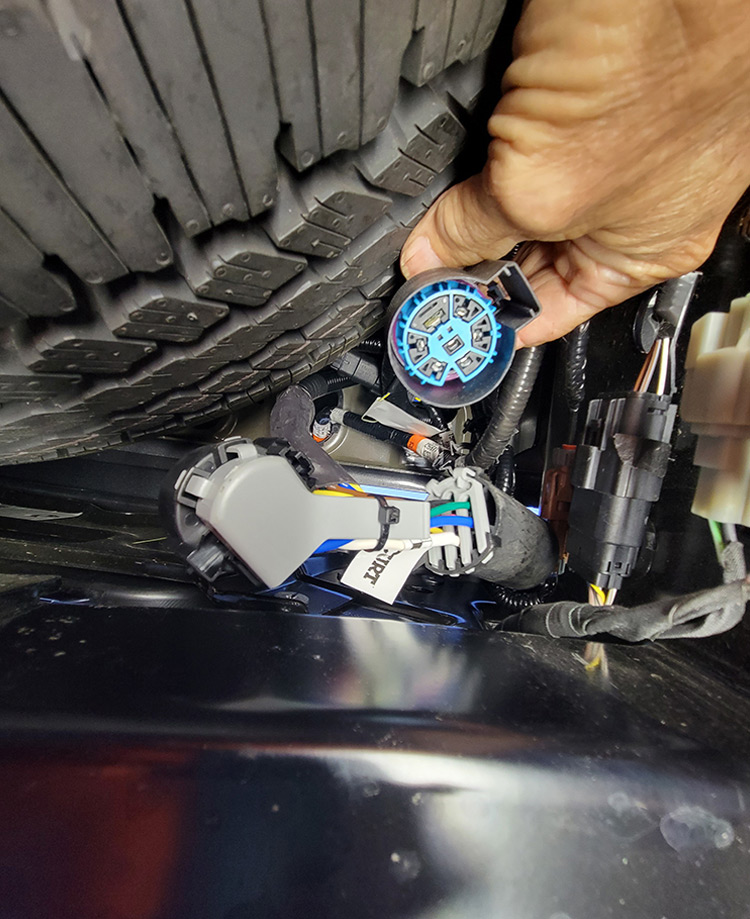
To circumvent cutting and splicing wires on this new Ford pickup, we used a Curt #57008 7-way, plug and play wiring harness ($109.15 on Amazon) that simply connects to the back of the existing OEM connector, leaving both locations active.

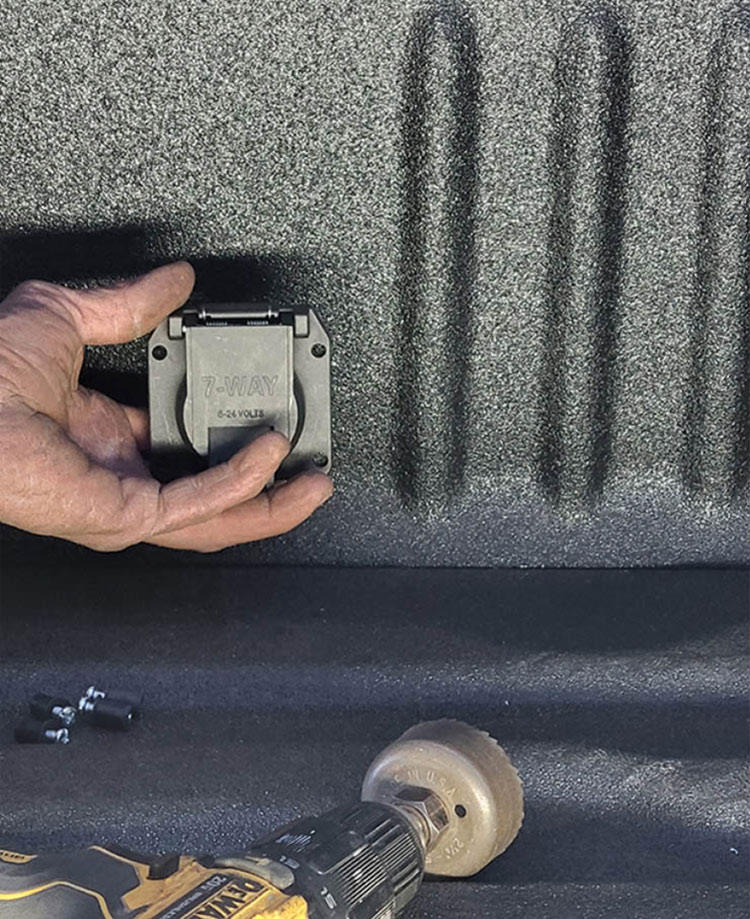
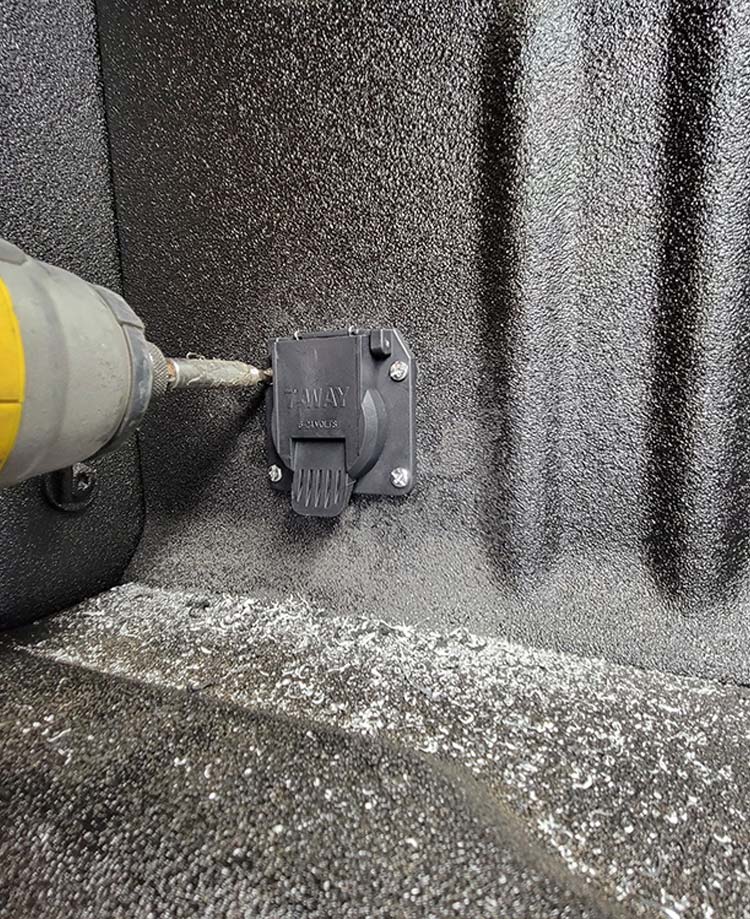
This wiring harness kit literally cuts the installation time in half. The hardest part of the installation is drilling the holes, which is really not that difficult. You’ll have to drill a large hole for the receptacle along with four holes for the mounting flange in the bed. Keep in mind that it’s not possible to use steel screws in the all-aluminum bed of the Ford truck because of possible electrolysis between the metals; instead, four rubber inserts are designed to isolate the screws.

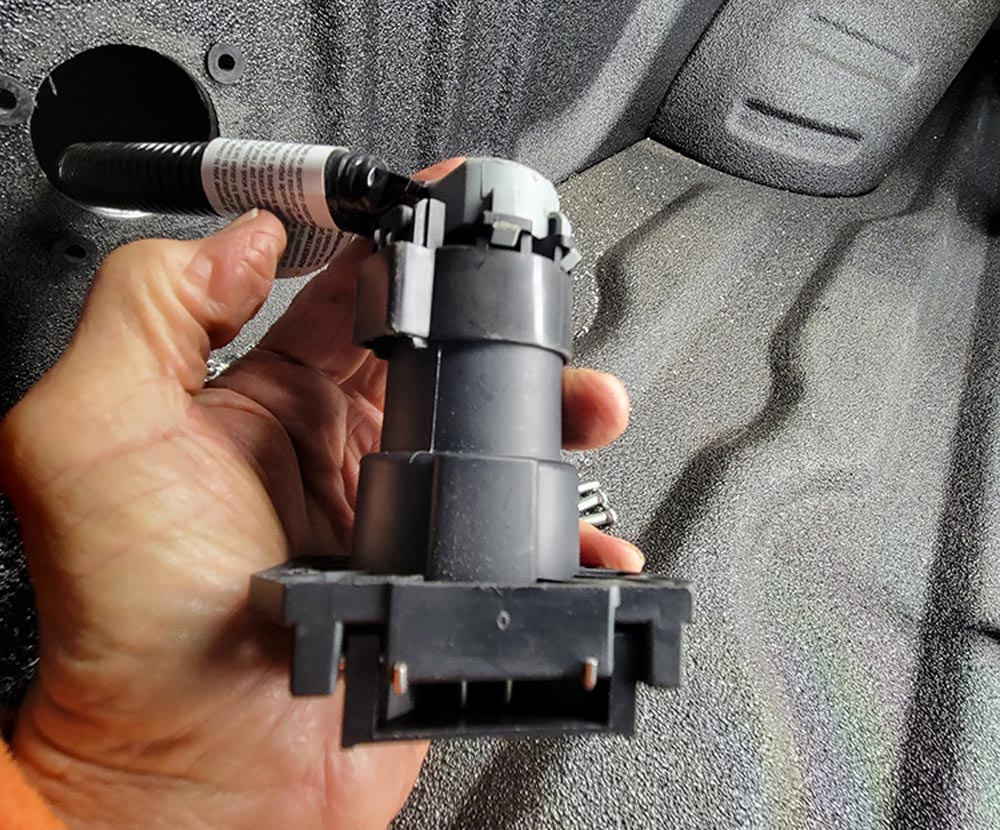
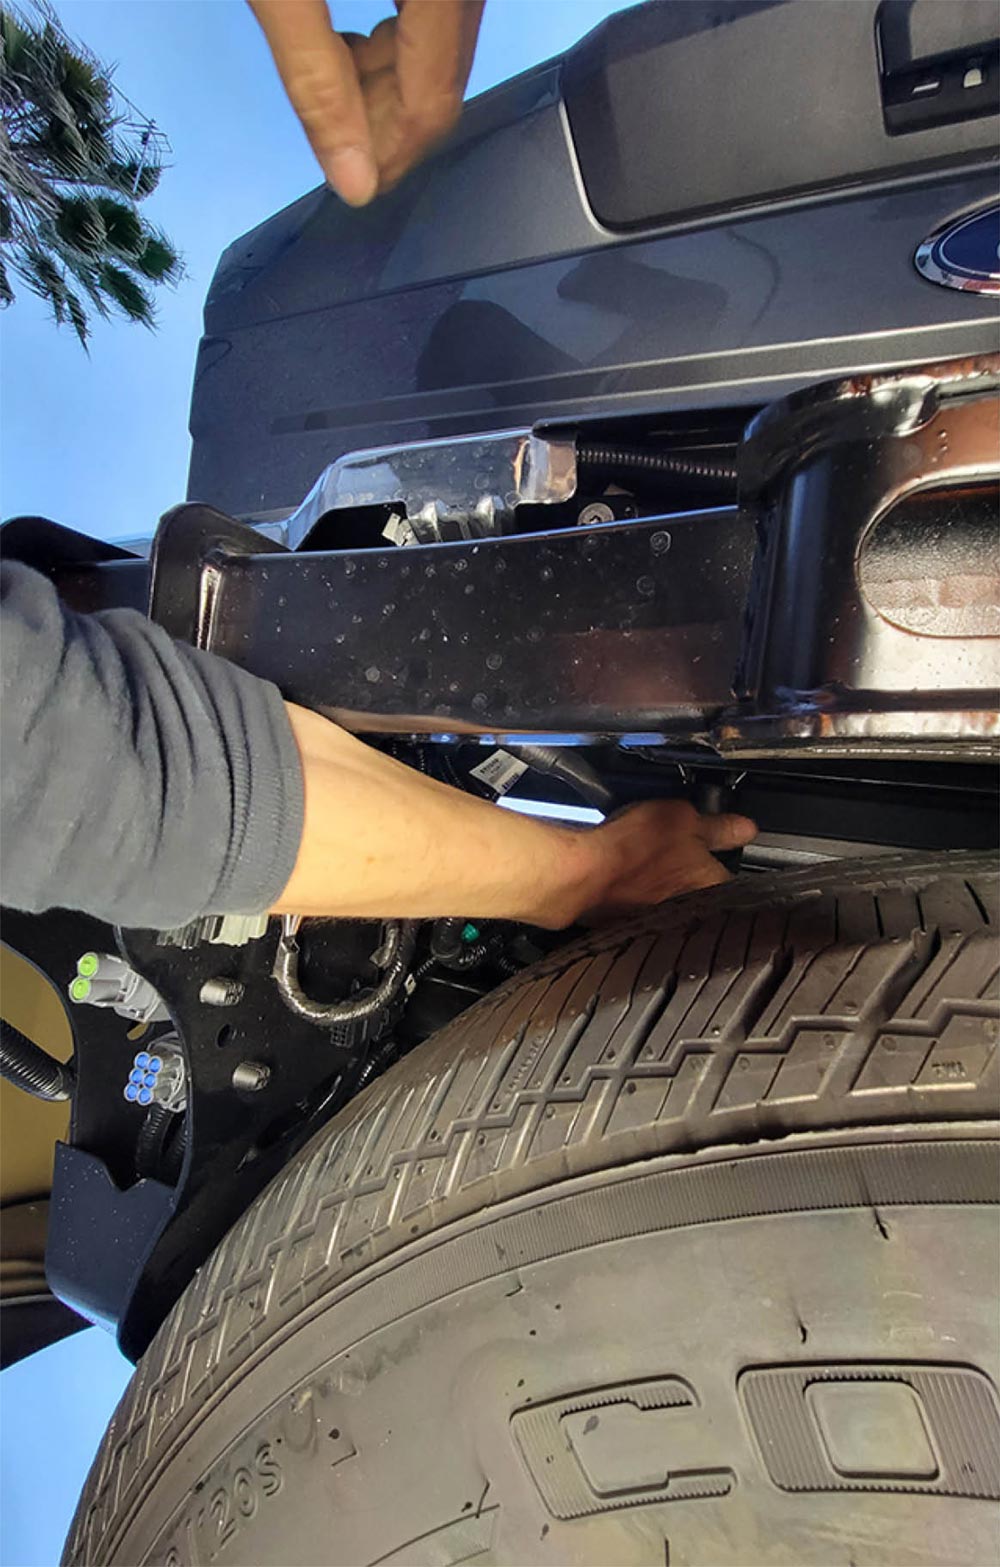
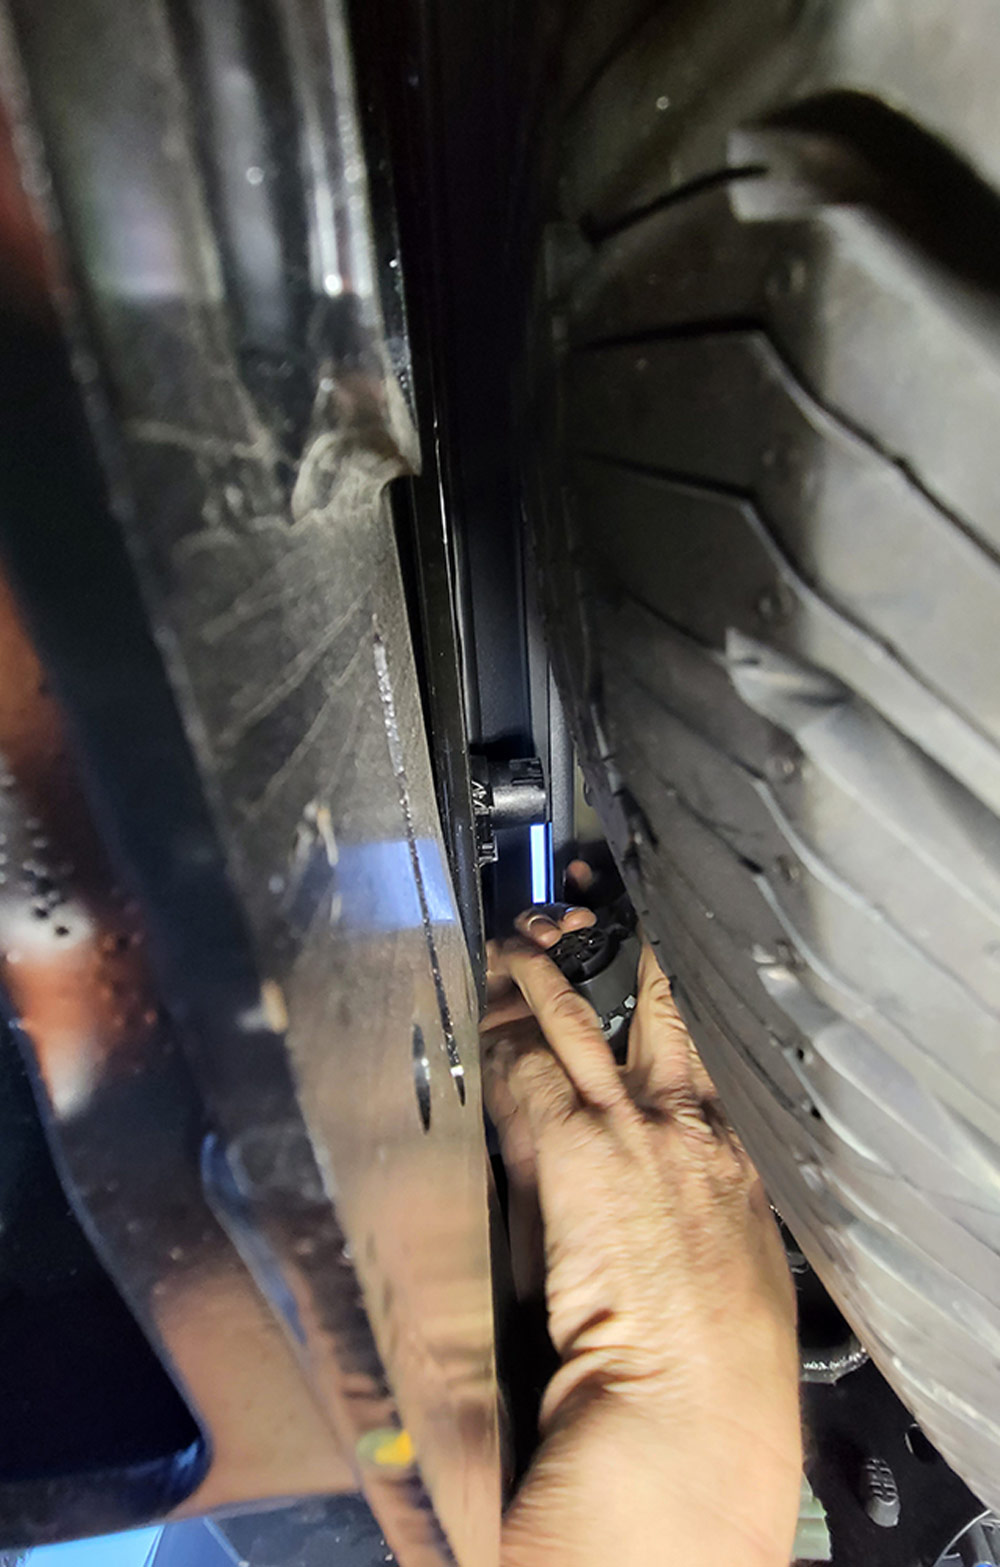
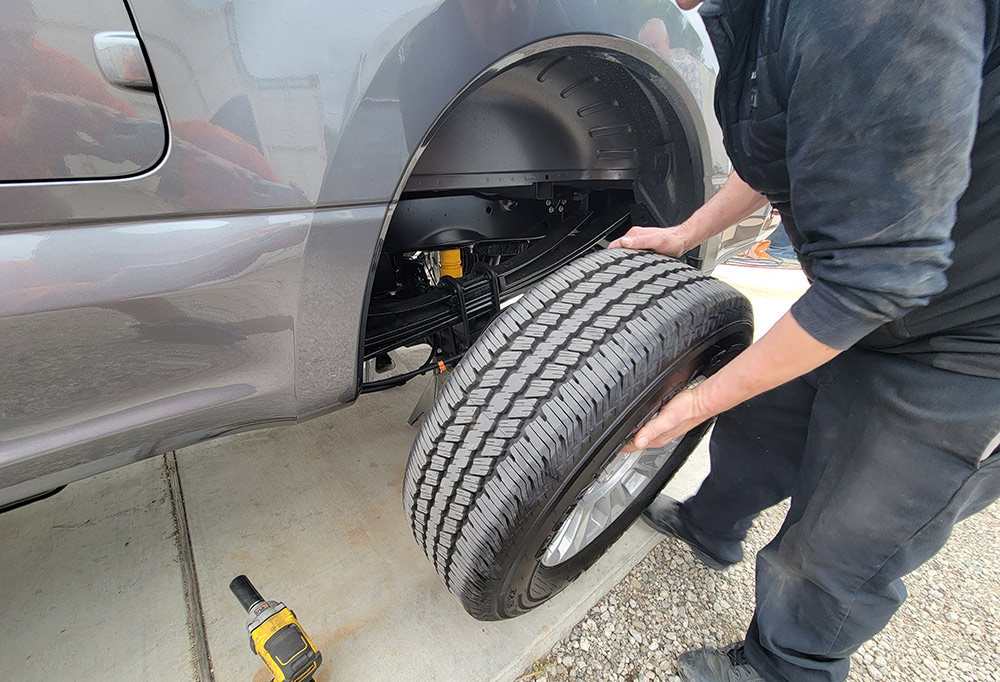
The directions call for the removal of the spare tire in order to facilitate enough room to plug the wiring harness into the original Ford 7-way connector, but those with smaller hands should be able work in the area without too much consternation. My cohort in this installation has smaller hands, so he was elected to make the connection. The kit comes with a 7-foot harness, which was long enough to reach the desired location for the receptacle.

Drilling bed sidewall
A large hole saw was used to cut into the bed sidewall to accommodate the new receptacle. It’s important to verify proper clearance between the bed’s inner and outer walls before cutting the hole. Here the hole was near the floor of the bed to allow for such clearance.
Wiring harness routed through hole
The harness is routed from the inside of the bed to the area where the Ford factory receptacle is mounted in the bumper. The 90-degree bend in the wiring harness accounts for limited clearance between the inner and outer bed walls.
Mocking up plug on wall
Screwing receptacle onto sidewall
The receptacle was held in position in the bed wall to mark the locations for the screws. Rubber inserts (well nuts) are provided to isolate the machine screws from the aluminum body. Without the inserts electrolysis between dissimilar metals could be an issue.
Replugging harnesses
Ford’s connector for the factory 7-way receptacle was removed and plugged into the Curt harness. The other end of the Curt harness was then plugged into the Ford receptacle; the wiring is done.
Accessing Ford 7-way receptacle
7-way receptacle behind spare tire
Access to the back of the Ford 7-way receptacle can be tight, so the instructions call for dropping the spare tire. Fortunately, small hands made it possible to complete this step without removing the spare tire.