Curing the Bouncing Blues
[maghub_sidebar]
Suspended Animation
Curing the Bouncing Blues
a mechanic works on the shocks of an RV
Installing shock absorbers on a travel trailer or fifth wheel suspension will take the hoppity-hop out of trailer towing — and Roadmaster’s Comfort Ride kits have reinvented the mounting process with patented brackets.
By Bob Livingston / Photos by the author
T

here’s nothing very exotic about a basic suspension under a trailer or fifth wheel. As a matter of fact, it still carries some similarity to the suspensions used on covered wagons and stagecoaches of a century or more ago: leaf springs hooked to axles and connected by an equalizer. Why? Because it’s simple, effective and works — at least, to a certain extent. But while these Spartan suspensions still offer some relief from less-than-perfect roadways, there’s really not much cushioning and bounce control going on.

On the other hand, shock absorbers — the most common device to damp unwanted impulses created by interaction of the vehicle body and springs — have been around for nearly as long as automobiles, but they are not commonly found on trailers and fifth wheels as standard equipment, especially on entry-level units. One reason for the omission is the belief that since people don’t ride in them while on the road, they have no idea how harsh the ride is and how abusive all that jostling and flexing can be on the structure and contents. That, however, completely ignores the fact that constant pounding on the road can lead to premature damage and costly repairs to installed components and the RV itself.

Where Are the Shocks?
Simply stated, all vehicles need shocks to improve handling. Jolts to the trailer are telegraphed to the truck, which exacerbates poor handling. Take out the jolting forces and the truck will handle better while towing — and even help “the tail from wagging the dog,” properly referred to as sway.

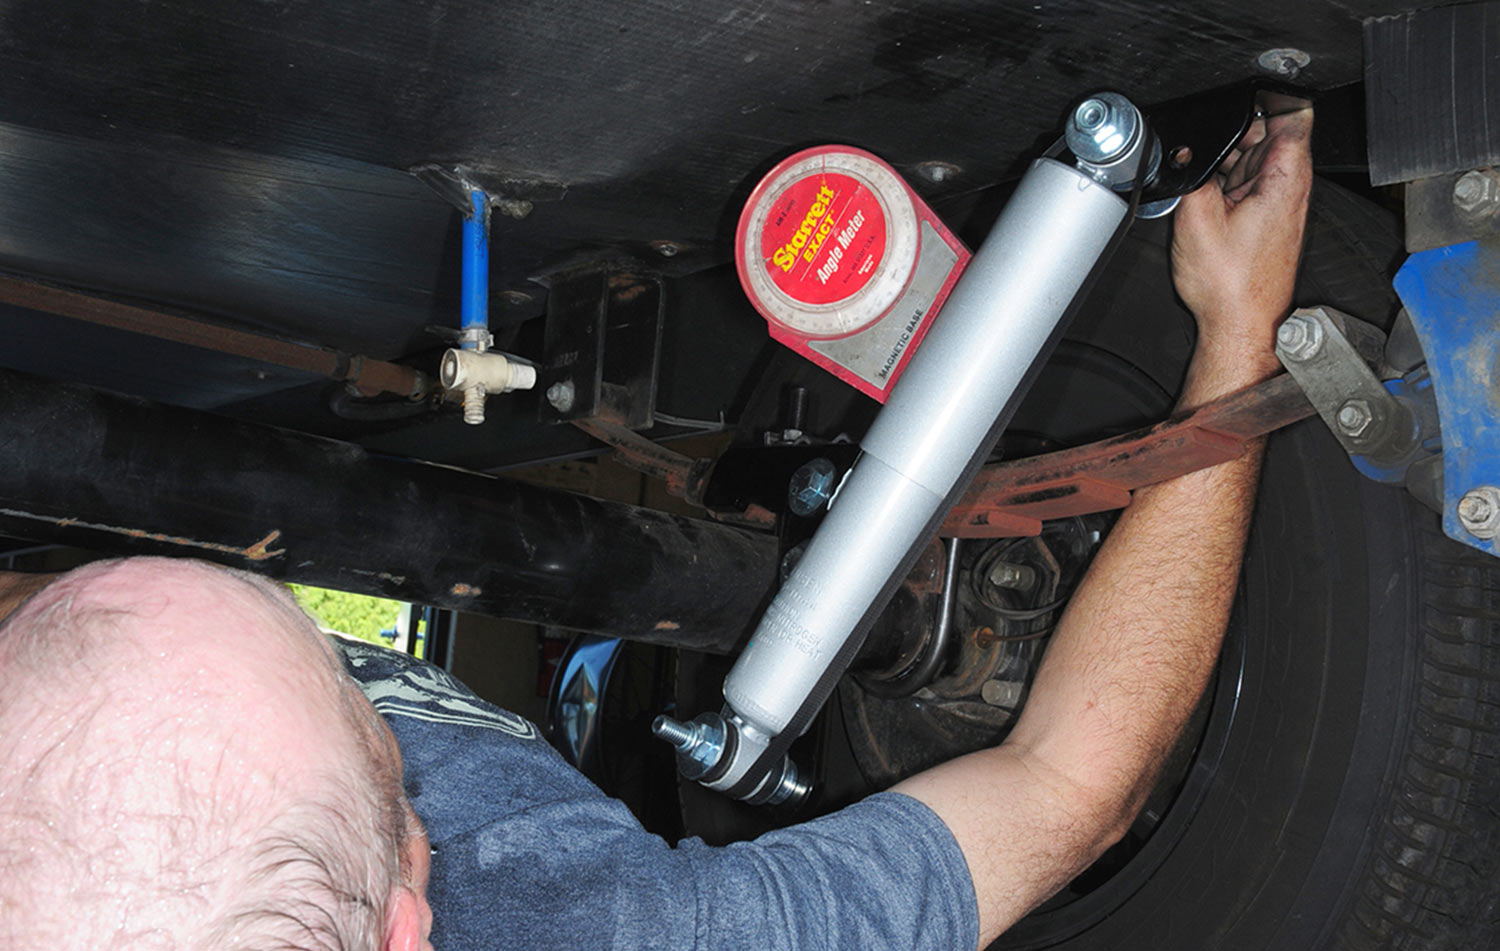
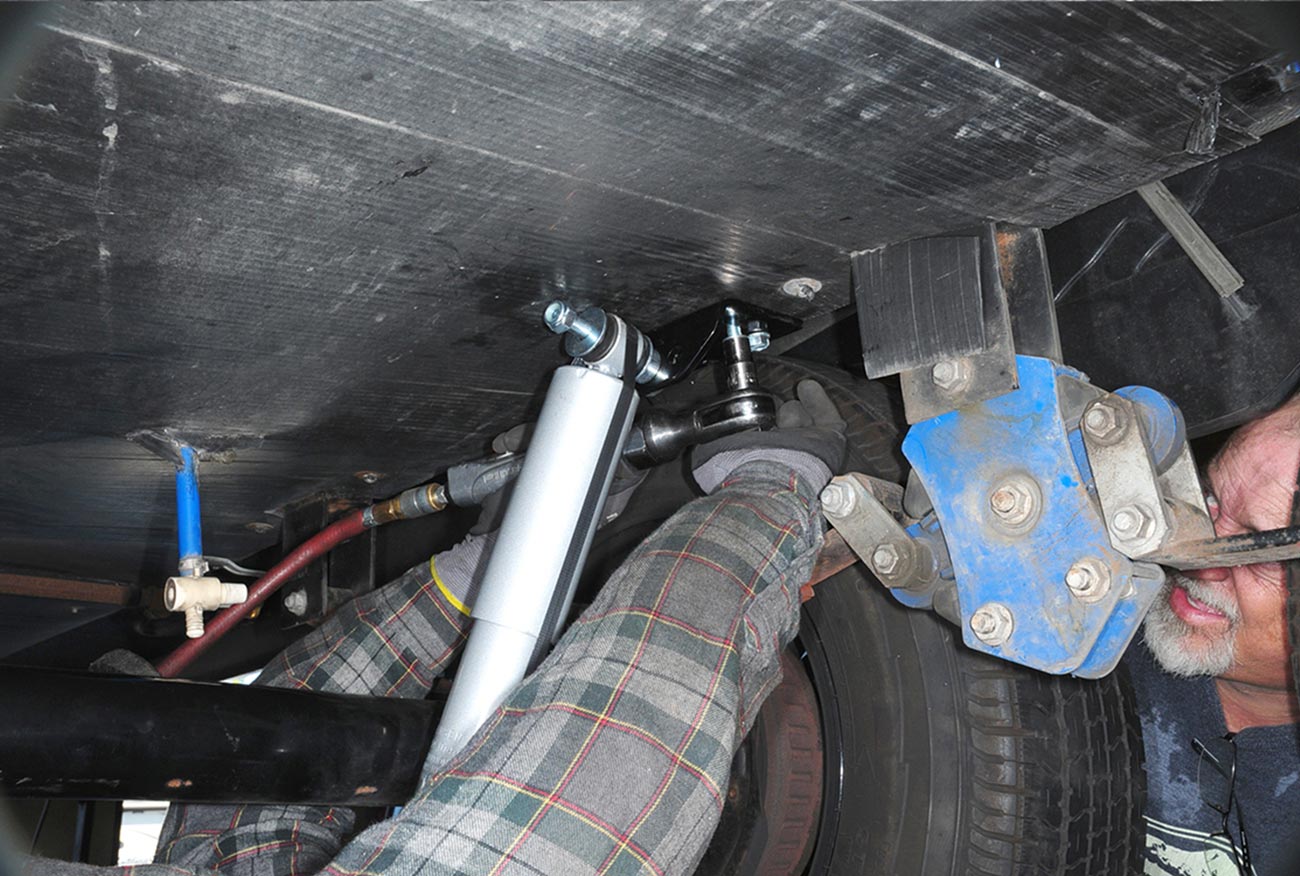
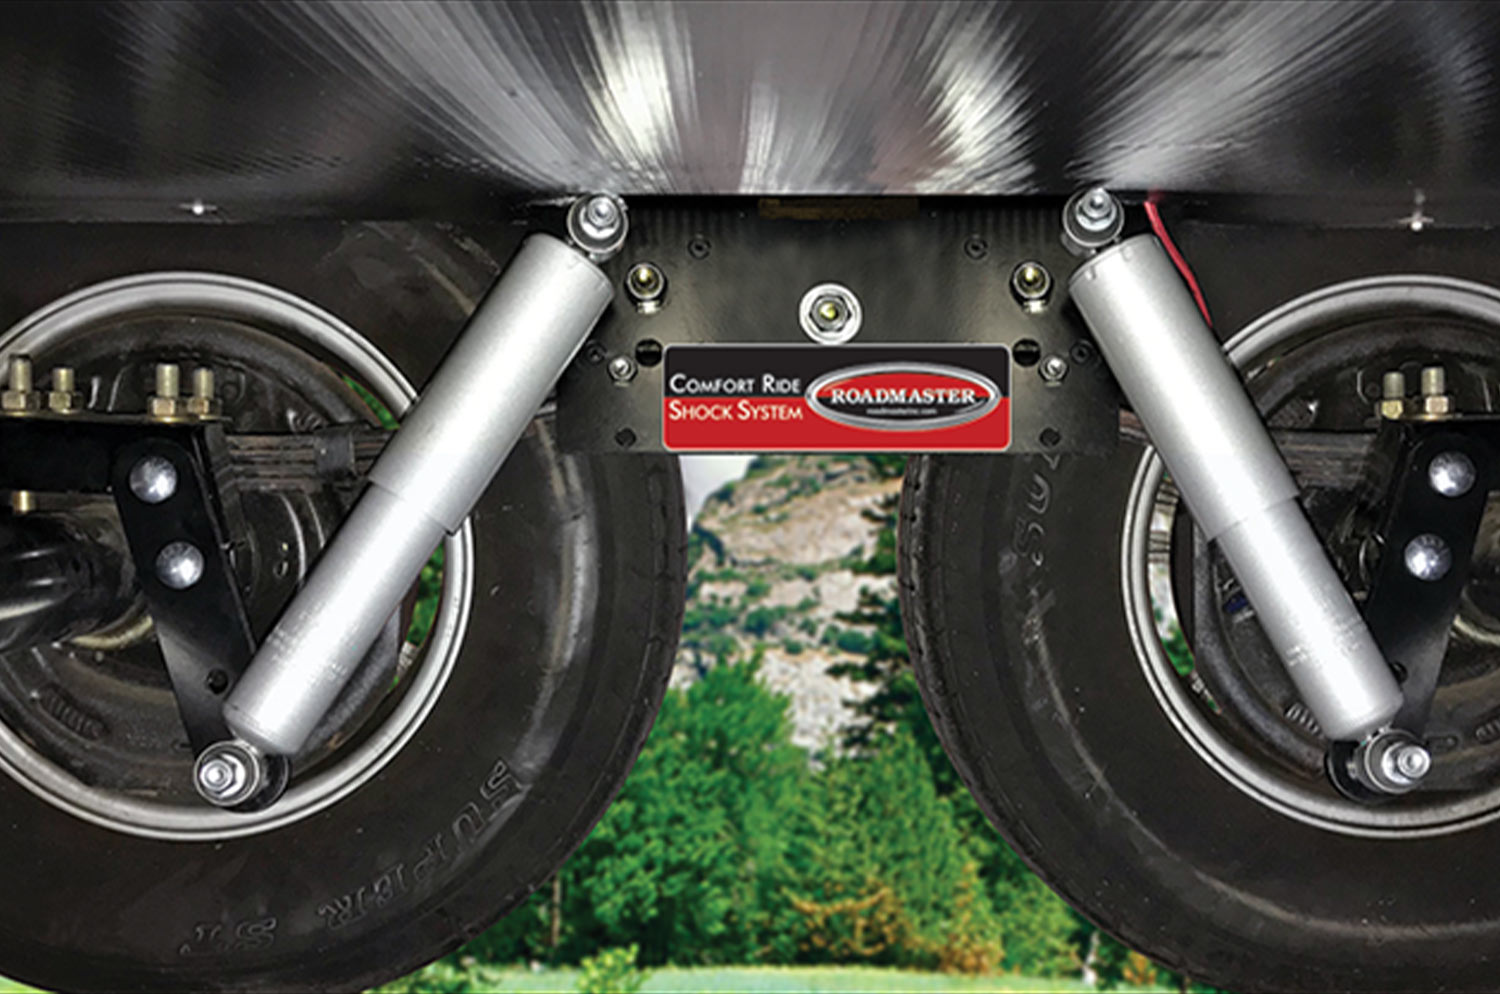
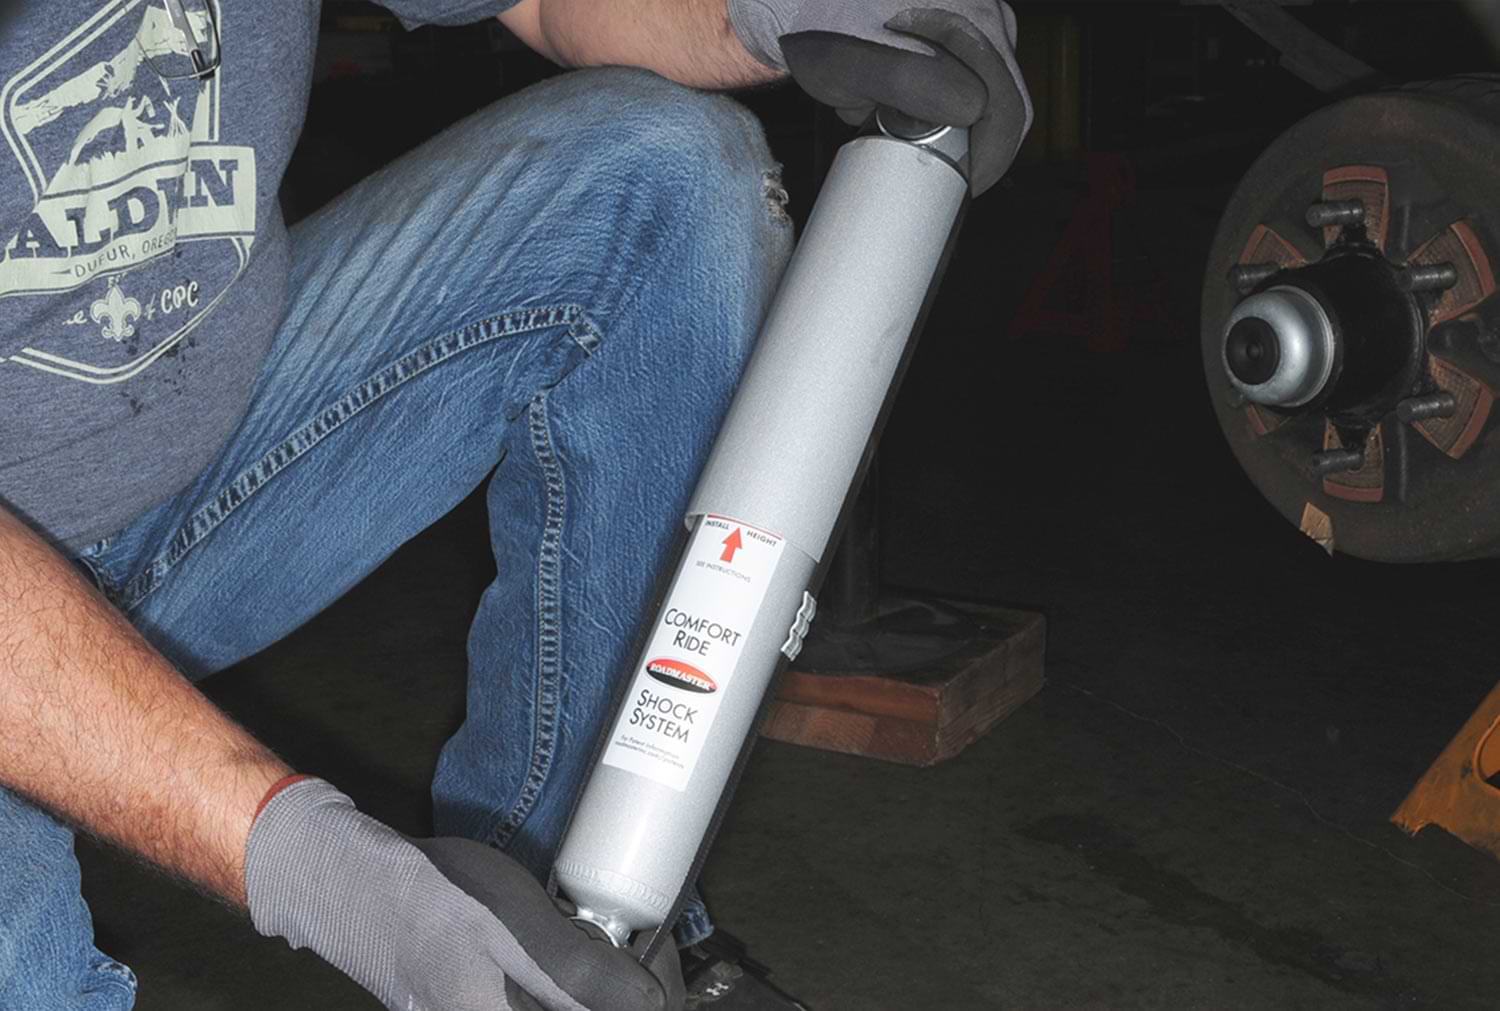
Even though common wisdom suggests that the use of shocks is best practice, trailer manufacturers — even those who understand the advantage of damping the ride — still mostly refrain from using them because there is usually not enough room to mount them properly. Fortunately, Roadmaster has introduced a patented mounting system for its Comfort Ride Shock Absorber system that allows them to be positioned at an optimum 30-degree angle. This provides the necessary leverage to control unwanted movements during compression and rebound (shocks that are mounted on a horizonal plane are virtually useless).

Lateral rocking and suspension travel are also controlled to a certain degree by angling the shocks to the outside of the frame, something that is also achieved by the design of the Custom Ride brackets. This mounting position, according to the company, centers the trailer weight over the tires and helps with sway.

inner view of the underside of the RV showing the springs attached to the axle with tie plates, the shackles welded to the frame and the equalizer mounted in the center
There’s not much to a basic dual-axle trailer suspension. Springs are attached to the axle with tie plates (shown here with the Comfort Ride tie plates already installed), shackles are welded to the frame and an equalizer is mounted in the center.
We recruited owners of a 2022 Cougar fifth wheel that bounced around on the roadways to document the installation of the Roadmaster system. Even though the owners never rode inside the unit, the driver could see clearly that the trailer was being pushed laterally while being towed and exhibited quite a bit of bouncing. Normally, Roadmaster recommends the installation of its Comfort Ride Slipper Spring suspension system along with the shocks, but in this case, the axles were too close to mount the longer springs and center bracket. When the Slipper Spring kit is installed, the mounting system for the shocks is integrated into the center bracket, which makes installation a snap. In this case, an independent tandem axle shock absorber kit was earmarked for installation on the 3-inch diameter axle.

Kits are available for 2 3/8-, 3- and 3 ½-inch diameter axles and include the aforementioned brackets and all the mounting hardware for tandem axles. The nitrogen-charged shocks are not unique, but they do utilize heavy-duty components and fasteners — and are sized for trailers and fifth wheels. Kits sell for $650 for all size axles; owners of triple-axle RVs will need the additional shocks and hardware for triple axles (which sells for $325, also in kit form).

Drilling and Bolting
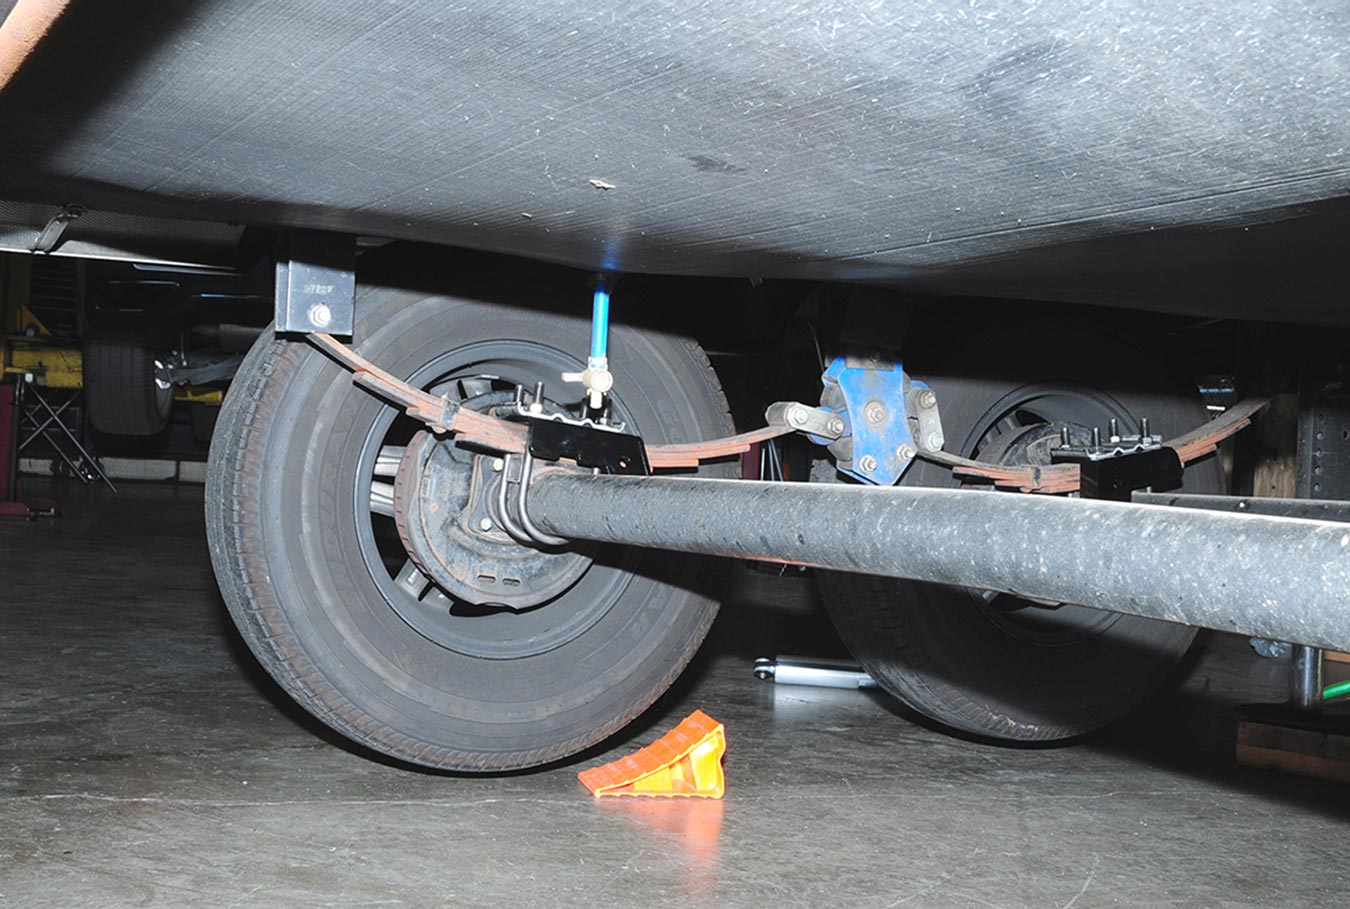
The installation is not difficult, but plan on spending at least four hours under the trailer. Before you start, take the time to read the clearly described and illustrated installation instructions carefully. The first step, obviously, is to lift the wheels and tires off the ground and place jack stands on the frame and axles to provide more room to install the new tie plates; you’ll have re-mount the wheels and tires and lower the trailer to the ground to determine the positioning of the frame brackets later in the process. Just make sure you don’t lift the frame using a jack on the axle. When the wheels and tires are on the ground, use chocks to prevent rolling; also, the trailer must be level.

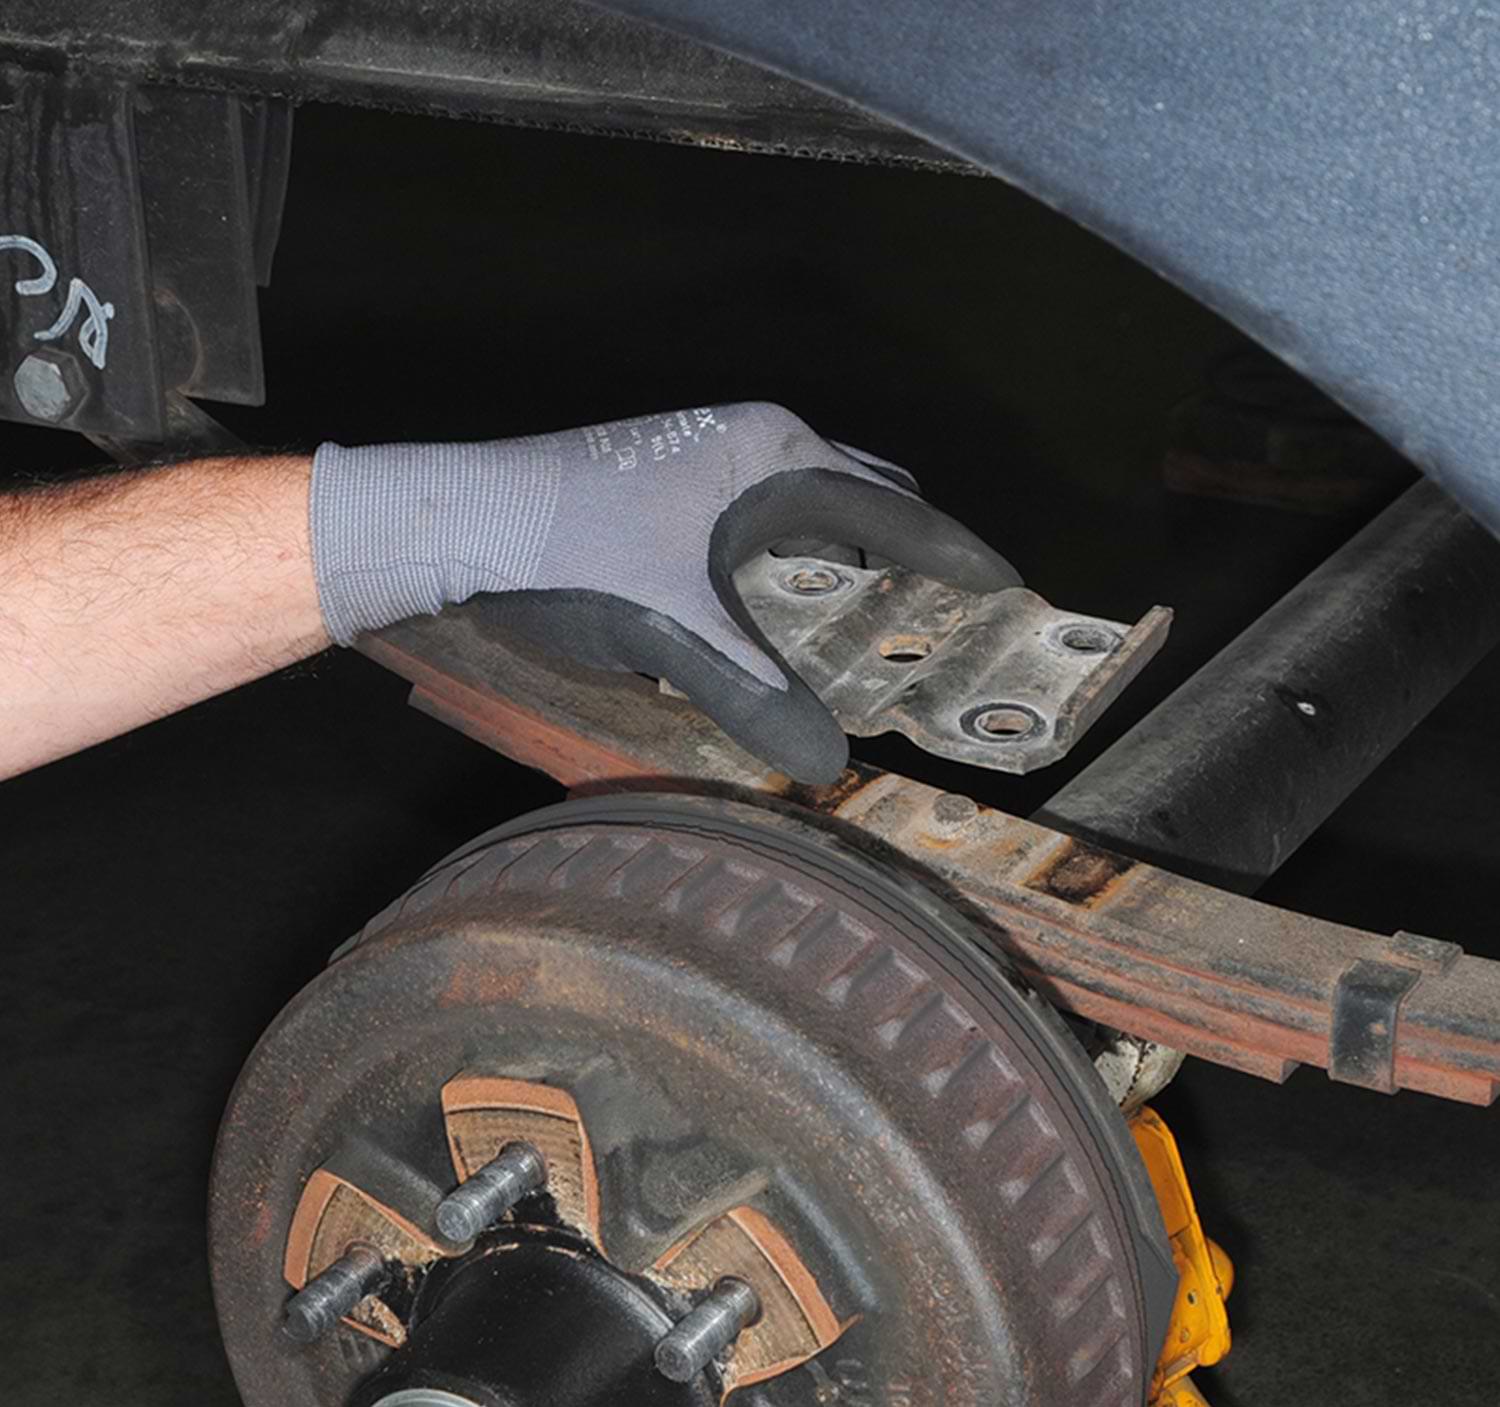
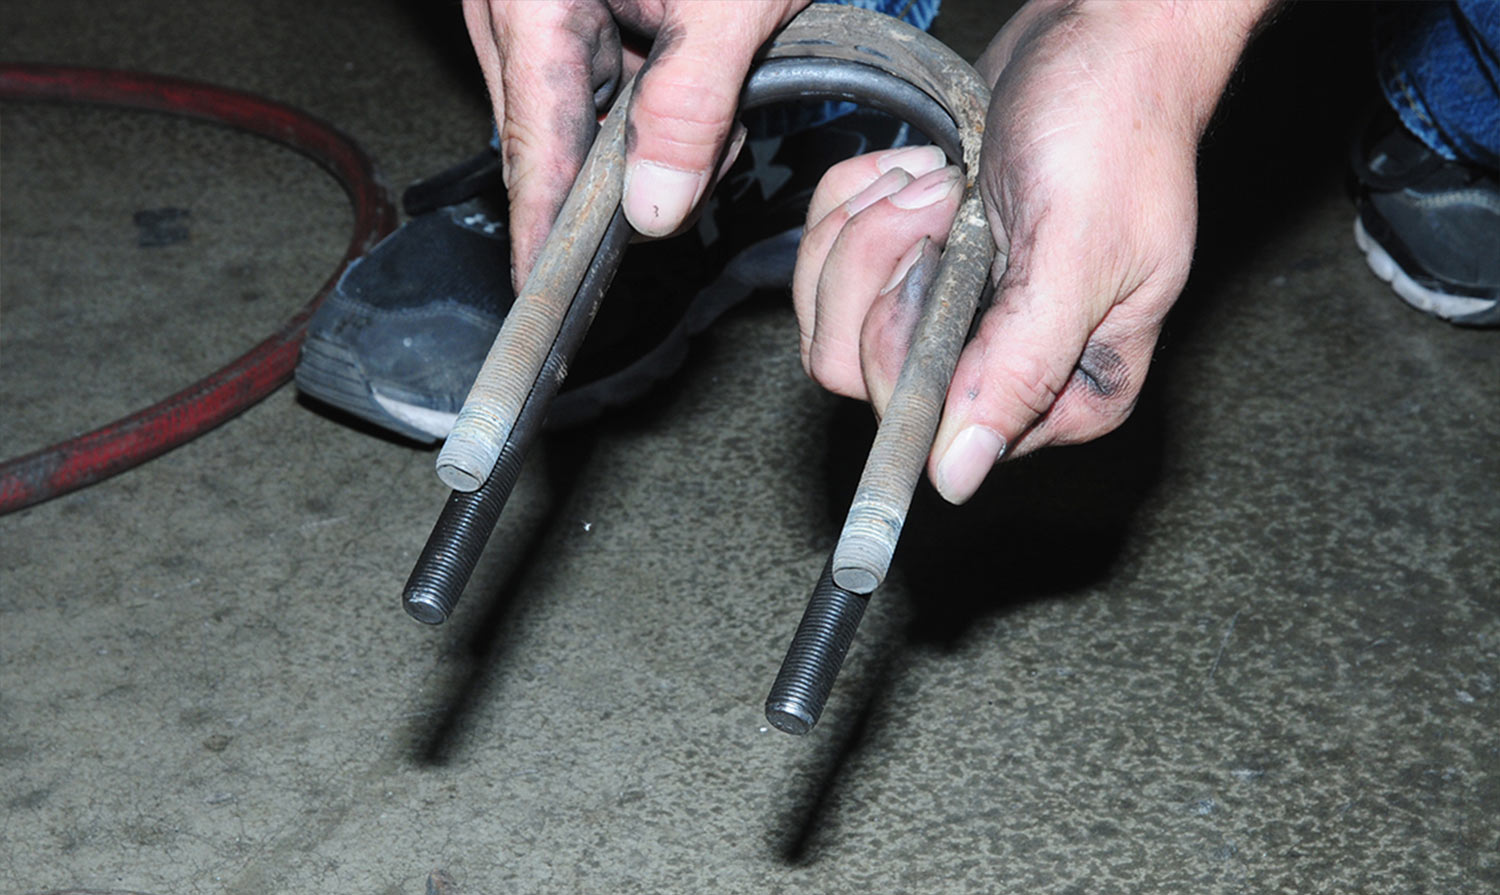
For this project, the wheels were lifted off the ground using the onboard leveling system and jack stands were placed in strategic locations. The old tie plates on the right side were removed from the springs and axles and set aside for the moment. Next, the new tie plates were placed on the respective locating pins and the original tie plates were set on top of the new ones, requiring the use of the provided longer U-bolts. The U-bolt nuts were torqued using the specification from the axle manufacturer that’s provided, by brand, in the instructions.

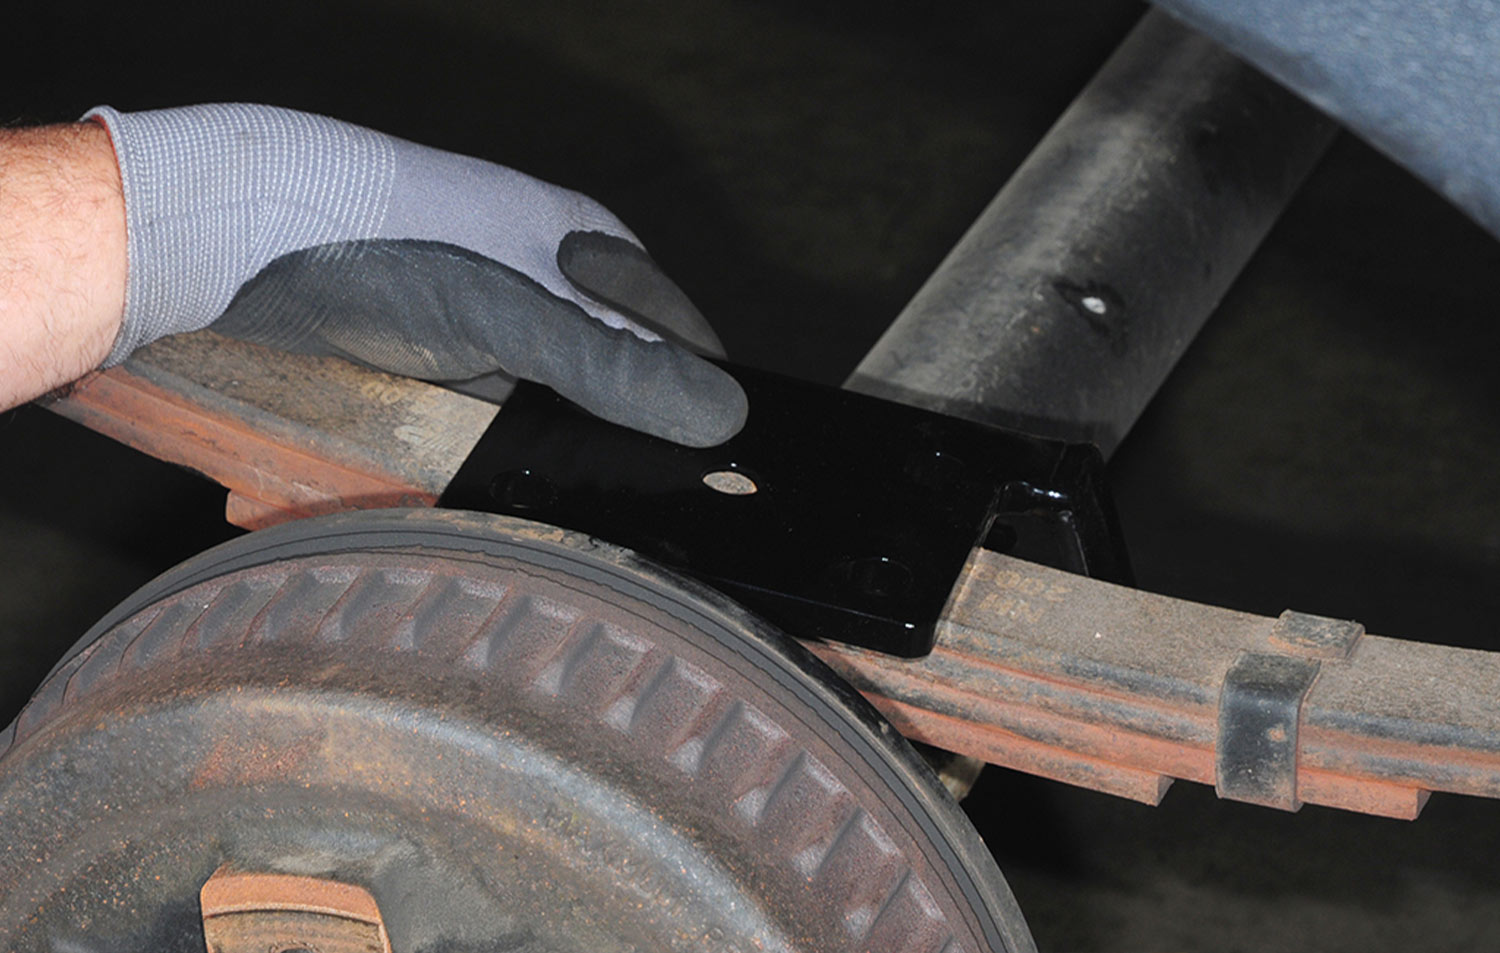
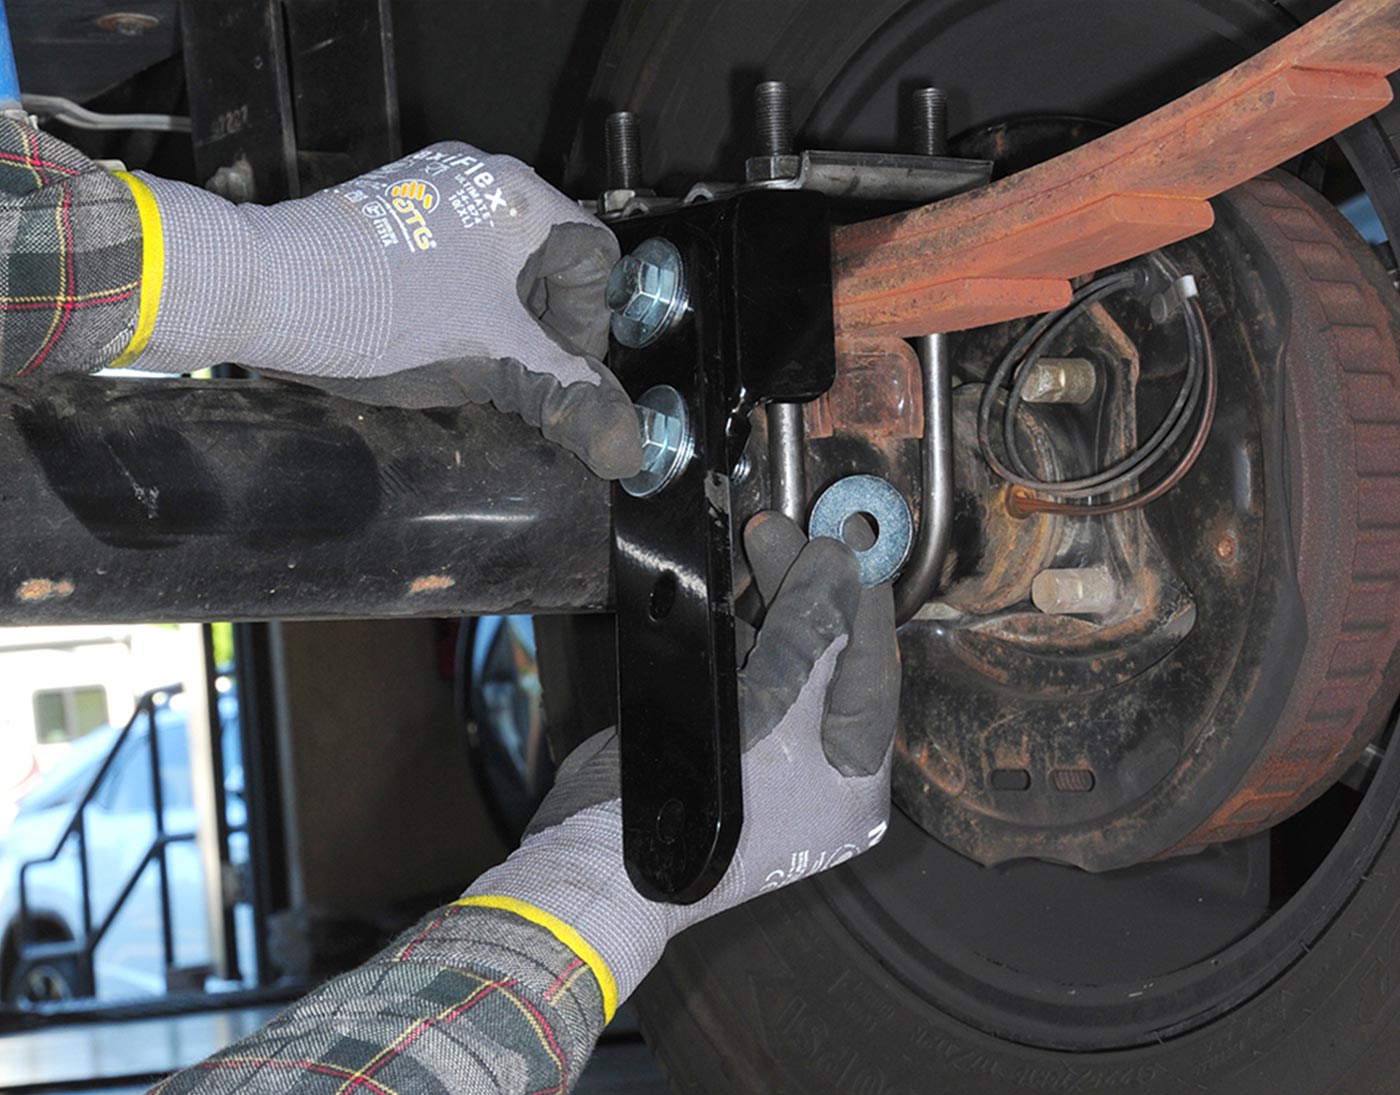
Once the wheel and tires were back on and the trailer was situated firmly on the ground, loading the suspension, an extension plate was bolted to each new tie plate. Since the axles were mounted below the leaf springs in the test trailer, the extension plates were bolted to the two holes in the end of the plate (the two middle holes are used if the axles are on top of the leaf springs). These bolts were torqued to 57 ft.-lb.

a rendered image of patented brackets allowing the shocks to be mounted vertically and angled to the outside
Patented brackets allow the shocks to be mounted vertically and angled to the outside so that trailer weight is centered over the tires for better sway control. Here the shocks are mounted to the Roadmaster Comfort Ride Slipper Spring suspension on another trailer, but illustrate how the shocks are positioned when placed at a 30-degree angle.
a mechanic holds a Nitrogen-charged gas shock from Roadmaster
Nitrogen-charged gas shocks are sized for trailers and fifth wheels. These shocks are made of high-quality components and are banded to prevent expansion, which would otherwise make it difficult to install.
The first shock was bolted to the extension plate and a frame bracket was then attached to the other end. Each shock is banded to prevent extension under pressure — which otherwise would make it difficult to determine the proper angle and compress for mounting — so the bands must be left alone until the end of the project. You’ll need to swing the shock and bracket up to the frame to find a mounting location that will allow for the best angle, preferably 30 degrees. A magnetic meter was used to determine the angle, which landed at the optimum 30 degrees. At this point the location for mounting the bracket was marked and a section of the belly pan was cut away to allow the bracket to sit flush against the frame.

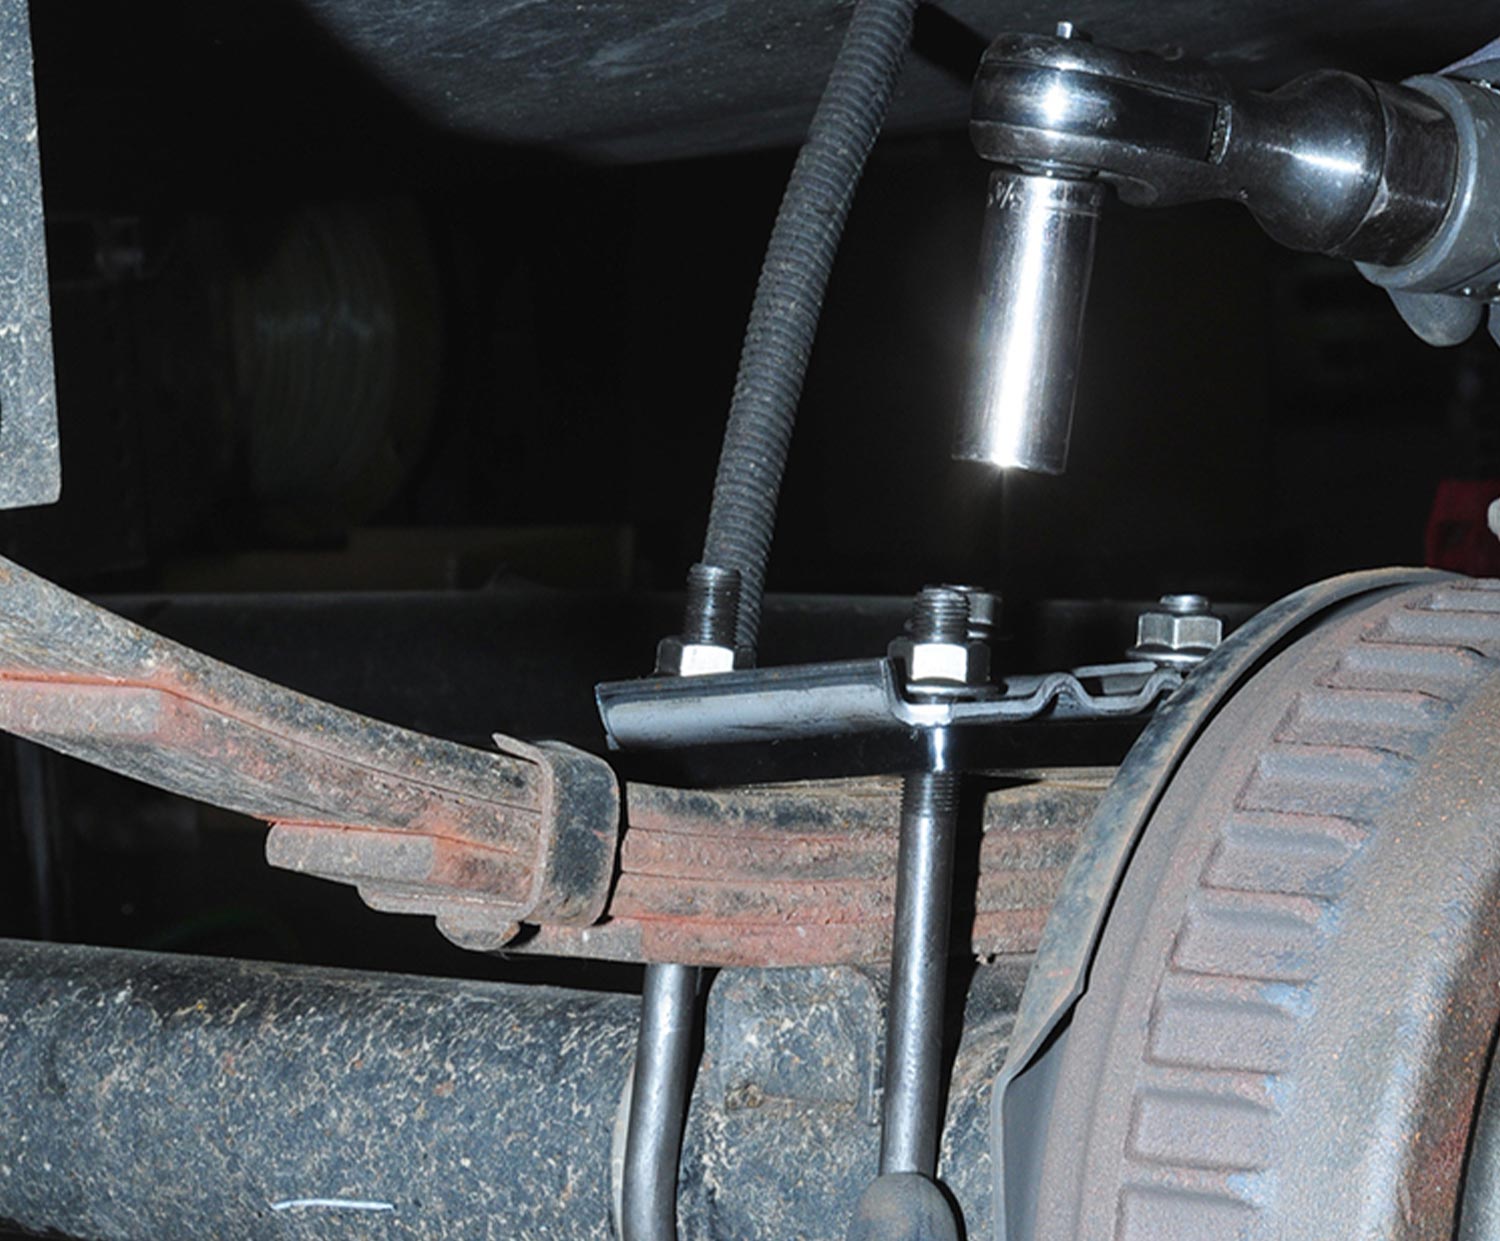
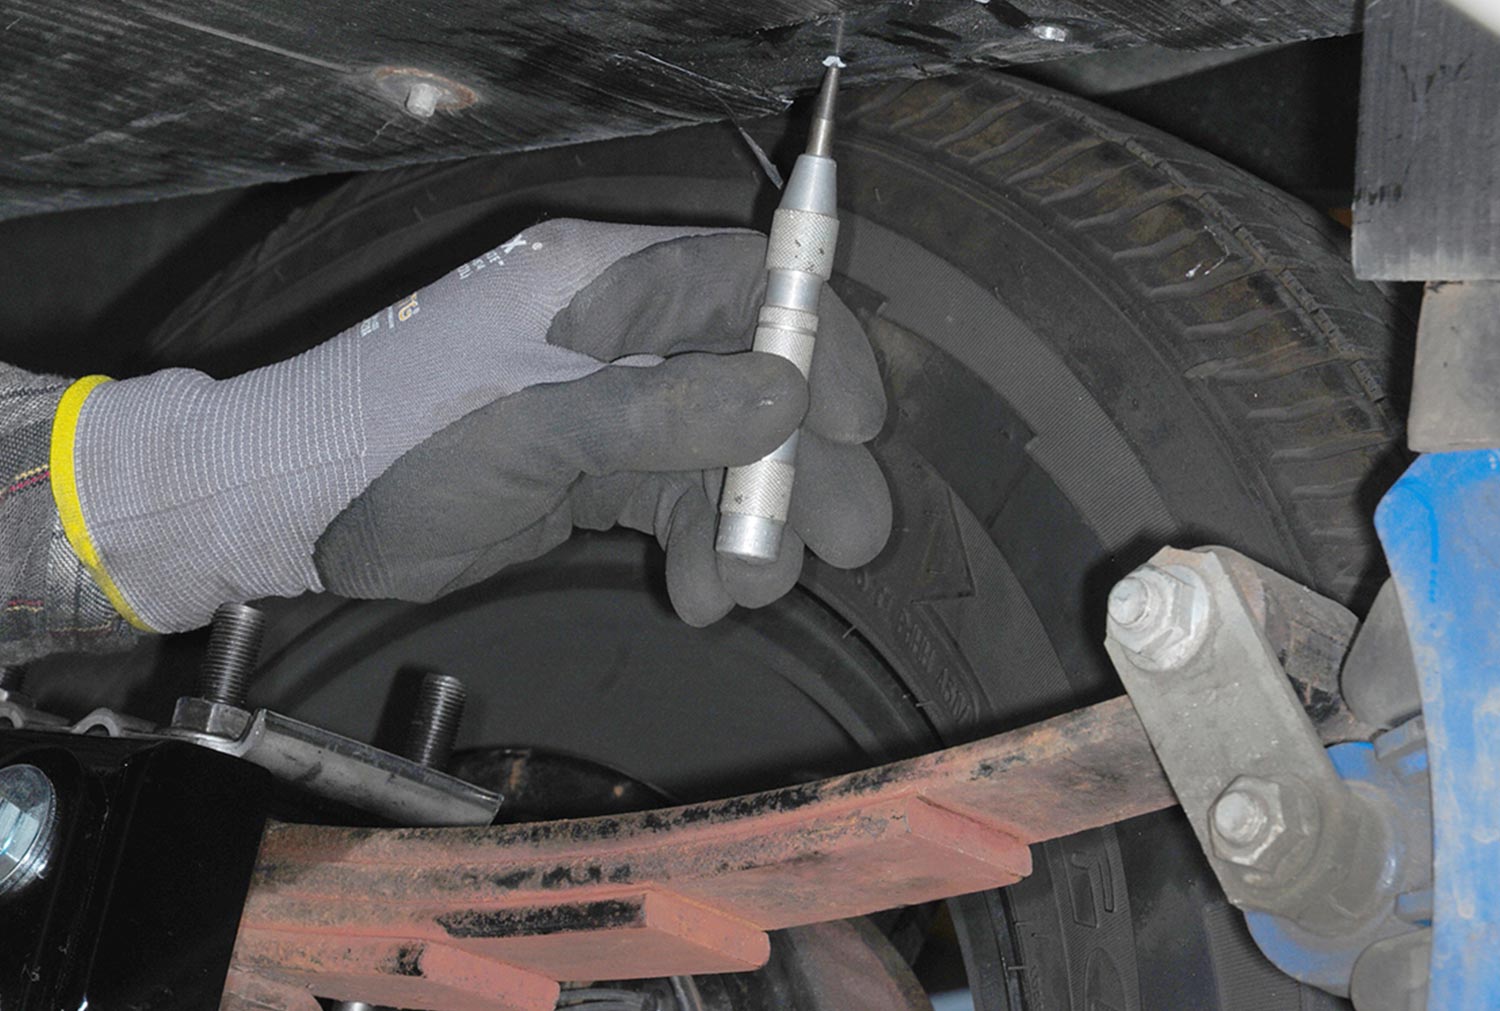
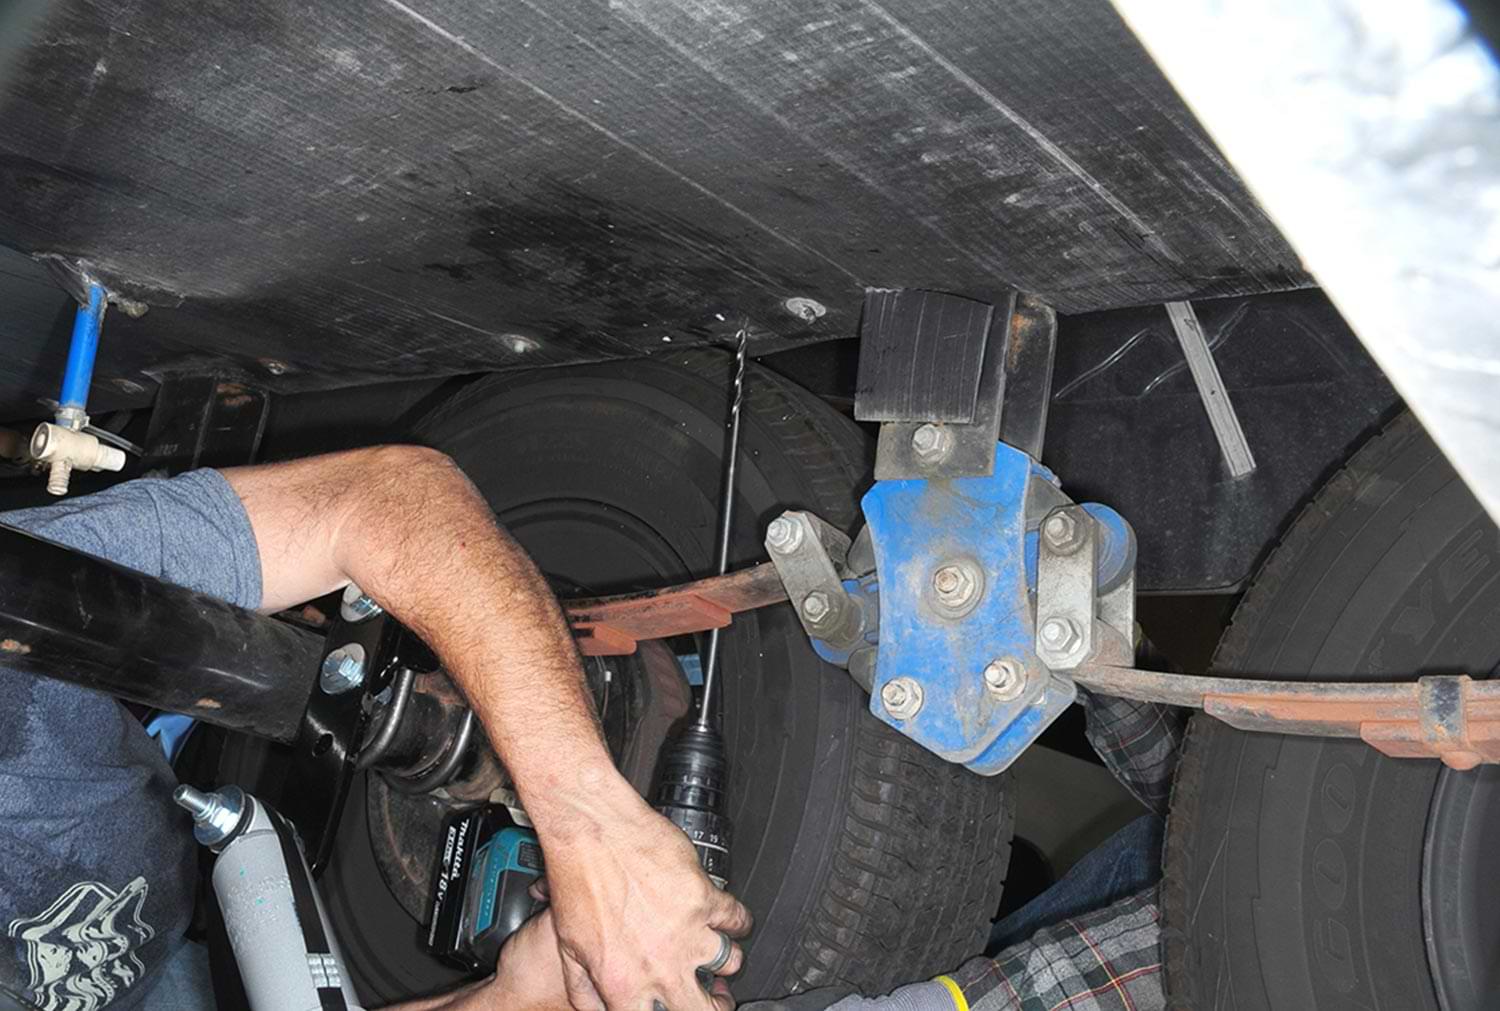
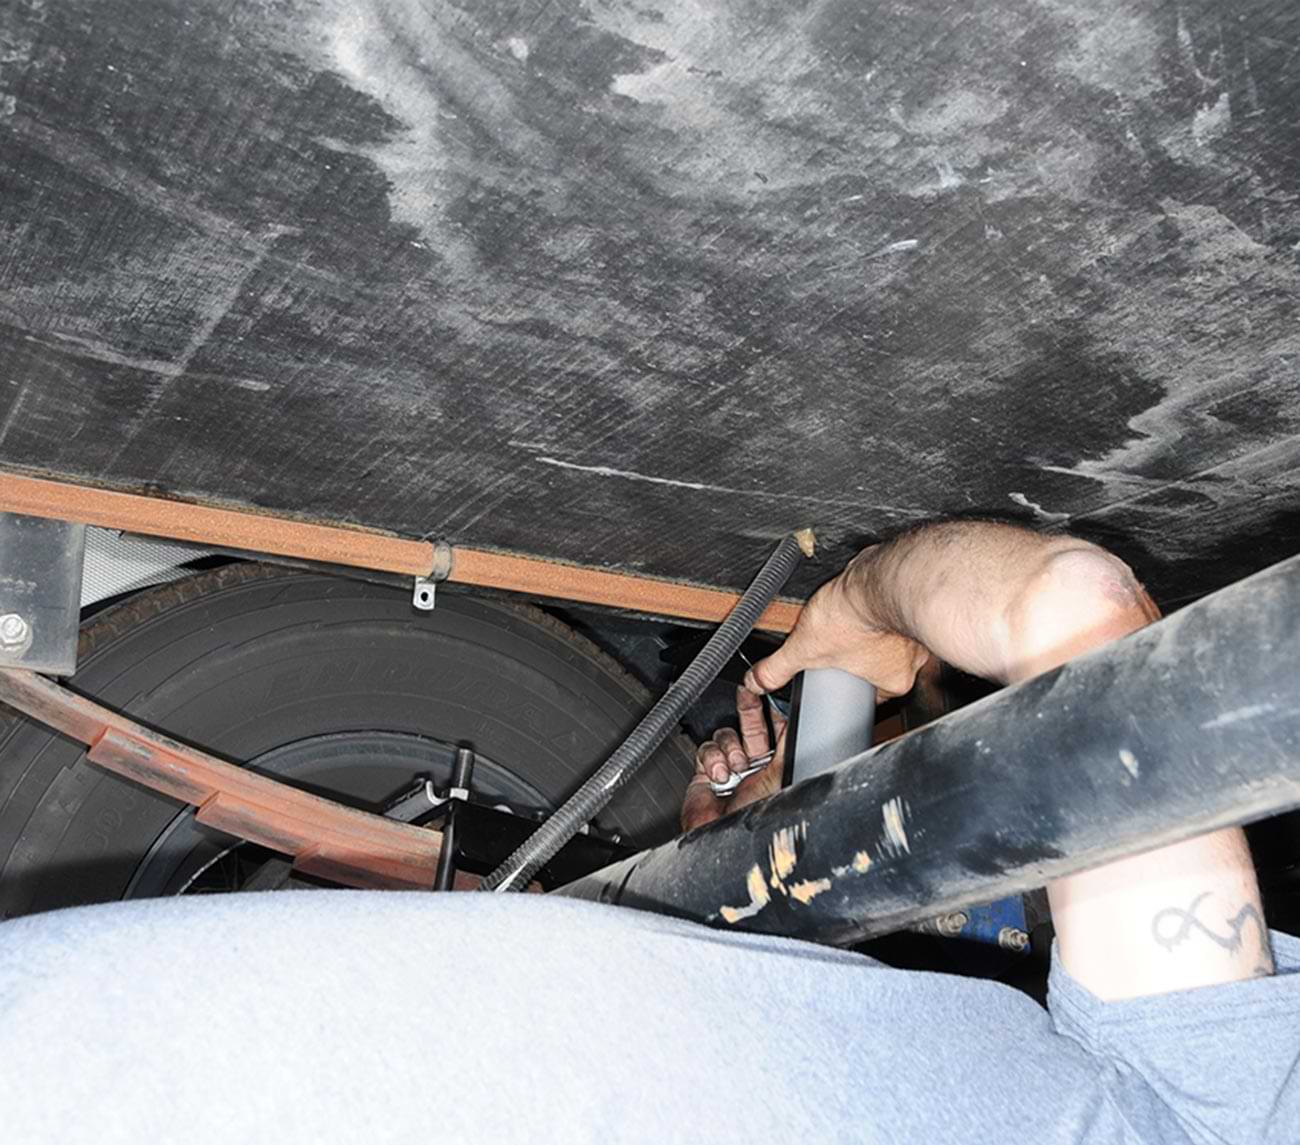
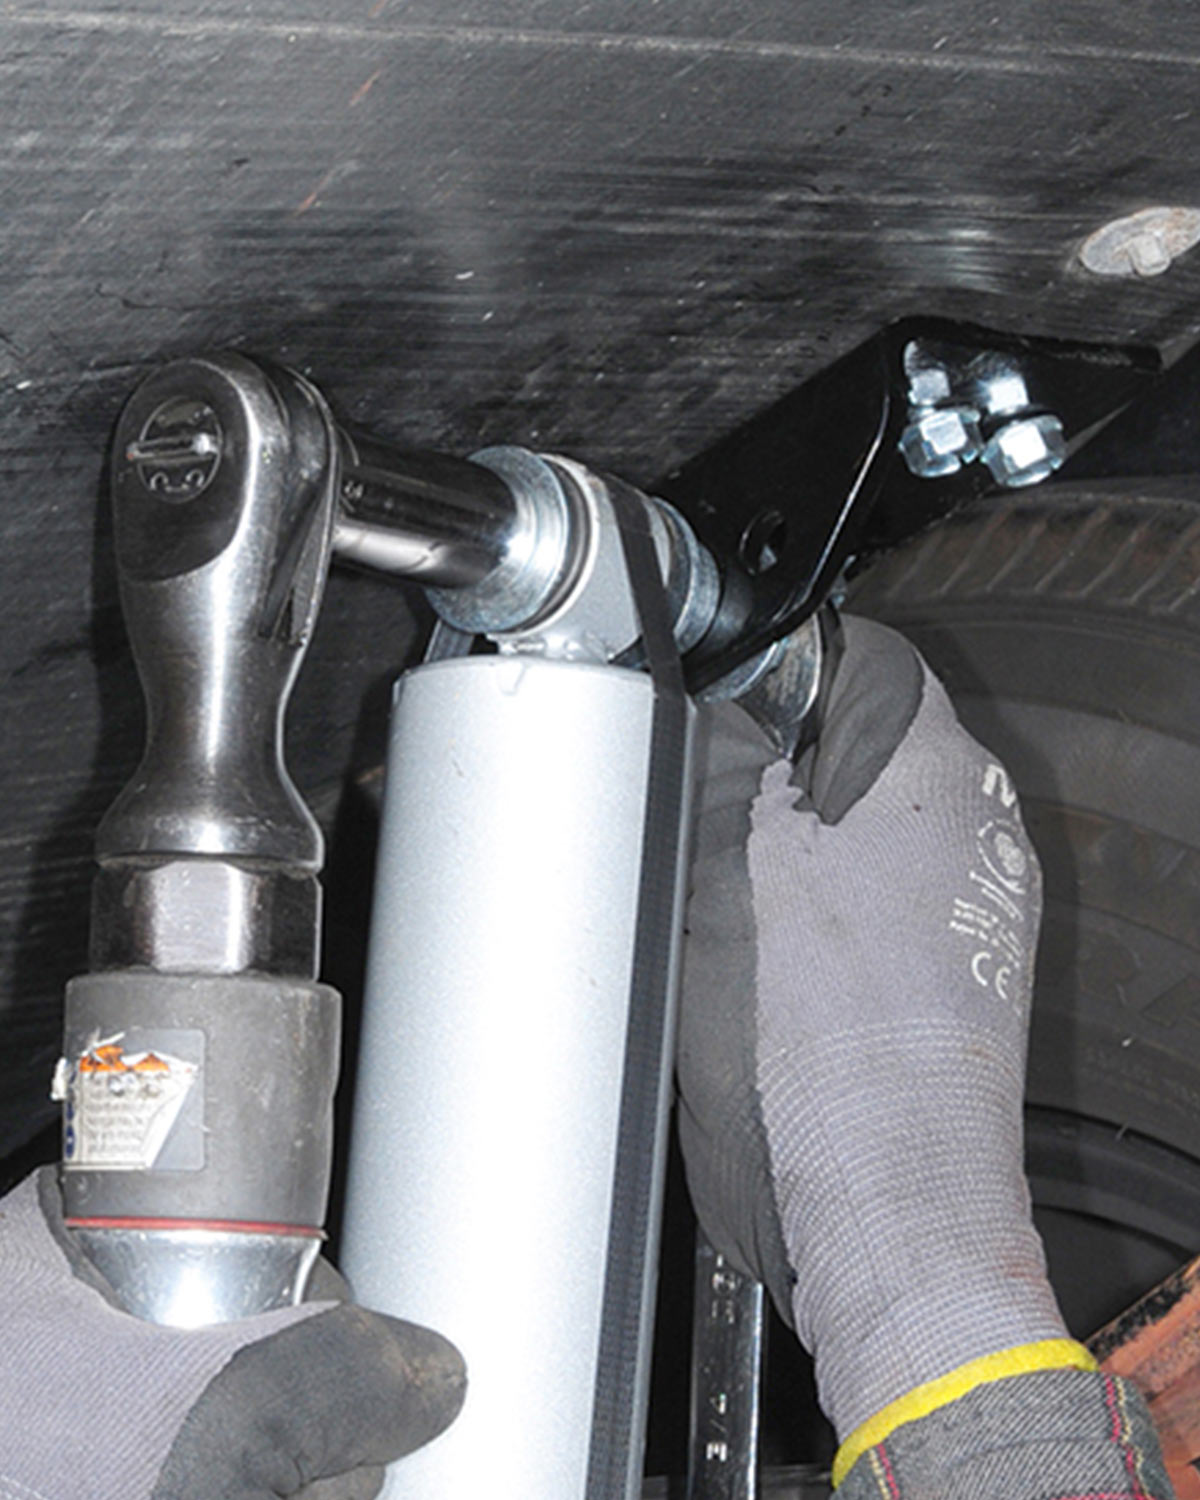
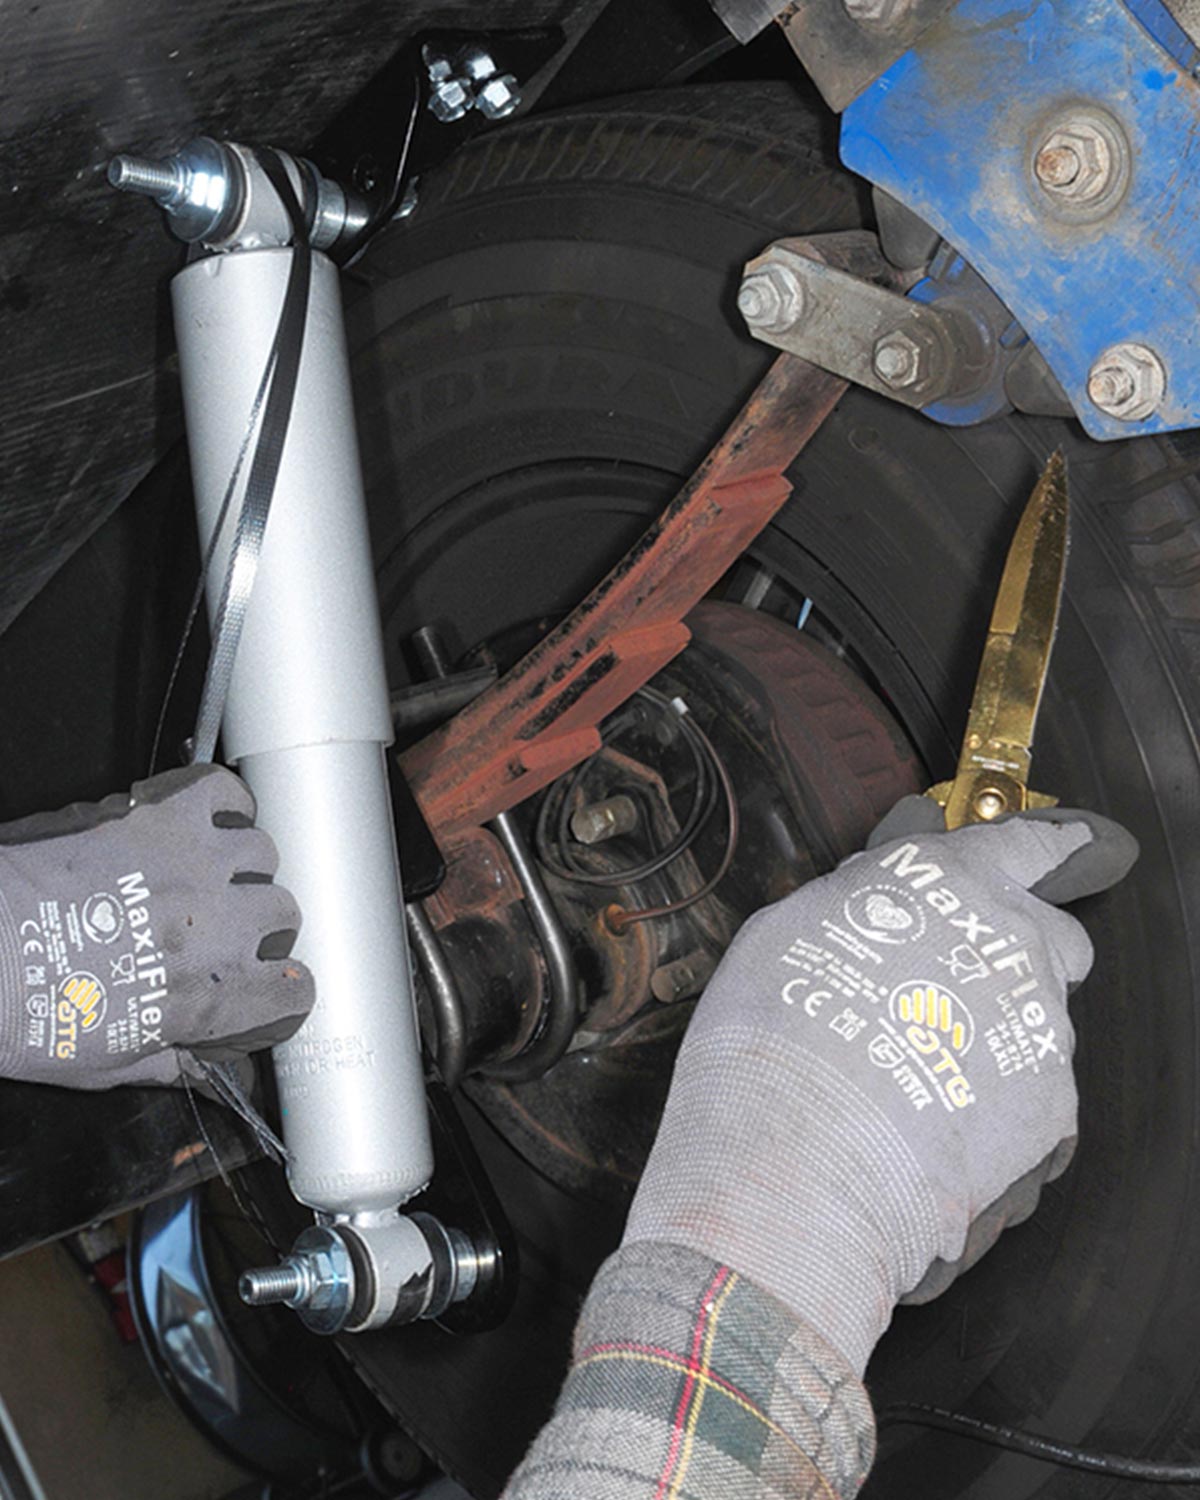
Drilling the holes required the use of a 12-inch long, 5/16-inch bit and enough energy to push upwards. Make sure the bit is sharp or you’ll be fighting a hopeless situation. The bracket was then attached to the frame using the self-tapping bolts, making sure there were no obstructions on the other side of the frame. With the first bracket installed, it was possible to measure from the end of the equalizer to determine the locations for the other brackets. This will allow you to lift the trailer again, stabilize it with jack stands and remove the wheels and tires to allow better access for drilling the holes and driving the bolts for the other three brackets. In this installation, the LP-gas pipe was in the way on the left side and had to be relocated.

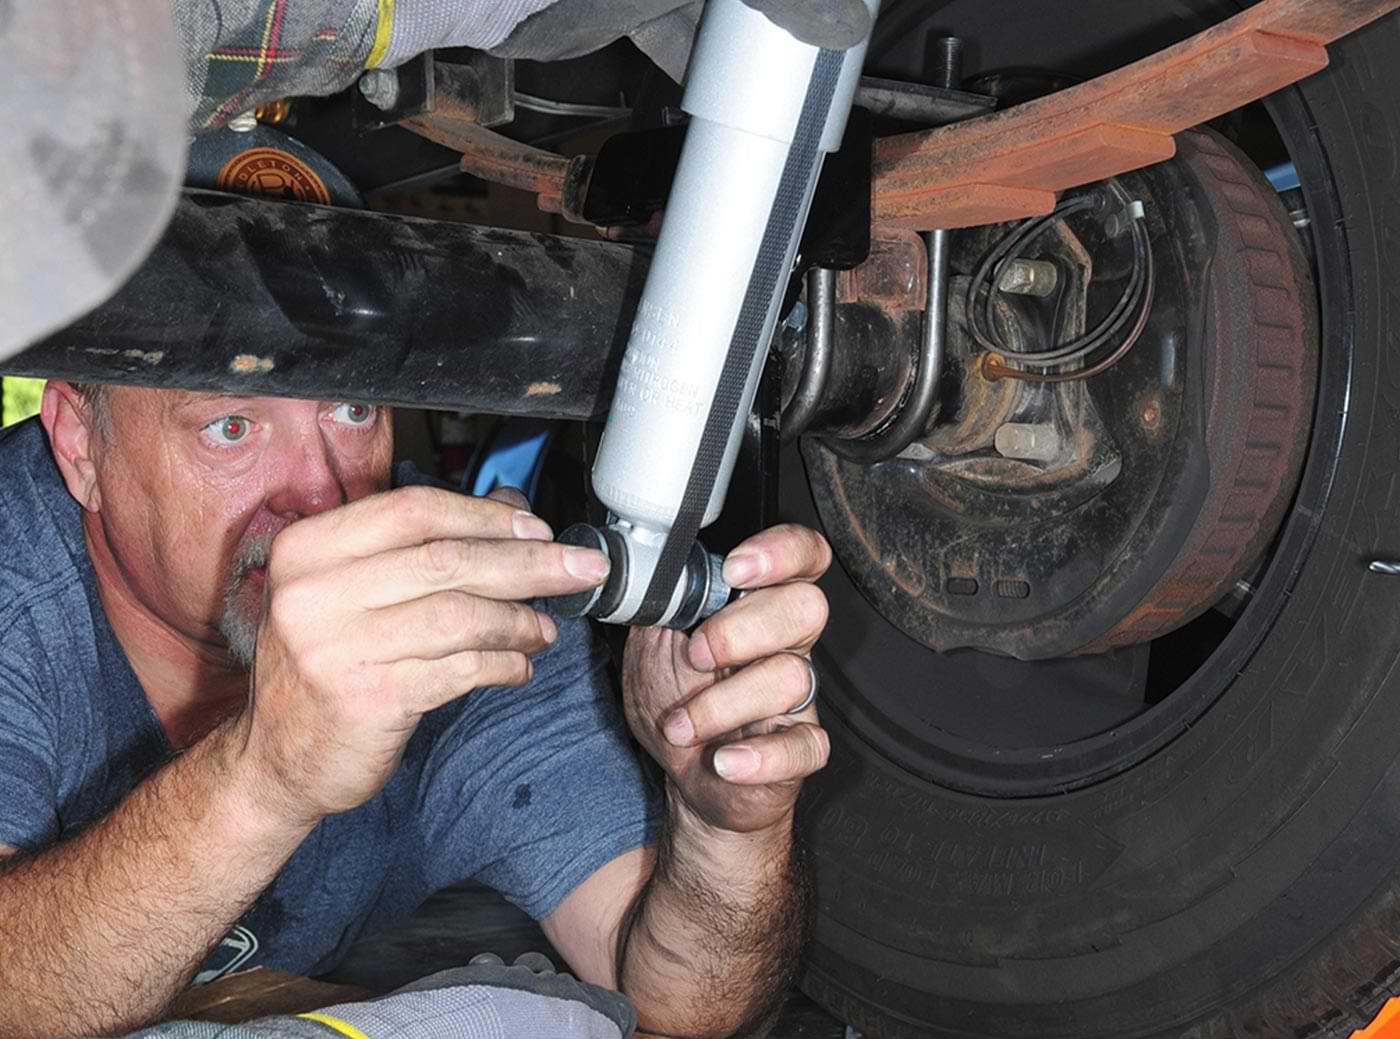
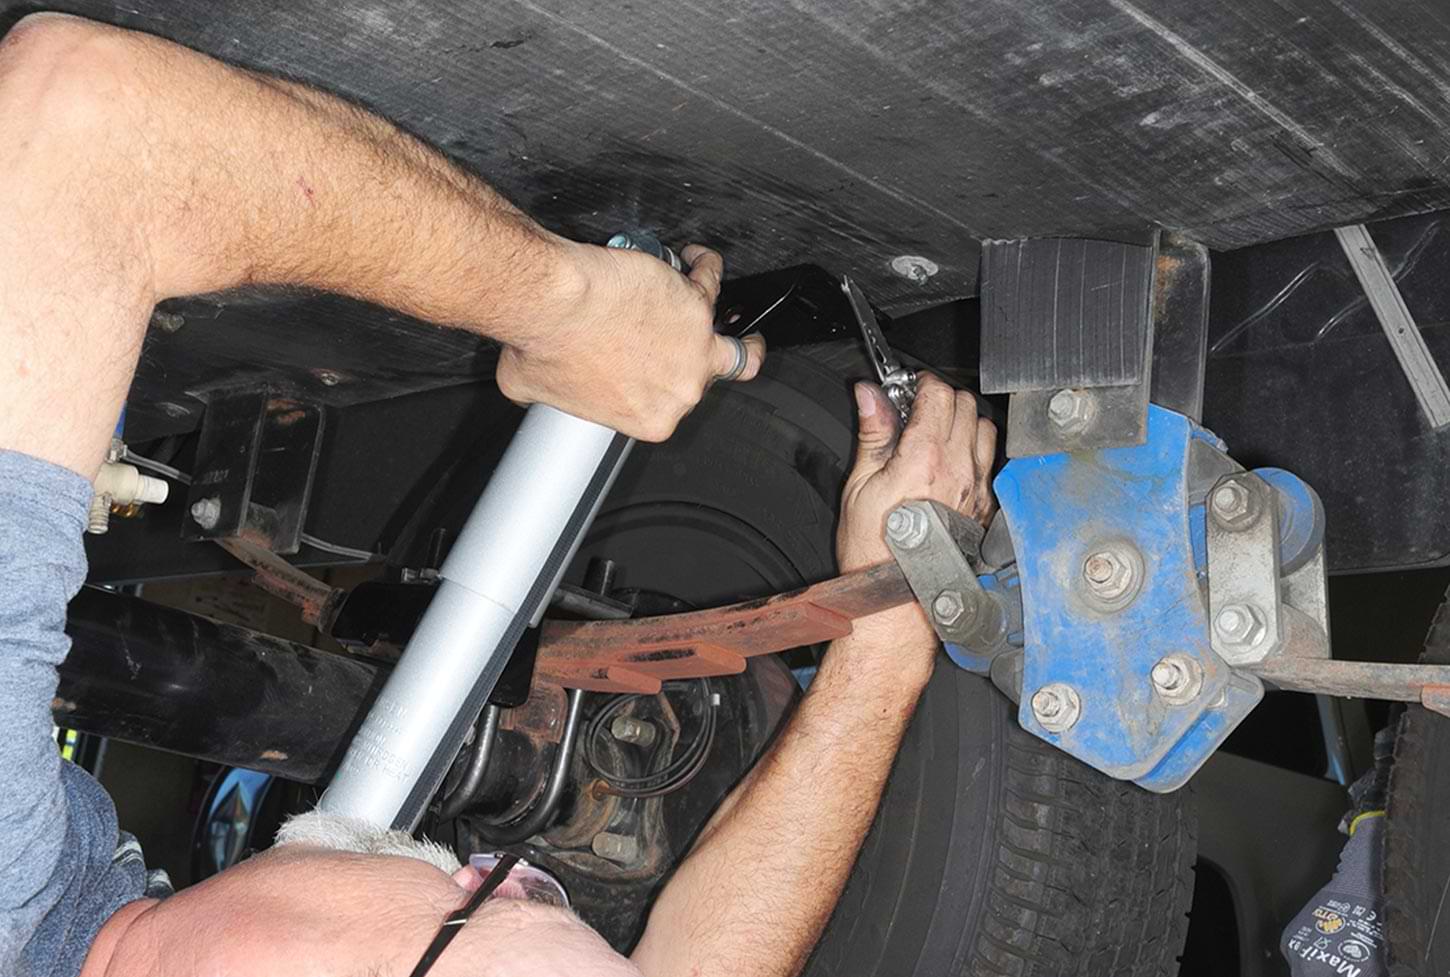
From here it’s a drill-and-bolt proposition and once the shocks are torqued to specification (provided in instructions), it was just a matter of cutting the bands, remounting the wheels and tires and torquing the lug nuts.

Smoothing Out the Bumps
It’s hard to quantify the results of adding the shocks because no one went for a ride inside the fifth wheel before and after the installation — but the shock absorber industry is huge and auto manufacturers don’t integrate damping provisions just to make suspensions look pretty. Shocks work, and in this test the results were positive, eliminating much of the bouncing while improving towability.

The owner reported much less rear-end movement and better control of interior contents (meaning, he wasn’t greeted with a mess inside when he opened the entry door). Previously, when towed on roads with potholes and uneven surfaces, the fifth wheel did a road dance. After the shocks were installed, the trailer settled down — and there’s no denying a smoother ride will improve longevity and minimize subsequent repairs.

a drill is used to loosen the bolts on the original tie plate
the original tie plate is removed
The original tie plate was removed from each spring pack/axle and retained for the next step. Removing the wheels and tires provides better access. After lifting the wheels and tires off the ground, make sure jack stands are used for safety.
a new tie plate from the kit is placed over the locating pin on the spring pack and axle
A new tie plate from the kit was placed over the locating pin on each spring pack and axle.
mechanic holds the old and new U-bolts on top of each other to compare
Longer U-bolts, provided with the kit, were needed to make room for the new and old tie plates, which were sandwiched and bolted to the axles and springs.
the U-bolt is initially hand tightened
the U-bolt is torqued to the axle manufacturer’s specifications
Access to mount the new and old tie plates can be tight if the wheels and tires are not removed. Once the tie plates are aligned properly, the U-bolts are torqued to the axle manufacturer’s specifications, which are provided in the Roadmaster instructions.
an extension plate is attached to one of the new tie plates
An extension plate was attached to each new tie plate. Since the axles here were mounted under the leaf springs, the two holes in the end of the extension plates were used to bolt up to the tie plates. If the axle is above the springs, the middle two holes are used. Bolts were torqued to 57 ft.-lb. as per instructions.
the mechanic snugs a nut on the attached lower shock
The lower shock mount was attached to the extension plate using the provided bolt, nut and washers; the nut was only snugged at this point to allow rotation of the shock for locating the frame bracket. Once the shock was in its final position, the bolt was torqued to 50 ft.-lb. For the moment, the shock was leaned against the trailer frame.
a magnetic angle meter is “stuck” to the shock housing to determine the proper angle (optimum 30 degrees) for mounting the frame bracket
A magnetic angle meter was “stuck” to the shock housing to determine the proper angle (optimum 30 degrees) for mounting the frame bracket that was previously attached to the shock. This process must be done with the wheels and tires on the ground to load the springs.
the proper positioning of the frame bracket is marked
Once the proper positioning of the frame bracket was established, it was marked so that a section of the belly pan could be cut away, exposing the frame metal. This allowed for a flush fit against the frame.
an area is marked in preparation for bolting the shock brackets in place
a drill is used to create a hole in the frame
And now the fun begins. Probably the hardest part of the installation is drilling the holes in the frame for bolting the shock brackets in place. A 12-inch long, 5/16-inch bit will facilitate drilling, which takes quite a bit of pressure (laying on your back and side) to cut the holes. Make sure the bit is new/sharp or you’ll be up against a hopeless situation.
mechanic lays under the RV while relocating the LP-gas pipe
The LP-gas pipe was in the way on the left side of the trailer. Before marking the position for the frame bracket and cutting the belly pan material, the pipe was relocated and later secured.
self-tapping bolts were used to mount the frame brackets
Self-tapping bolts were used to mount the frame brackets. These bolts cut their own threads through the previously drilled pilot holes. You’ll need an impact wrench for this procedure. Once the first frame bracket is bolted up, measurements can be taken in relation to the equalizer to determine the location for the other three shocks. That makes it possible to provide better access for drilling through the frame and bolting the brackets after removing the wheels and tires.
a bolt is tightened on the top end of a shock
the retention bands are cut away
The retention bands were cut once the shocks were bolted and torqued to specification. Now it was just a matter of replacing the wheels and tires, torquing the lug nuts and going for a road test.