

nlike your home, RVs have dual electrical systems: a 12-volt DC (direct current) circuit to operate appliances like the furnace and demand pump and 120-volt AC (alternating current) power to run air-conditioners, washers/dryers and refrigerators, among others. The network of wiring, connectors and outlets is fairly complicated — and when something goes wrong, chasing down the gremlins can be difficult. That’s why most people rely on professional help, but with some understanding of how these systems work, do-it-yourselfers can fare well when diagnosing and/or repairing electrical issues.
AC or DC
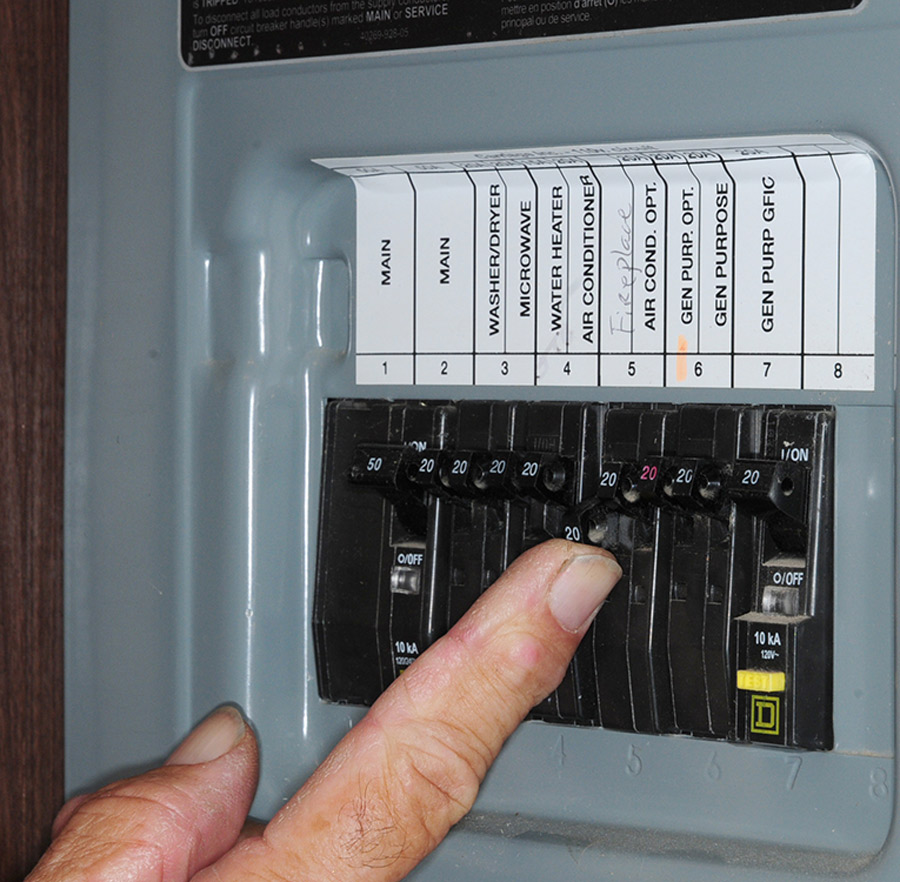
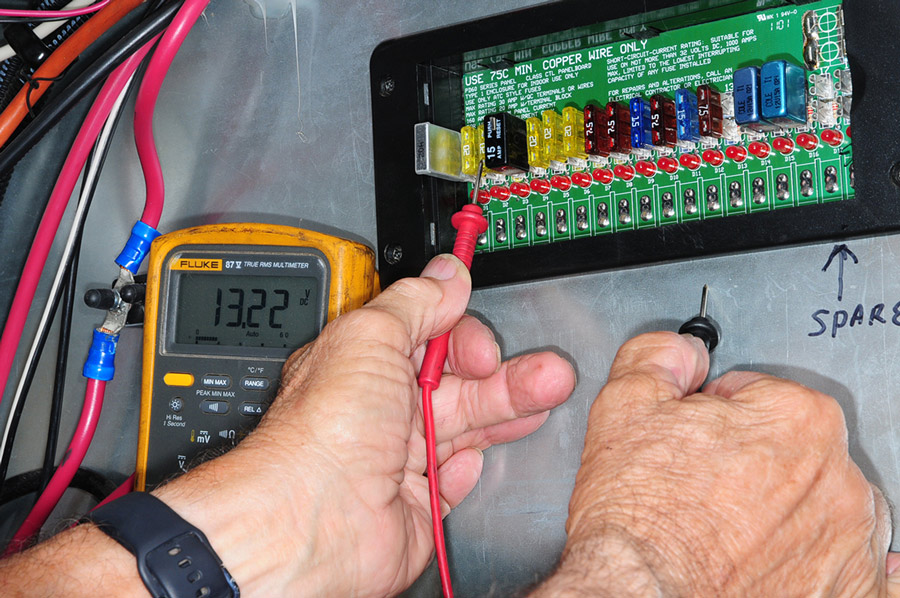
Electrical systems can be identified via their respective distribution panels. If the panel is fitted with home-style breakers, it’s feeding the 120-volt AC appliances and accessories and will be labeled accordingly. Those systems tied into a box or panel with fuses or small (push-in) breakers will operate on 12-volt DC power, and should also be marked clearly. One exception is the use of a 12-volt DC-style fuse within a circuit board, even though it’s powered by 120-volt AC current.
Direct current travels in a loop from the negative terminal on the battery, through the appliance and back to the positive battery terminal. If the loop is interrupted for one reason or another, the 12-volt DC light or appliance will cease to function. Unlike alternating current, DC current can be affected by corrosion or a bad connection on either the positive or negative side.
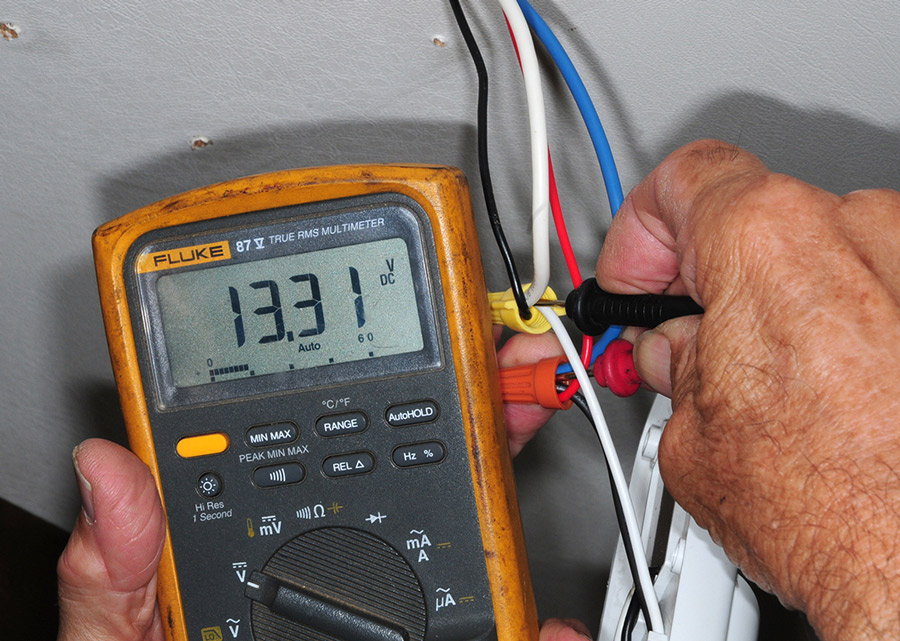
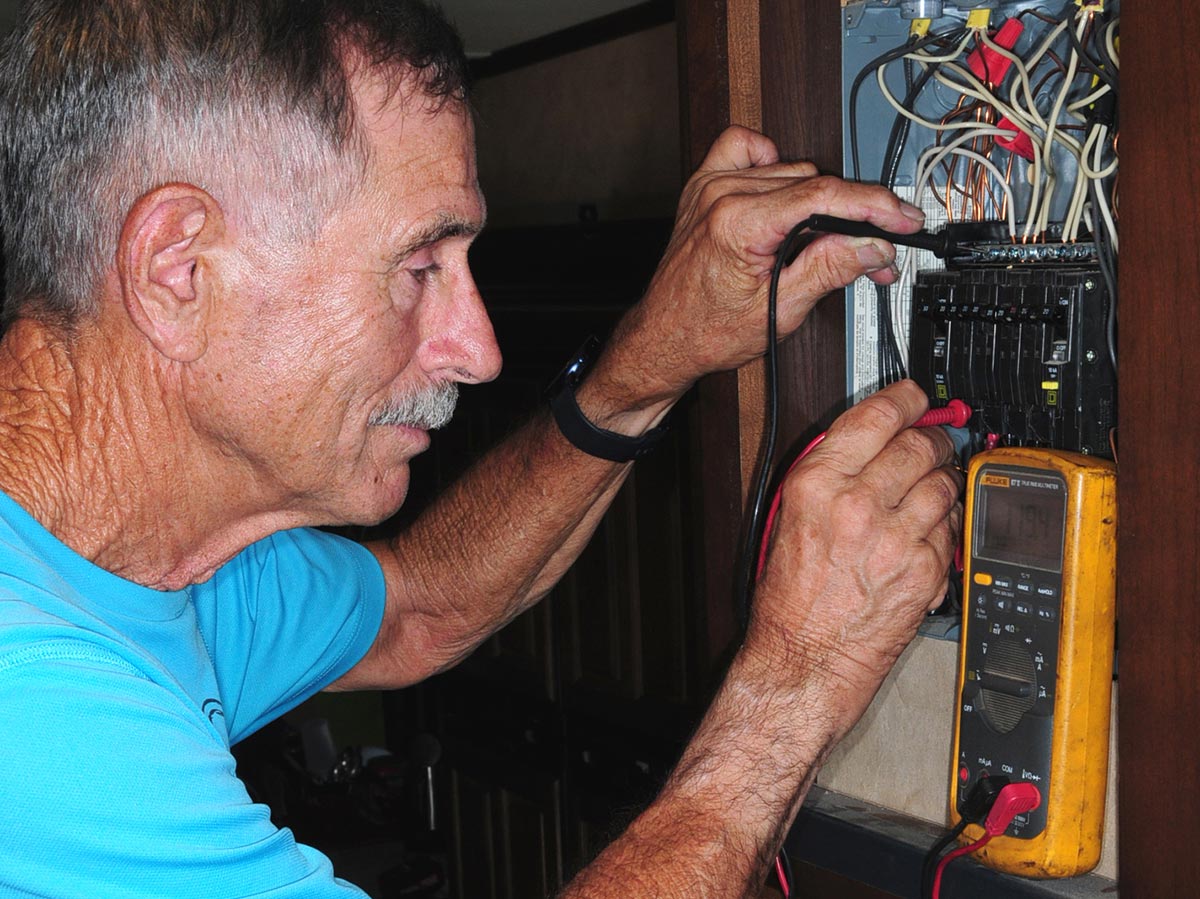
Alternating current, on the other hand, travels in a straight line. If, for example, the ground (or copper) wire fails, the appliance or an outlet will most likely continue to function but you’ll lose the safety factor. Should the white (common wire) or the black (hot wire) fail, a light or appliance will cease to function. A multimeter is used to diagnose AC or DC issues, and the process is similar. When testing for 12-volt DC power, you hold the appropriate leads on the positive and negative wires/terminals to get a reading; with AC, you will use the meter probes across the black and white wire and they do not need to be polarity-correct while taking a reading with your voltmeter. With a little knowledge on how to use a multimeter correctly, diagnosing can be much easier — and save your camping trip should a problem arise.
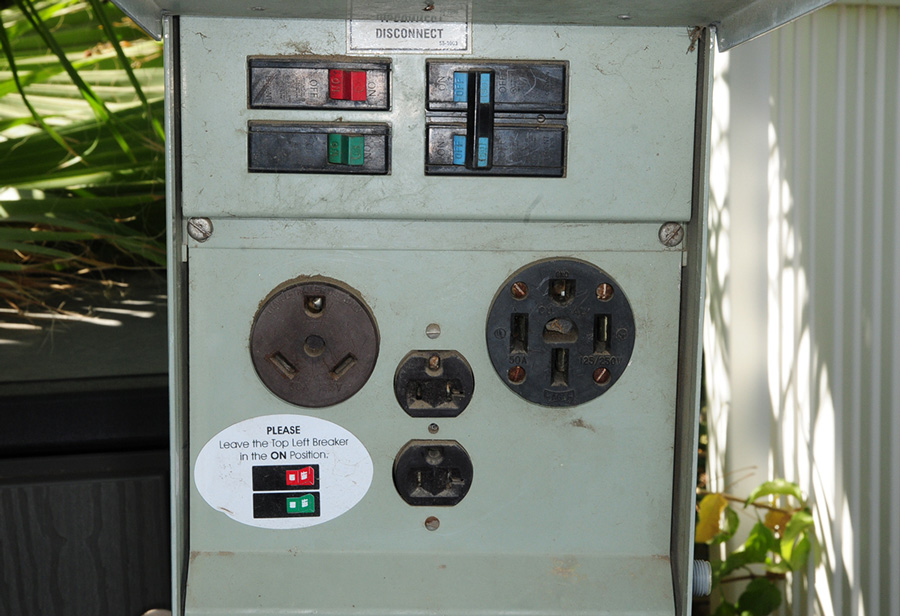
Basic 30-amp AC service in RVs is far less complicated than the 50-amp (technically 100-amp) systems found in larger units. The 30-amp system is just like it sounds, providing a maximum of 30 amps before the breaker trips in the park’s pedestal. (This, of course, can be plus or minus 10% and as the breakers get older — primarily due to the fact that most RVers use them wrongly as On-Off switches at the pedestal, which accelerates the effectiveness of the circuit breakers.)
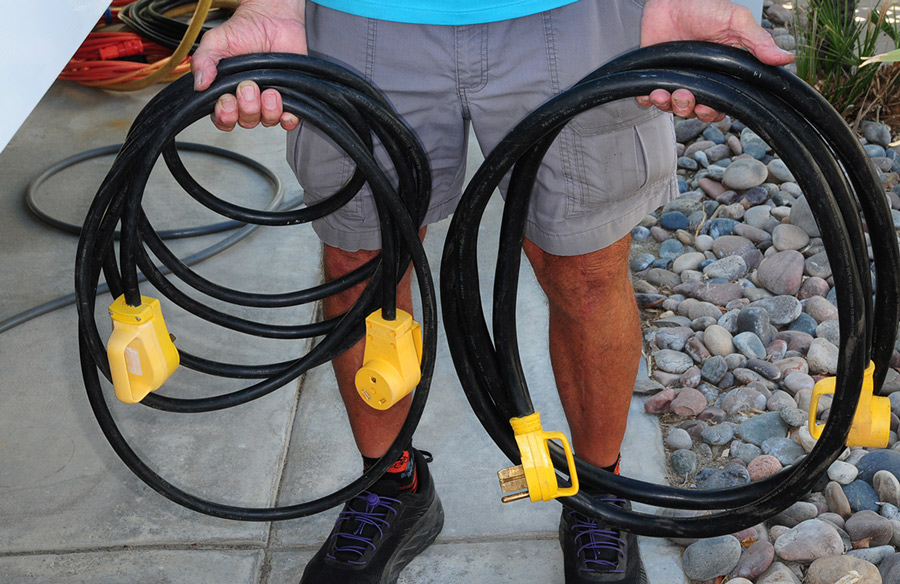
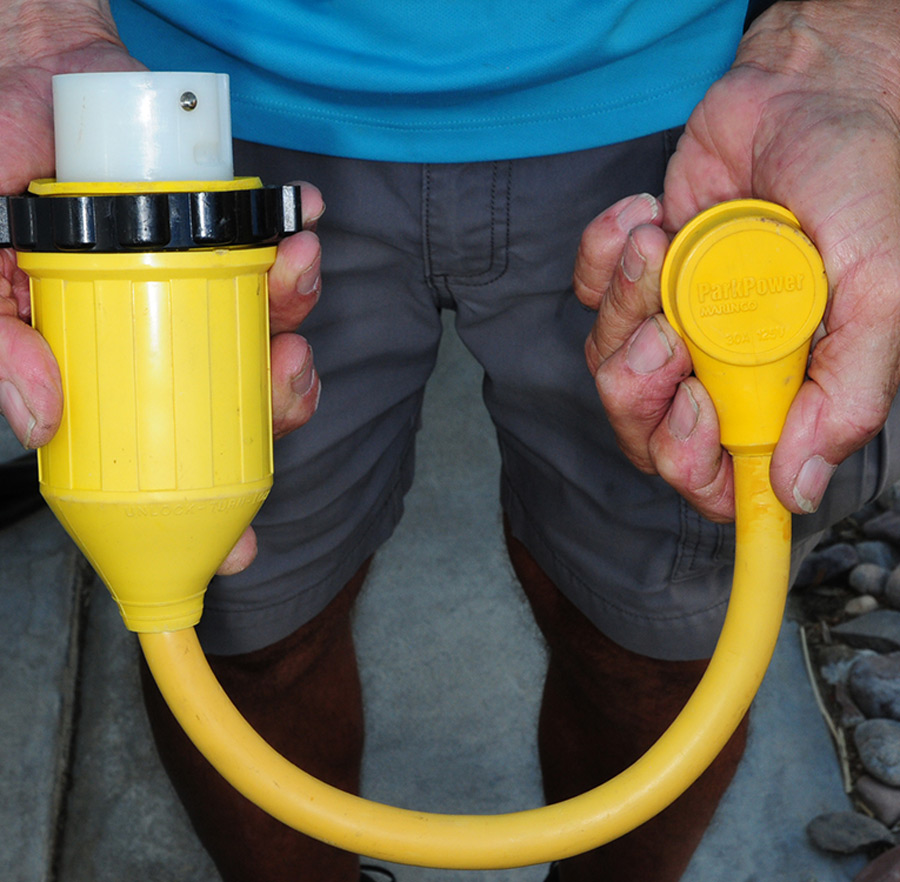
The plug for the 30-amp cable has a three-wire system: two angled blades connected to white (common) and black (hot) wires, while the ground has a round or U-shaped terminal. All 30-amp power cords, extension cords or adapters have the same wiring schematic and configuration. Some owners are tempted to plug their RV power cord into the dryer outlet in their home garage, which shares the same plug configuration. However, in a residential environment this outlet is connected to 240-volt AC power, which will fry all the appliances and accessories in their RV.
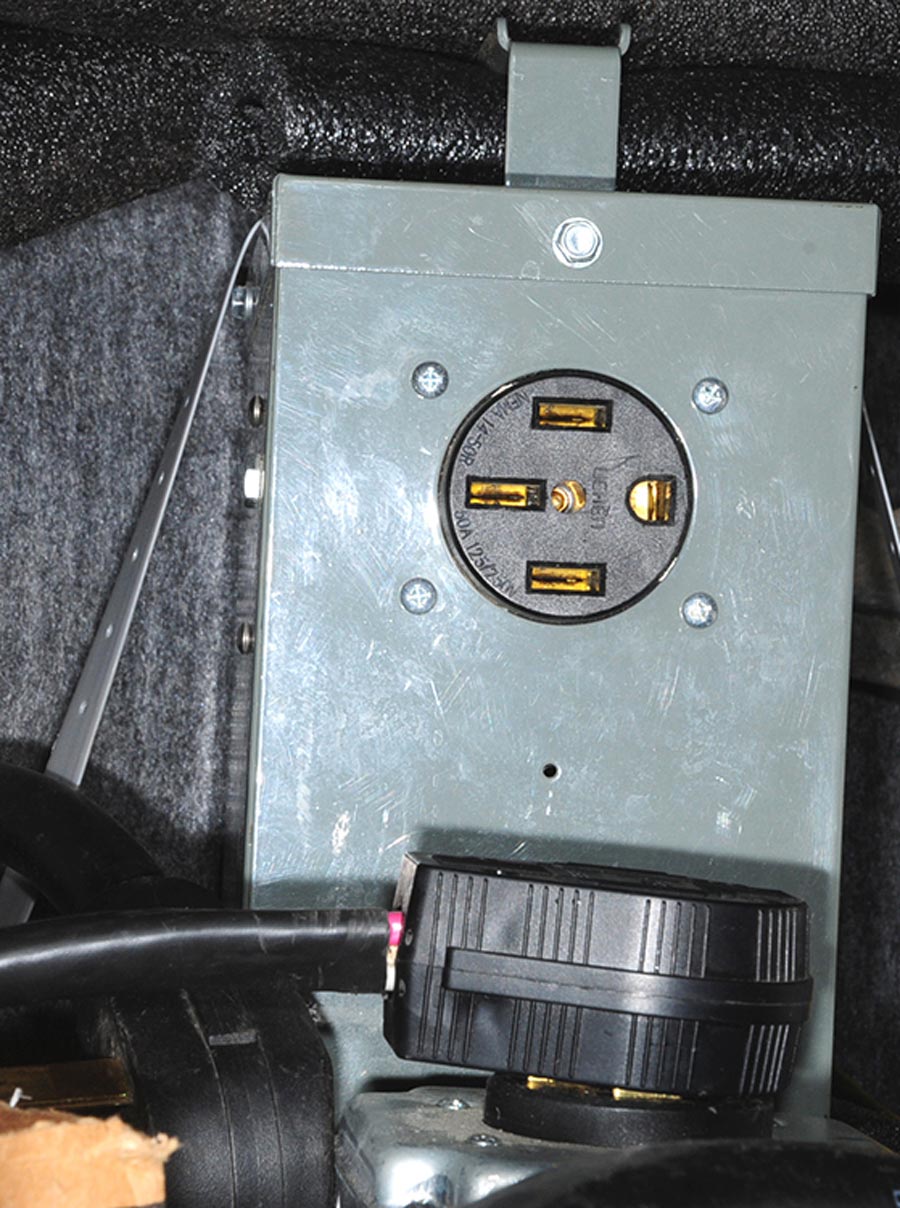
One-hundred-amp service (commonly known as 50-amp service in the RV world) is more complex. The power distribution center on the utility post has two 50-amp breakers with a total capacity of 100 amps that is routed to the RV. This is where it gets a little bit confusing, as some people think that there’s 240 volts AC when, in fact, there are two pairs of 120-volt AC power that are out of phase. This means that there are two power leads and only one common wire and one ground. The two power wires, one black and one red, need to be out of phase so that the single white common wire is prevented from being overloaded. If the system was wired as 240 volts AC, serious appliance/accessory damage would result. If you need to use a 50- to 30-amp adapter, it simply eliminates one of the hot wires, normally the red wire. They do make 30- to 50-amp adapters, which are rarely needed since pedestals in most parks with 50-amp service also have a 30-amp provision.
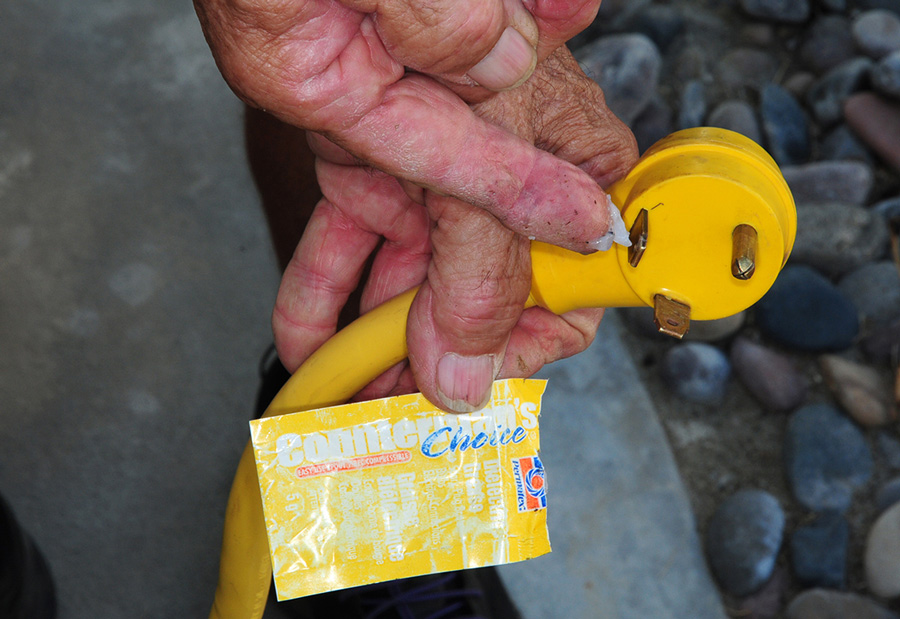
Before hooking your power cord to the park service, it’s good practice to check voltage at the 50- or 30-amp service just to be on the safe side. If using an adapter, check to make sure the terminals have not overheated and started to melt the plastic or rubber. If the terminals are corroded, dirty or black from friction, take the time to clean them with sandpaper so that the brass color is restored.

Adapters and power cords can be difficult to plug in and unplug because the terminals need to be very tight to avoid excess heat and melting of the adapter or the power cord end. I suggest using dielectric grease (Permatex 22058 Dielectric Tune-Up Grease on Amazon for $8.99) to coat the terminals; this is is commonly used in the automotive industry for connections under the hood to make them waterproof. Dielectric grease, for example, is also used for spark plug boots so they can be released easily after many miles of heat and dirt build up.
I found that it does not pay to buy cheap electrical adapters because the terminals can be too short and the material used to make the adapter can be inferior, which can lead overheating problems. Marinco (marinco.com), for one, makes high-quality power cords, extension cords and adapters. Replacement ends for power cords are also available should your terminals and surrounding casing become damaged. Adapters with pigtails are your best bet.
Another common problem is the end separating from the power cord, thereby exposing the internal wires. Installing a replacement end should be done before you go out on a camping trip to eliminate surprises. When installing these replacement ends making sure that all of the wires are in the correct positions is critical — if you are not sure of the process, leave this job to professionals to avoid electrical malfunctions or, even worse, electrical shock.
Need an Extension?
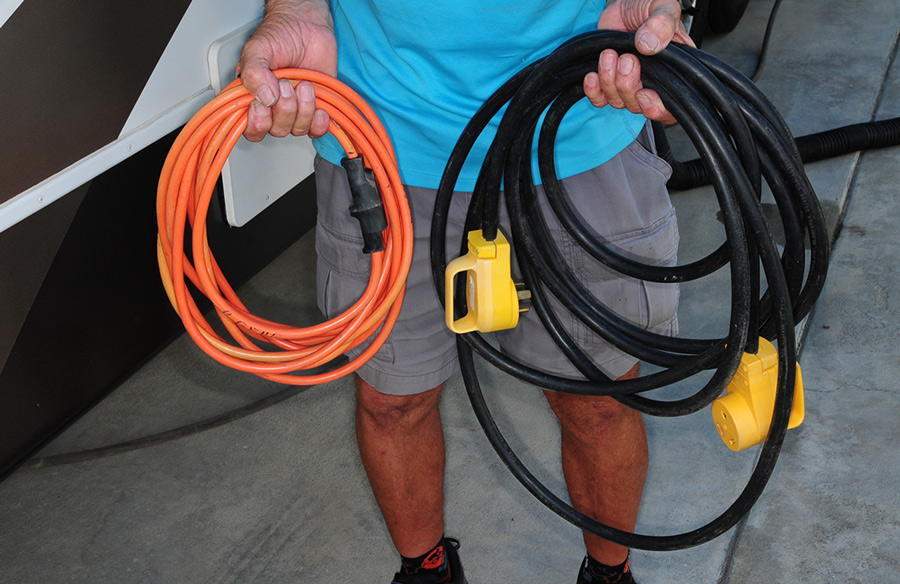
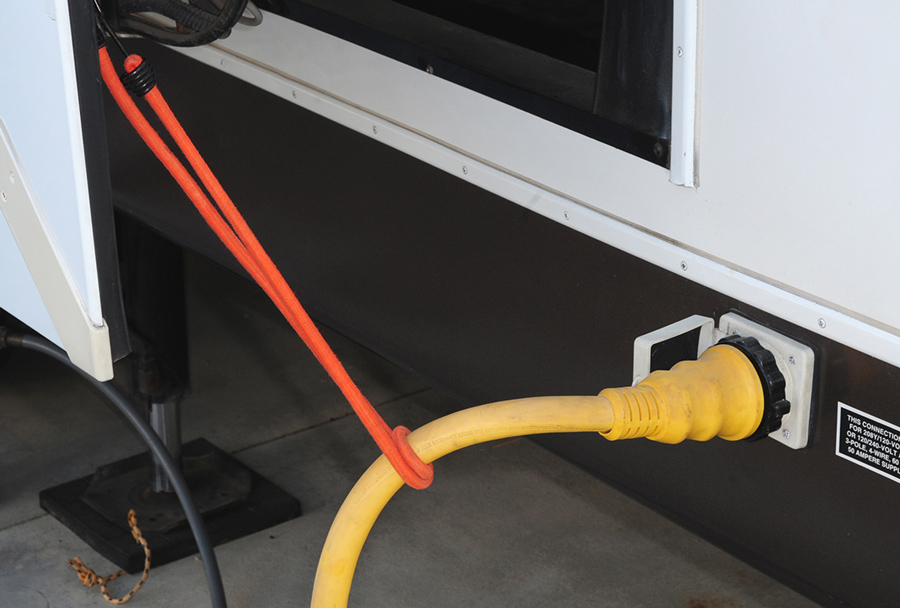
Adequate-size extension cords can be very important, especially when pushing them to their rated limit. Ten-gauge wire should be used for 30-amp extension cords while 50- amp cords are typically comprised of 8-gauge wire in order to handle their respective rated loads; do not use a 12-gauge extension cord for 30-amp. When using extension cords, length matters; the longer the extension cord, the more voltage loss. Normally, I do not recommend any more than 25 feet of properly rated extension cord for either 30- or 50-amp service. Voltage loss due to extension cord issues can lead to damaged electrical appliances such as the microwave, air-conditioner or other sensitive components.

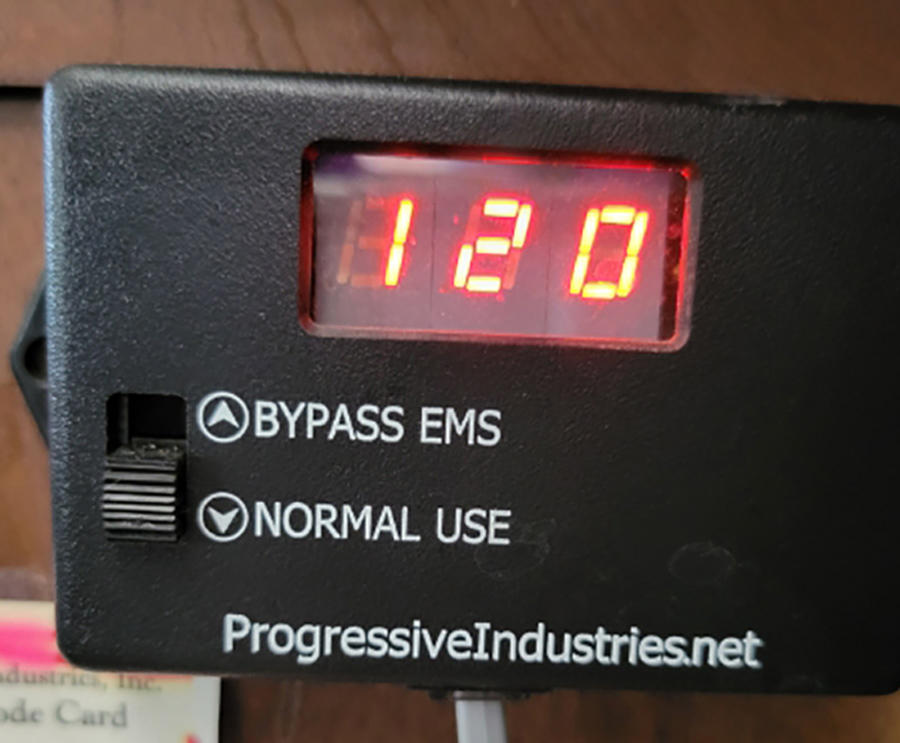
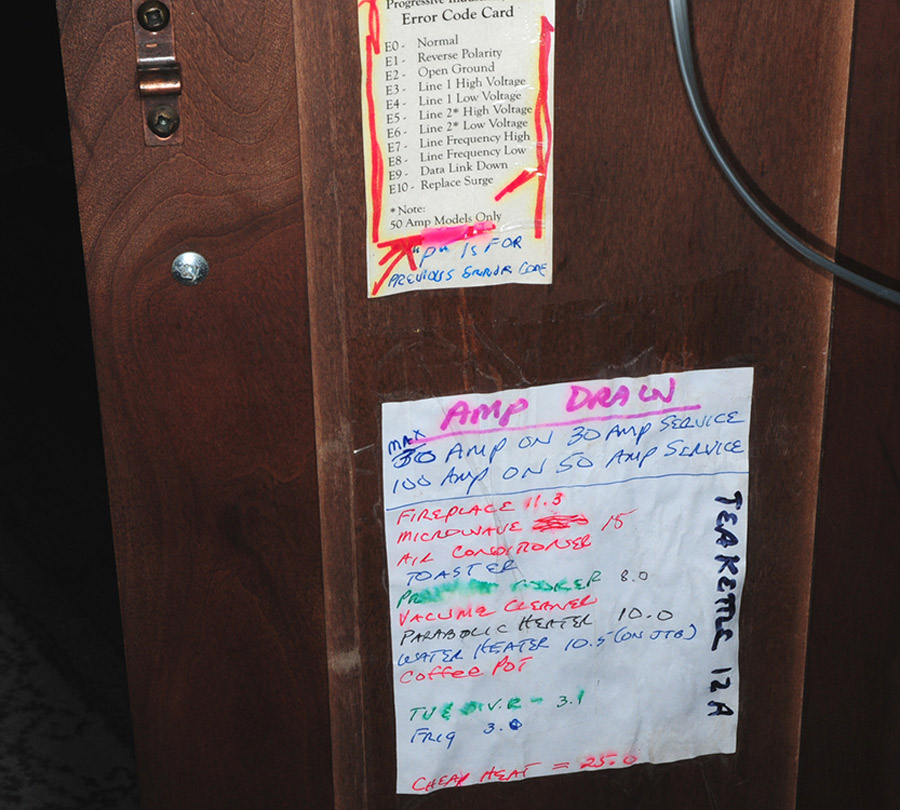
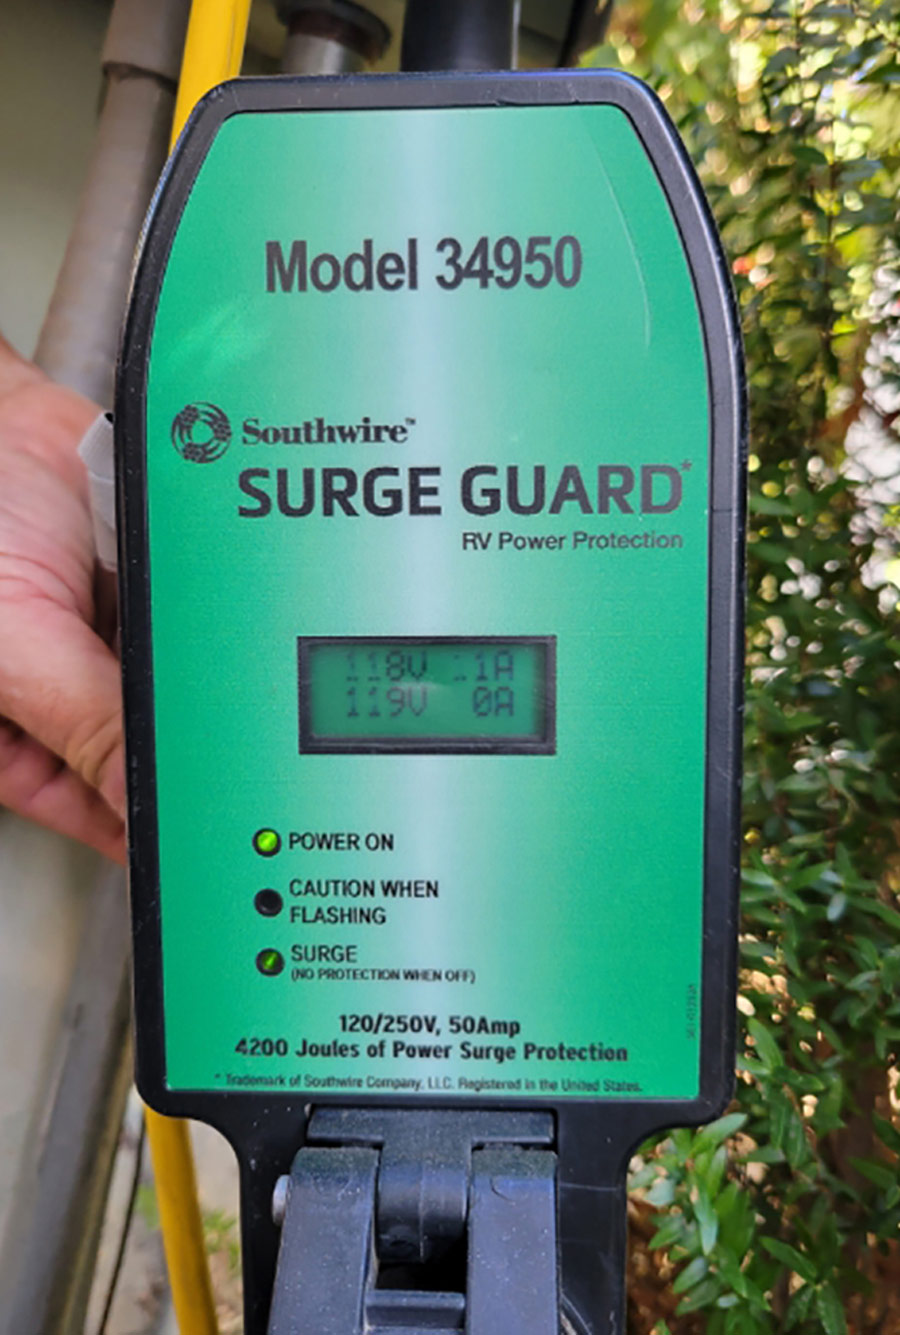
It is a good idea to keep a voltmeter, preferably digital, plugged into one of your outlets for a quick glance of what’s happening in your AC system — some RVs are equipped an electrical management system (EMS) with a remote readout. The EMS shown on these pages, EMS-LCHW50 from Progressive Industries (progressiveindustries.net) is a valuable tool that allows you to track the loads placed on the available hookup power; it comes with a remote monitor. An EMS can protect appliances/accessories from low or high voltage and some models even protect from lightning strikes. It’s well worth the money when you consider the damage this can do to your RV appliances. These devices are also available on the aftermarket and can be installed by do-it-yourselfers with electrical experience. Portable surge protectors can also be equipped with readouts to monitor power output.
Another item that I would not be without is a Hughes Autoformer (hughesautoformers.com), which also protects your system from low voltage by boosting the voltage to a normal level. The Autoformer comes in either 30-amp or 50-amp capacities. The Autoformer provides several functions beyond boosting power: it protects the system from power surges resulting from electrical storms or faulty hookup power, and it has an onboard diagnostics feature to help solve common voltage variation problems. Low voltage can damage air-conditioners, leading to compressor overheating, which can shorten service life. Normally, air-conditioners can function on the low side at around 106 to 109 volts AC, depending on the make and model. This is where the readout from either an EMS or voltmeter plugged into an outlet can help you.
On a Pedestal
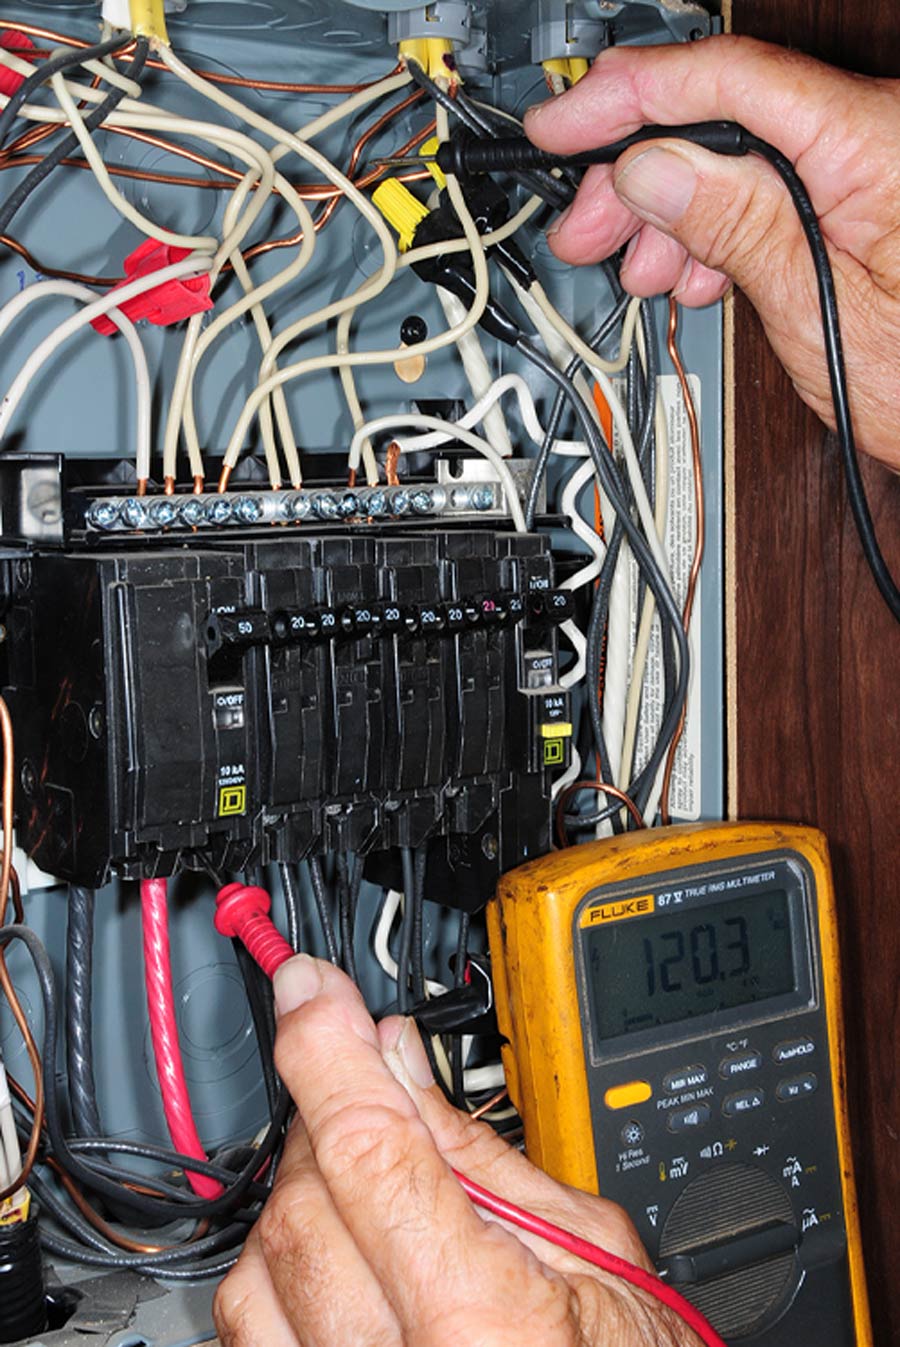
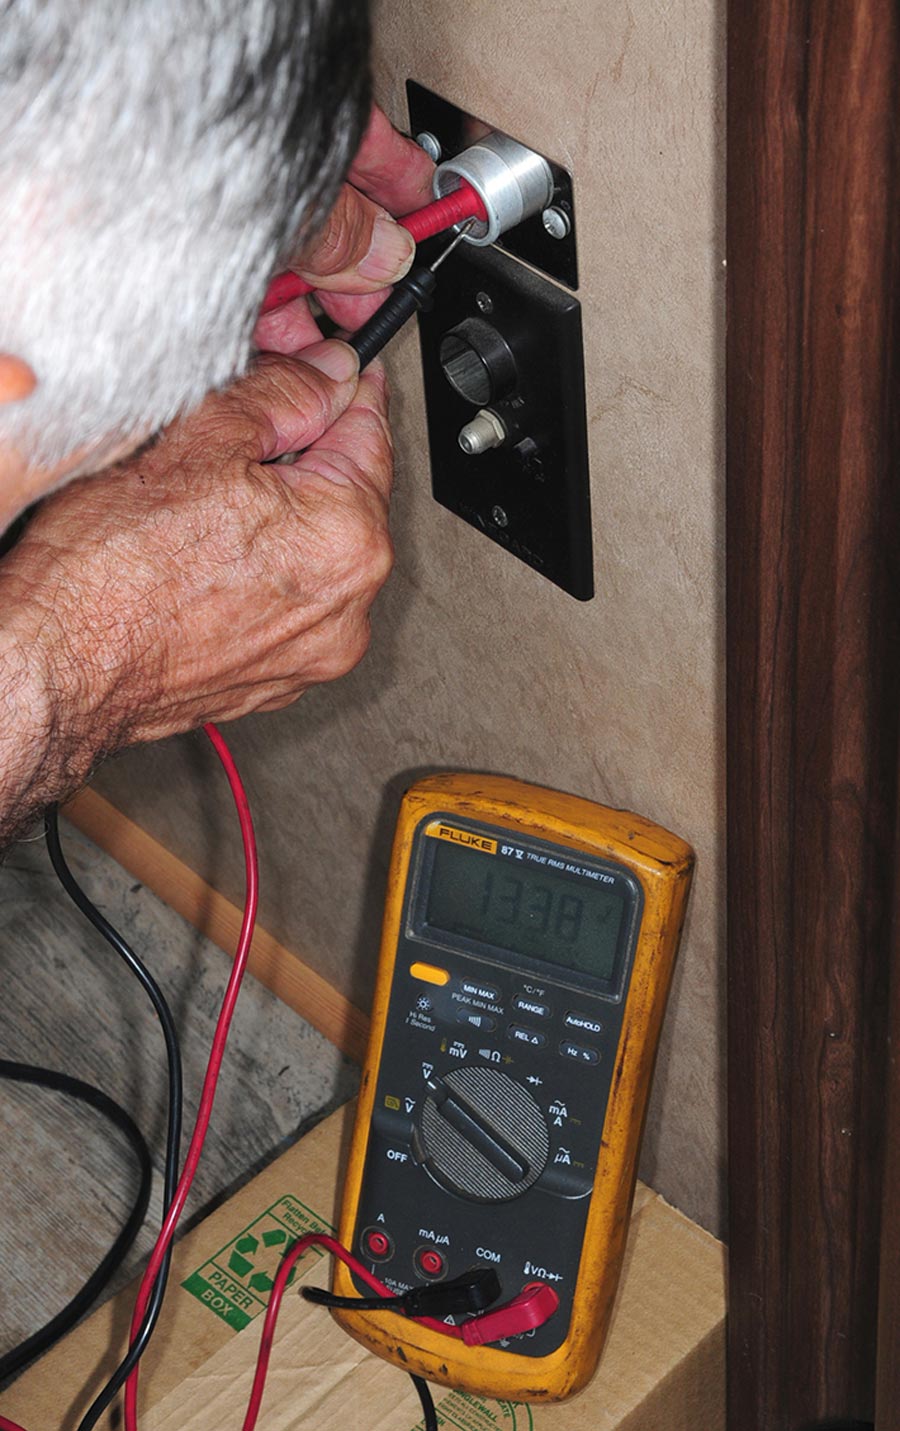
Using a handheld voltmeter (multimeter) will allow you to test the power at the park’s pedestal, the circuit breakers, ground fault circuit interrupters (GFCI) and circuits that may or may not be overloaded. Use your voltmeter to test the static voltage before plugging into and loading the park’s service. If the voltage is too low from the outset, it’s only going to get worse when you plug in and start to add heavy loads. Always discuss problems with the park manager and ask for a site relocation if the pedestal cannot be repaired in a timely manner.
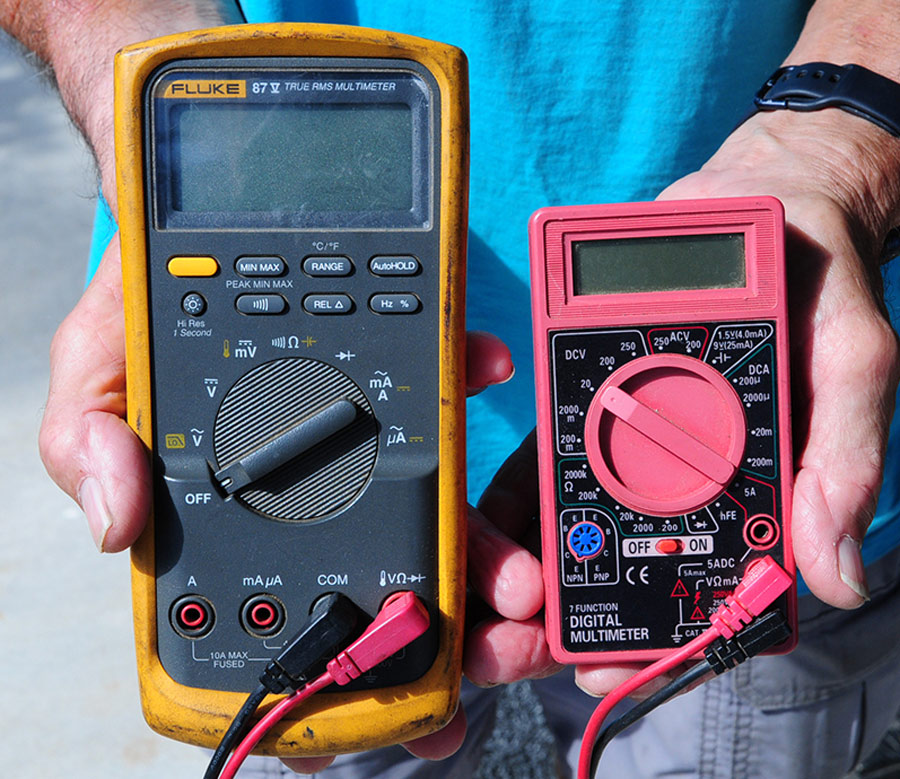
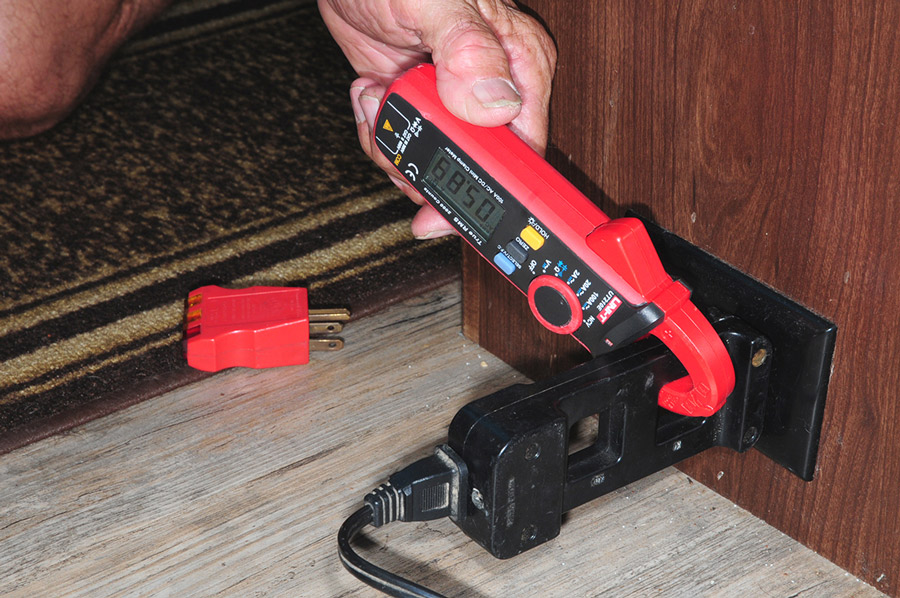
There are dozens of handheld volt/ohm meters on the market. While you should refrain from using a cheap multimeter, it’s also not necessary to buy an expensive Fluke meter (commonly used by professional electricians and auto mechanics). A multimeter with a clamp-on induction DC-voltage capability is most versatile for RVers. One thing that’s quite handy is the ability to read resistance or ohms when testing wire or terminal continuity; most have audible tones to help with diagnosing continuity. You should be able to find a decent meter for around $40 or $50.
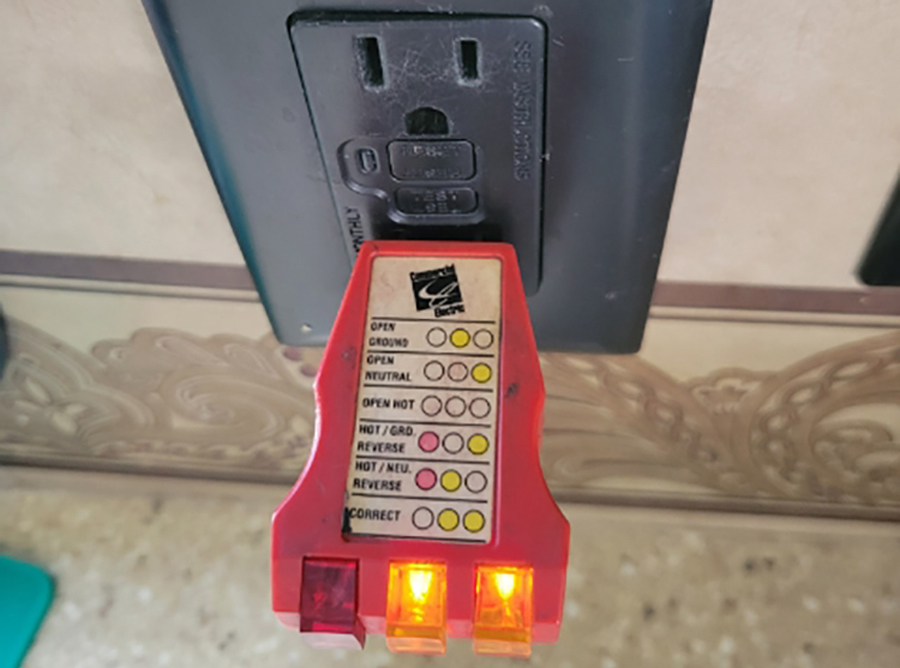
Polarity can also be an issue with park power — and some appliances/accessories may not be resistant to reverse polarity and lead to failure/damage. Unfortunately, voltmeters will not diagnose reverse polarity. Your best bet is to use a simple plug-in device, like the Bastex Socket Tester (available on Amazon for $8.99) that will show whether polarity is correct, if one of the power legs is dead and provide other pertinent information depending on the model of the device. I recommend plugging this device into a wall outlet and leaving it there permanently, making it easy to check every time you hook up — or want to monitor at a glance.

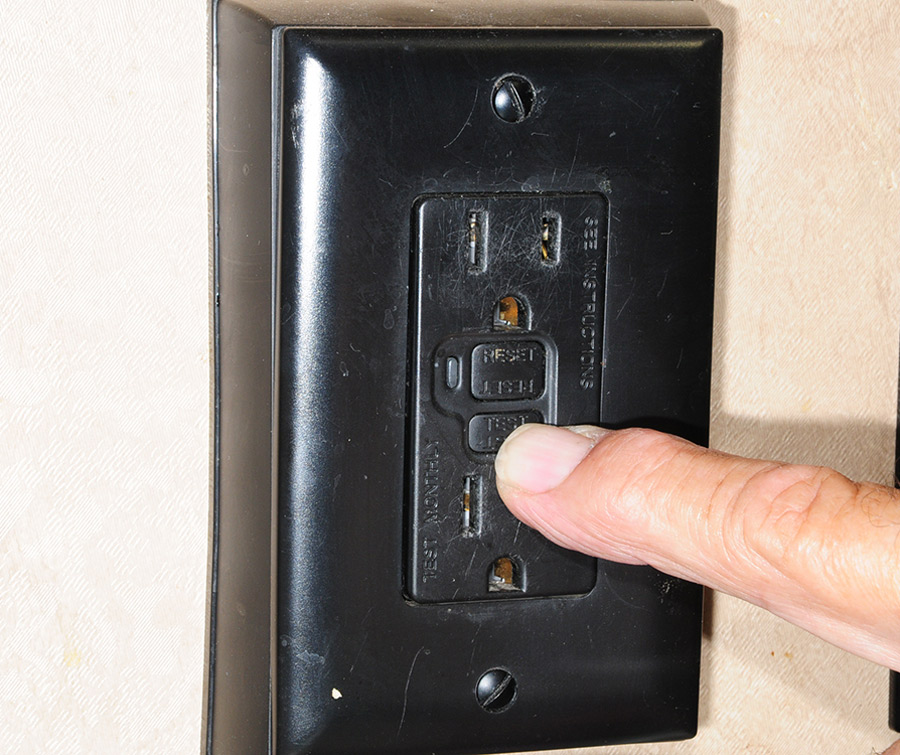
It’s not uncommon for an RV to have ground-fault circuit interrupter (GFCI) problems and sometimes these safety devices — which can be located in obscure places — can trip and interrupt two or three other outlets, including the refrigerator and/or power converter. GFCI outlets should be tested and reset periodically. The basic reason for this is to make sure that they will prevent electrocution when using appliances around water or moisture. These safety devices are more susceptible to failure if they’ve been tripped several times. GFCI outlets come in 15-amp or 20-amp versions, so make sure that you get the proper model and type for your particular application if replacement should be necessary.
If a GFCI needs replacement, pay close attention to the Load and Line terminals; if they are wired backwards, the GFCI will not function. It is not uncommon for RVs to also have a GFCI in the power distribution panel along with the other breakers, as well as one in the wall in the galley area and/or the bathroom. It’s never a good idea to replace a GFCI with a standard outlet.
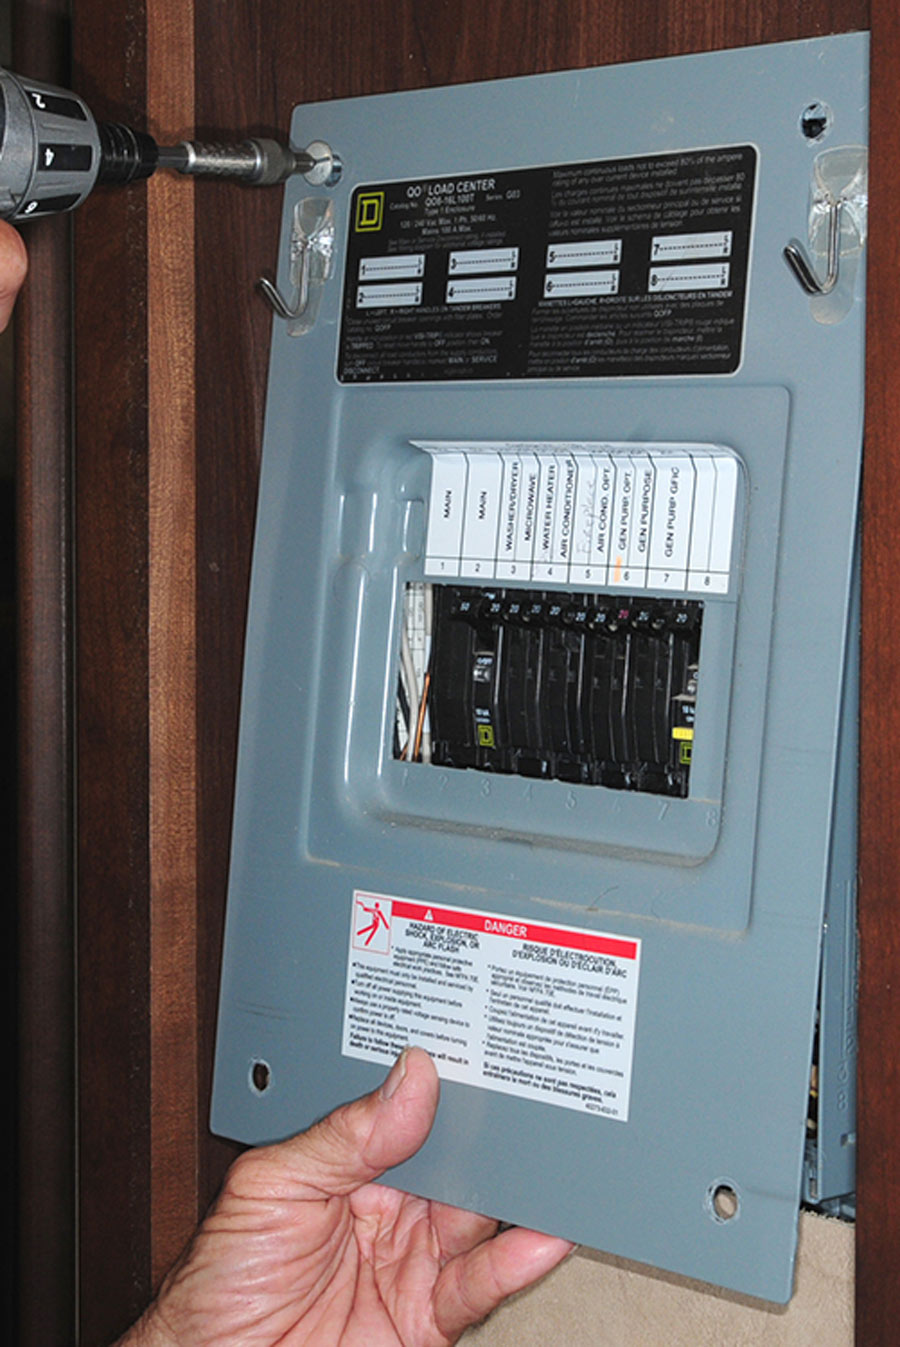
Distributing the Power
Power distribution panels are often overlooked and can become dangerous if they become cluttered with heavy lint, pet hair and/or a huge amount of dust. Every circuit breaker has a black (hot) wire attached via a clamp with a screw at the bottom of the breaker. Depending on the installation of the breaker, the wires can come loose and, with enough amperage, they’ll build a lot of heat — which will melt the insulation around the black wire and burn the wire itself, causing a poor connection. It’s good practice after the first couple of years of ownership to remove the cover to the distribution panel annually (after making sure that the power is disconnected) and check the screws that clamp the black wires in place. While you’re there, check all the set screws that keep the white (common) and the copper (ground) wires in place; these can come loose and create a poor connection, which can result in high heat and consequential failure of appliances and/or accessories.
Rigs that have a large inverter (2,000 watts or more) typically require the use of a subpanel with breakers for the appliances that are powered by the inverter. These subpanels are usually close to the main distribution panels and the breakers should also be inspected annually. The inverter often has its own GFCI, which can cause service interruptions. Get familiar with the rather large inline fuse, which should be close to the battery bank — the closer to the battery the more effective the fuse in providing a safety cut-off.
Most inverters have controls built into the housing that can be used in case the remote panel ceases to function for some reason or another. Periodically test the voltage coming from the inverter supplying the RV to check for high or low voltage. This is where an accurate voltmeter is useful, because only two or three volts can make a big difference. Use caution when testing and working on an inverter; they supply household voltage, which can result in a shock. When troubleshooting the inverter with a voltmeter, be sure to check battery voltage when the inverter is in the On position and powering an appliance; check the owner’s manual for the parameters for high and low voltage — low voltage generally will cause the inverter to shut down. If that’s the case, leave the inverter segment off while charging the batteries.
Inverters have come a long way from the old days when they were only capable of producing a modified sine wave. Computers and sensitive electronics require the use of true sine wave power (similar to household power), which is now provided in RVs. Troubleshooting an inverter can be extremely complicated; some remote panels will give you an idea of performance using codes that can be deciphered and cross-referenced with repair guides. Other than testing to determine whether it has the proper 12-volt DC input, it’s going to be very difficult to troubleshoot issues without a background in the inner workings of an inverter. If the inverter has the proper input voltage and fails to provide power, consult the owner’s manual for the reset procedure. If the inverter refuses to come on, try disconnecting it from the battery for 30 minutes to see if it will reset.
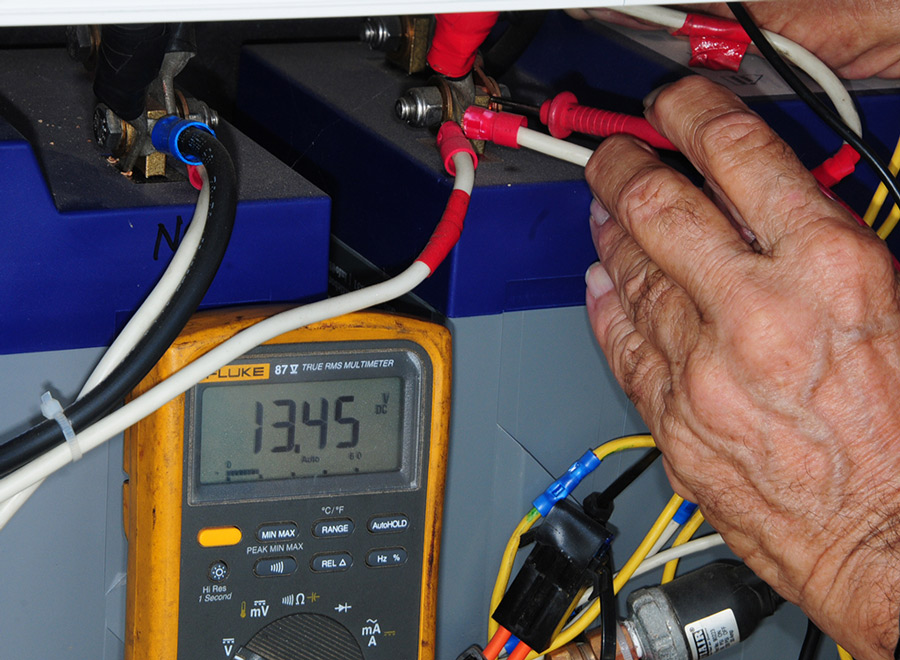
The 12-volt DC system in your RV is necessary to operate appliances like the furnace, demand pump and, in most cases, the refrigerator. Armed with a multimeter, you can diagnose battery-power problems — and if you have clamp-on induction feature on the multimeter, you can check loads at any time. You can also purchase standalone amp meters that can be mounted in a cabinet or in a compartment for monitoring current draw. These meters can be quite handy if you do a lot of boondocking. While you’re checking the amperage draw from various appliances and components, keep a log to become familiar with battery performance. Make sure the terminals on open-cell batteries are clean and use a protectant to control corrosion. (This, of course, is becoming an extinct service procedure as more owners embrace lithium battery banks.) If you need to replace fuses or 12-volt DC breakers, make sure to use high-quality parts to avoid problems down the road.
A Clean Trailer Connection
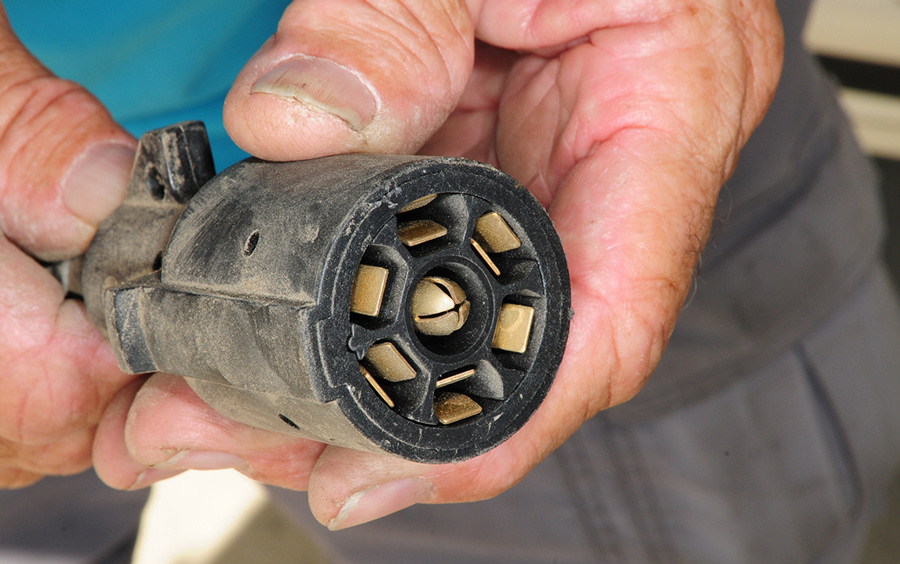
Last, but not least, let’s zero in on the 7-way power cord between the tow vehicle and trailer or motorhome and dinghy vehicle. Wires for the clearance lights, taillights, a good ground, electric brake controller and a positive charge line all run through a self-contained cable attached to the trailer/dinghy with blade connectors that easily plug into respective receptacles. Almost all towables and many motorhomes are equipped with a Bargman (or similar style) 7-way connector. Fortunately, they all use the same wiring schematic, which can help immensely when trying to troubleshoot a problem on either end of the cable. These connectors can build up a layer of corrosion, which will impact continuity. Clean these terminals on both ends with a small brass brush, followed by a coating of a continuity improver product like DeoxIT D100L ($25.99 on Amazon).
Most electrical problems can be easily diagnosed with the use of a good multimeter. Chasing down line breaks and terminal failure takes some time, but is not insurmountable to most owners with basic mechanical skills. Staying abreast of input and output voltages throughout your RV can result in early detection and timely repairs. As always, however, don’t be shy about consulting with professional help if issues are beyond your competence level.