Flat Out
[maghub_sidebar]
Flat Out
clipart of tire
Changing a tire on a trailer isn’t the same as on a car or truck — but with the right tools and techniques, you can be back on the road in no time.
By Chris Hemer / Photos by Chris Dougherty
I

f you drive, the chances are good that at some time in your travels, you’ve experienced a flat tire. It’s scary at first, but soon your mind catches up to what’s happening and you pull over. From here, you probably called roadside assistance or mounted the spare yourself. With a flat on your travel trailer or fifth wheel, it’s a different story. Roadside assistance isn’t always available for an RV and changing a trailer tire isn’t as simple as whipping out a jack, lifting the trailer and putting on a spare.

Honestly, it’s surprising that the practice of properly changing a tire isn’t better known — the procedure isn’t in the owner’s manual, and we’d be willing to bet that the dealership you purchased the RV from didn’t show you (or tell you) how to do it. But changing a tire on a trailer safely and without causing any damage isn’t difficult — you just have to know the correct procedure and have the right tools at your disposal.

The first thing that you should consider a must-have is a Camco Trailer Aid PLUS, a lightweight, super strong polymer ramp designed specifically for changing a tire on a tandem-axle trailer. On a triple-axle trailer, a single Trailer Aid PLUS ramp can still be used, then a trolley jack can be employed to lift the axle with the flat just enough to remove the wheel. Single axle trailers are commonly small and light, so on these, you can use a screw or bottle jack and some wood blocks on the frame (as close to the center as possible) to lift the wheel off the ground. In any case, You’ll also need a lug-nut wrench, correctly-sized thin-wall socket (a regular or impact socket won’t fit inside the recesses of aluminum trailer wheels) and a torque wrench.
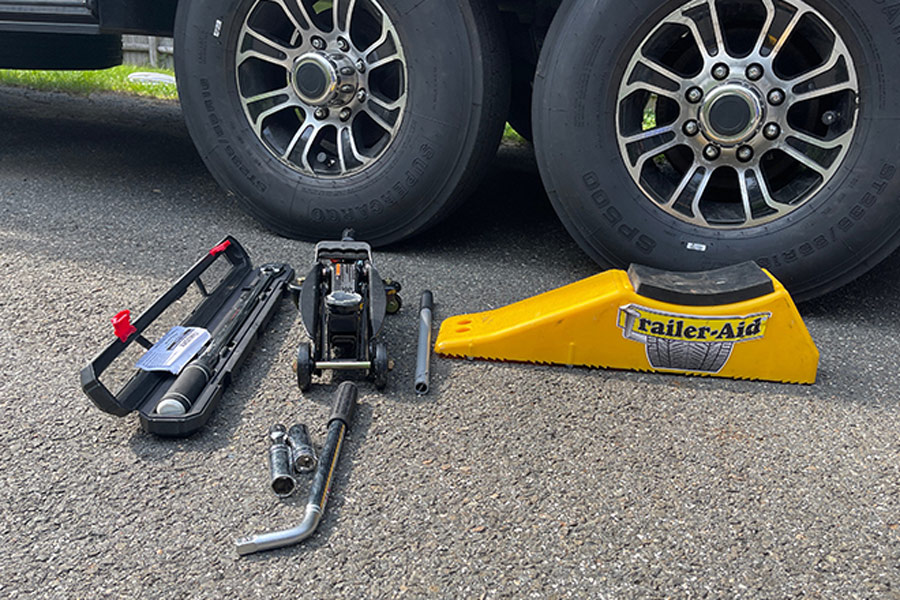
torque wrench, a trolley jack (small floor jack), wrench, thin-wall socket and a Trailer Aid PLUS
This is all you need to change a trailer tire correctly and safely on a tandem axle trailer: A torque wrench, a trolley jack (small floor jack), wrench, thin-wall socket and a Trailer Aid PLUS. You should also have some wooden or plastic blocks handy
As with changing a tire on a car or truck, the first step is to use the wrench to loosen the lug nuts on the wheel with the flat tire — you won’t be able to do this once the wheel is in the air, because it will turn. Just loosen them so that they turn easily with the wrench but not so much that the wheel is loose, because you still need it to safely support the weight of the trailer. Place the Trailer Aid PLUS ramp in front of (or behind) the good tire and pull forward/back up onto it (depending on whether it is a front or rear tire). The ramp raises the flat tire just enough to get it off the ground. From there, use the wrench to remove the lug nuts, then pull the wheel off the hub. To do this correctly — and to minimize the chances of damage to the hub or wheel studs — the lug nuts should be removed in a “star” pattern (see the illustration for the correct torque sequence on five, six and eight lug wheels for reference).

Travel trailers and fifth wheels come with a spare tire, which you should regularly inspect for correct air pressure and to make sure it is a suitable replacement — in other words, it’s in good condition and hasn’t “timed out” or expired. A small, inexpensive 12-volt DC air compressor is also a good thing to have just in case the tire is low and needs to be inflated to the proper level. Remove the spare, then put the spare wheel/tire on the hub. Tighten the lug nuts as much as you can with the wheel off the ground, then drive the trailer off the ramp.

Can You Change a Motorhome Tire?
Motorhome tire failures aren’t as common as those on trailers — but if you get a flat tire, can you change it yourself if need be? That depends entirely on the motorhome. Class B motorhomes are essentially van conversions, so changing a tire on one of these is no more difficult than a truck or, well, a van. Class C motorhomes obviously vary greatly in size, from 22 feet to more than 30 feet, but the one thing they have in common is a spare tire and an automotive-style frame; changing a tire on a Class C should present no more challenge than a pickup truck and the motorhome should have come equipped with the necessary jack and lug nut wrench. If not, a screw or bottle jack, some wood blocks and a lug nut wrench should help you get on your way. If your motorhome has leveling jacks, don’t use them to raise the tires off the ground; they are not designed for that purpose and could be damaged.

Class A motorhomes are a different story completely. Most don’t come with spare tires, and even if they did, they are usually too large, heavy and difficult to handle for one person, particularly those on diesel pushers. It’s best to keep your tire brand, size, load range and other information on hand, and contact roadside assistance with that information.
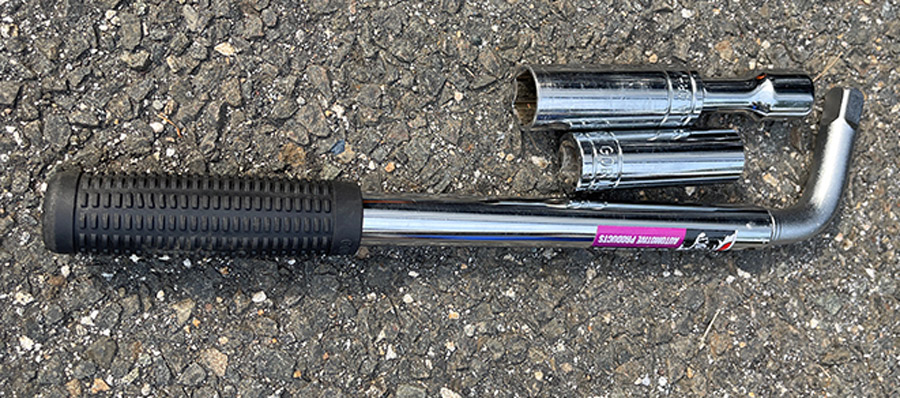

Gorilla Power Wrench
For this demonstration, we used a Gorilla Power Wrench, which includes a 3-inch extension and ¾-inch and 13/16-inch thin wall sockets, available on Amazon https://amzn.to/2W5knmE. The telescoping handle extends to 21 inches for maximum leverage but collapses to 14 inches for easy storage.
lug nut and the mounting hole on aluminum trailer wheels
There’s not a lot of space between the lug nut and the mounting hole on aluminum trailer wheels, so this is where the thin-wall socket comes in. The deep socket, combined with the 3-inch extension gets a good grip on the nut, and clears the center cap. Loosen the lug nuts before elevating the wheel.
Before you ever have to change a tire, look at your trailer owner’s manual to determine the recommended wheel torque. If you don’t have the owner’s manual, now would be a good time to get one, or consult with the axle manufacturer (i.e., Dexter or Lippert) to find out what the correct wheel torque should be. Begin tightening the lug nuts in sequence using your torque wrench. It’s good practice to start with the torque wrench at one third the specified torque, then tighten the wheel in the correct sequence. Repeat the process at about half the specified torque, then again at the final torque setting. A word of caution here: Though it may be tempting to use a battery-powered impact driver to tighten the lug nuts, don’t do it. It’s too easy to over-tighten the lug nuts and damage the studs, wheel or both. There are impact guns with torque limiters, but then you are relying on the accuracy of same — a torque wrench is still the safest bet.

Once the wheels are properly torqued, you’re ready to hit the road again—but be sure to re-check the torque after 10 miles, then again at 25 miles and at 50 miles to make sure the lug nuts are tight and you’re safe to travel to your next destination. And don’t forget to replace that spare as soon as you can.

Position the tire on the Trailer Aid PLUS ramp
Position the tire on the Trailer Aid PLUS ramp, as shown. Since both of the tires in this demonstration are inflated, there isn’t any clearance between the ground and the tire that’s not on the ramp, but in most cases there will be when the tire is flat (or shredded, as they most often are). If there is still no clearance, the trolley jack can be pressed into service to elevate the tire.
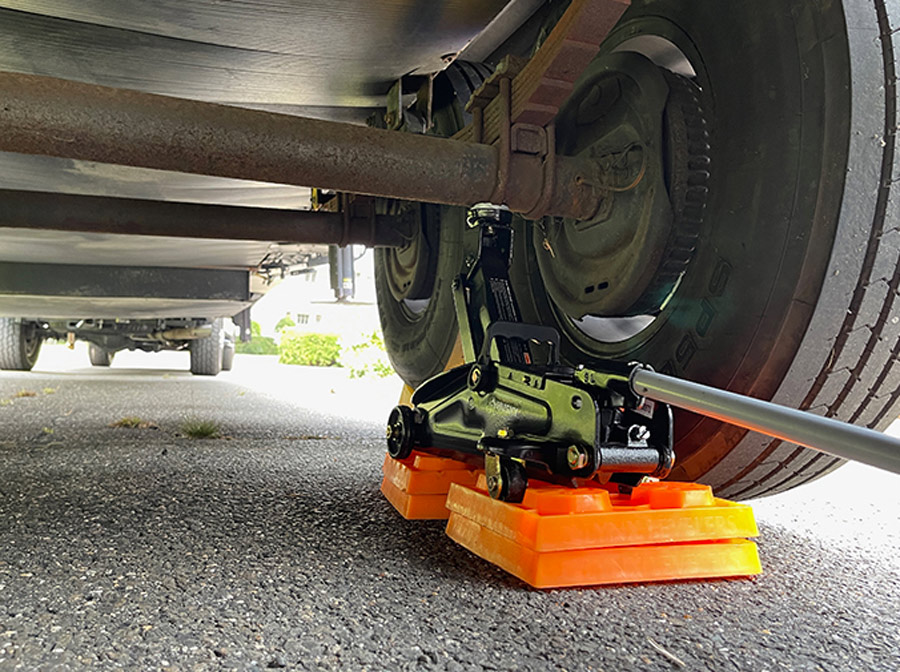
use some blocks and a trolley jack to lift the axle directly underneath the spring perch
If the tire does not clear the ground, use some blocks and a trolley jack to lift the axle directly underneath the spring perch, as shown until it clears the ground by a couple of inches. Since you are not lifting the full weight of the trailer in this scenario, there is no danger of bending the axle.
Torque the lug nuts in three passes
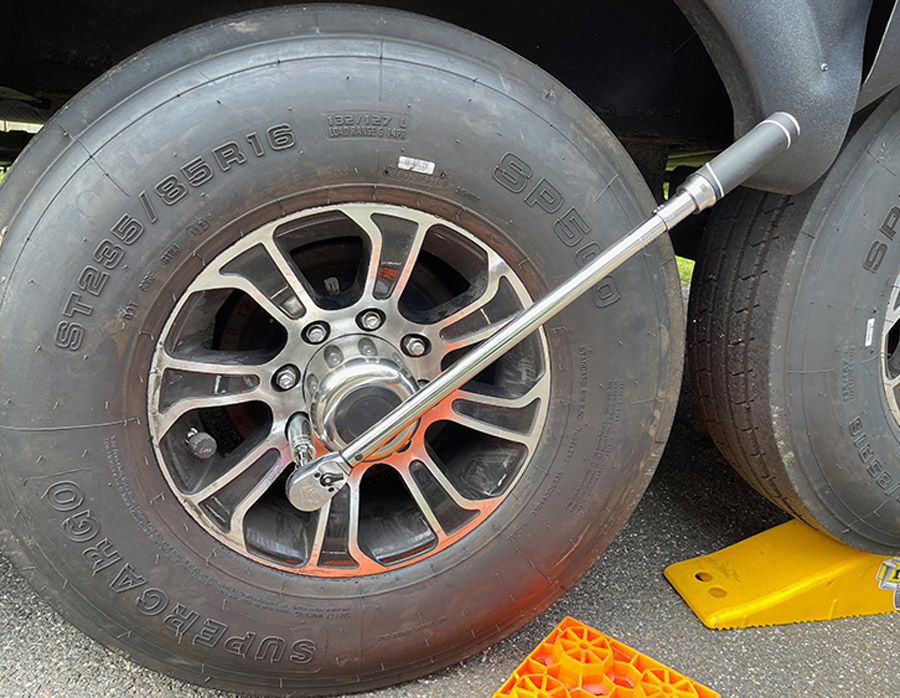
Torque the lug nuts in three passes, using the correct sequence for the lug nut pattern.
torque wrench handle
There are torque wrenches of all kinds on the market today, but this style is most common. Turn the collar until it reaches the desired torque value and you’re ready to go.
five-lug wheel torque sequence
six-lug wheel torque sequence
eight-lug wheel torque sequence
Torque-sequences: This illustration from Keystone RV Company shows the torque sequences for five-, six- and eight-lug wheels. These should be used when removing the wheel as well as re-installing it.