Aesthetically Speaking
[maghub_sidebar]
clipart stopwatch; Quick Tips & Tricks
Aesthetically Speaking
Sidewall transition seam molding on fifth-wheel beginning to fall off
Trim molding that’s falling off sidewall transition seams ruins the look of a well-kept RV. Finding matching material can be difficult — but restoring the original works amazingly well.
By Bob Livingston / Photos by Lynne Livingston and author
W

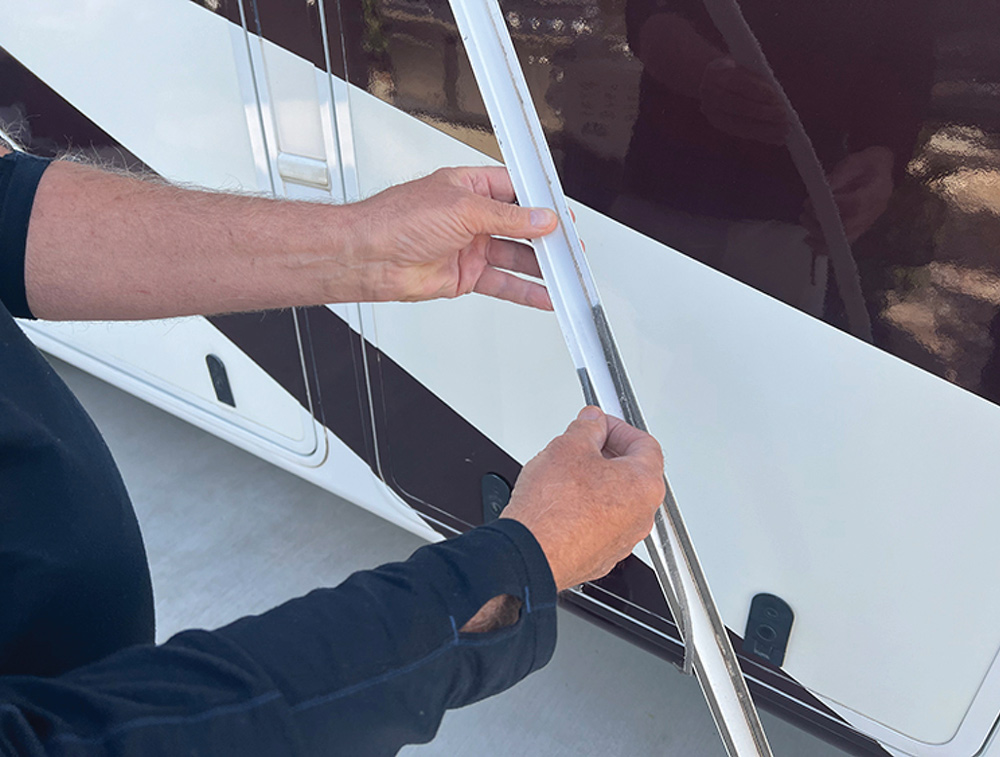
hen the trim molding that conceals the transition between the sidewall and lower section of a fifth wheel started peeling off, it was time to search for replacement material. While it’s possible to find various styles of trim molding, the people who sell this material are very proud of their prices — like, $10 a foot proud. Realizing that the molding was in relatively good shape (only discolored and losing the stickiness of the foam tape), the owner of this 14-year-old Teton fifth wheel made the decision to restore the finish and re-stick the molding to the sidewall.

At first, I chuckled at the owner’s thriftiness, but he’s retired and has a lot of time on his hands, so restoring the finish just meant more time to drink beer throughout the project. A rattle can (spray paint to car buffs and graffiti “artists”) of white paint, some fine-grit sandpaper, a few feet of double-sided acrylic foam 3M VHB tape and a tube of white silicone were acquired at a local home improvement store and on Amazon, and the project was on its way.

Removing the old trim molding
After 14 years, the molding on the sidewall transition seams of this fifth wheel was starting to peel off. It took very little effort to remove the molding and get it ready for restoration.
Sanding surface of molding before paint
The first step was to rough up the surface with 220-grit sandpaper. A tedious task, but necessary to make the paint stick properly.
The first step was to remove the remaining molding that was still stuck to the sidewall. The foam tape and silicone sealer were then scraped off the back side of the molding to make way for sanding; we also cleaned off the wall. Using 220 fine-grit sandpaper, the entire surface of the molding was roughed up to make sure the paint would stick and cure. From there the surface was cleaned with alcohol, sprayed with the paint and allowed to dry. The sanding was a little tedious and will take more time on longer sections of molding.

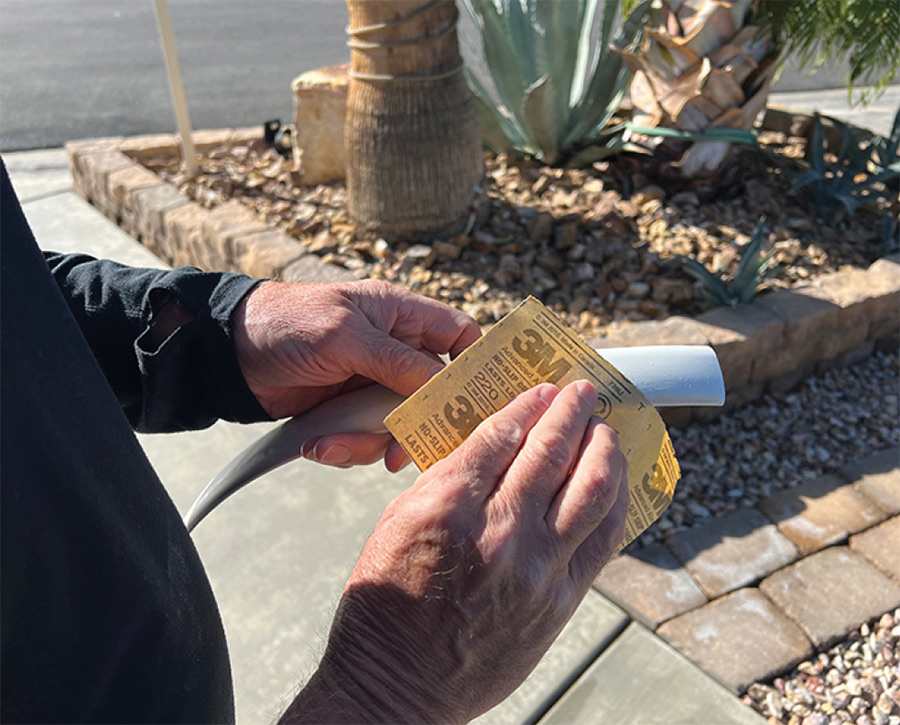
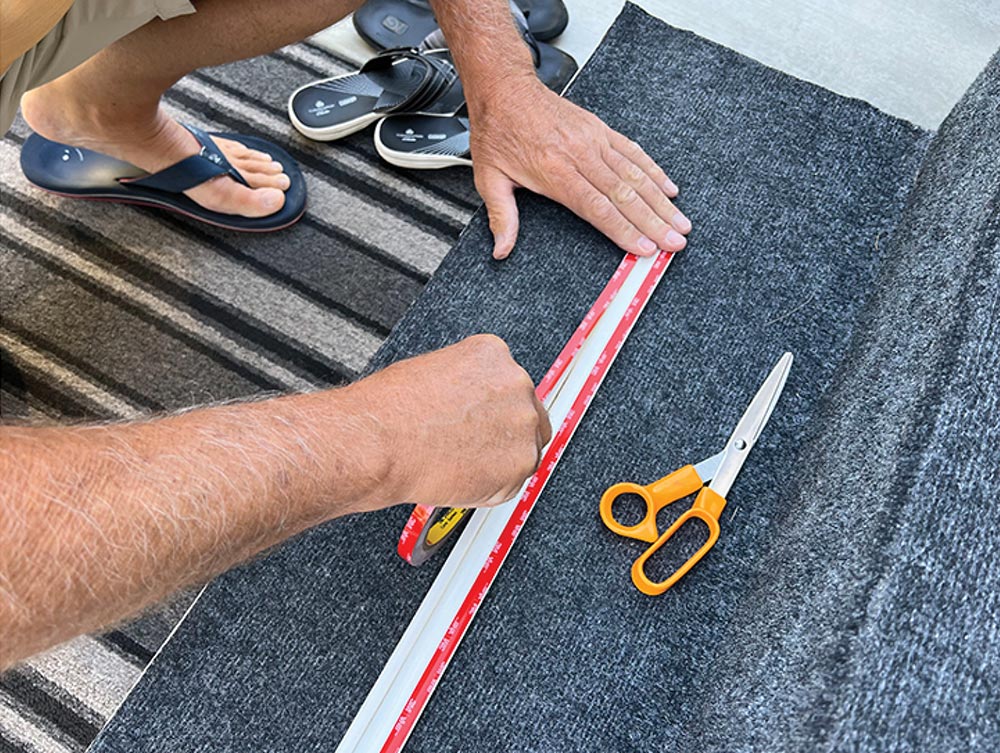
Amazingly, once the paint dried, the molding looked new. Two sections on the back side of the molding were lined with very thin 0.4-inch wide VHB foam mounting tape after cleaning with alcohol. (Refrain from using thicker tape because it will leave a bigger gap, which will ultimately look ugly.) The tape was procured from Amazon and cost $14 for 33 feet. You can also use the same foam tape that was applied at the factory, but the VHB tape has a stronger adhesive.

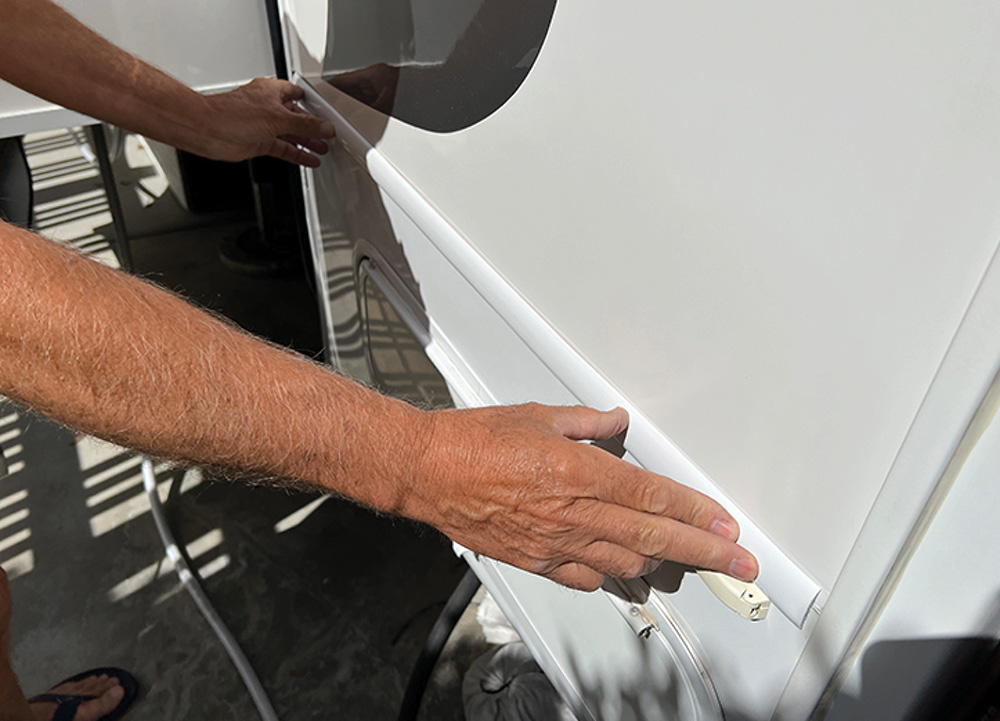
Finally, the molding was allowed to sit overnight to make sure the VHB adhesive cured properly, then the top and bottom edges of the molding were treated with a bead of white silicone rubber. To be honest, the application of silicone here was thicker than desired since the owner didn’t cut the tip at an angle and the tip was also cut too far back. The pros always cut the tip at an angle for this type of work to facilitate a more controllable application of sealant, which will mitigate time consuming clean-up and making smudges on the adjacent sidewall.

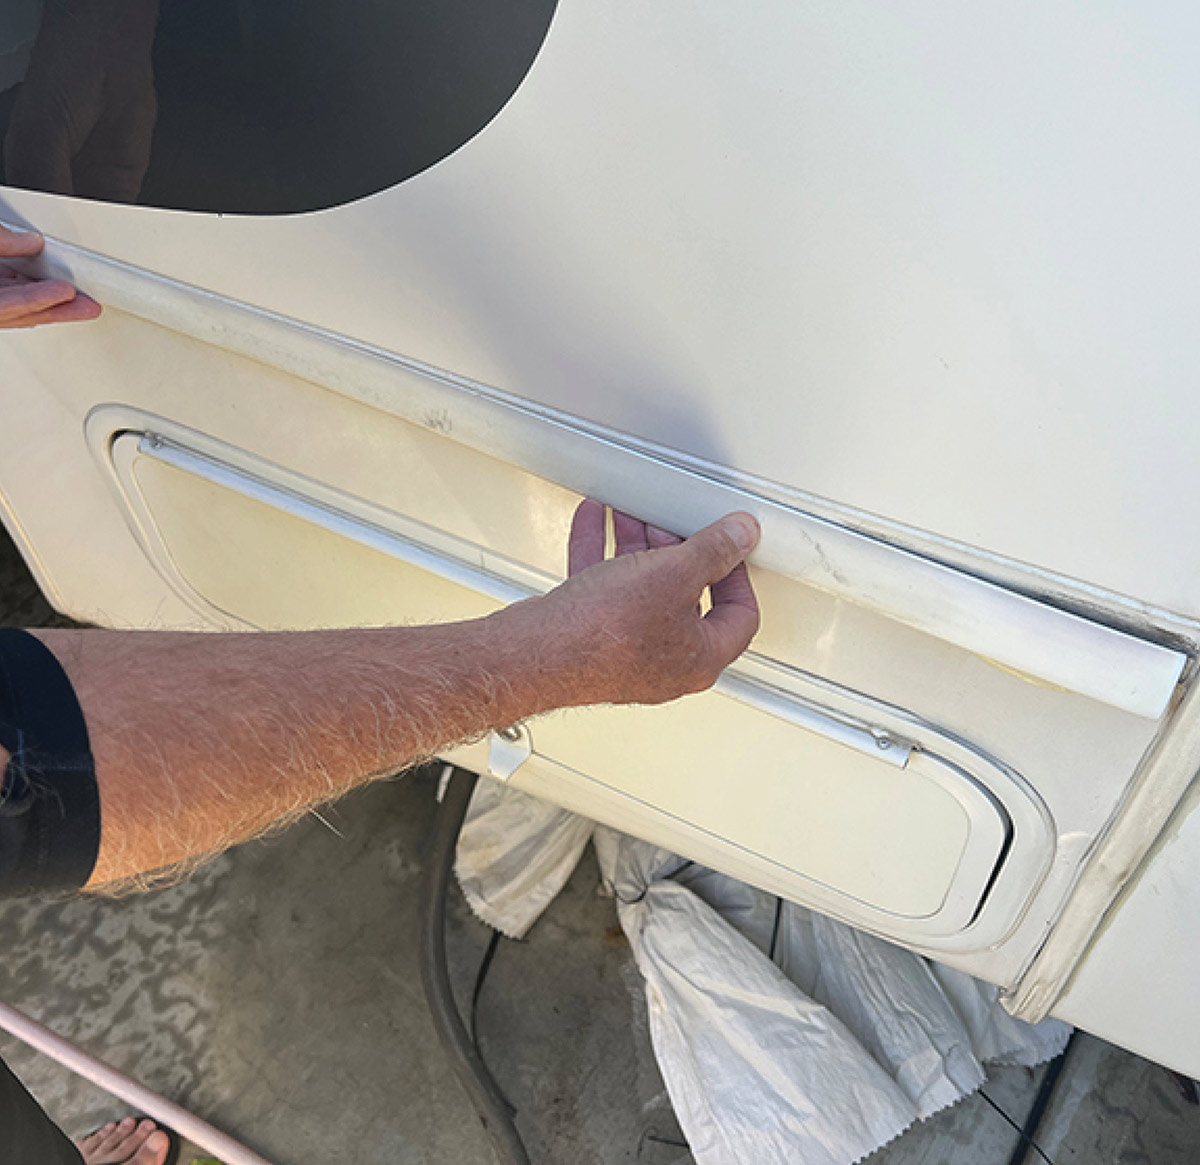
Sometimes, a little extra effort — as crazy as some projects seem — can go a long way toward restoring aesthetics.

Removing old foam tape from underside of molding
Originally the molding was attached to the sidewalls with foam tape, which actually did a good job for many years. All the remaining tape was removed from the molding before proceeding.
Spray painting molding
White spray paint was used to restore the molding color. Always spray light coats to prevent the paint from running. The paint was allowed to dry overnight.
Unrolling 3M VHB acrylic foam tape
Applying VHB tape to underside of molding
A 33-foot roll of thin 3M VHB acrylic foam tape was purchased at Amazon for $14. This 0.4-inch-wide, double sided tape offers superior holding properties if the surface is cleaned with alcohol beforehand. The VHB tape was attached to the upper and lower flat surfaces on the back side of the molding, in the same manner as the original foam tape. Take your time to make sure the lines are straight and not overlapping the molding edges.
Cleaning sidewall surface before mounting molding
Attaching refreshed molding to sidewall
After cleaning the entire length of the sidewall surface with alcohol, the molding was “stuck” to the wall, being very careful to keep the line straight. Finish by running a narrow bead of white silicone along the top and bottom edges of the molding.