trailer or fifth wheel underbelly is a wonderful addition. It conceals the “spaghetti bowl” of wires, tubing and tanks, and offers a smooth — and aesthetically pleasant — finish to the underside of the chassis. It also allows for ducted heating from the furnace as part of a factory-offered cold weather package. All-in-all, you wouldn’t want a trailer without a one-piece belly pan — until it becomes necessary to make a plumbing or wiring repair. Then it becomes a nightmare.
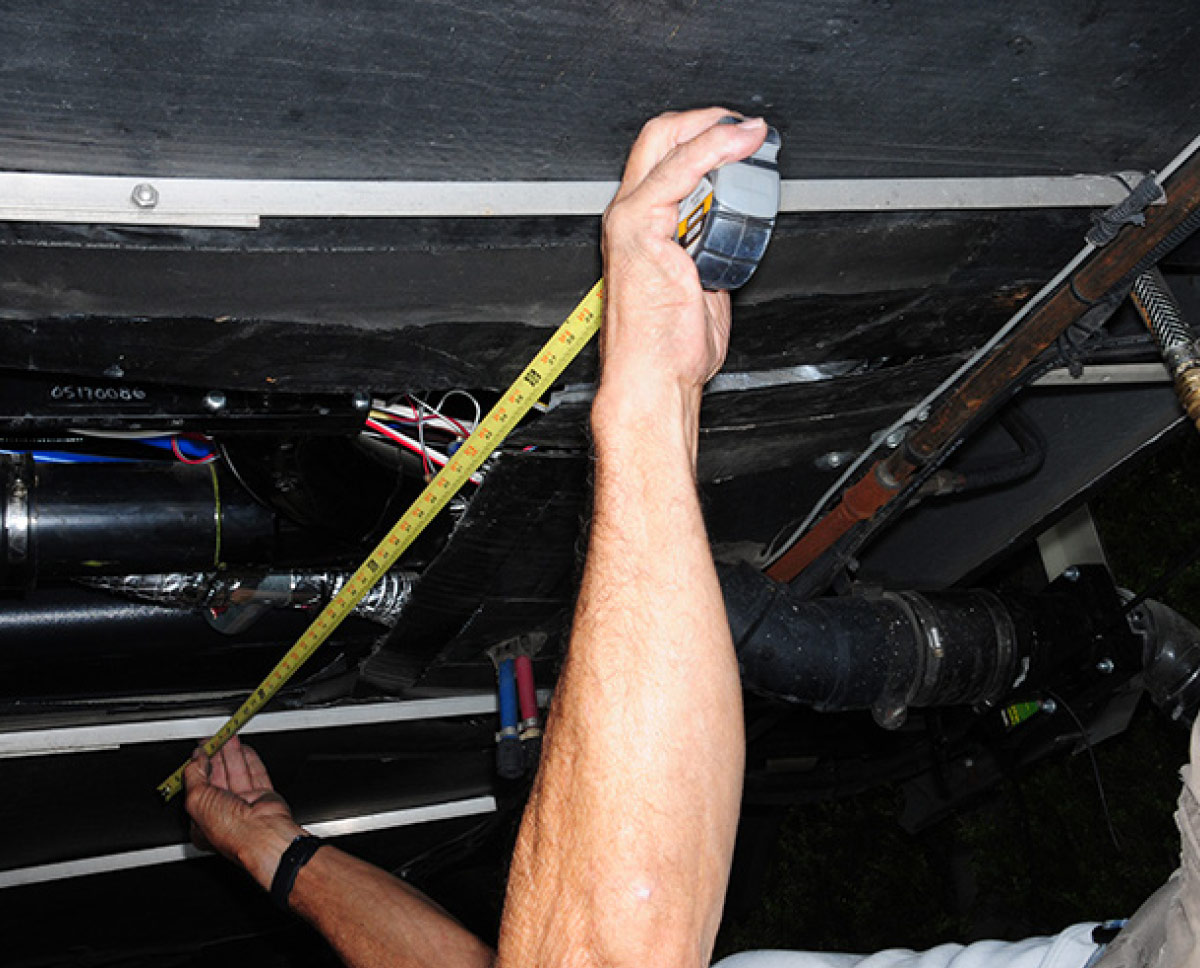
Removing the entire belly pan to access a dump valve, for example, is a lot of work — and the chances of replacing it to factory conditions are slim. Then, there’s the mystery of where everything is located without having precise blueprints, which typically is just fantasy. It would be nice if the factory provided strategic access panels — or at least marked the location of the holding tanks and dump valves — but that doesn’t happen. So, mechanics and do-it-yourselfers simply make blind guesses and hope for the best.
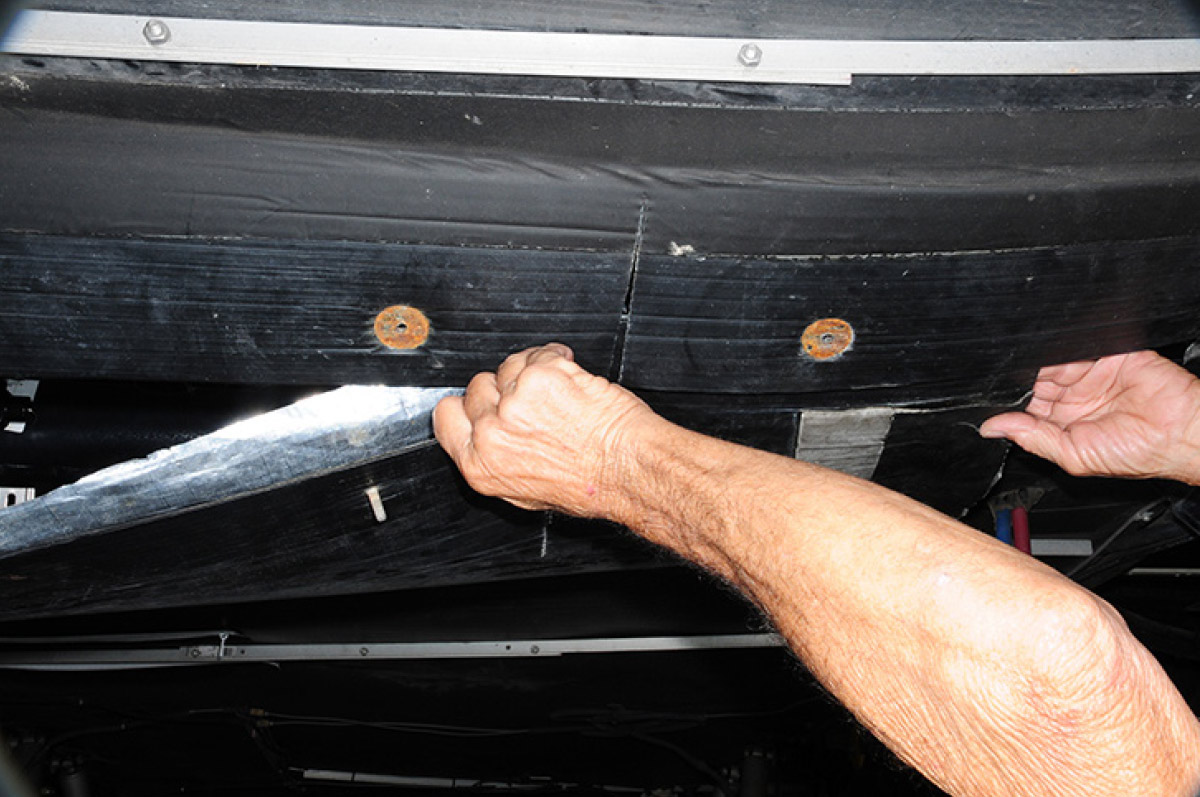
The first time we needed to repair a dump valve, a large section of the underbelly was removed at the place we figured the valves should be. We got lucky, but we were faced with consulting our Rube Goldberg manual for makeshift repairs to conjure up a system to patch the hole while allowing for future access. Using a number of galvanized bolts, washers and nuts, the cut panel was jury-rigged in place and, surprisingly, the patch job held up much better than expected, enduring thousands of road miles — but it was ugly! The only caveat was having the remove the big chunk of Coroplast sheeting every time we needed to access the dump valves. That not only got old, but also fatigued the holes for the fasteners.
Last fall, Technical Director Bill Gehr and I concocted a system that we felt would offer simple — and fast — access to the valves. It was one of those projects on the fly, meaning changes were made frequently to the “design.” In the end, the project was wildly successful, but it took a lot of time — in fact, most of a week. So buckle up: here’s how this crazy project turned out. Since we previously opened the belly pan to make valve repairs, we started the project by unbolting, cutting and discarding the crude, homemade access panel. For those of you doing this for the first time, plan on being covered with mounds of sawdust and wayward pieces of plumbing, wiring and fasteners when the belly pan is opened. (Actually, if you want to record a slapstick moment, have someone take a video of the “grand opening.” It will make great Internet fodder.)
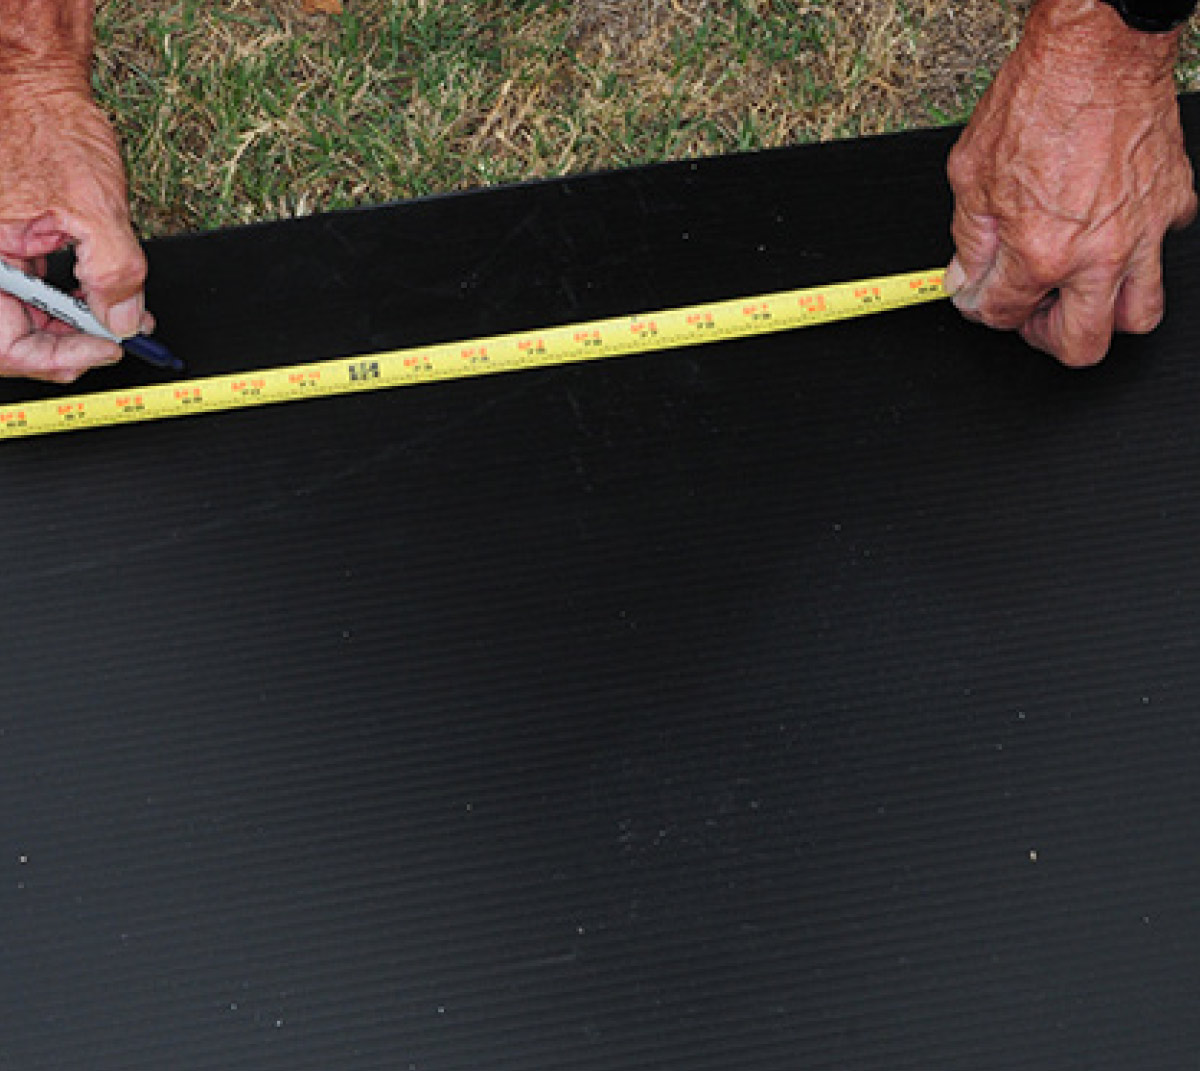
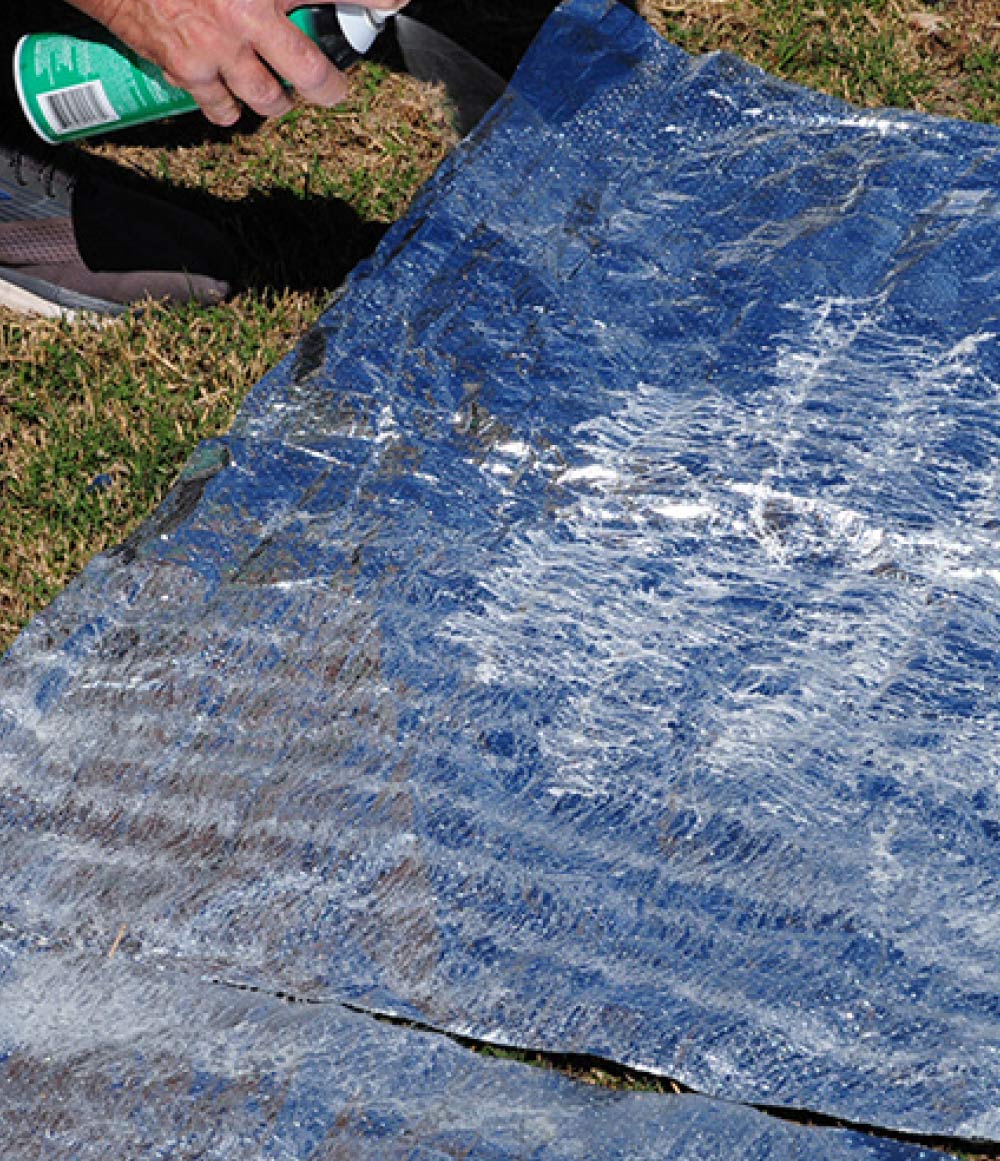
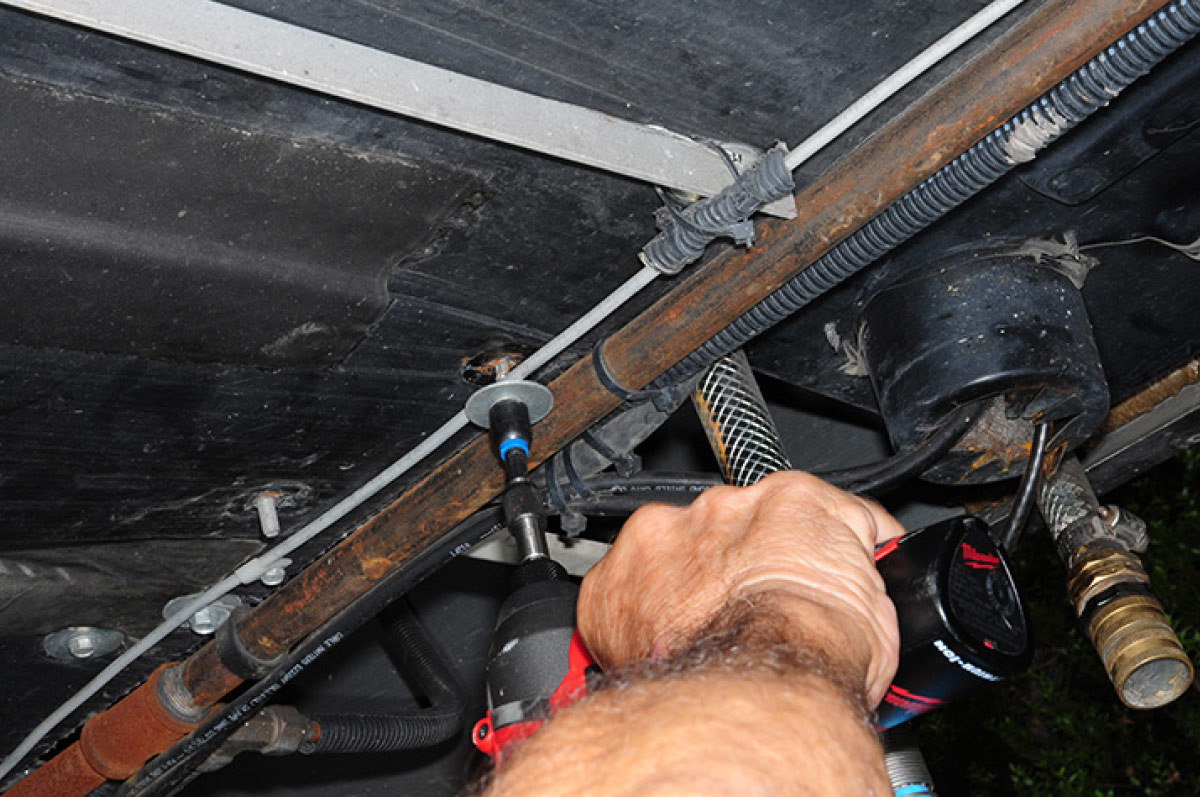
Cutting the Coroplast panel large enough to cover the entire open area was easy, but care must be taken to assure straight cuts. A razor knife cut through the material like butter. The panel was cut specifically to facilitate securing the edges to the chassis using self-tapping lag screws in the same manner as the original material was mounted. We also decided to use ¾-inch angle aluminum to combat sagging that would likely develop after mounting to the frame. Actually, we learned this trick when looking for a way to secure the hydraulic tubing that was connected to the disc-brake calipers when they were installed years ago. Trying to secure the tubing using tape proved futile. Later, we discovered that even Eternabond tape releases over time, succumbing to road elements, heat and the pressure exerted by the bends in the tubing. Installing a network of ¾-inch angle aluminum that was bolted to the chassis and spanned the width of the trailer provided reliable locations to cable-tie the tubing in place while preventing the belly pan from sagging. Thus, we used the same procedure to provide stability for the new access panels (more on this later).
Based on our new plan, the new Coroplast was marked for cutting the access panels and the area around the termination pipe from the holding tanks. After marking the locations for the cuts and checking out the dimensions on the ground, the entire panel was reinstalled temporarily to confirm that the lines were not backwards. We actually repeated this step a number of times throughout the process to ensure we didn’t do something stupid. There is no way to reverse the cuts and we didn’t want to make another trip to the sign shop.
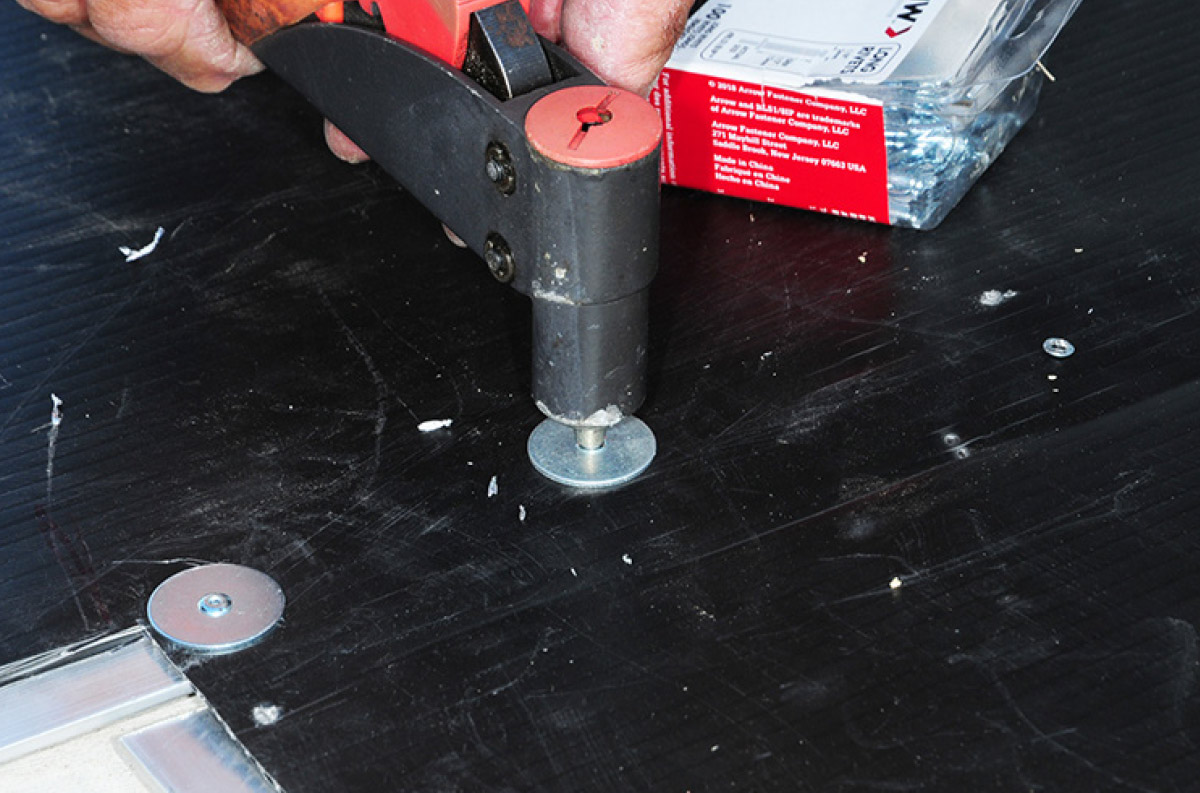
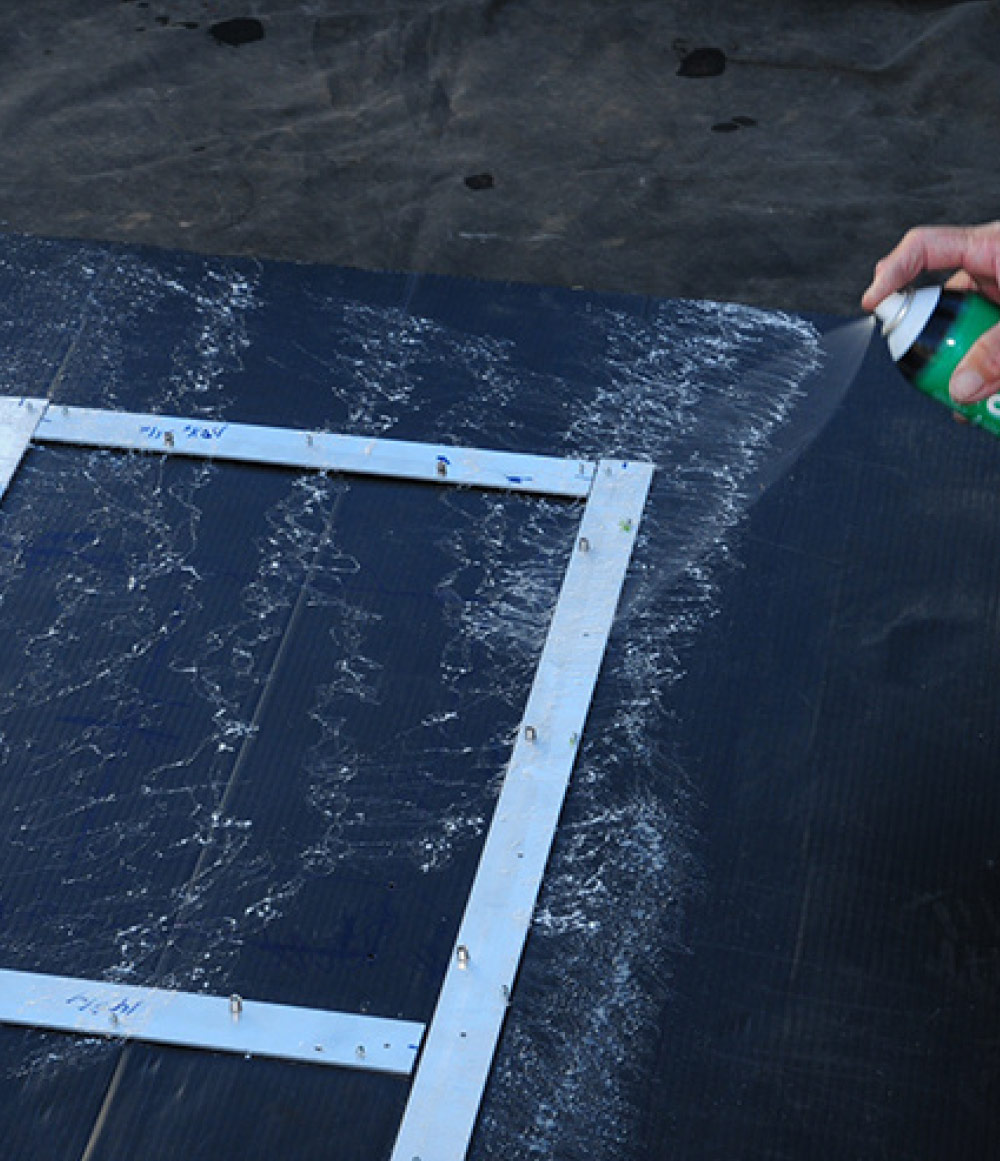
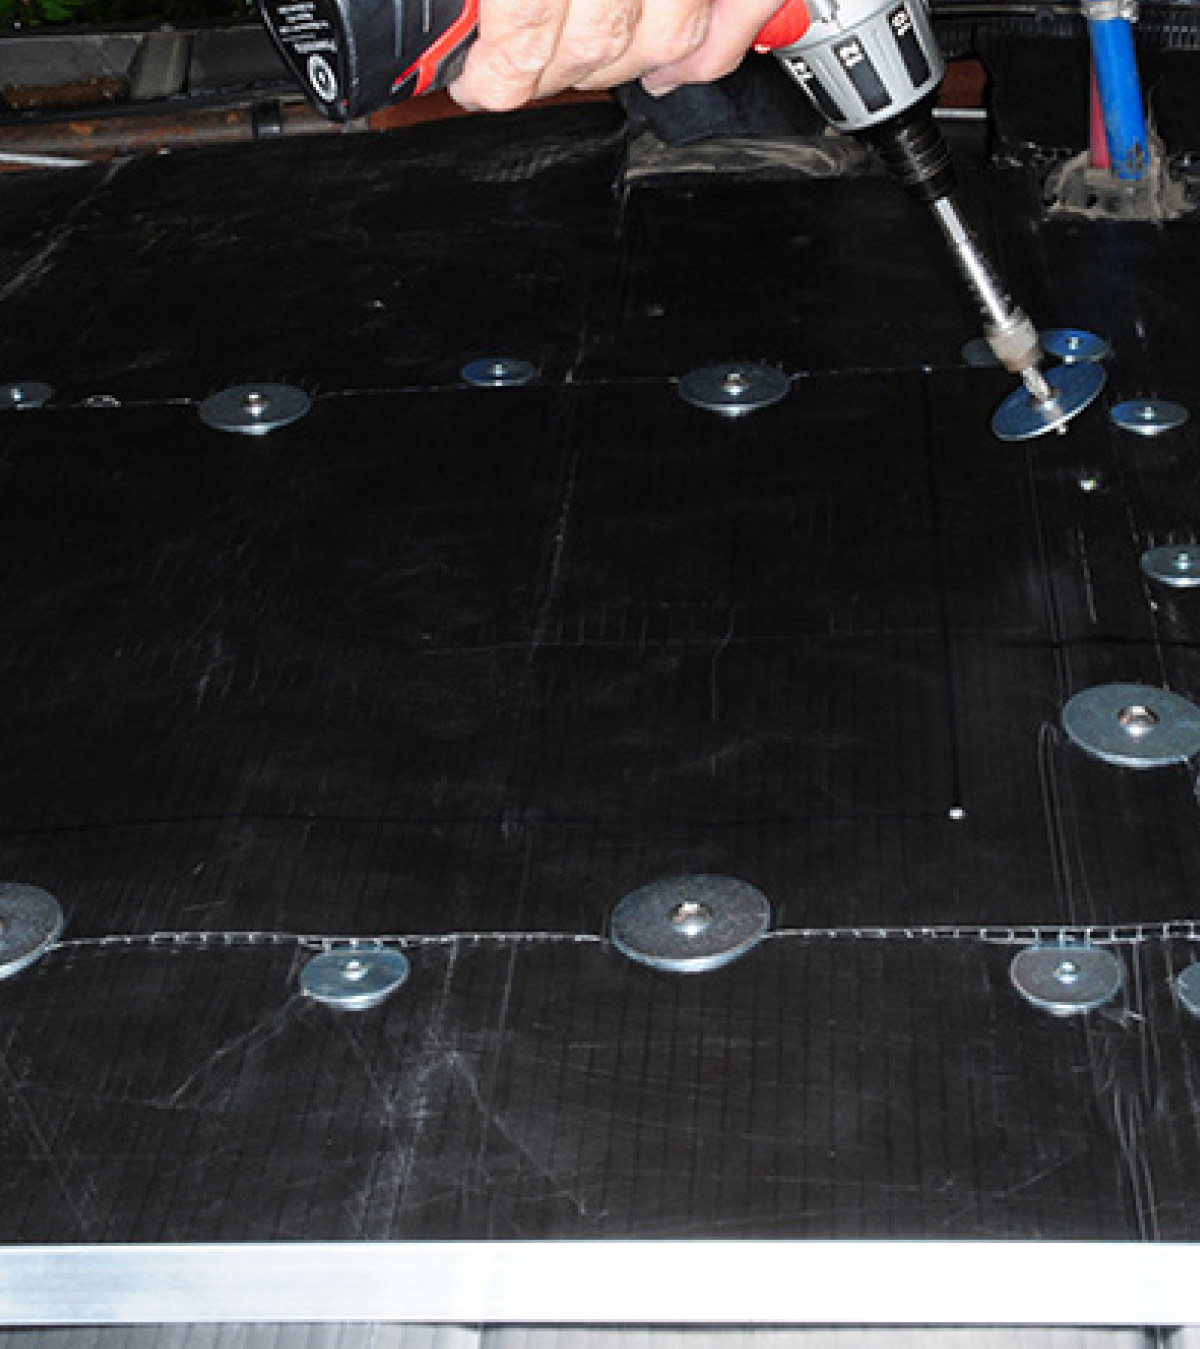
One we were happy with the access points, the entire panel was removed again to build the frames needed to hold the “doors” in place. There are a few ways to build frames, including the use of wood and screws, but we wanted something that will last for a long time and eliminate stripping after the screws were removed and re-installed repeatedly. While more expensive, we decided to use 1-inch x 1/8-inch flat aluminum stock and fit the pieces with nutserts that accommodate machine screws that would hold the access panels in place.
My professional nutsert kit was in storage at the time, so a Hifeson Rivet Tool with mandrels was procured from Amazon for $27.88. Admittedly, this tool required more work and the use of wrenches to install the rivet nuts (rather than squeezing a lever on the gun) into the aluminum strips, but it worked better than expected. Along with the tool, a 25-pack of 10-20 x 1 ½-inch truss head, full thread, Phillips drive, stainless-steel machine screws were purchased ($9.49), along with a bag of stainless-steel ¼-20 rivet nuts ($11.99), both from Amazon. Large (fender) washers were found at a local hardware store.
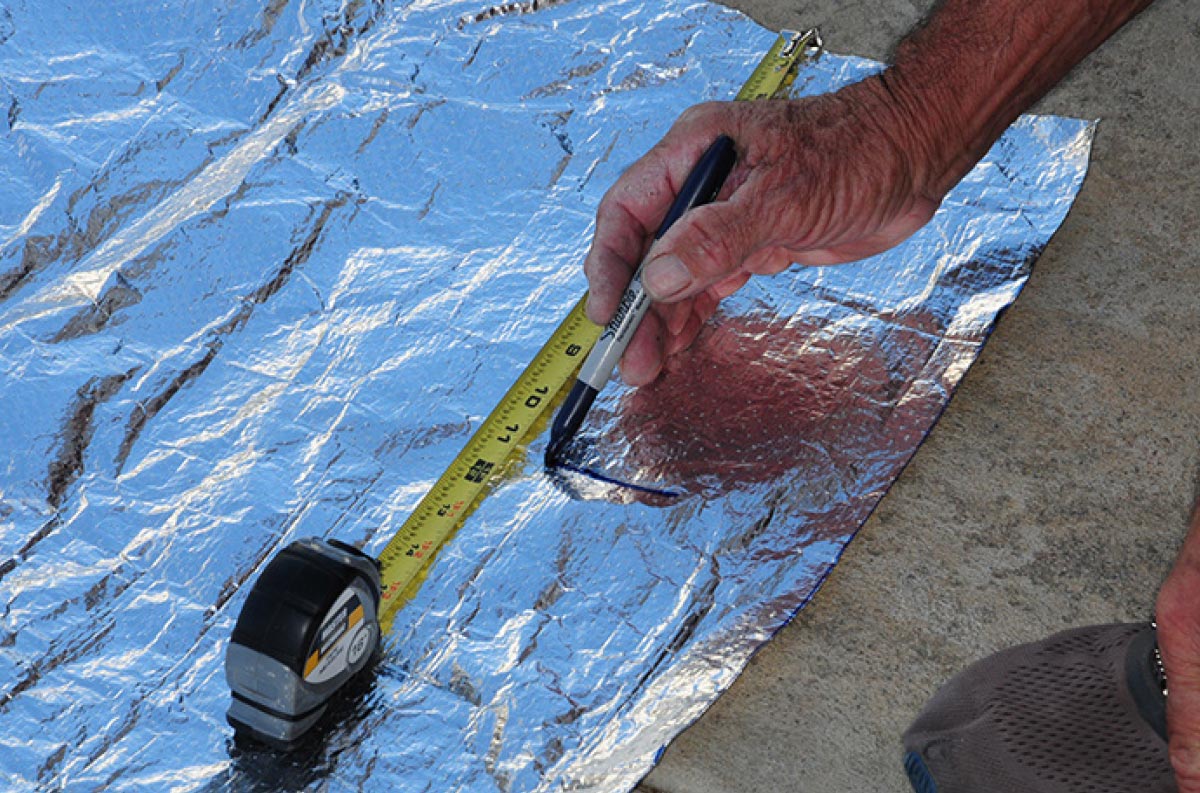
Spray adhesive, available at any hardware store, was applied to the Coroplast panel (with the access panels in place) and one to side of the insulation and allowed to dry (in contact cement form) before mating the surfaces. The openings for the access panels were cut carefully to isolate the insulation from the rest of the material, and the entire section of Coroplast was bolted to the chassis using the existing holes in the frame.


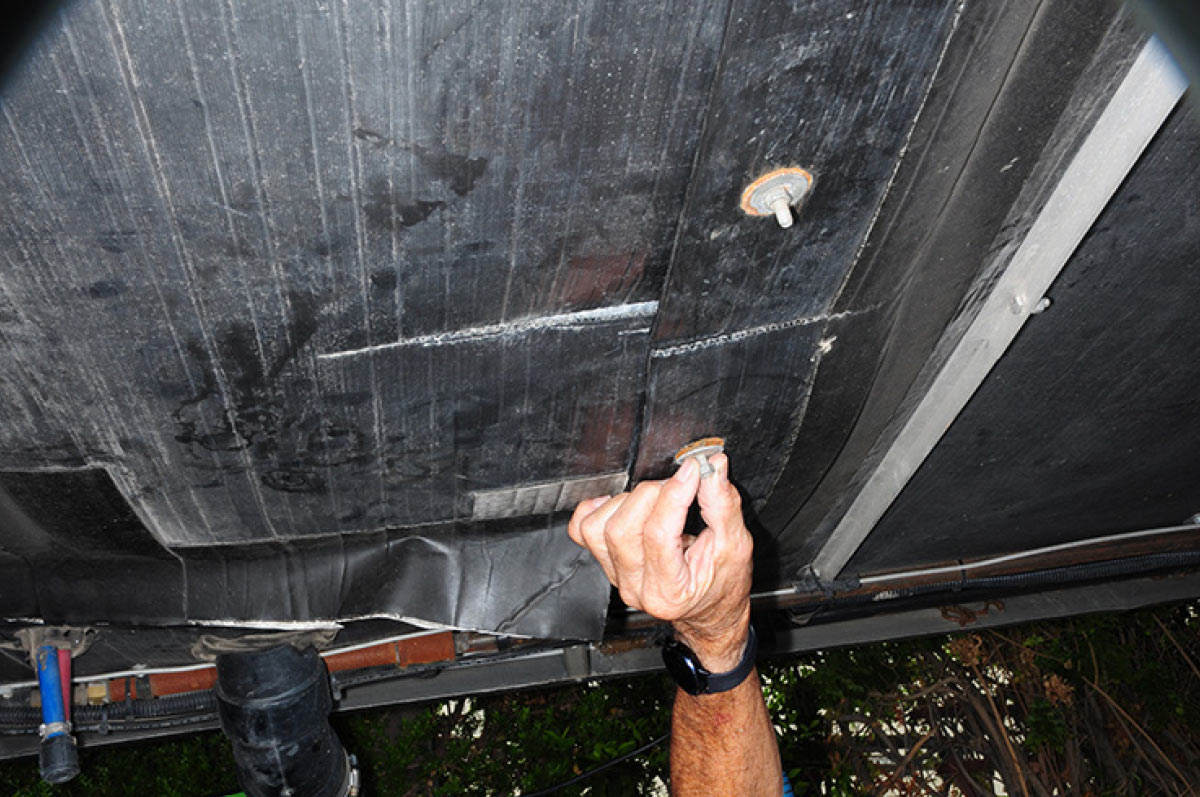
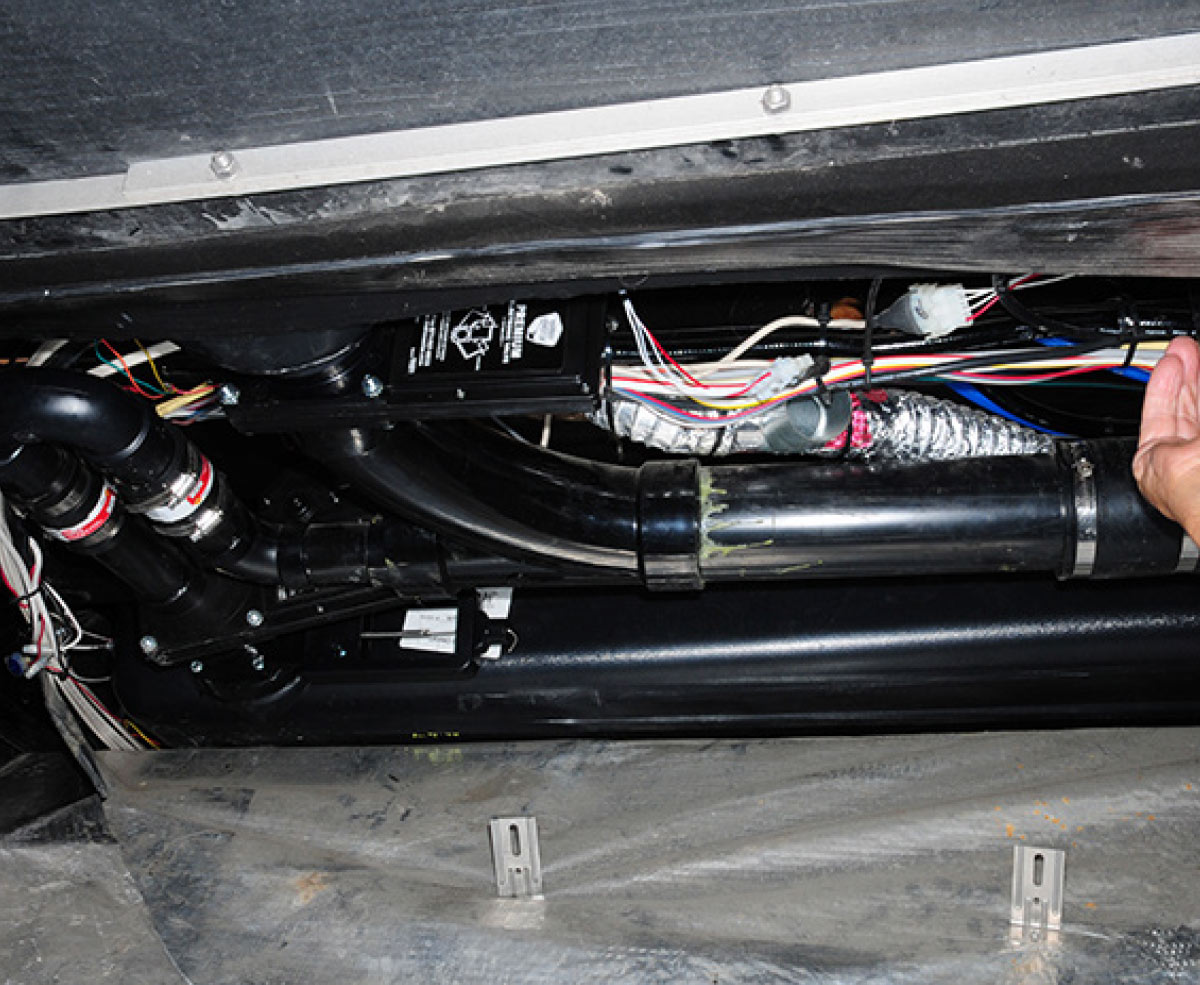
Not long after the underbelly project was completed, we experienced an issue with the black-tank valve. The corresponding access panel was removed in a few minutes and the repair was made with little fanfare — confirming the validity of the project. Not having to wrestle with a wayward section of Coroplast when repairs are necessary was well worth the time and effort expended for this unique but practical project. Eat your heart out Rube.