Graphic Arts
[maghub_sidebar]
Graphic Arts
If your sidewalls are showing their age with dull, cracked or peeling decals, you can restore the shine with computer-generated vinyl that will return pride of ownership.
By Bill Gehr / Photos by the author
M

ost owners want to keep their RVs looking nice for as long as possible. To get there, they make sure the exterior is cleaned and waxed on a regular basis. While that helps keep the shine, all the cleaning and buffing in the world won’t prevent vinyl graphics from deteriorating over time. Sure, you can treat the vinyl to regular doses of protectant, but the sun still wreaks havoc with the vinyl material.

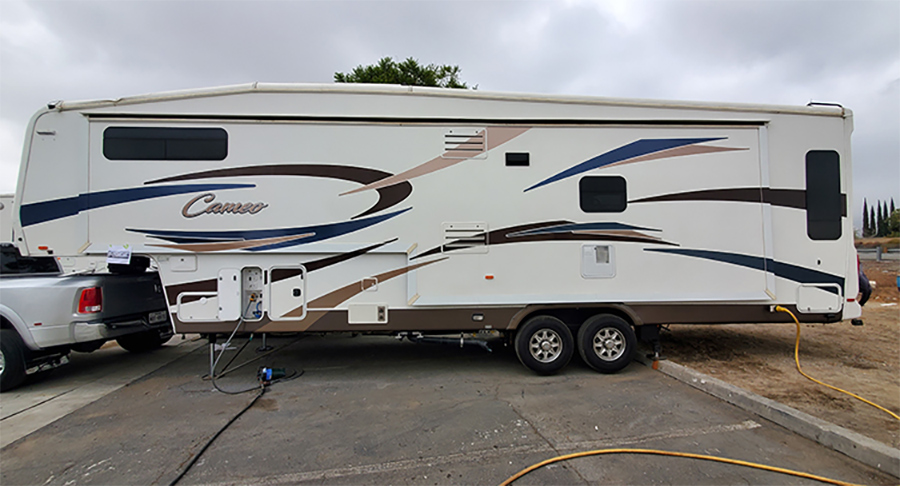
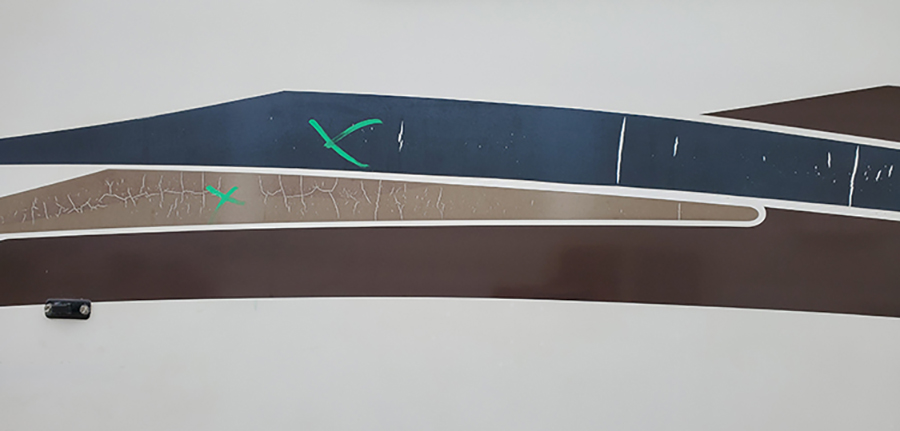
That was certainly the case with my Carriage Cameo fifth wheel. In fact, it’s exposed to strong sunshine every day under full-time habitation in the Southwest, a situation that caused the factory-applied decals to fade after just a few years. Originally, the vinyl graphics were replaced by V.I.P. Enterprises in San Bernardino, California, a company that has been restoring the appearance of weathered and used RVs since 1993. The results were beautiful, but continued exposure to the elements caused the replacement vinyl in two colors, dark blue and bronze, to start cracking and discoloring prematurely. Fortunately, V.I.P. Enterprises keeps the artwork for all its projects in a database and was capable of removing the defective pieces of vinyl without damaging the other graphics. It’s not an easy task, considering the good stripes swirl and are within ½-inch of each other in some cases, but it demonstrated the advantage of working with a company that holds on to valuable data and has the necessary expertise.
Old vinyl
Old vinyl closeup
The old vinyl was suffering from early cracking due to constant sun exposure. Green marks are placed on vinyl to be removed.
The original job cost $4,200; this time around the fifth-wheel graphics were restored to original condition at a fraction of the cost ($1,200), taking advantage of the company’s warranty that provides for replacement graphics at no charge within a five-year time frame (material only; labor is one year). V.I.P. Enterprises trains several technicians specifically for the process of removing and installing the vinyl pieces and have become very good at what they do. We followed along and documented the process. It’s not an easy task, but the company can print new graphics for installation elsewhere — or by yourself, if you have the patience and skills.
Grabbing the end of the vinyl strip
If the technician can get a good grip on the end of the vinyl stripe, most of it can be pulled away carefully from the siding without the use of a scraper.
Getting Rid of the Bad Vinyl
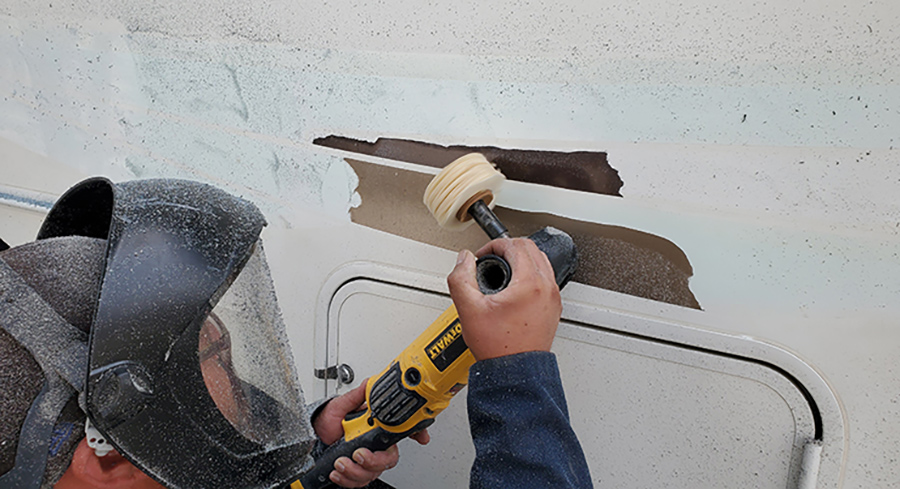
The process starts by identifying vinyl graphics that need attention and removal. Using a 3M rubber wheel with a special adapter in a standard variable-speed grinder that’s set to operate at 2,200 to 2,600 RPM, the technician was very adept at removing the vinyl pieces without burning through the Filon siding (which is a mix of fiberglass and plastic). In tight areas he had to use a razorblade scraper specially adapted for this type of work; of course, he made it look a lot easier than it really was. After the vinyl pieces were removed, a special adhesive remover was applied and the razorblade tool used to strip the remaining glue from the surface. Again, this is not an easy task without gouging the siding — keep in mind if attempting this job yourself that any gouge or a nick will show through the new vinyl pieces.
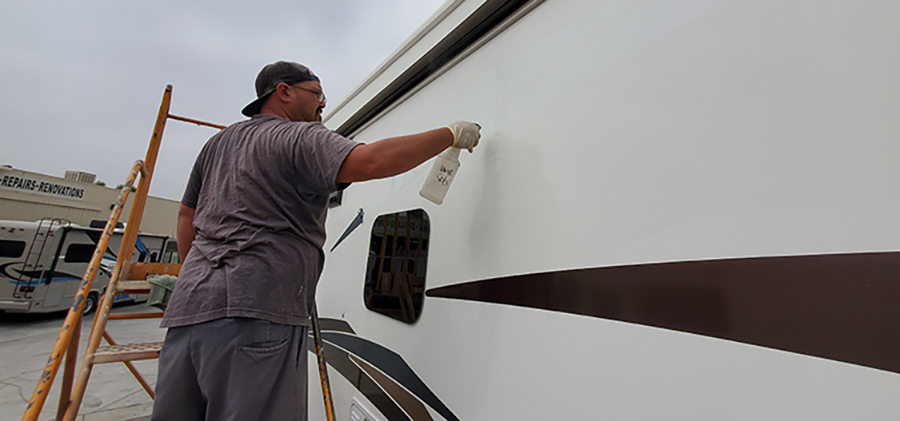
Spraying the leftover adhesive
Leftover adhesive is removed with a special chemical that is not available to the public. Do-it-yourselfers will have to use an over-the-counter adhesive remover.
Removing the graphics from a painted surface is even more difficult. It does not take a lot of pressure from the rubber removal tool to burn into the paint and, of course, using a razorblade is not an option. The vinyl graphics that covered sections of the window were dried and cracked, which also presented some challenges. If they get hard and old, the rubber removal tool does not work as well — so it’s all up to the razorblade and the adhesive remover.

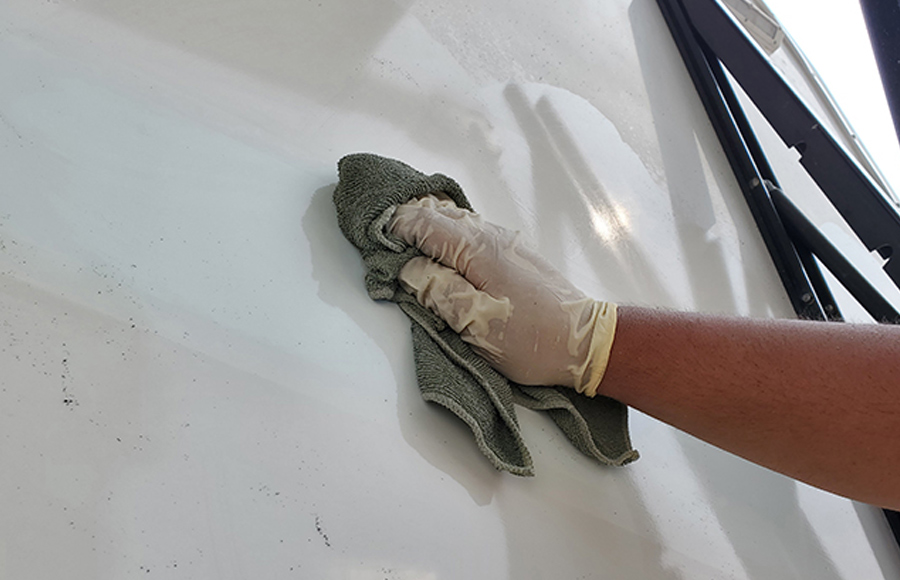
In some extreme cases, they will use a heat gun to assist in removal. When using the razorblade, the technician angled the blade (instead of straight into the material) for a more accurate method of scraping without gouging the Filon siding. When glue cannot be completely removed with the special chemical used, the technician will employ fine steel wool to help with the removal of adhesive in the most difficult areas. With all the vinyl removed, the surface was cleaned using alcohol and water on a microfiber cloth. The intense removal and cleaning process ensures that there will not be any remaining specs of glue that might show through the new vinyl graphics.
Special wheel
A special wheel made by 3M is designed to remove vinyl without damaging the siding. This wheel can be used in a standard variable-speed grinder.
Applying the New Graphics
When it came time to apply the new vinyl, another technician with different skillsets was called in to apply the new computer-cut pieces using the shadow left on the siding for orientation after the old pieces of vinyl had been removed. This process is quite a bit slower, and of course, must be precise or you will see shadows. Getting this process down pat takes years of practice — and a lot of patience.
The removal wheel makes short work of grinding the vinyl from the sidewall
The removal wheel makes short work of grinding the vinyl from the sidewall, without damaging the surface. Still, the entire job takes a lot of patience.
Using a mixture of water and baby shampoo, the technician sprayed the vinyl pieces and the corresponding siding on the fifth wheel, which allowed the graphics to be located precisely. The installer attached one side of the longer pieces of vinyl at a time; the shorter graphics can be applied as one piece if it can be moved around successfully. The process requires the use of a special squeegee for applying pressure without allowing air bubbles to build in the vinyl material. If you are doing this yourself, pay particular attention to baggage doors, refrigerator access panels, windows and water heater access panels, which present even tougher installation requirements because of the raised edges and angles.
3M wheel
Vinyl material
While the 3M wheel is very effective in removing vinyl, it wears down fairly quickly. Most of the time the job requires five to eight wheels. The removal wheel grinds up the vinyl material into tiny pieces, which will make a mess, and the adhesive allows the ground-up vinyl to stick to everything.
The end result was once again impressive, restoring a “like-new” look to the 2011 Carriage fifth wheel. The technician was successful installing all of the material — in two separate colors — without a mistake, which speaks volumes about the difference nice vinyl graphics make.

The technicians at V.I.P. Enterprises are also experts at restoring the luster of fiberglass sidewalls. If possible, the company will suggest that a buffing compound be used to bring back the finish. Amazing results have been documented, but if that process won’t suffice, the company is capable of partial or complete repainting.

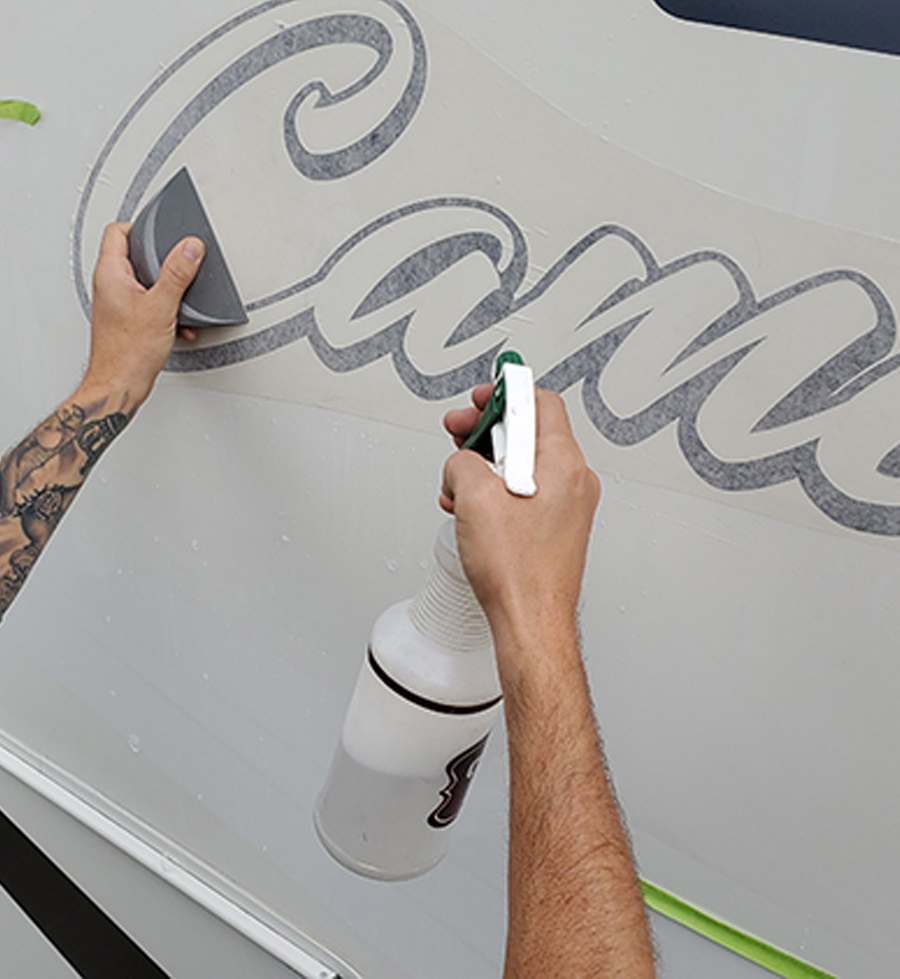
The process of replacing the vinyl graphics, buffing/compounding and/or painting the necessary sections does not come cheap. You’d be amazed, however, at how restoring the appearance of an older rig also restores your pride of ownership.

Razorblade scraping tool

A razorblade scraping tool is used to remove vinyl in tight places, like around the compartment door frame.

Razorblade scrapers used by V.I.P. Enterprises

The razorblade scrapers used by V.I.P. Enterprises are more rigid than those often found at hardware stores, giving the technician additional control when removing the vinyl. Made by companies like Stanley, they can be purchased online and at industrial supply stores such as Granger.

Dealing with the residue
Spraying and scraping
Dealing with the residue seems like a never-ending task. It takes a number of passes with the scraper to remove most of the residue, and the adhesive remover is used repeatedly to clean the blade.
Fine steel wool pad
Wiping down
When the vinyl and adhesive are dried by the sun and stick to the sidewall, the chemical may not completely remove the residue. When that happens a fine steel wool pad is used to loosen the residue, which is followed with a final wiping with a cloth impregnated with a mixture of alcohol and water.
Designing the Design
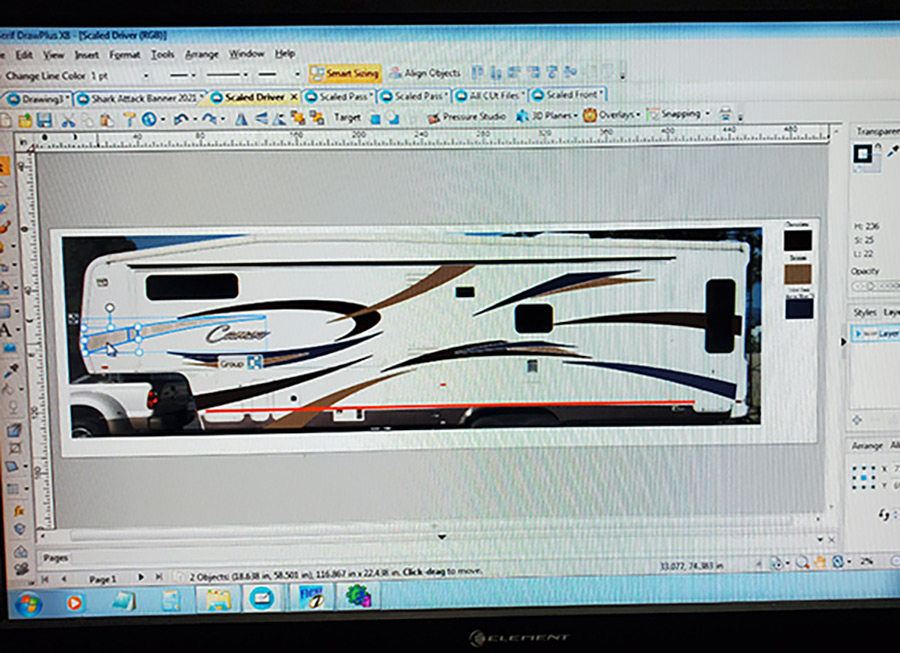
V.I.P. Enterprises retains all of the patterns from the original job, which makes it easy to retrieve sections of vinyl. This computer program is always used to duplicate the original graphic design.
Replacement vinyl decals
The replacement vinyl decals are printed from computer-generated graphics the exact pattern is cut for replacement, which eliminates shadowing.
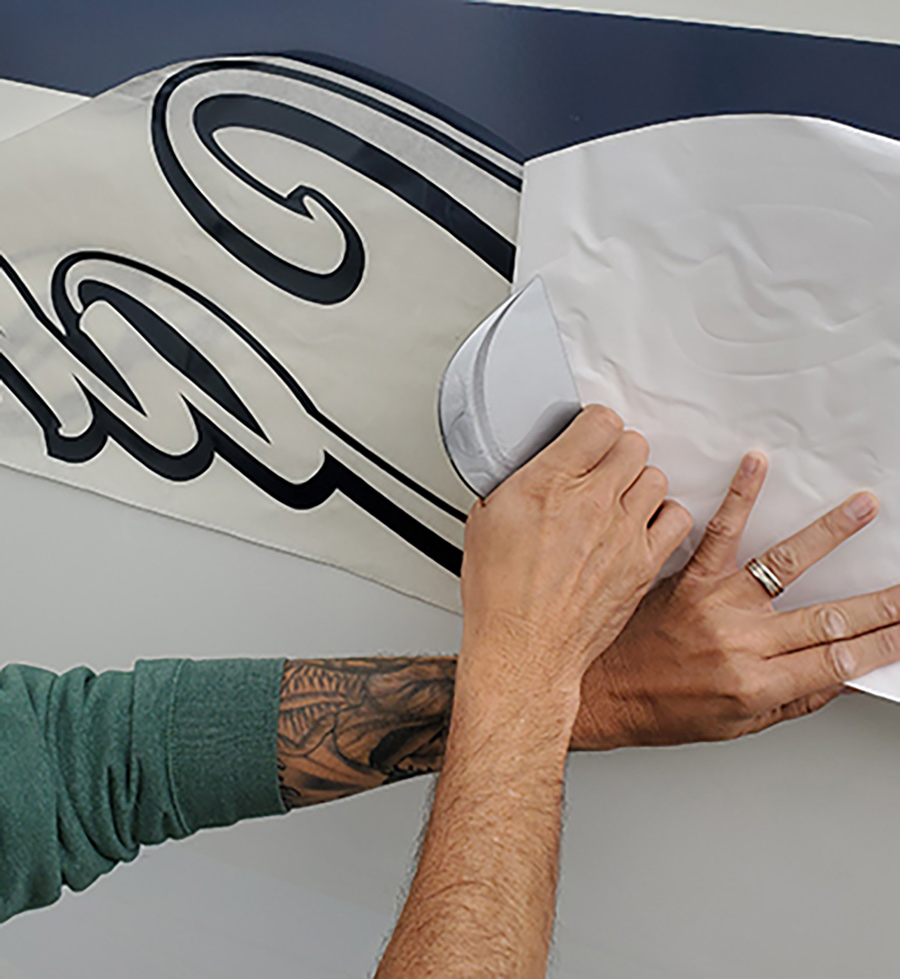
A hard silicone squeegee helps lay down the vinyl without causing bubbles and creases
A hard silicone squeegee helps lay down the vinyl without causing bubbles and creases. Here the vinyl is applied to the refrigerator vent and adjacent siding, which takes a lot of experience to get it done seamlessly.
The vinyl is cut around the vents
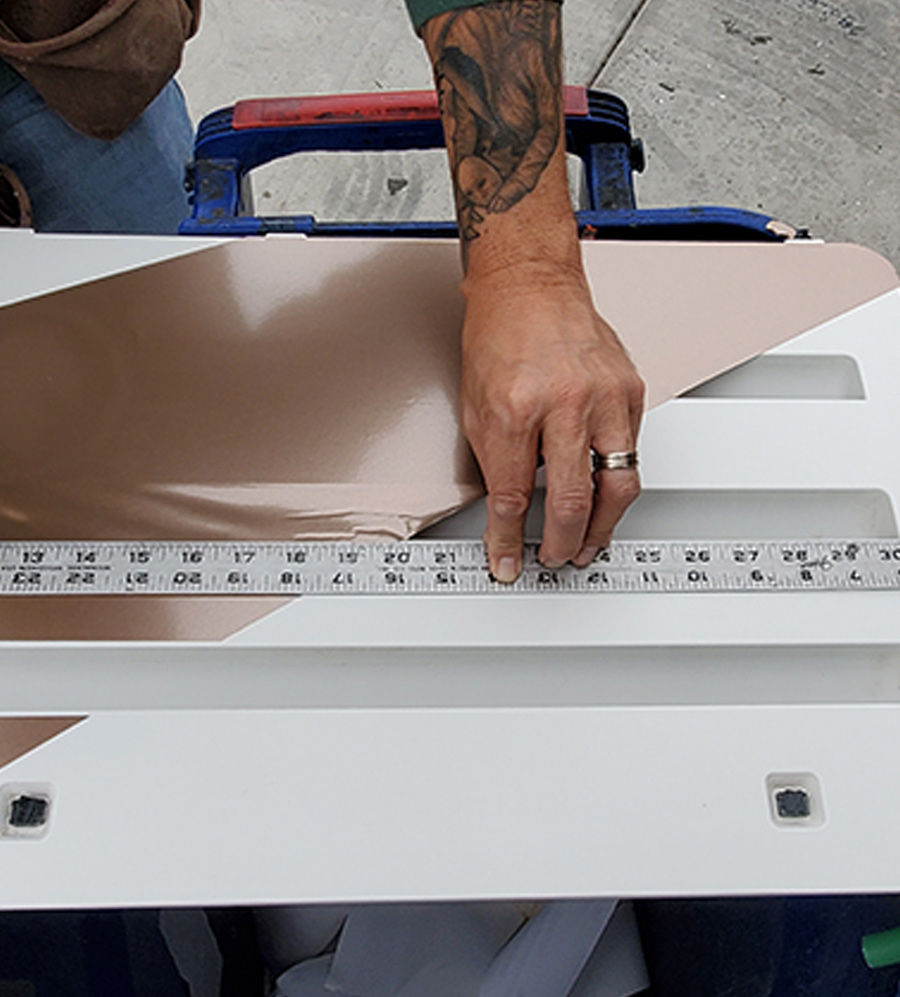
It can help to remove exterior access doors. Here, the vinyl is cut around the vents in the refrigerator access door. It takes a steady hand and a very sharp blade to ensure the lines are straight.
The backing that’s placed on the new printed vinyl
A mixture of water and baby oil is sprayed on the outside protective paper
The backing that’s placed on the new printed vinyl is removed to expose the adhesive. After pulling only half of the backing off, the vinyl is (masking) taped in place. A mixture of water and baby oil is sprayed on the outside protective paper while the squeegee is used to lay the vinyl down. The water and baby oil allow the tool to glide over the new vinyl protective cover before removing.
The mixture is sprayed on the graphics
The mixture is sprayed on the graphics once they are in place and any tiny bubbles missed with the protective cover in place are carefully eliminated.
V.I.P. Enterprises can buff out oxidized siding as an option
V.I.P. Enterprises can buff out oxidized siding as an option, which will restore the luster and make the RV look new again.
The final product
The final product: This 11-year-old Cameo fifth wheel looks near-new again after all the cracked/faded vinyl was replaced.
Source:
V.I.P. Enterprises / (909) 367-0395 / rvstripes.com