Full of Hot Air
[maghub_sidebar]
Full of Hot Air
Summer Cooling Special Section! logo
Full of Hot Air
Summer Cooling Special Section! logo
Often neglected until needed most in summer, cleaning the rooftop air-conditioner filter, condenser and evaporator will restore maximum cooling — and the process is simpler than one might imagine.
By Bill Gehr / Photos by the author
T

he hot days of summer lure RVers to the road, visiting places where the weather makes it possible to enjoy the outdoors, including participating in water sports and other activities. Of course, it also raises the temperature inside the RV — which can quickly end all that outdoor joy when retreating to the inside. Fortunately, almost all RVs are equipped with air-conditioning to help moderate the inside temperature — but many owners don’t used their air-conditioner(s) during the other seasons and simply turn it on when temperatures rise and expect them to work.

And sometimes, they don’t.

I am also guilty of neglecting my air-conditioner — and I know better. However, I didn’t use my air-conditioner very often during the last three or four years, so there was a huge build-up of grime and dirt on everything from the evaporator to the condenser — leaves, dirt and cobwebs seemed to be everywhere. Very few RVs come with an adequate manual for the appliances (including the air- conditioner) describing in detail proper maintenance procedures. At the very best, the owner’s manual suggests that you take your RV to a certified dealership for service. Fortunately, servicing (think cleaning) your air-conditioner is accomplished easily without specialty tools except for maybe for the fin straightening tool.

Cleaning Products
There are a couple of ways to go when it comes to cleaning the evaporator or condenser. The “least messy” alternative is using Nu-Calgon evaporator foam (on right) that doesn’t require rinsing with clean water. Before the no-rinse spray came around, Coil King Condenser Coil cleaner (center) was the best stuff to use (it works well, but makes a mess). A dishwashing wand makes short work of the cleaning process.
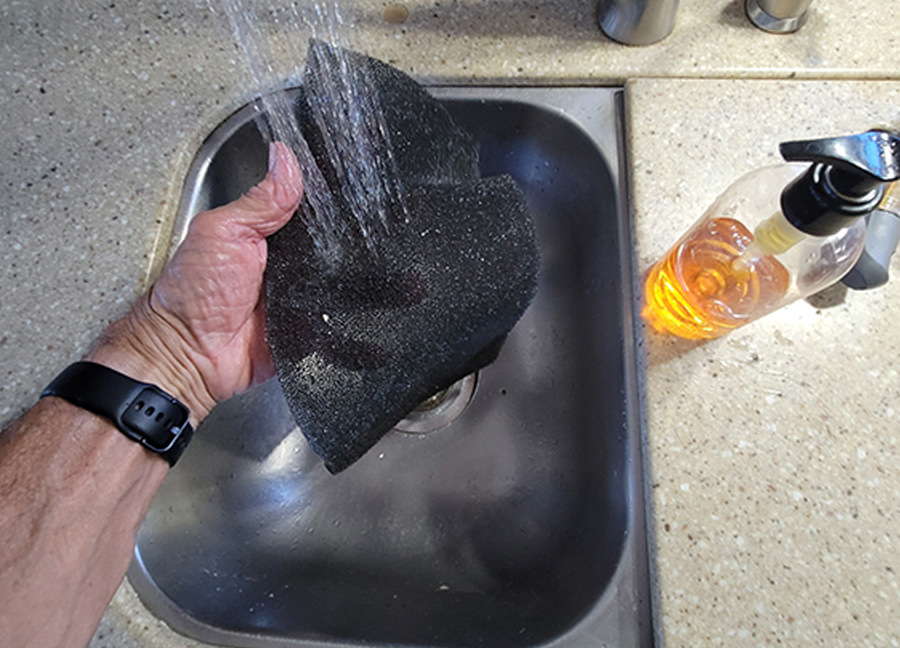
The most important service point is the return-air filter. It is easily accessible, and you should frequently check the condition of the foam filter, which should be cleaned on a weekly basis during heavy use. Preventing debris or oily substances from reaching the evaporator is critical for efficient performance. Remove the return-air grille from the ceiling assembly, lift out the foam filter and clean it with mild soap and water. Be sure to let it completely dry before reinstalling. If the filter is falling apart from age, replace it with a new one that has similar material, thickness and dimensions; preferably replace it with a filter designed for the year, make and model of the air-conditioner on your RV. Be careful with aftermarket filters; if they are too dense the return air could be significantly reduced, which will affect the efficiency of the air-conditioner.

Cleaning the evaporator is one of the most overlooked maintenance tasks. I’d venture to say most RVers have never even seen the evaporator, much less cleaned it. The evaporator is deep inside the return air cavity and is not easy to see or clean. While the return air-filter assembly is off, grab a bright flashlight and look up into the cavity and check for oil, dirt and debris on the evaporator fins. If the evaporator needs cleaning, you’ll find this cleaning task easier by removing the entire ceiling assembly. The aluminum fins are delicate, so be careful when cleaning. I found that a soft bristle dishwashing wand works very well for removing lint/dust.

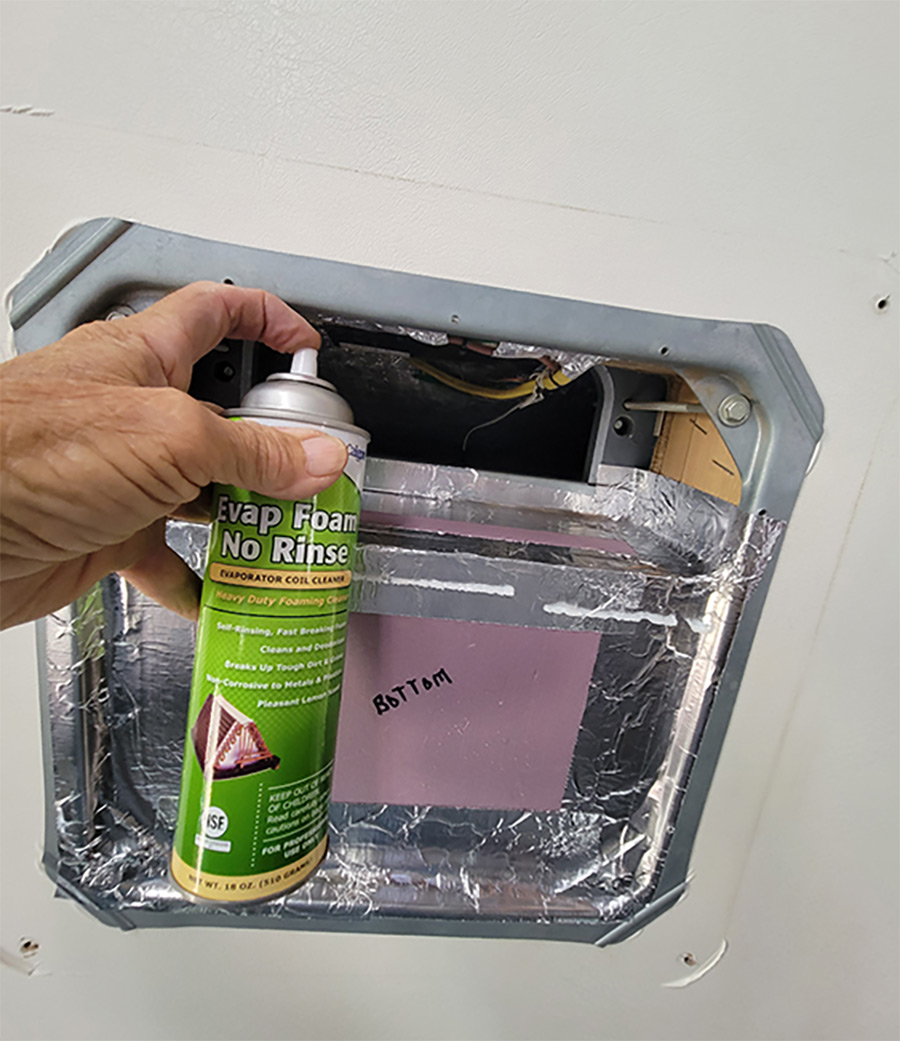
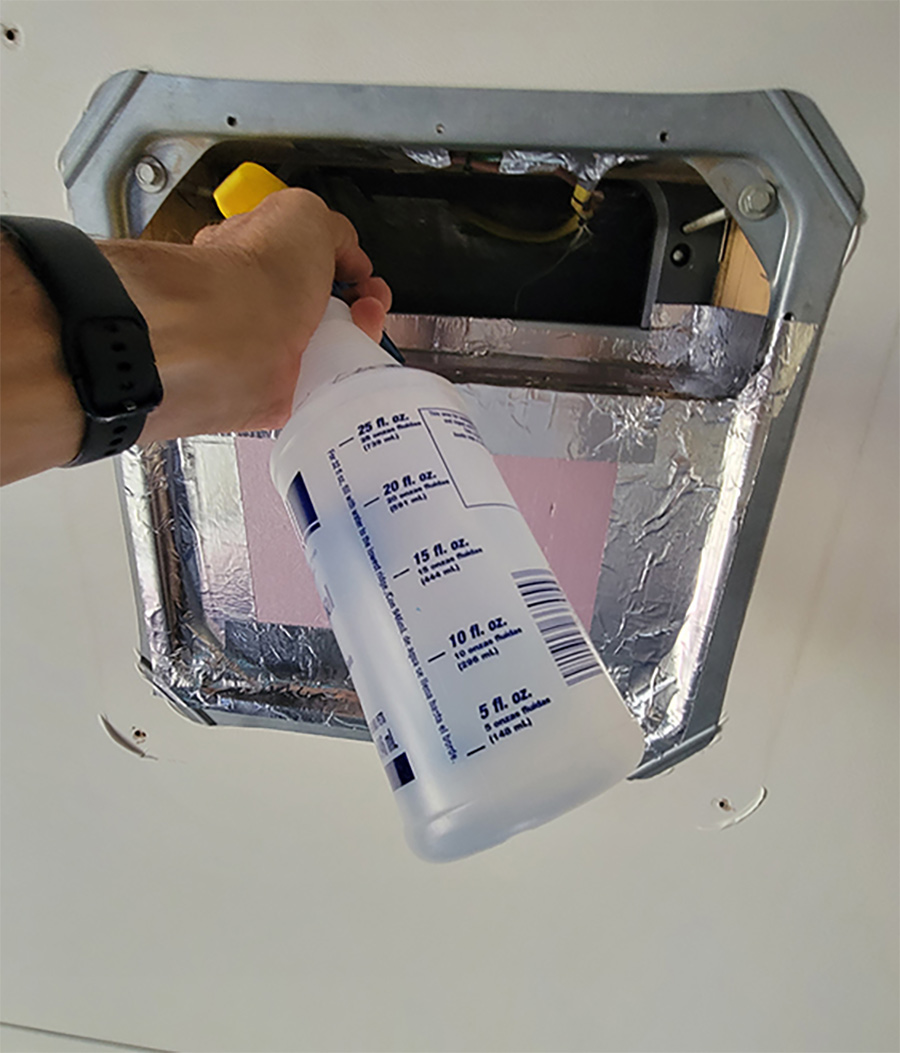
For some reason the evaporator assembly itself always tends to get oily or greasy, which requires cleaning. You can use a mild cleaner and water in a spray bottle, but rinsing off the soapy water from the fins can make a big mess as the water splashes everywhere. I use an evaporator coil cleaner foam made by Nu-Calgon that comes in a spray can that sells for $22 on Amazon (Nu-Calgon 4171-75 Evap Foam No Rinse Evaporator Coil Cleaner, 18 oz.). This is a no-rinse formula that utilizes condensation to rinse the cleaner from the fins on the evaporator. If you live in a dry climate, however, condensation is going to be limited, which might make it necessary to rinse the foam off with water from a spray bottle. This can be done carefully by starting at the top and working your way to the bottom of the evaporator. Don’t overdo it, because the water will not run out through the condensation hole as quickly as you can spray it on. Be sure to wear eye protection and some type of a mask when using this cleaner and follow the directions printed on the spray can.
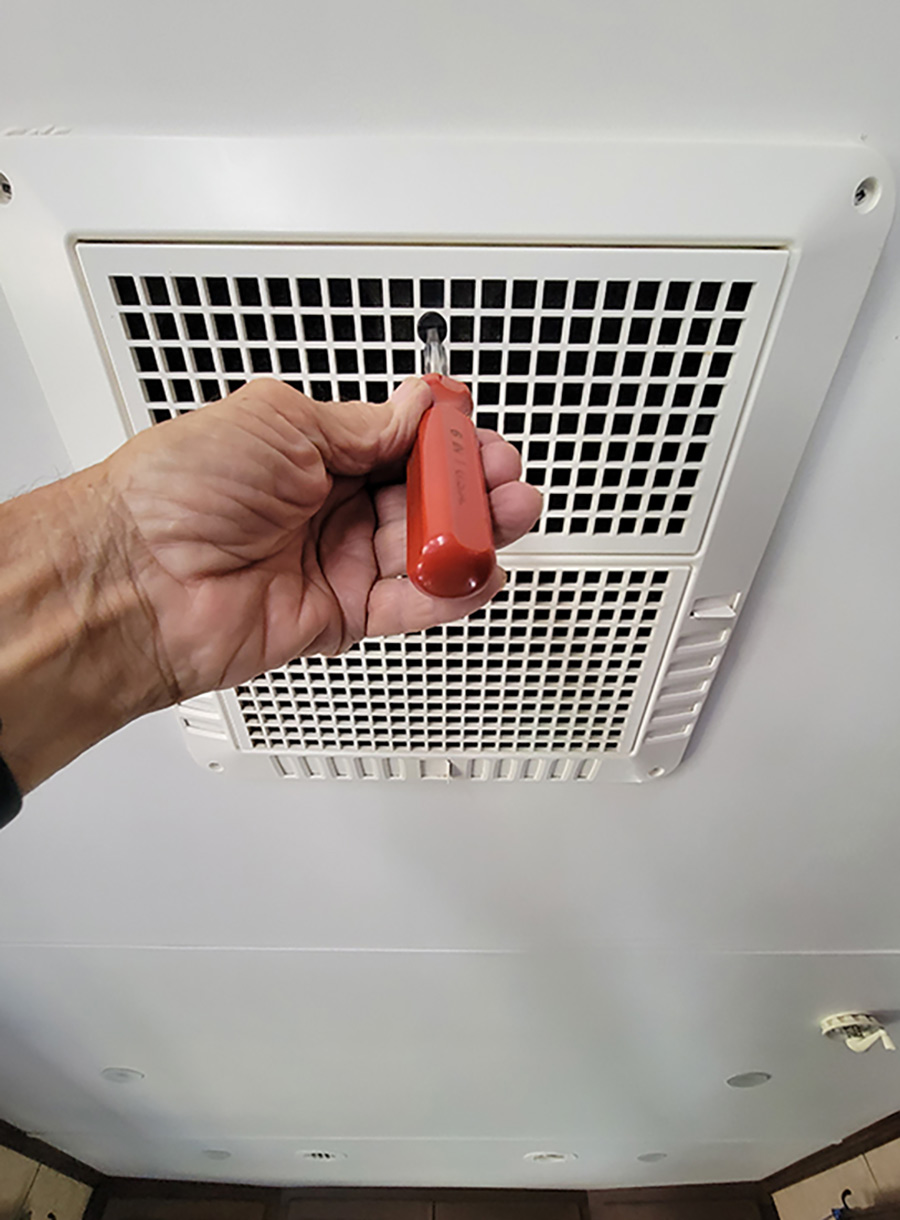
A screwdriver is used to unlock the return-air access panel with the filter attached
A screwdriver is used to unlock the return-air access panel with the filter attached.
Once you are satisfied that the inside section of the air-conditioner is clean and dry, it’s time to move on to the upper unit on the roof. Start by removing the shroud to access the working parts. I’ve always been amazed at the high level of dirt accumulation, even though the shroud is always in place. Since all of the components, for the most part, are waterproof, the shroud is just basically there for aesthetics. If it was missing the weather would not affect the operation of the air-conditioning unit in the short run; however, over time you’d likely see more wear-and-tear on the components.

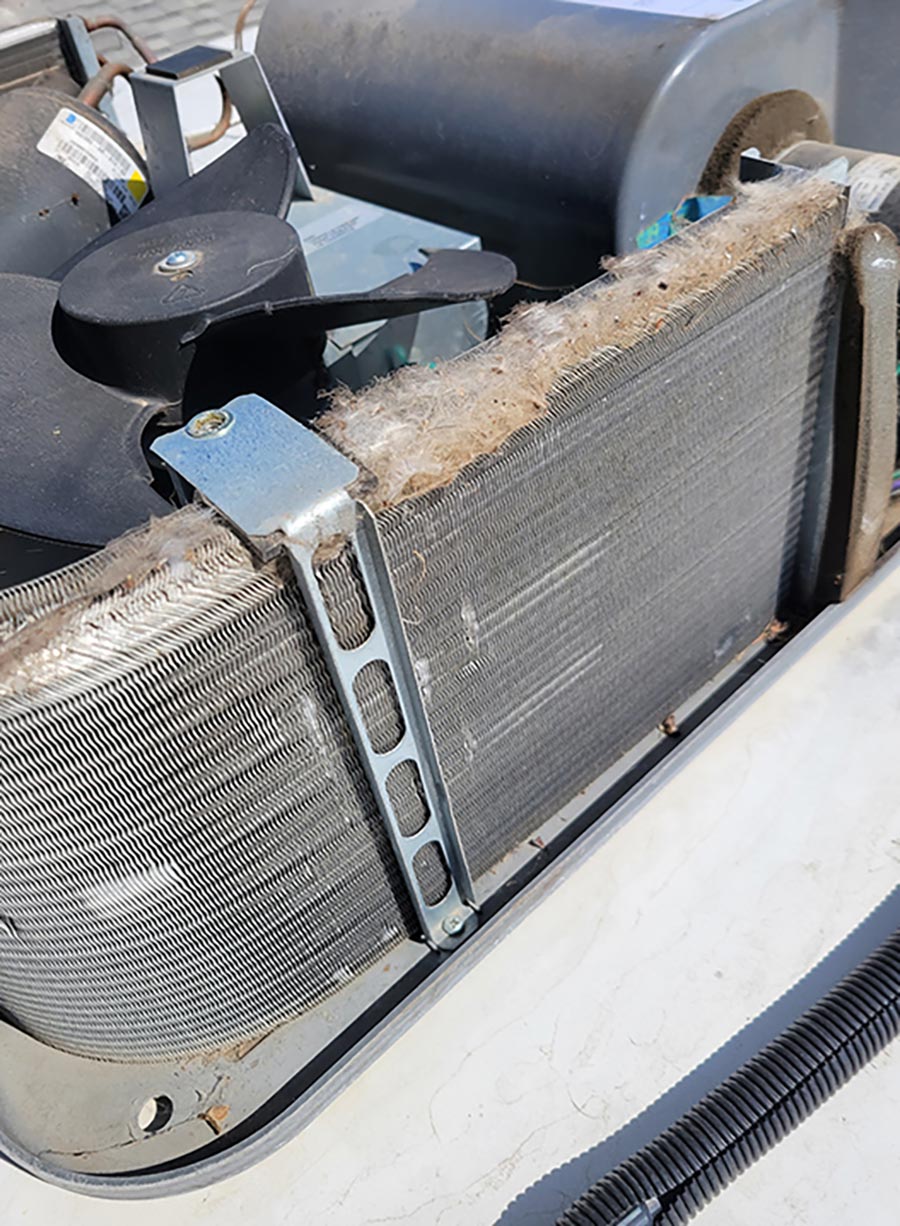
Using an air compressor — set no higher than 110 psi — blow out all the debris, dust and spider webs. If you do not have access to an air compressor, you could use a vacuum cleaner — but it won’t be quite as effective when cleaning the condenser. Blow the dust and dirt out of the condenser, being careful not to hold the air nozzle any closer than 8 or 10 inches to the condenser; the air pressure could damage the delicate aluminum fins. If you do have a large area of bent fins, now is the time to straighten them — using a specific fin straightening tool designed for this purpose. I recommend the Malco FST2 Fin Straightening Tool (available on Amazon for $15.86). You can also use a dull knife, but that could take hours. It is important to straighten the fins to restore cooling efficiency.

You can also use a soft-bristle toothbrush to clean some large pieces of debris that may be stuck in the fins on the condenser before blowing out the area with compressed air. Spray on the evaporator foam cleaner if some of the fins are oily or greasy, followed by a rinsing with very low-pressure water. Use a wet towel or a rag to wipe off dirt or oil from the compressor and fan housing, being careful not to damage any of the wiring. If water was used for cleaning, let the moisture dry before reinstalling the shroud. When replacing the shroud, make sure the front is hooked over the metal catch (if so equipped) to prevent lifting during travel — and, again, be careful not to bend any of the fins during reinstallation of the shroud.

Tools and supplies needed for this project are pretty straightforward and include the aforementioned evaporator cleaner, a soft-bristled brush, screwdriver or impact driver, fin straightening tool (or dull knife), flashlight, cleaner and rags, air compressor with nozzle or vacuum cleaner (if air is not available), water, hose and spray bottle.

Plan on spending a few hours completing this project — and be careful when working on the roof. Your hot body will thank you for restoring the cool air on hot days, especially when trying to sleep at night.
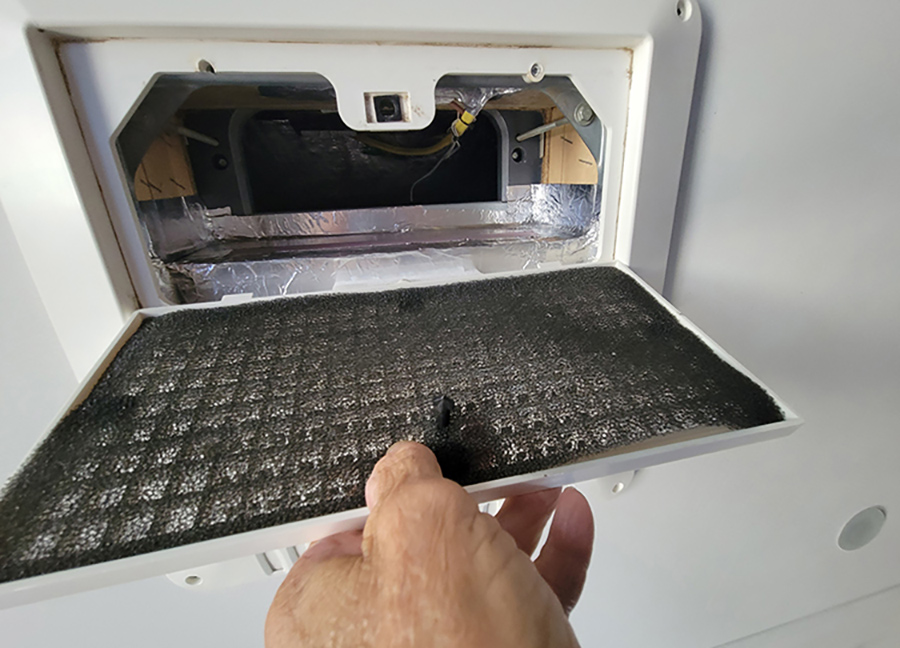
Open Vent
Sink
Remove the filter from the return-air access panel so it can be washed with soap and water in the sink. It must be dry before reinstalling and operating the air-conditioner to eliminate moister gathering in the evaporator.
Screwing off vent
Vent is off
The ceiling assembly is pulled to get better access for cleaning the evaporator. Normally, there are four to six screws holding it in place. It can on the heavy side, depending on the model. This model has a steel plate, which adds to the weight. You don’t want to drop and damage this ceiling assembly because the replacement cost is expensive.
Cleaning with a microfiber towel
The inside of the ceiling assembly can collect quite a bit of dirt. While it is down for this servicing, use a microfiber towel to clean up any dirt and debris.
Nu-Calgon foam
The Nu-Calgon foam is sprayed up into the return-air cavity to reach the evaporator. No rinsing is required, which makes little mess. Condensation while running the air-conditioner cleans off the foam.
Coil King Condenser Coil cleaner
If the no-rinse foam is not handy, you can use Coil King Condenser Coil cleaner, which is available at home improvement stores. Clean water must be sprayed onto the evaporator or condenser to rinse off this liquid product. It must be allowed to dry before running the air-conditioner.
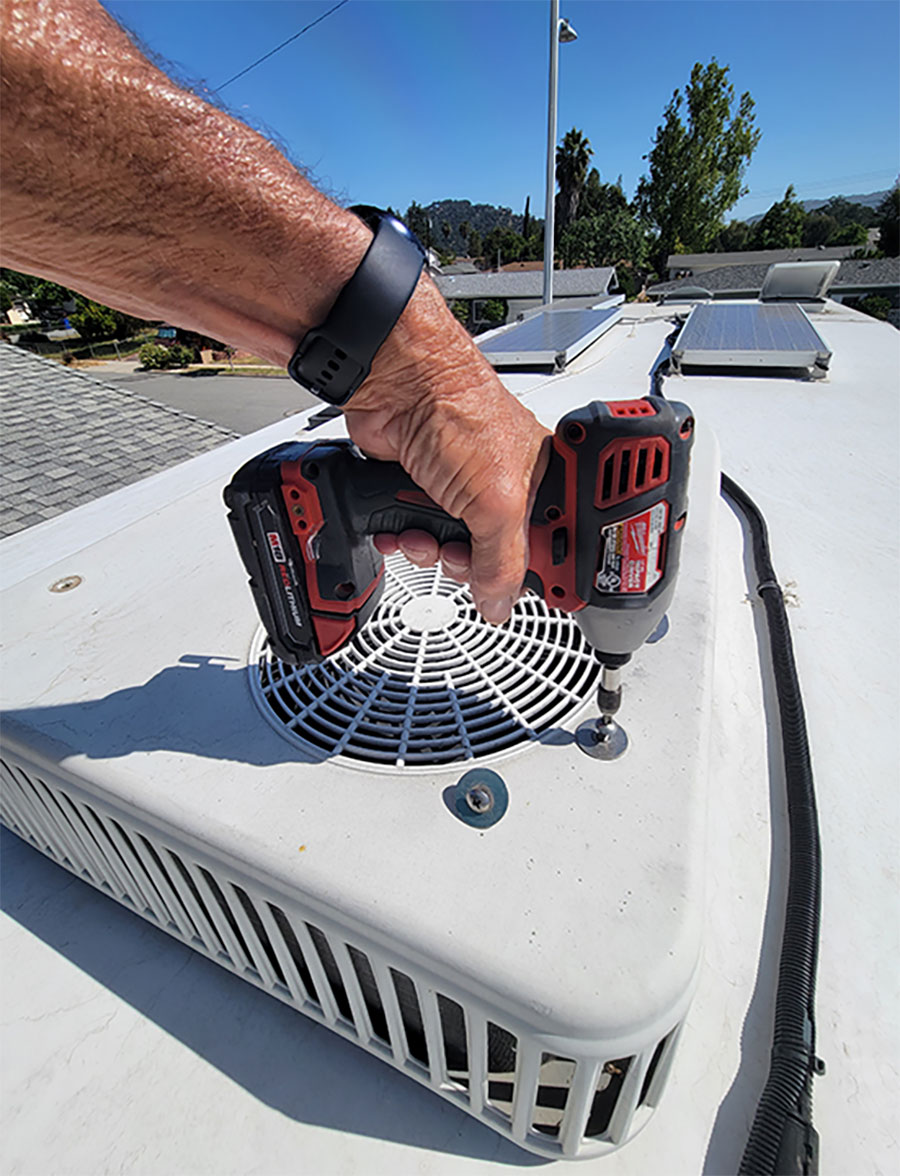
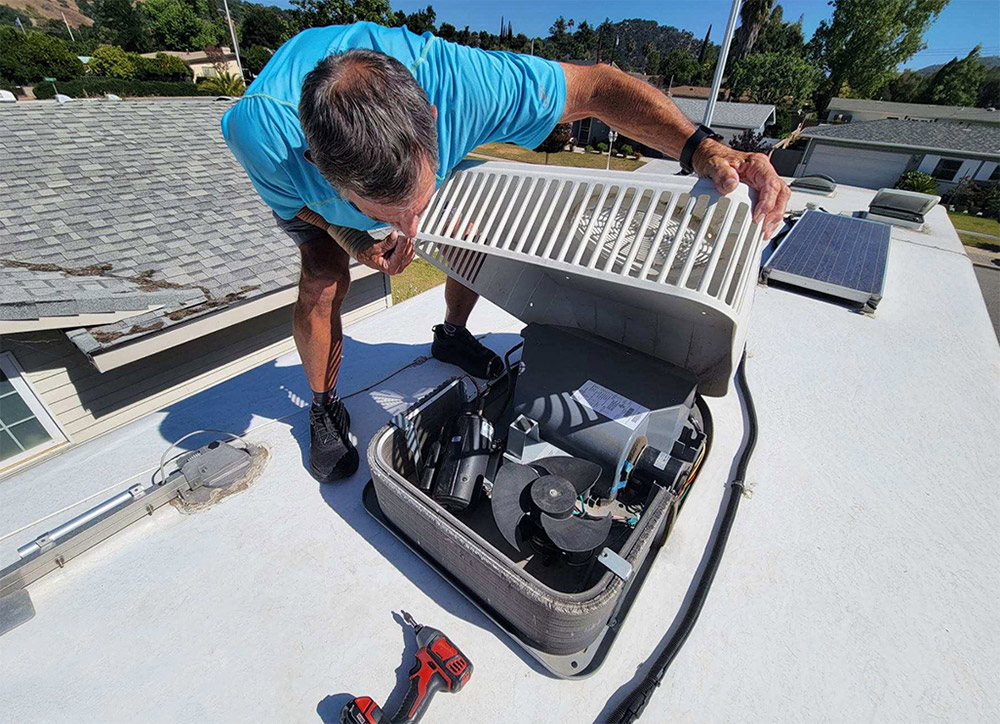
This air-conditioner model has four bolts on top that must be removed to lift off the shroud
This air-conditioner model has four bolts on top that must be removed to lift off the shroud. Some models have several screws around the skirt, which must be removed.
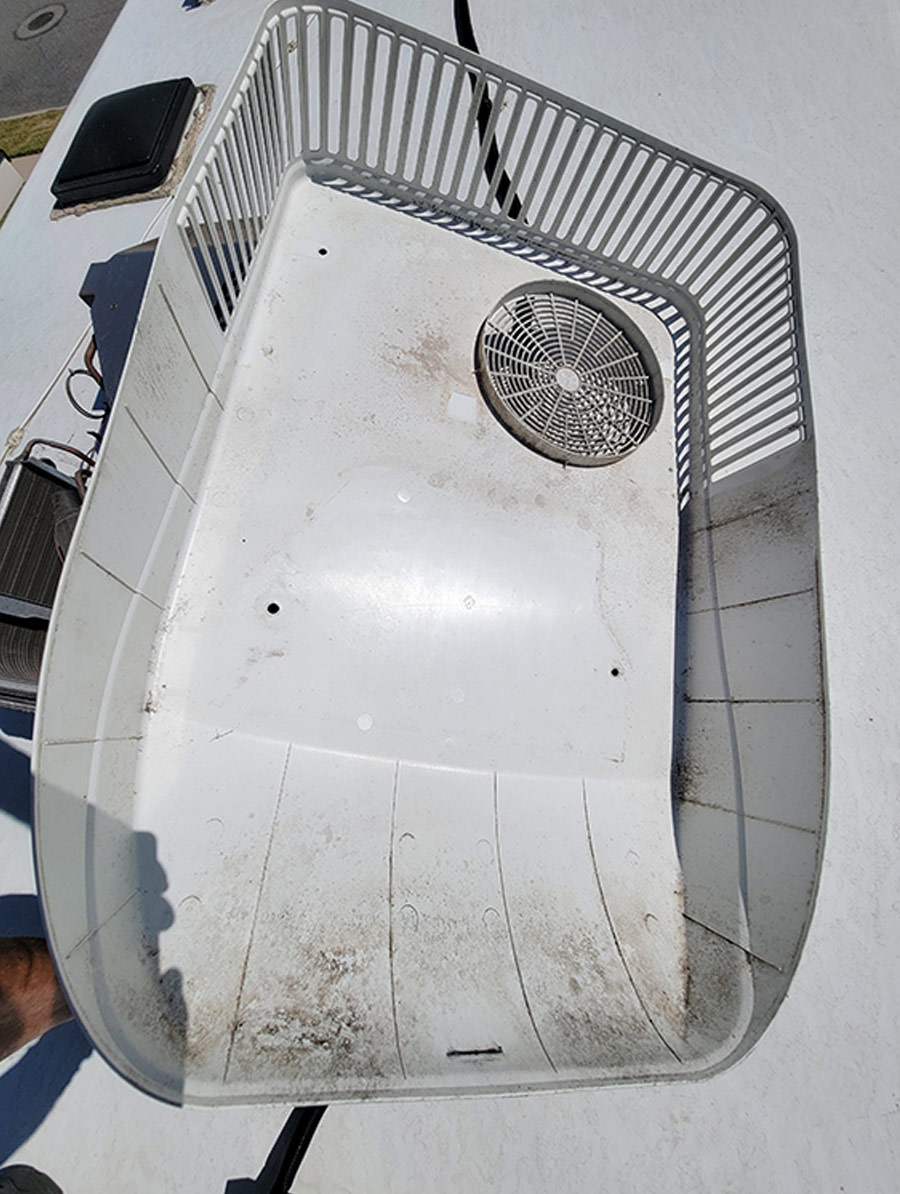
The design of this particular shroud allows the top of the condenser to collect excess dirt and debris, which must be cleaned off
The design of this particular shroud allows the top of the condenser to collect excess dirt and debris, which must be cleaned off.
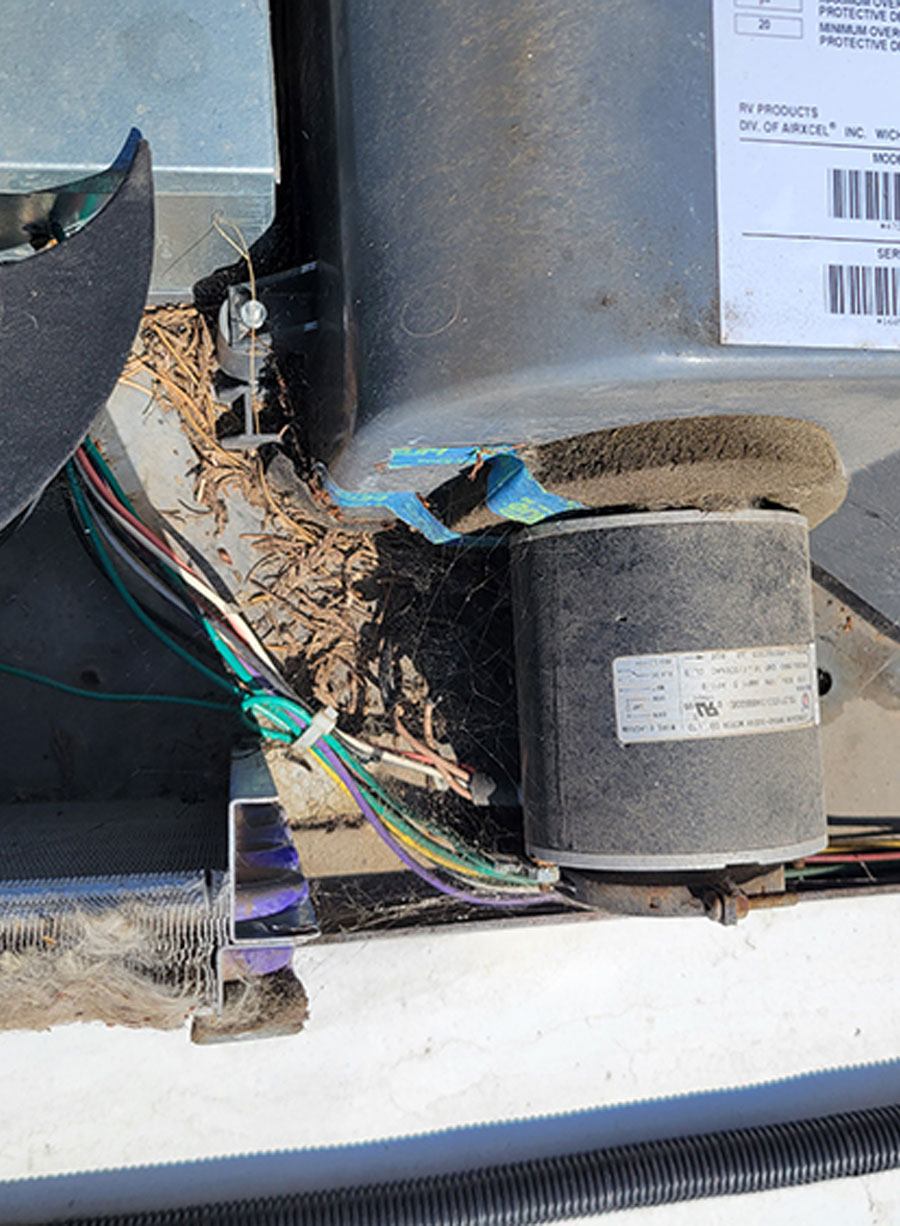
Debris is collected between the motor and wiring harness
Debris is collected between the motor and wiring harness. This pile of pine needles, twigs and dirt must be cleaned without dislodging the wiring.
Cobwebs
Spiders love the dark environment with dirt and debris and will stay busy building cobwebs, which can be difficult to blow out with compressed air.
Utility brush
A basic utility brush, available at any home improvement store, is used to remove debris from the condenser. Apply light pressure to avoid damaging the delicate fins.
Compressed Air
Once the bulk of debris is removed, compressed air through an air gun is directed to the condenser coils (no closer than 8-10 inches) to blow away the remaining dust and dirt. Keep pressure below 110 psi to avoid damaging the fins.
Cleaning the battery
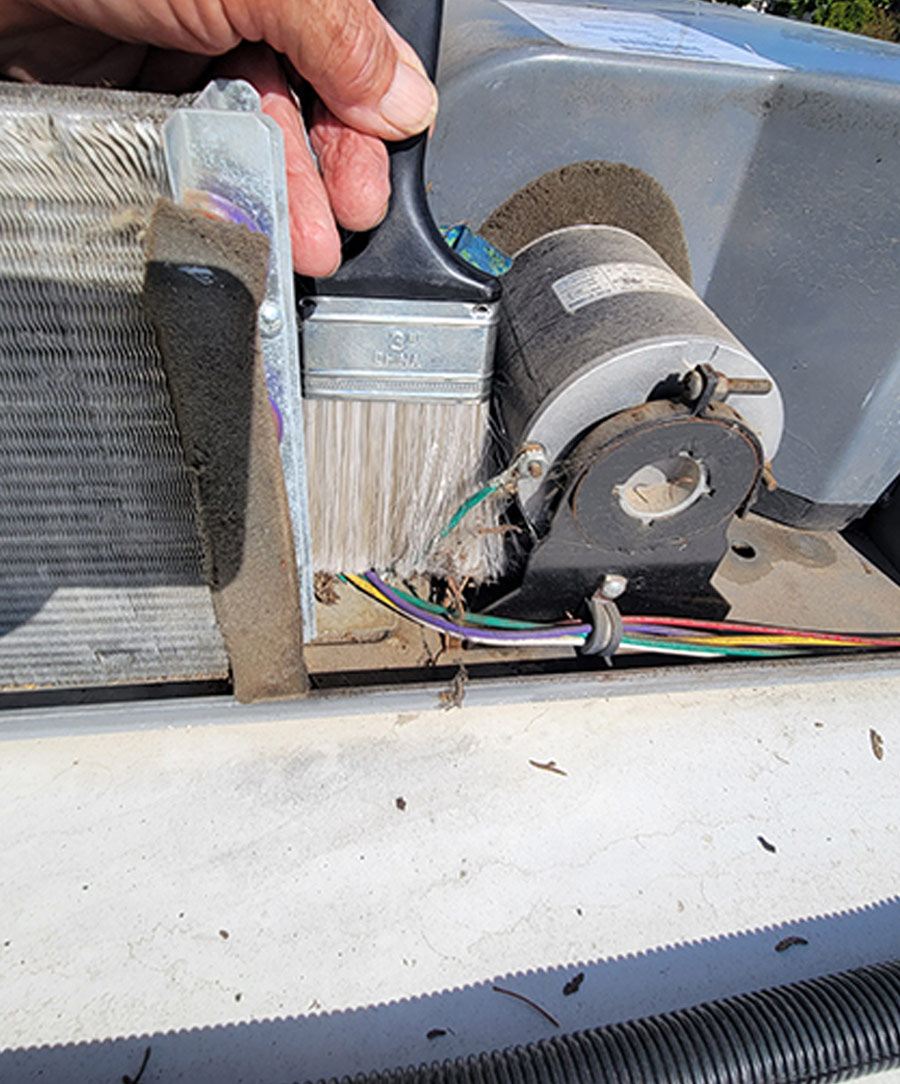
A clean paint brush comes in handy for removing debris in delicate areas.
A commercial straightening tool is best for fixing damaged condenser fins
A commercial straightening tool is best for fixing damaged condenser fins, but if one is not available a dull knife will suffice. It can take some time to fix the fins but doing so will restore peak efficiency.
Before replacing the shroud, take the time to clean the underside of any dirt and dust
Before replacing the shroud, take the time to clean the underside of any dirt and dust.