Ending the Belly Pan Blues: Part 2
[maghub_sidebar]
Ending the Belly Pan Blues: Part 2
hand holding the OK sign next to a fabric tear that's been stitched together with zip ties
Accidental cuts and tears in the underbelly material can be difficult to close. Forget duct tape; a better way to make the repair(s) is to “stitch” the cut with zip ties.
By Bill Gehr / Photos by the author
M

ost RV owners will tell you that Priority One is to always use caution when maneuvering their rigs over rough terrain or unknown places. The goal is to prevent impacts with tree limbs, rocks and other solid debris that goes unnoticed until too late. A vulnerable area is the belly pan, made of flexible material like Coroplast that can be easily cut or ripped from debris kicked up from the roadway or running over a tree stump, for example.

In my case, I cut a 5-inch-long section in the belly pan of my fifth wheel by mistake while working on a project. Yep — anybody can make a mistake.

Trying to fix that cut in the Coroplast with duct tape was futile, and sealing the cut with specialized tape for this purpose was also a no-go due to the rough surface, which was likely designed to help prevent accidental tearing. Nothing I’ve found thus far will stick solidly — for a reasonable length of time — to the underbelly material on my fifth wheel.

My next thought was to sew the cut using nylon string. The string would be plenty durable, but I could not locate a big enough needle before leaving on a trip. So, I put on my thinking cap — and came up with the idea of using common zip ties (“cable ties” for purists). They are durable, can be tightened beyond necessity for this project and they are readily available in hardware, auto parts and home-improvement stores.

The trick is to avoid tightening the zip ties too much once they are “threaded” in place.

Since this project was all about guesswork, I estimated that covering the material at least ½-inch from the cut line and 2 inches between each “stitch” would work. At worst-case scenario, if the zip ties didn’t hold, you could install extra zip ties between the first batch.

I wasn’t sure if I needed a drill bit or an awl to punch the holes through the material, so I tried both — and found that a 9/64-inch drill bit worked, but not as well as the awl. It was not easy pushing through the material with the drill bit as it wanted to move upward, so I decided to use a very sharp-pointed awl, which punched through the material quite easily — and the tapered awl also made it possible to modify the hole just enough for the zip tie to fit tightly without binding.

I had access to either side of the cut area because I was already working on another project (installing a zippered access panel in the belly pan). If you need to make a repair in the middle of the underbelly you may have to take the Coroplast loose from one side to get up in there and install the zip ties. Once the zip ties were in place, they were carefully tightened to prevent the underbelly material from being stressed and ripping around the holes.

Of course, depending on where the cut/tear is located, it may not be possible to use the zip ties to make the repair. If you can’t get the zip tie to feed through both holes, you can consider using a curved needle designed for sewing up skin on horses and/or cows and use some type of nylon string.

Both methods will allow you to close cuts or tears, preventing dirt and moisture intrusion — and prevent the cut from getting longer. And this quick repair process can be used in an emergency situation while on the road.

cut in Coroplast material
This cut in the Coroplast was made by mistake. Unfortunately, fixing cuts and tears in the material is not easy. Don’t even try using 100-mph duct tape; it just won’t work for more than a few days. The zip-tie solution worked better than expected.
measuring tape being used to measure a cut in Coroplast material
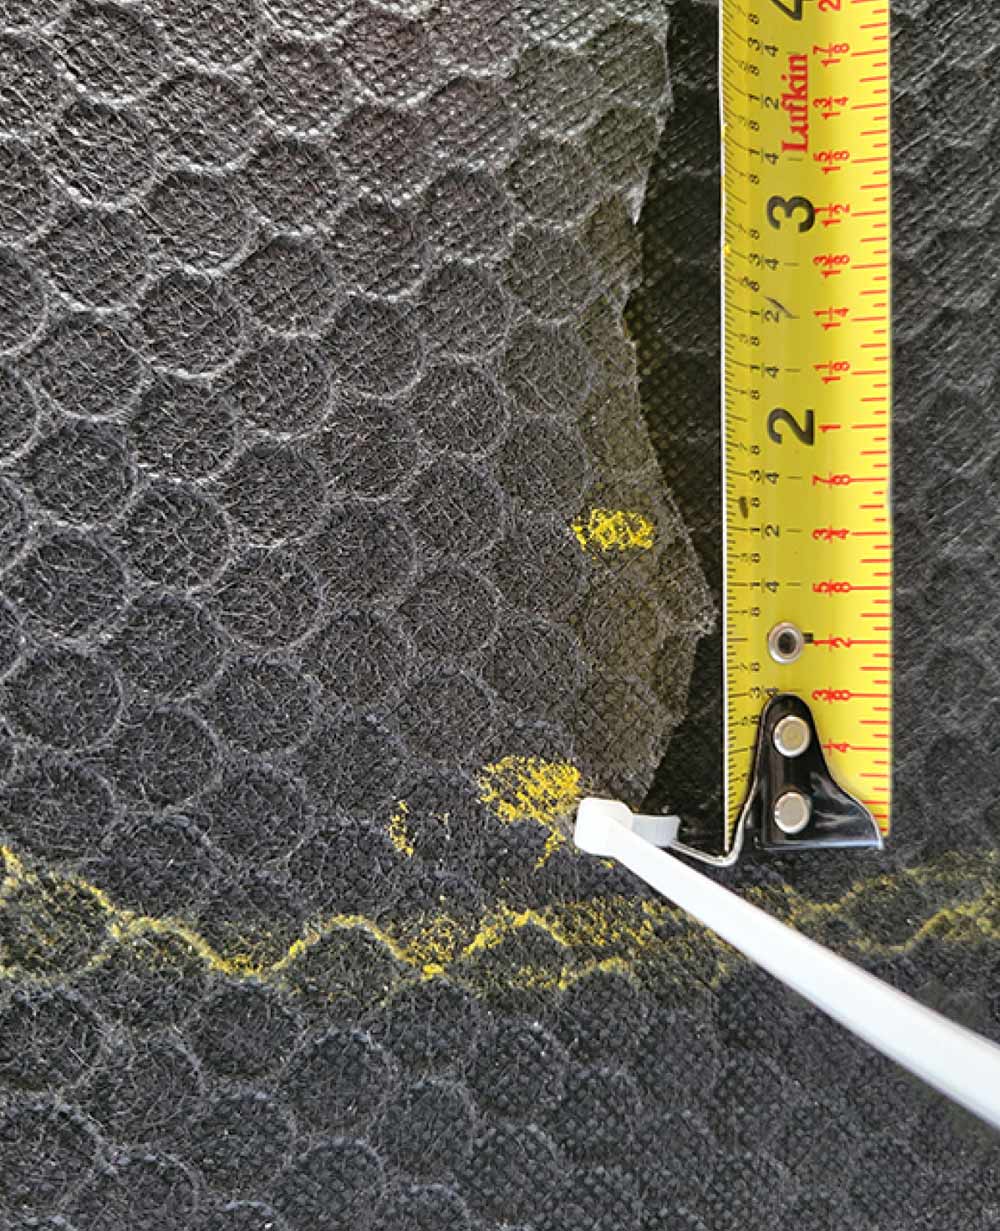
The first step was to measure the ideal location for the holes that would accept the zip ties. I decided to locate the holes 1/2 inch from the cut on both sides. The hole locations were marked with yellow construction crayon.
measuring tape being used to measure distance between two dots
drill being used to make a hole in Coroplast material
screwdriver being used to make a hole in Coroplast material
Holes for the zip ties were spaced 2 inches apart. Locations were measured and then marked accordingly using the yellow construction crayon. The first zip tie was laced and tightened to keep the cut from moving while the other holes were marked and punched.
At first, I tried drilling the holes in the Coroplast with a 9/64-inch bit, but that didn’t work because the material moved as pressure was applied, throwing off the drill point. A very sharp awl penetrated the Coroplast, even though the material moved under pressure. Using the awl make it possible to adjust the diameter the hole for the zip ties because of the tapered shaft.
measuring tape being used to measure distance between two dots
Holes for the zip ties were spaced 2 inches apart. Locations were measured and then marked accordingly using the yellow construction crayon. The first zip tie was laced and tightened to keep the cut from moving while the other holes were marked and punched.
drill being used to make a hole in Coroplast material
screwdriver being used to make a hole in Coroplast material
At first, I tried drilling the holes in the Coroplast with a 9/64-inch bit, but that didn’t work because the material moved as pressure was applied, throwing off the drill point. A very sharp awl penetrated the Coroplast, even though the material moved under pressure. Using the awl make it possible to adjust the diameter the hole for the zip ties because of the tapered shaft.
hand looping a zip tie through Coroplast material
Threading the zip ties through both holes took some doing. Bending the zip-ties into a U-shape helped but it still took time to navigate the material. If the cut is near the edge of the underbelly, it can be removed to improve access (not shown).
multiple zip ties looped through Coroplast material
After struggling for a while, the zip ties were threaded through the holes and left open. This made it easier to thread the zip tie next in line along the cut. White zip ties were originally used for illustrative purposed because the black counterparts were hard to show on camera. Black, exterior grade zip-ties are best for this type of project.
tightened zip ties looped through Coroplast material
excess being cut from tightened zip ties looped through Coroplast material
Coroplast material that's been stitched together with zip ties
When closing the zip ties, make sure they are not too tight. If you bear down on the closure, the material can become stressed and the zip-ties will dislodge from the material, making it more difficult the next time around. Once the zip ties were tightened, the tails were cut close using a high-quality, sharp cutting tool made for this purpose.
The zip ties did a good job closing the “wound.” This repair turned out better than expected and should last for years if the black, exterior zip ties are used. This is a great on-the-road emergency repair option, too.
tightened zip ties looped through Coroplast material
excess being cut from tightened zip ties looped through Coroplast material
When closing the zip ties, make sure they are not too tight. If you bear down on the closure, the material can become stressed and the zip-ties will dislodge from the material, making it more difficult the next time around. Once the zip ties were tightened, the tails were cut close using a high-quality, sharp cutting tool made for this purpose.
Coroplast material that's been stitched together with zip ties
The zip ties did a good job closing the “wound.” This repair turned out better than expected and should last for years if the black, exterior zip ties are used. This is a great on-the-road emergency repair option, too.