An Expanded View
[maghub_sidebar]
Extra Eyes icon
An Expanded View
truck towing a trailer in a driveway
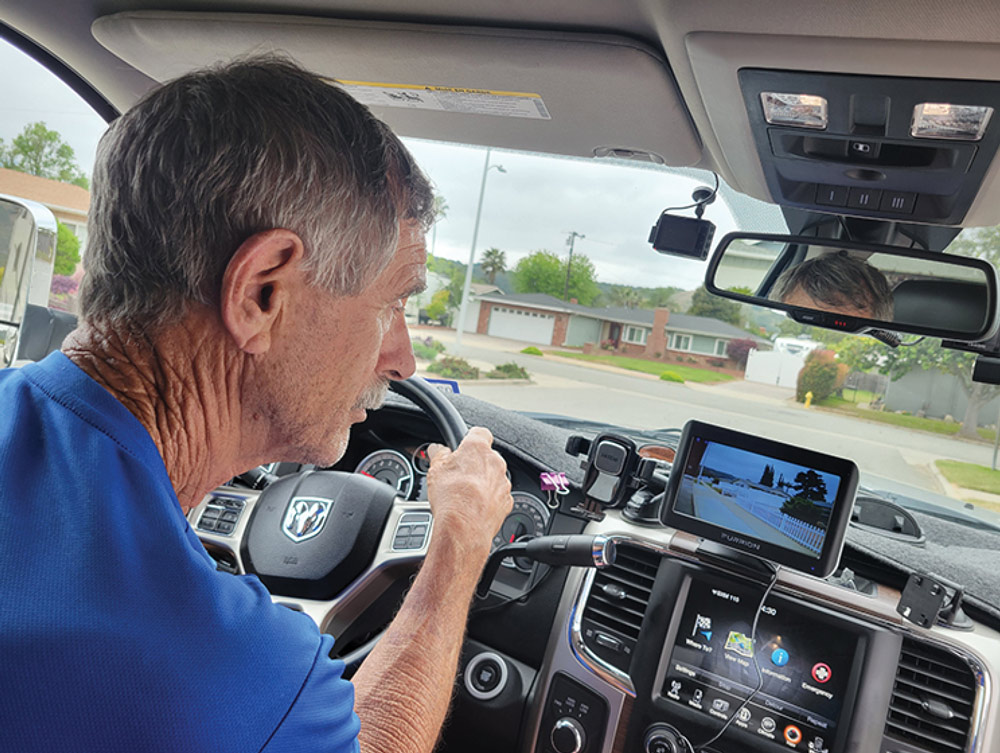
man driving and looking at a back up camera view
Towing a trailer or fifth wheel requires the utmost attention when negotiating roadways and backing into an RV site. Installing a backup camera system with “eyes” also on the sides takes a big chuck of worry out of the picture.
By Bill Gehr / Photos by the author
P

ulling a trailer or fifth wheel presents inherent challenges that all owners deal with, from watching traffic on the roadways to maneuvering in an RV park. When on the road, drivers must be on the lookout for other vehicles that seem to come out of nowhere in adjacent lanes when passing. Then there’s backing up, especially on the blind side — and let’s not forget obstacles that are out of sight when parking in back-in RV sites, especially if there are a lot of trees or shrubs blocking the view. The ongoing joke about yelling at your co-pilot becomes all too real in difficult situations.
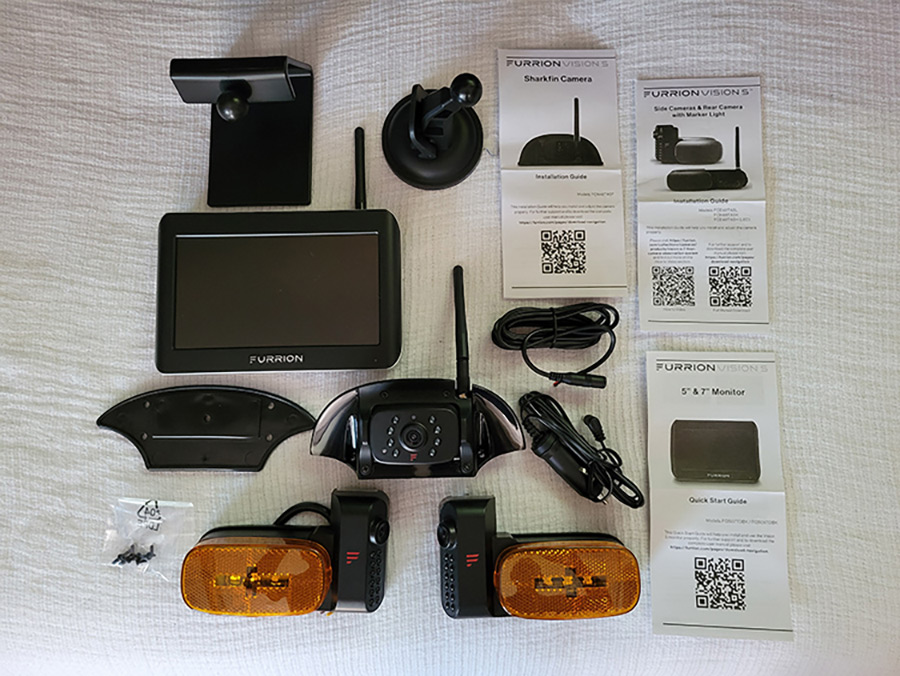
Portrait photograph close-up view of Lippert’s Furrion Vision S RV, which is a complete kit that comes with a Sharkfin backup camera, two side cameras and the requisite hardware; The instructions are very good, making this kit DIY friendly.
Lippert’s Furrion Vision S RV is a complete kit that comes with a Sharkfin backup camera, two side cameras and the requisite hardware. The instructions are very good, making this kit DIY friendly.
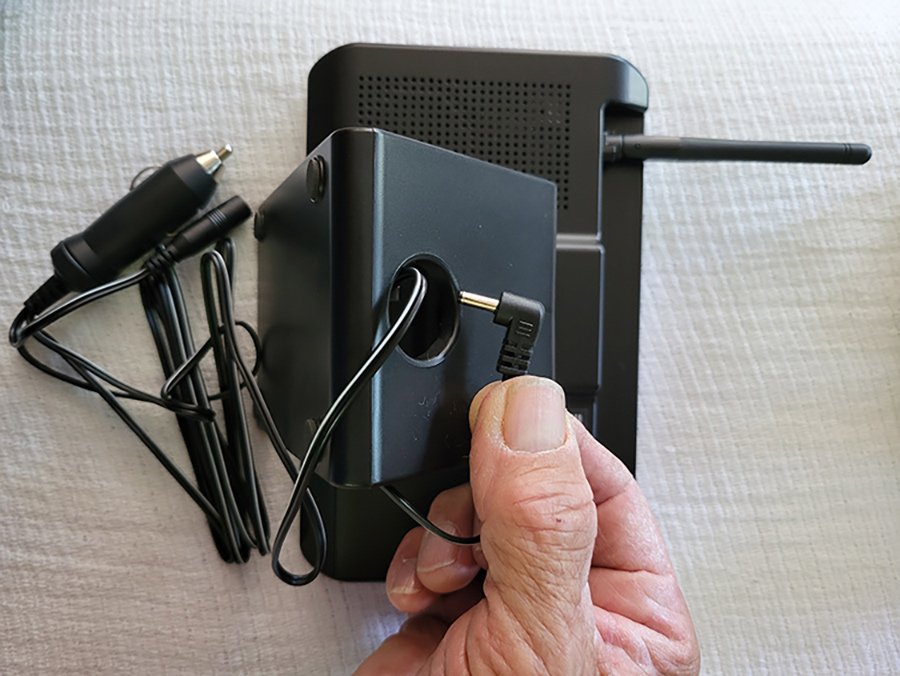
Portrait close-up photograph view of Bill Gehr's hand holding a specialty bracket from the Furrion Vision S Wireless RV Backup Camera System kit, which this bracket can be attached to the monitor so that it can sit on the dash and be removed at will; Power can be provided by a connection to a 12-volt DC outlet or hard wired, if desired.
A specialty bracket can be attached to the monitor so that it can sit on the dash and be removed at will. Power can be provided by a connection to a 12-volt DC outlet or hard wired, if desired.
Portrait close-up photograph view of Bill Gehr's hand holding an extension cable nearby the Furrion Vision S Wireless RV Backup Camera System device; The camera connects to the prewiring from the factory or can be hard-wired into the leads that power the clearance light in the rear in other installations (not shown).
The camera connects to the prewiring from the factory or can be hard-wired into the leads that power the clearance light in the rear in other installations (not shown).

Backup cameras mitigate much of the stress, but what about the sides? Fortunately, backup camera systems can be upgraded with side view cameras — and even better, manufacturers are pre-wiring their trailers and fifth wheels for plug-and-play camera installations, as was the case on my fifth wheel purchased last year. Furrion, a Lippert division (lippert.com), markets camera kits designed specifically for this purpose (although several companies offering backup camera systems can provide adapters for trailers pre-fitted for Furrion components).

The Furrion Vision S RV 3-Camera System with Sharkfin Camera—7” Monitor ($1,100) was a perfect choice for this project since the fifth wheel was pre-wired from the factory. It comes with a high-resolution monitor, a rear camera and two side cameras with attached clearance lights plus all the brackets and wiring needed for the installation. The monitor can be set to show multiple images at the same time; the rear camera has a 120-degree angle while the side cameras are set at 65 degrees.

A nice metal specialty bracket with a ball and socket also was provided with the kit for mounting the monitor. It allows the monitor to be placed on the dash and adjusts in several directions. There’s also a suction cup mount that came with the kit for “sticking” the monitor on the windshield or somewhere on the dash (smooth surface required). Since the cameras were bundled with the monitor, they were already paired to receive the wireless signals.

Installing the Vision S components was truly do-it-yourself friendly. On the rear of the fifth wheel was a plastic placeholder for the camera and the clearance lights on the sides have plastic extensions that were removed when the cameras were mounted. Both side clearance lights and the rear camera location were prewired. If the RV is not prewired for this system, camera power will need to be tapped into the system. If that’s the case, it may be necessary to purchase additional wire and connectors from a local source.

A ladder was needed to reach the top location for the rear camera. Since the fifth wheel was prewired, the only work involved removing the placeholder plate above the clearance light, plugging in the wire cable and mounting the camera — a 30-minute job at most. The side cameras and clearance lights were even easier; after removing one screw, the false plate was pulled away leaving a set of brass connectors. The new clearance light and camera were then slid into place as the spring-loaded brass pins automatically found their way into the connector. It took maybe 10 minutes to do both sides. Again, of course, plan on spending more time if the trailer is not prewired. Even so, it probably won’t take more than a couple of hours to complete the entire job if wiring is required.

After the cameras were installed, the monitor was attached to the bracket for placing on the dash and plugged into a 12-volt DC source. The system is activated when the parking (clearance) lights on the trailer are turned on. The rear camera came on first and even though the scene in the back was shady and dark, the picture was still clear enough to locate any obstructions. It’s possible to adjust the view to preference; for example, the camera can be focused to show part of the RV and areas behind, or to see deeper into the campsite.

Touching the screen will pop up icons for the side cameras and the door camera, if so equipped. This makes it very simple to switch cameras and/or provide a split view on the monitor. My only complaint with the system is the inability to adjust the viewing angle on the side cameras. They are factory set to provide a view away from the sides and too far into the adjacent lanes. It all works great as designed, but a better compromise would be to show the area closer to the sides of the trailer, which would provide better vision of passing vehicles and maneuvering into campsites with tighter access.

Although the images on the screen come up quickly, I may wire the system to be activated at all times (while driving) to allow for monitoring of traffic behind the RV and to watch over my bicycles mounted to a rack out back.

The safety afforded by a backup and side-view camera system is well worth the money. Once you get accustomed to having “eyes behind you,” you’ll wonder how you ever did without such a support system — and your co-pilot will thank you.
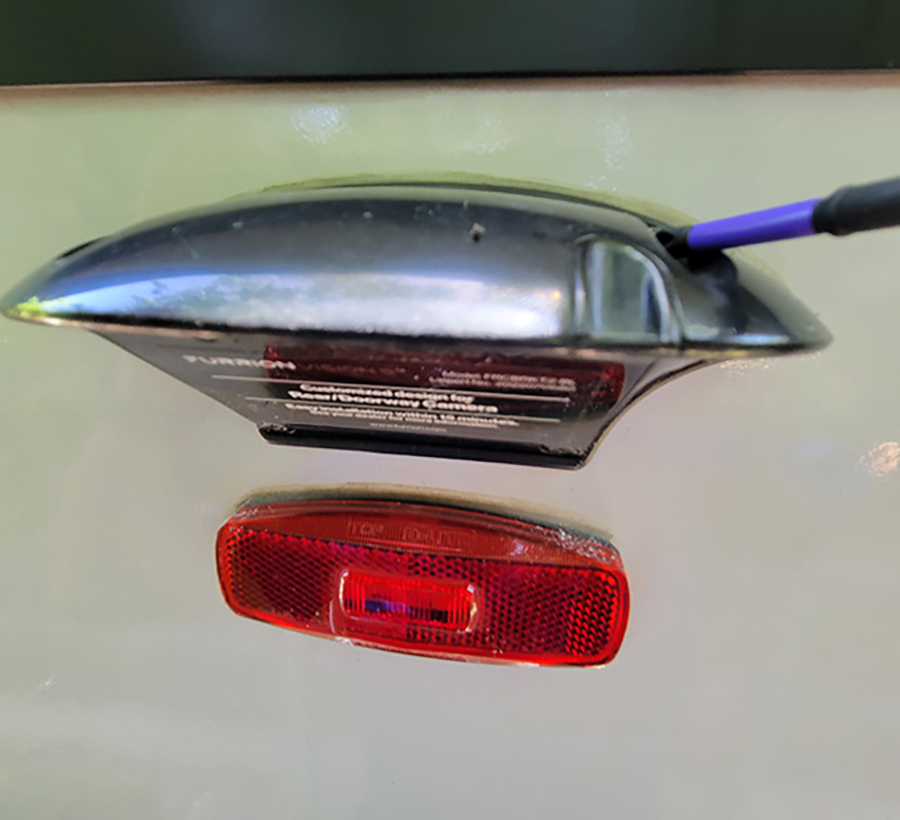
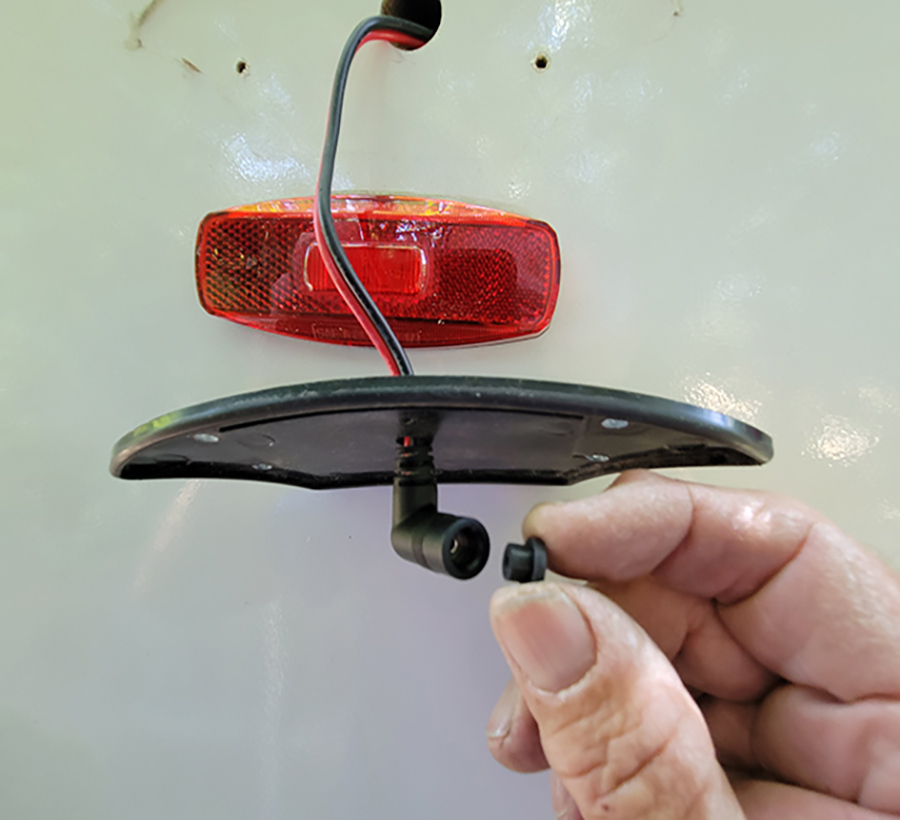
Portrait photograph close-up view of a plastic placeholder fixture for each side cameras, which is provided when the trailer is pre-wired from the factory; Two recessed screws hold the plastic in place. You’ll need a long shaft Phillips screwdriver to remove the screws. Once the placeholder is removed, the wires (positive and negative, 12-volt DC activated when the clearance lights are turned on) and rubber grommet are ready to be plugged into the camera. Weatherproof plug is removed before connecting the camera.
Portrait photograph close-up view of Bill Gehr's hand holding a black rubber grommet belonging to the camera device situated nearby the plastic placeholder fixture
A plastic placeholder fixture for each side cameras is provided when the trailer is pre-wired from the factory. Two recessed screws hold the plastic in place. You’ll need a long shaft Phillips screwdriver to remove the screws. Once the placeholder is removed, the wires (positive and negative, 12-volt DC activated when the clearance lights are turned on) and rubber grommet are ready to be plugged into the camera. Weatherproof plug is removed before connecting the camera.
Portrait close-up photograph view of Bill Gehr's hand holding the camera housing, which is plugged into the factory-provided wires before mounting on the wall; The gasket is retained for this step.
The camera housing is plugged into the factory-provided wires before mounting on the wall. The gasket is retained for this step.
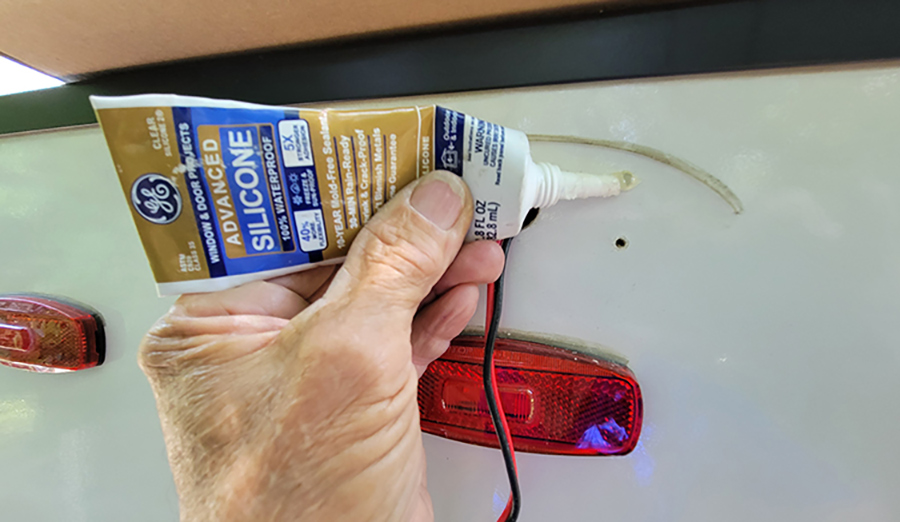
Portrait close-up photograph view of Bill Gehr's hand using a silicone sealer bottle to squirt into the gasket although the gasket has been designed to stop water intrusion, for which silicone sealer was applied as extra insurance; Any moisture that works its way into the sidewall can create almost undetectable damage down the road.
Although the gasket is designed to stop water intrusion, silicone sealer was also applied as extra insurance. Any moisture that works its way into the sidewall can create almost undetectable damage down the road.
Portrait close-up photograph view of Bill Gehr's hand holding a part of the camera's antenna; Once the camera is installed, follow the instructions for pointing the antenna in the proper direction. Proper pointing is critical for transmitting signals to the monitor.
Once the camera is installed, follow the instructions for pointing the antenna in the proper direction. Proper pointing is critical for transmitting signals to the monitor.
Portrait close-up photograph view of Bill Gehr's hands using a screwdriver to remove the orange light lens fixture; Mounting the side cameras is even easier than installing the back camera. The first step is to pop off the clearance light lens. If the trailer is not pre-wired, you’ll need to remove the stock clearance light (not shown).
Mounting the side cameras is even easier than installing the back camera. The first step is to pop off the clearance light lens. If the trailer is not pre-wired, you’ll need to remove the stock clearance light (not shown).
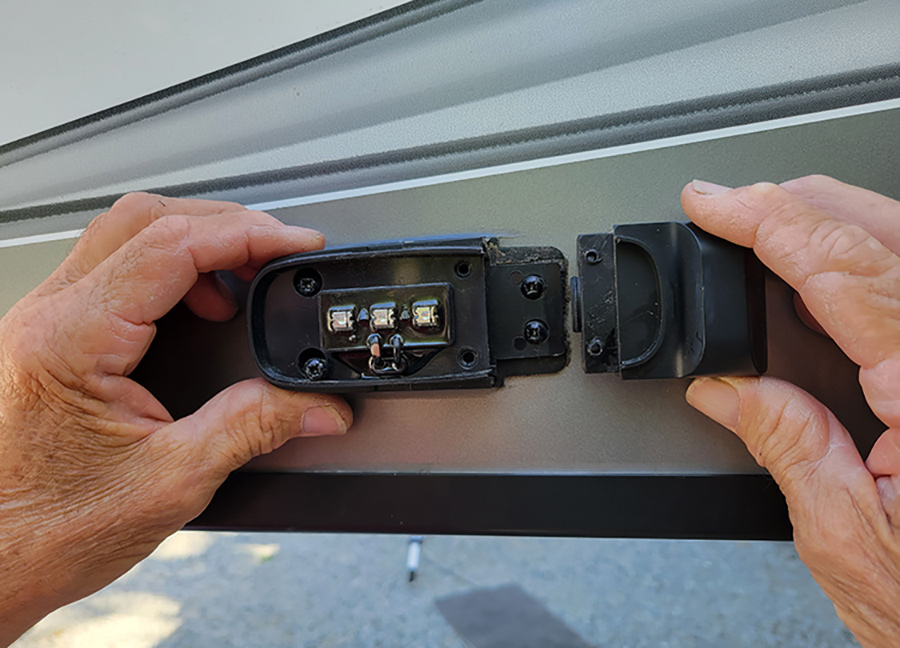
Portrait close-up photograph view of Bill Gehr's hands holding the false plate, which is pulled away from the clearance light base (pre-wired system) as this was done via after removing two tiny Phillips head screws
After removing two tiny Phillips head screws, the false plate is pulled away from the clearance light base (pre-wired system).
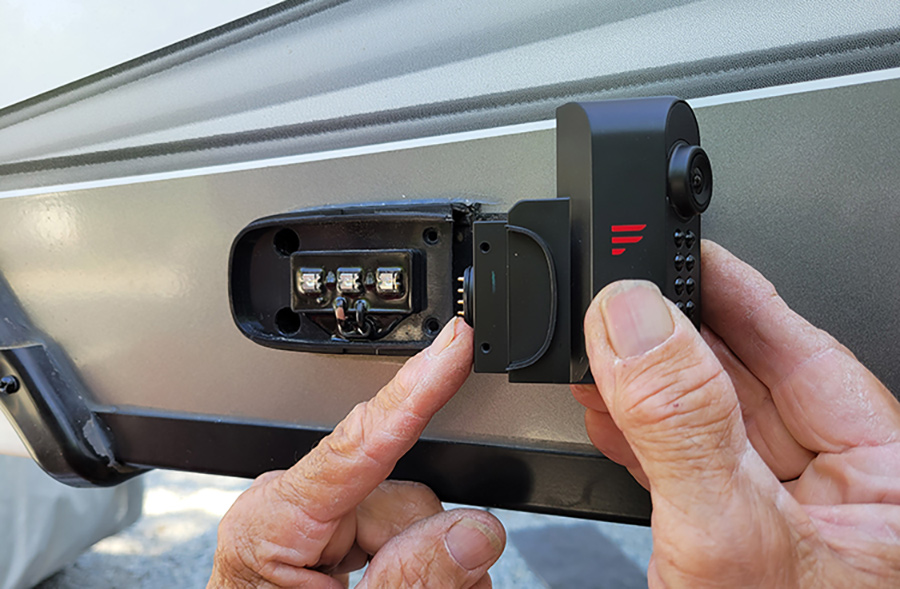
Portrait close-up photograph view of Bill Gehr's hands holding the side-view camera, which is simply pushed onto the connecting pins and slid into place; The tiny screws are then reinstalled. Once the clearance light lens is snapped on, you’re done.
Portrait close-up photograph view of the side-view camera with the clearance light lens snapped on
The side-view camera is simply pushed onto the connecting pins and slid into place. The tiny screws are then reinstalled. Once the clearance light lens is snapped on, you’re done.
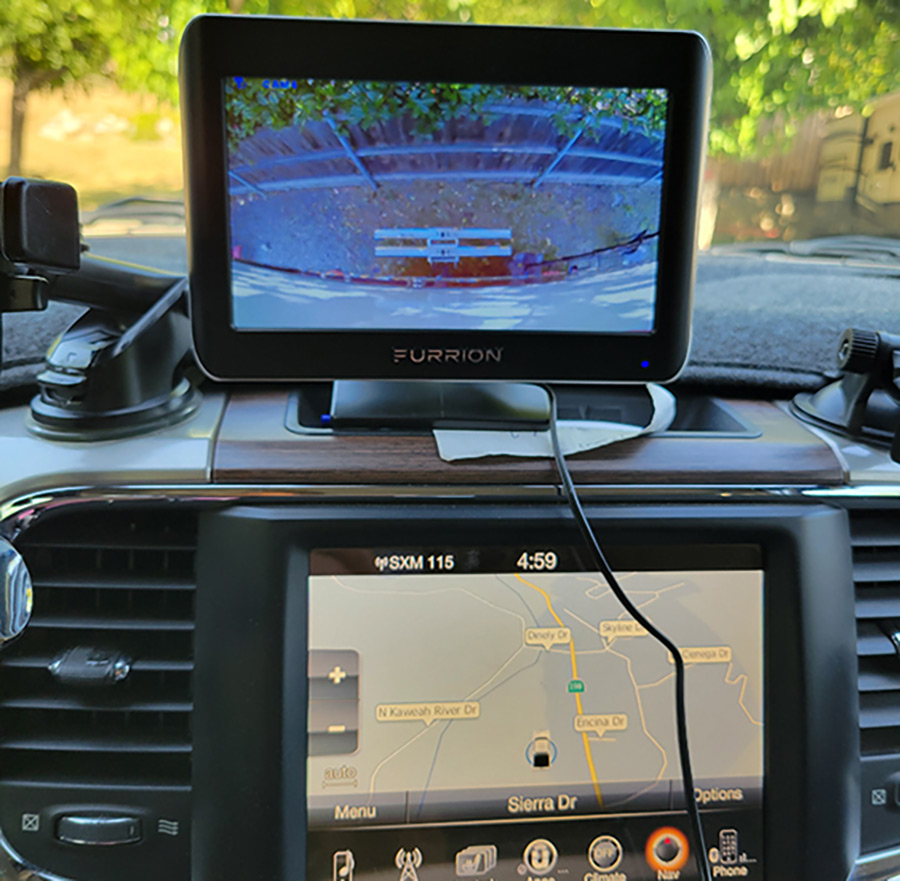
Portrait inside close-up photograph view of the 7-inch monitor Furrion Vision S Wireless RV Backup Camera System device located temporarily set on the dash space area of the vehicle using the specialty bracket that comes with the kit; Other options require the use of the bracket with the suction cup.
If dash space is at a premium, the 7-inch monitor can be temporarily set on the dash using the specialty bracket that comes with the kit. Other options require the use of the bracket with the suction cup.
Portrait close-up photograph view of the 7-inch monitor Furrion Vision S Wireless RV Backup Camera System device screen showing the camera surroundings as Bill Gehr's finger is seen holding it; Multiple icons (tool bar) are displayed on the bottom of the screen. View from an individual camera can be displayed or multiple images can be seen at the same time. Guidelines can be shown on the screen to help determine distance to an obstacle. High-resolution image is very sharp.
Multiple icons (tool bar) are displayed on the bottom of the screen. View from an individual camera can be displayed or multiple images can be seen at the same time. Guidelines can be shown on the screen to help determine distance to an obstacle. High-resolution image is very sharp.