

o RV can be considered self-contained without a bathroom — and, of course, a toilet. Unless you’re into potty humor, a toilet is one of those “things” that most owners take for granted; they only serve one purpose and are usually not top of mind until they break. The trend is to have a toilet that emulates those found in stationary homes, with preferences for porcelain and residential-type seats. These days, there are myriad toilets on the market for RVs, including those with electric- and/or vacuum-flushing mechanisms and Americans with Disabilities Act (ADA) height compliance. For the most part, the majority of RV toilets have foot pedals for flushing and are made of plastic or porcelain. Nothing terribly exotic.
We first installed a Dometic 320 in our fifth wheel only days after delivery, replacing a smaller model that was less comfortable. It’s a good toilet, albeit the flushing stream a little anemic, but that wood seat was a game changer. While it provided decent service, full-time use pushed its limits, especially when it came to valve seal integrity. It was time for an upgrade.
We chose the Thetford Aria Deluxe II for its forceful — and complete — flushing cycles and because pushing a button has a certain appeal for those who enjoy automatic features and, frankly, like pushing buttons. The company’s big selling point is the ability to push the button and walk away, allowing the mechanism to complete the flushing cycle. And it works fabulously.


Obviously, the installation process is more complicated than simply replacing one toilet with a similar product because 12-volt DC power must be routed to the back of the Thetford toilet and plumbing modifications are necessary (there’s no such thing as a universal installation). The procedure is not difficult, but it does take a little time to sort out the installation instructions.
The first step was to figure out a source for 12-volt DC power, which is needed to operate the flushing mechanism. Fortunately, the rig’s power distribution panel was on the other side the bathroom wall near the toilet location. A hole was drilled through the wall and wires snaked to the distribution box where they were connected to an open, fused 12-volt DC circuit. Before the toilet was installed, a new harness was connected to the existing wires in the back of the toilet using a two-prong connector.
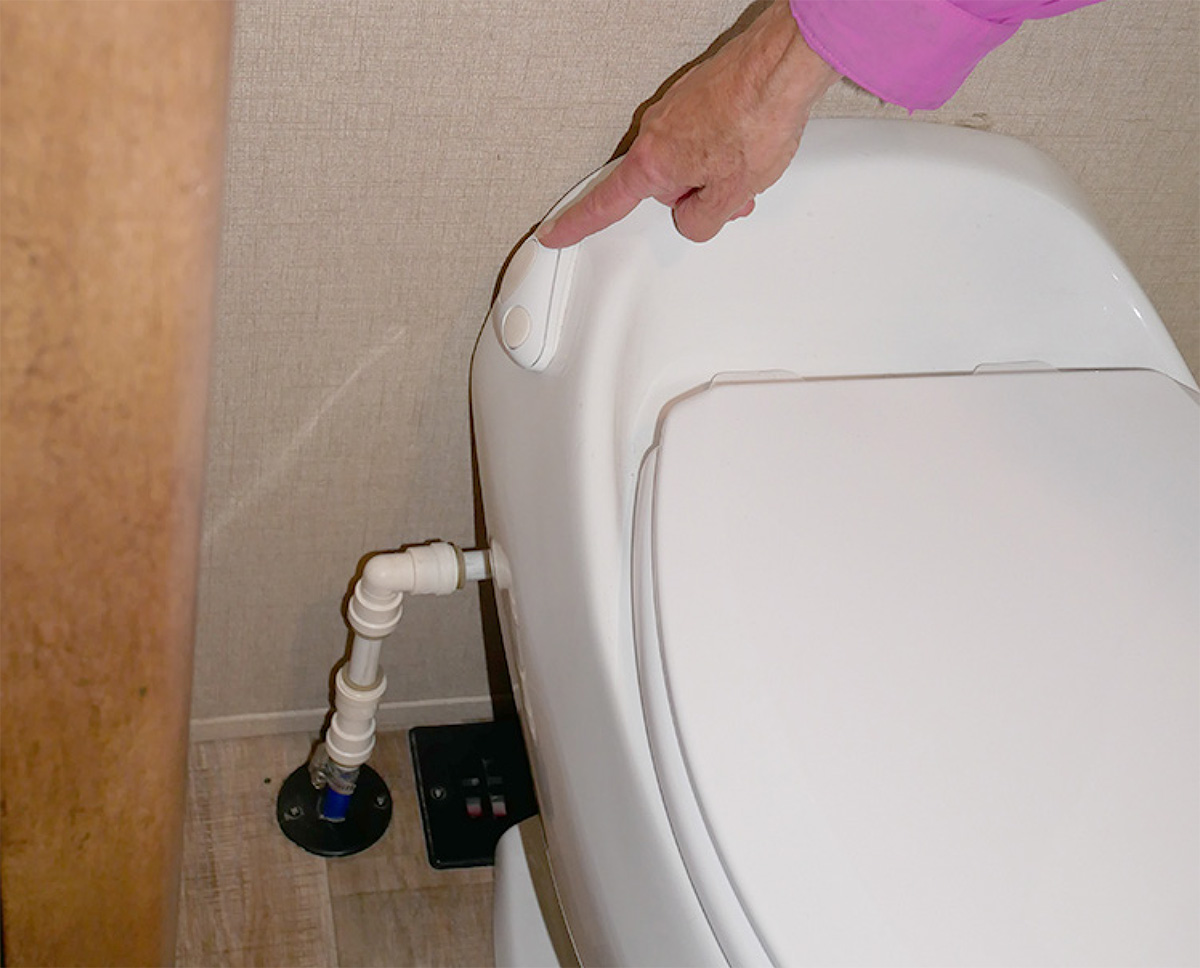
While the toilet was propped up on the tow vehicle tailgate for wiring and plumbing, we oriented ourselves with the controls/override integrated into the back of the housing. An included manual override valve can be used to flush the toilet in the event of a power outage, but it takes some alacrity to get your hand in there to turn the knob once it’s installed. Nevertheless, it’s there and will get you out of a jam, if necessary. The other control allows you to switch from automatic flush — with a previously set level of water usage when hookups are available — to one that lets you control the amount of water manually when in a primitive environment.
The next step was mounting the toilet to the floor. Once the toilet was centered over the closet flange and the seal was in place, pilot holes were drilled and the bolts driven into the floor. Mounting the toilet directly to the floor provided much more support than bolting to the slots in the flange collar (which had a tendency to break over time under the weight of a heavier toilet).

Configuring the plumbing took some planning, but in the end, we employed Watts AquaLock Push-to-Connect fittings (watts.com) and a few inches of Pex tubing to make the connection. A barb-to-Pex adapter was hose-clamped to the existing water pipe to attach the fittings. Make sure you use high-quality, wide hose clamps — otherwise the connection will likely leak.
Some owners might consider the electric-flush mechanism to be somewhat of a novelty, but a controlled amount of water through the flushing cycle keeps the bowl cleaner with less risk of getting paper caught in the valve seal. It’s all about timing; there’s just the right amount of pulsating water to move the contents through the valve before it closes. Manual operation via a foot pedal, for example, requires the user leave the water running long enough, which can be problematic when guests not familiar with RV toilets use the facilities. Also, kids tend to close a manual valve too soon.
Water can be added to the bowl, when necessary, by pushing the smaller of the two buttons on the left side of the toilet. Be prepared to use more water when flushing in residential mode. This is not a problem when hooked up and, as a matter of fact, the extra amount of water assures that the holding tank contents will be diluted enough to help with a more forceful flow when dumping. This will help prevent the dreaded build-up when not enough water is used during traditional, foot-pedal flushing. Consequently, the time it takes to flush the holding tank was reduced substantially — a nice side benefit of having controlled water flow during flushing. There’s little doubt the Thetford Aria is worth the money ($670-750 street prices). It takes a little time to get used to the sound of the “flushing monster” when the mechanism is activated, but that’s part of the interaction of the gurgling water and motor noise when the valve opens and closed.
It’s hard to believe that flushing a toilet could be this much fun.


