



f you’ve somehow missed it, RV interior design is all the rage these days. Virtually every major RV manufacturer has an interior designer or two on staff — and for those that don’t, suppliers such as Lippert and Patrick Industries have founded design studios to assist builders in the fabrication of a more custom “look” to RV living quarters. These designers go to the same home shows, subscribe to the same magazines and speak to the same trend-setters and product suppliers as the people responsible for the extraordinary rooms photographed for the covers of those magazines.
Their task is at once both seemingly simple and arduous — identifying upcoming trends in brick-and-mortar homes and adapting them to a mobile lifestyle.
It’s not easy to do when you’re only working with about 400 square feet of living space, but their limited success — underscored to an extent, perhaps, by the popularity of current “farmhouse” interiors which jettison “traditional” wood tones for light colors — is evident on every RV dealership lot across North America. “Residential style” has, in fits and starts, been a years-long cornerstone of RV interior designers when choosing everything from colors and fabrics to backsplashes and faucets.


There’s a reason for that: trends have an expiration date. The only problem is, no one knows when it is. Or, as Alice Zealy puts it, “fads fade — but style is eternal.” And the “style” she’s referring to can’t be found on an assembly line. It’s personal. And it’s what attracted her to the RV lifestyle.
Like a lot of RVers, Zealy is painfully aware of the shortcomings of older RVs. She owns one, a 2003 Holiday Rambler Presidential fifth wheel bought well-used and, at the time, unlivable.
“The guy that had it before me had started to ‘renovate’ it,” she said, “but he really didn’t know what he was doing. For instance, he started painting the cabinets, but hadn’t sanded or primed them first — just threw paint up. They looked terrible and started peeling. So, I was basically starting from scratch.”
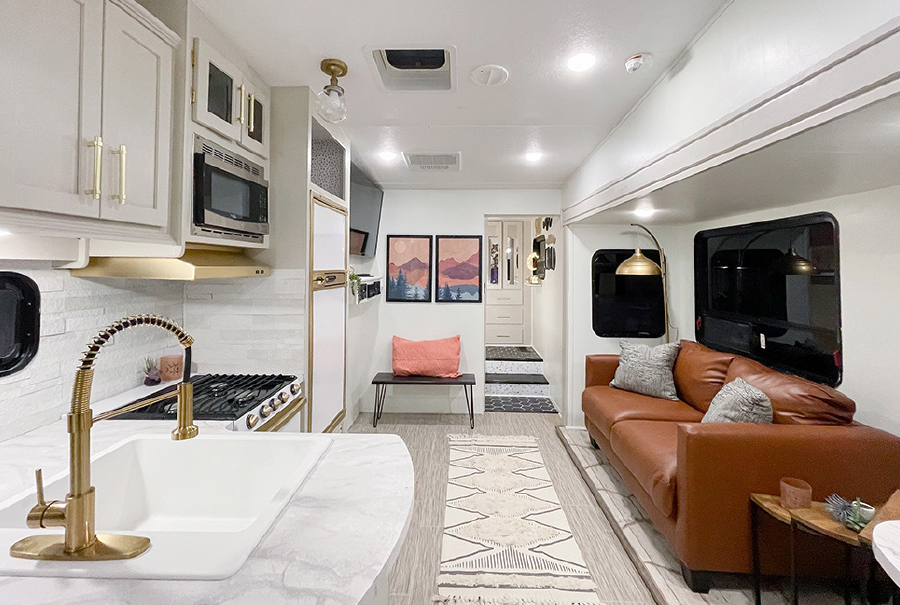
In this case, “starting from scratch” is an apt description. The North Carolina resident essentially gutted the fifth wheel down to the studs, retaining little of the original interior except the cabinets “because they were solid wood.” Over the next few months, plans were laid and sandpaper, primer and paint was ordered in bulk. But she wasn’t just renovating the Holiday Rambler — she was transforming it. And that took a lot more than discarding nearly two-decades-old carpeting and linoleum in favor of plank-style floors and tile, or new colors and backsplashes and window treatments.


And everywhere, the predominantly white interior is splashed with blue accents and an eclectic array of wall décor reflecting her personality.
Then, after moving the Holiday Rambler to a nearby Thousand Trails resort as her residence, Zealy did what most of us would do: she showcased her efforts on social media. And the feedback, she said, was “incredible.” More to the point, viewers began asking her if she’d be interested in taking on their RVs, “and I said ‘sure — why not?”

“This really is one area where you can’t cut corners,” she said. “Put some time and muscle into it — and wear a mask when sanding and gloves when using chemicals and paint.”
Here, then, are Alice’s recommendations on surface preparation, paint and her tools of the trade:
- Remove all cabinet doors and drawers.
- Use a DA orbital sander with 220-grit sandpaper to sand every inch of surface you intend to paint.
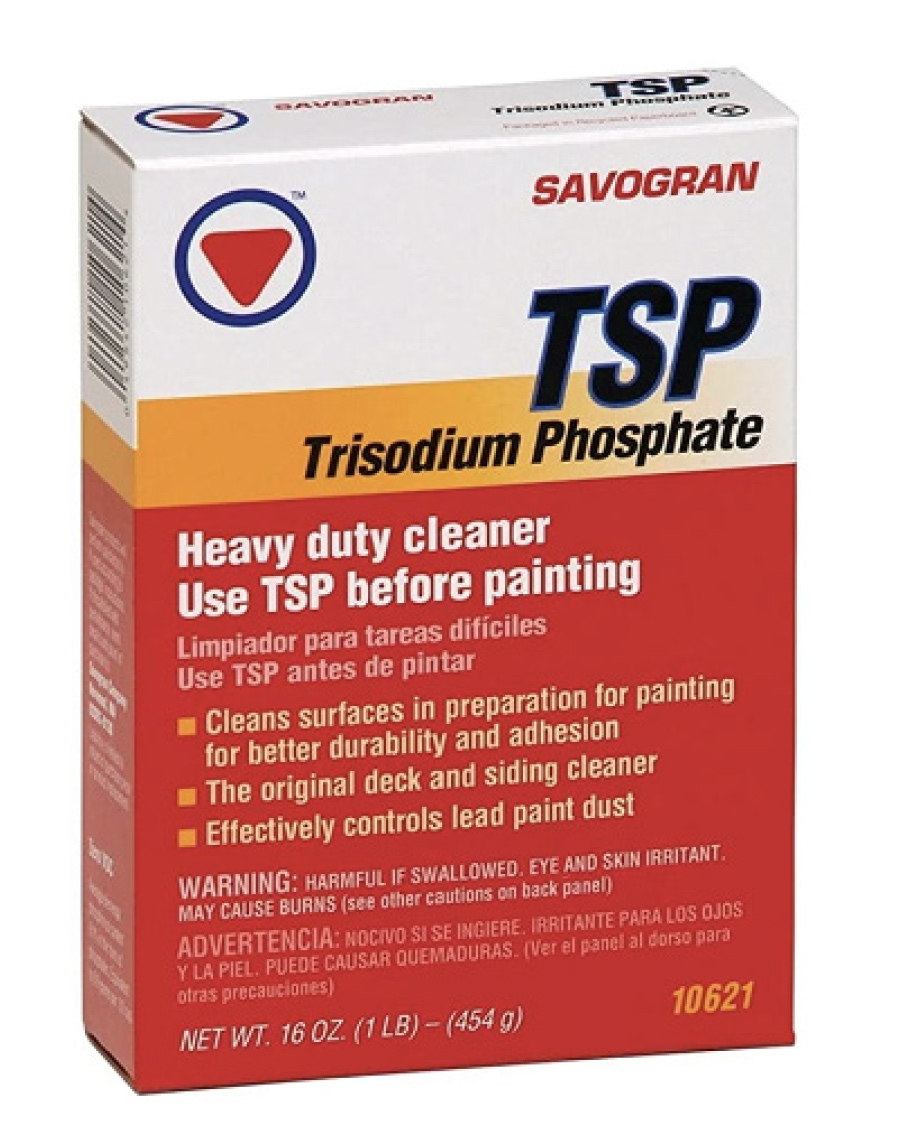
- Use TSP (Trisodium Phosphate) all-purpose heavy-duty cleaner mixed with warm water (per the instructions on the box) to wipe down with a wet sponge everything you sanded (and wear gloves).
- Go back over the same areas and wipe it down a second time with plain warm water and sponge.
- When painting, Alice recommends an industrial spray gun. She uses a Graco Magnum 262805 X7 Cart Airless Paint Sprayer to prime and paint, which offers adjustable spray speeds and pressure — but unless you’re going to use it more than once a year, it’s costly (about $479 at home-improvement stores). Less-expensive options are available — and also consider renting the spray gun. And yes, you can also use a brush and roller — carefully, to prevent brush strokes remaining on the surface.
- If using a sprayer, cover all windows with kraft paper (or plastic) and FrogTape (multi-surface painter’s tape, $9.98 at Amazon). If using a roller, tape the window frames completely. “If you’re not the best at taping, use a razor blade or X-acto knife to trim the tape to the exact edge of the window frame,” she advised. Kraft paper, by the way, is a strong unbleached brown paper available at Amazon and home-improvement stores in a variety of widths and lengths.
- Apply primer.
- Wait 24 hours, then tape off the section you want to paint. “I typically do the walls first,” she said, “so I tape off the ceiling and cabinets. If you’re using a sprayer, you’ll need to cover the ceiling 18 inches in from the wall(s) with kraft paper or plastic, and FrogTape — and if you aren’t replacing the floor, be sure to cover it entirely and tape along the edges by the wall.

- Remove the FrogTape immediately after finishing painting and let the area dry for a few days before taping off for the next location. Note: Paint typically takes up to 14 days to fully cure, so be careful to not scratch or bump it for two weeks.
- Repeat the process as the job requires until it’s completed.
Oh, yeah — those cabinet doors and drawers you removed? “I typically prime and paint them outside or in my shop, depending upon the weather,” Alice said. “It’s a good idea to use some sort of “riser” to keep them off the ground while painting — red Solo cups work great!
“I also wait to reinstall the cabinet doors and drawers until the renovation is essentially finished,” she added. “That prevents them from inadvertently getting banged up during the remodel. Just store them securely away someplace.”
Product Recommendations
Primer — Kilz Adhesion water-based for interior/exterior
Walls — Sherwin-Williams Superpaint Satin (an interior acrylic latex paint)
Cabinets — Sherwin-Williams ProClassic Semi-Gloss

For a time, Zealy put that education and talent to work, renovating homes for her father’s property management company, but when he passed away suddenly, the need for a paycheck pushed her in different directions for a number of years. Selling shoes, creating store window displays and designing custom jewelry — even jewelry included in gift bags handed out at the Emmys and the Golden Globes — wasn’t the stuff of architectural dreams, so for Alice, Rain 2 Shine was, in a lot of ways, returning to her roots. To say she’s made the most of it would be an understatement. Since establishing the company in January 2021, Rain 2 Shine has affected more than a dozen RV transformations. And while she didn’t receive her first commission for three months, there’s now a waiting list for her services. Not surprisingly, she’s also added a pair of technicians and asked her sister, Mary-Knox Zealy, owner of When Life Knox, to join her.


Among her other efforts:
- “Gidget” is a GMC conversion van owned by an elderly retired gentleman who, with his wife, enjoys attending music festivals. “They had just removed the back seat and installed a blow-up mattress,” said Zealy. “But their dream was to have it turned into a real camper van.”
As Zealy discovered, there’s a difference between building a conversion van and updating an RV.
“With an RV, you already have the electrical and plumbing in place, you’ve got the walls and ceiling already in,” she said. “We took this down to the bare shell, then had to design and route all the internal systems and put in the walls and ceiling and floor.” Fortunately, Eric lent a hand on the plumbing (“I’m getting pretty good with electrical,” Zealy added) and the conversion was made a bit simpler by the owner’s requirements, which only included a bench, sink, cabinetry, microwave, a place to store a generator (under the bed) and a flip-down TV.
Top 5 Recommended Changes
1—PAINT (yes, it’s intentionally capitalized — it’s that important)
2—Flooring
3—Countertops
4—Backsplash
5—Window Treatments
“Lighting is an easy and somewhat inexpensive way to update your RV,” she told RV Enthusiast. “You can use any kind of lighting (RV or residential) as long as it will take a 12-volt bulb. You can buy 6-packs of 12-volt bulbs on Amazon in different color spectrums, from warm white to daylight. Make sure, though, that you check the measurements before you buy a new fixture so it covers any holes when removing the old lighting,” she added.
For anyone on a budget, Zealy recommends making a list of priorities — and start with the top two. “You can take it from there — adding a backsplash, replacing a sink — but I always tell people, ‘knock out the two biggest jobs first and go from there.’”
- “Maisie Moon” is a fifth wheel owned by full-timers with a 2-year-old (Maisie) and two dogs. Along with a host of furniture changes, new paint and cabinetry hardware — which goes a long way to changing the appearance in an RV all by itself — Zealy and her crew replaced all carpeting with linoleum and tile. Two changes stand out: the cabinets forward of the refrigerator were removed and the walls restored, which truly open up the space, and the bathroom earned a new sink, wallpaper and lighting.
“It actually looks more involved than it was,” Zealy said. “We didn’t really ‘move’ anything, other than just a bit with the sink for the new faucet. We also removed the original shower liner and rebuilt it as we would a residential shower. The panels are huge and look great — I was a little leery of them at first, but they worked out really well and went a lot easier than most of my tile jobs.”
By the way: another refreshing aspect of Zealy’s designwork is her willingness to share what she’s done. Visitors to the company’s website — rain2shineventures.com — will not only see before-and-after photos of a number RVs transformed by the company, but Zealy also includes information on virtually everything used to transform the rig. Want to know what brand and color of paint she used for the kitchen and bathroom cabinets in Maisie Moon? Wonder where she acquired the Boho braided pillow cover or the curtains seen in the bedroom of Stella? It’s all there — with links that take you directly to the supplier.
While Zealy likes to start with a “blank canvas” — an unmolested RV — it’s not unusual for her to be approached by someone who attempted the job first only to discover they are in over their heads.

A paint job, she noted, can usually take between two and three weeks when including the requisite sanding and taping. “Prep, by itself, usually takes me an entire week,” she pointed out.
Not surprisingly, prep and paint also tend to account for the lion’s share of the cost of a Rain 2 Shine renovation, which begin with far-reaching discussions between Zealy and the client.
“When I sit down with a customer, one of the first things I ask is if there’s anything they’ve seen in photos that they like, whether it’s on Pinterest or Google or any other site. I ask them to send them to me so I know what their style is,” she said. “I want to be sure what we do is functional for their needs and their lifestyle. You have to find a balance between being aesthetically pleasing and functionality.”
And, while Zealy will give a prospective client an estimate for labor, she doesn’t give estimates on materials.
“Prices fluctuate, sometimes from one day to the next,” she said. “But I always give them three options; more than three can be overwhelming. So whether it’s paint or a light fixture or a sink, I pick what I think will fit the ‘look’ and then they can choose what they like and what they want to spend.”
Costs can also vary with the intricacy of the transformation, she added. “Do they want the ceiling one color, and their walls another? Some people also want their upper cabinets a different color than the bottom cabinets. If you’re taping off four or five different times, it’s time-consuming and labor-intensive.”
And, because transforming an RV into a “personal space” often means changing the actual floorplan — from turning a bedroom into an office or moving the bathroom to the other side of the camper — there’s a cost involved in that, as well, especially if it requires modifying the electrical and/or plumbing systems.
At the end of the day, though, it all comes down to style. “The No. 1 reason people want to have their RV renovated is, they want it to feel like home,” said Alice Zealy. “They don’t want it to feel like a camper. And to be a home, it has to reflect who they are.”

Exteriors present sometimes seemingly insurmountable hurdles to restoring an RV’s former appearance. When you consider the harsh environment the outside of your RV is forced to endure, it’s understandable — and we haven’t even touched on the toll taken on exteriors by everything from bug splatter to road debris.
Unfortunately, you can’t just restore an exterior in phases unless you want to stand out in the campground for all the wrong reasons. If the weathering isn’t extreme, exterior surfaces can sometimes be restored by anyone knowledgeable about cleaners, cutting compounds and waxes — but even then, the original factory graphics usually can’t be brought back from the grave. That’s when RV owners usually discover that their dealership — and their manufacturer — don’t normally stock older replacements.

“We’ve been in business almost 40 years, and I could get you designs dating back 40 years ago,” said Doug Graham Jr., BGS vice president and general manager of the company’s Elkhart, Indiana, facility. “Our library of designs and parts and shapes and sizes for the RV and marine industries is extremely large. There’s a good possibility that for any retail consumer who calls, we have what they need. We will have instant access to that design.”
Further to that, BGS is also making its team of expert installers and designers available for RV owners who want either partial or full wraps instead of attempting to restore the original exterior appearance.
Customers also can work with BGS designers to update or personalize existing graphics, along with selecting a color change or even creating a custom design.
“You can freshen up the entire look of an RV just by wrapping the front cap,” Graham said. “Typically, that’s where RVs suffer the most damage — and it can be difficult to get paint repaired out in the field. But beyond that, maybe someone bought a new tow vehicle and they have a blue graphic on their coach that doesn’t match their new truck. In less than a day, they can refresh the entire look of the coach and match it to whatever they might be towing it with.”
Interested in wrapping your RV, or needing replacement or new graphics? Contact:
burlingtongraphics.com
Ellen Damron
(262) 554-8808
Ellen.damron@bgsink.com