


Preventing heat-robbing breezes from flowing under your fifth wheel is one key to a warmer, less expensive winter
f the professional weather prognosticators are correct in their predictions for the U.S. 2021-2022 winter, the jet stream that carries storm fronts in from the Pacific Ocean and the Arctic will be dipping deeper into the Midwest this season — and bring with it colder-than-average temperatures across much of the country.
At the same time, natural gas prices — of which propane is a natural byproduct — continue to rise. By some estimations, the cost of natural gas has increased by more than 180% compared to just a year ago. These two factors don’t bode well for anyone who continues to enjoy the RV lifestyle once the snow starts flying. But there are ways to “survive” quite easily in cold-weather conditions.
f the professional weather prognosticators are correct in their predictions for the U.S. 2021-2022 winter, the jet stream that carries storm fronts in from the Pacific Ocean and the Arctic will be dipping deeper into the Midwest this season — and bring with it colder-than-average temperatures across much of the country.
At the same time, natural gas prices — of which propane is a natural byproduct — continue to rise. By some estimations, the cost of natural gas has increased by more than 180% compared to just a year ago. These two factors don’t bode well for anyone who continues to enjoy the RV lifestyle once the snow starts flying. But there are ways to “survive” quite easily in cold-weather conditions.
To be clear, the typical heavy vinyl or fabric RV skirting adds nothing to the R-value like increased insulation. Instead, think of it like a windbreaker that you would wear over a sweater; on its own, it would not keep you warm — but by preventing cold air from pulling heat away from your body, it retains heat, and that keeps you warm. Skirting does do a good job of helping retain more of the heat produced by the RV’s furnace and any secondary heat sources.

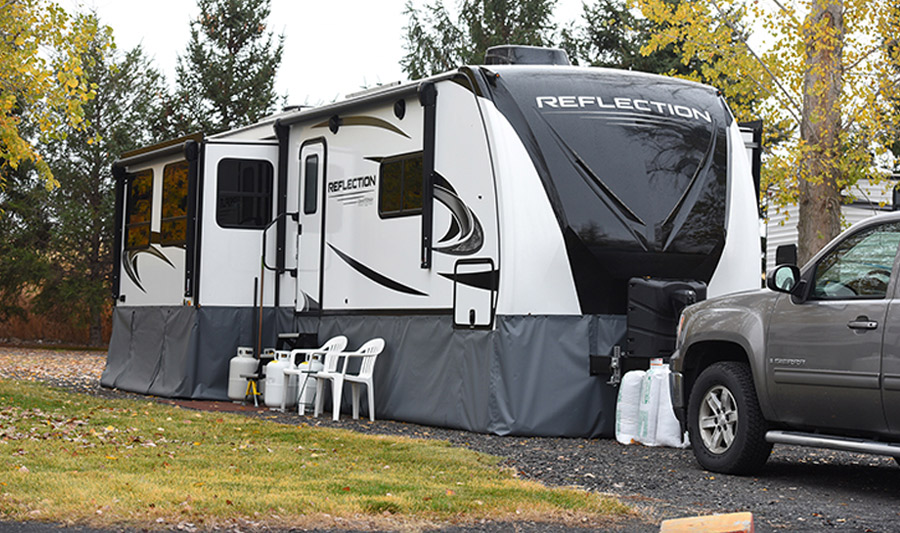
The installation of RV skirting is becoming more popular as full-time RVers face rising heating/cooling bills. A properly installed skirting helps reduce such costs and keeps the interior more comfortable as well.
In regions of the country where sub-freezing temperatures during the day can persist for weeks on end, you can build a wood framework under your RV out of 2 x 2-inch wood sections and attach rigid insulation (foam) board to it. Place and attach the framework pieces around the RV. Rigid insulation like this provides an R-value of about R5 per inch of thickness, so when the vinyl skirting is installed around the rig, with the extra insulation you now have a reasonably insulated area underneath your RV.
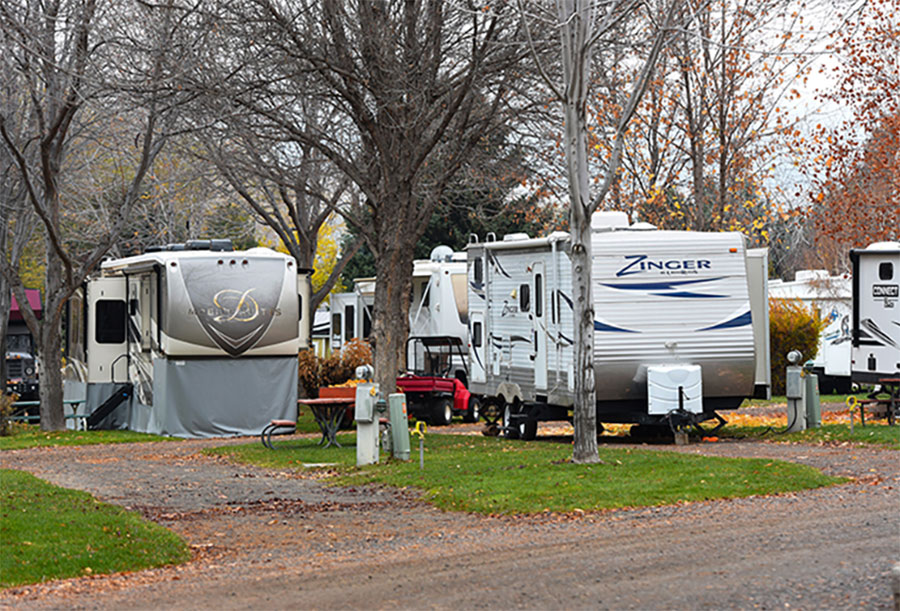
Most RV parks have strict rules as to what types of skirting is allowed. Vinyl and fabric skirting is approved everywhere you travel to or call home.

Some RVers use straw or hay bales stacked around the perimeter. Cheap. Easy. Messy. Good for farm animals. Bad because they attract rodents and other critters. OSB (oriented-strand board) is another option some RVers use; OSB is cheaper than plywood, but unfortunately doesn’t fare well when exposed to sunlight or water.
Other RVers build skirts out of T1-11 plywood siding. If one has the woodworking skill set and time to properly make the framework and prep/paint, this type of skirting is okay for a trailer that’s going to be parked in the same place for a long period of time. (This is a common skirting on mobile homes.) Wood used for sheeting or siding isn’t supposed to touch the ground, so there’s another factor to deal with when applying it as skirting.
Then, of course, other options include aluminum, fiberglass or vinyl siding for skirting. These materials are better than T1-11 because they are lightweight and more suitable for use on RVs. Installation still requires some sort of framework to hold each piece secure and tight against the bottom of your RV and the ground. The siding is usually available in many different patterns and colors, so you could closely match your RVs looks.
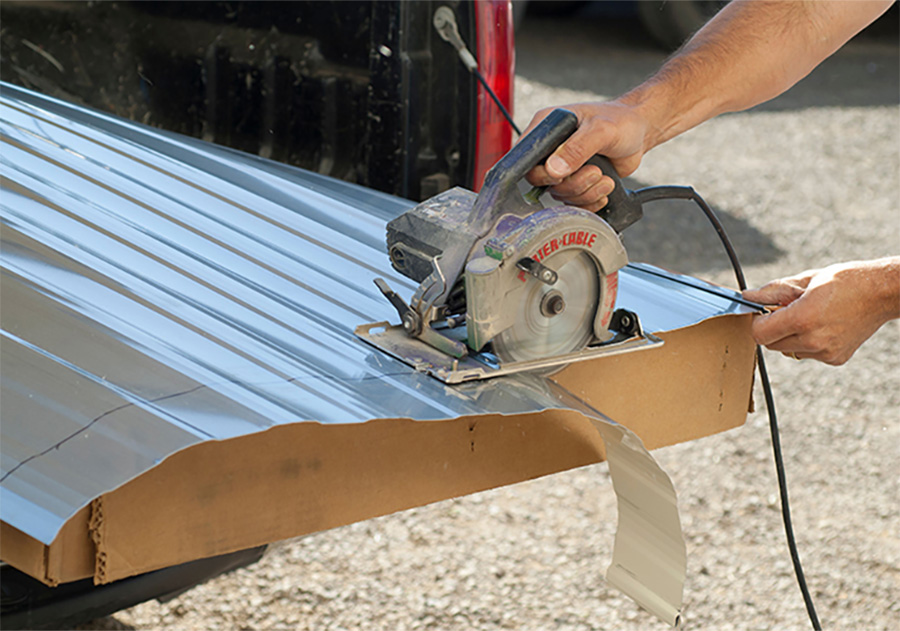
Fiberglass and aluminum designed for RV siding is also a good alternative to vinyl or fabric skirting if you aren’t planning on moving your trailer for a long time. Installation requires some form of framework to hold it in place like T1-11 and other hard panels used in skirting a trailer. (Photo by Larry Walton)
There are many types and sources for these types of skirting. Some fabric versions, such as those offered by RV Wind Skirt, come in long panels and attach with hook-and-loop fasteners so there’s no drilling required for attaching snaps. These are good for DIYers on a budget.
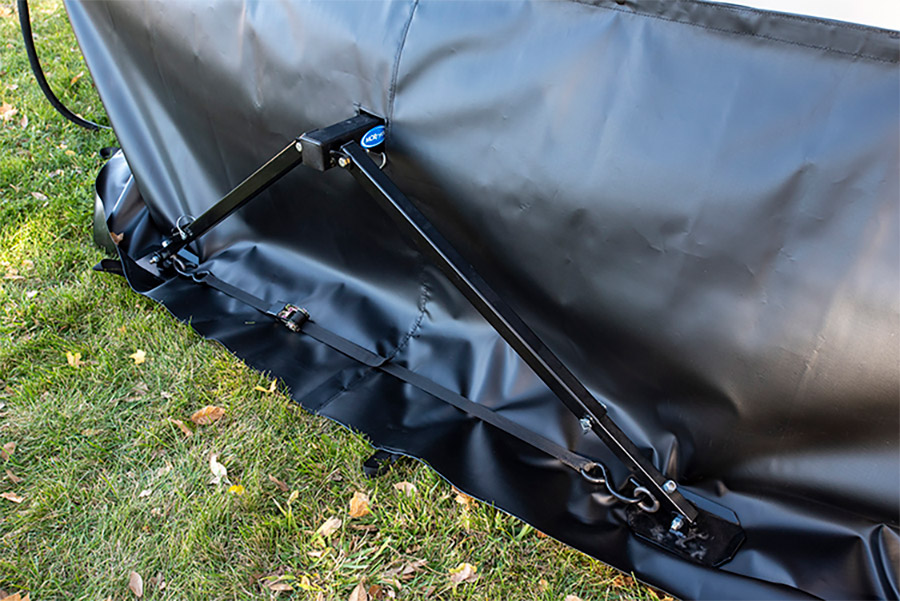
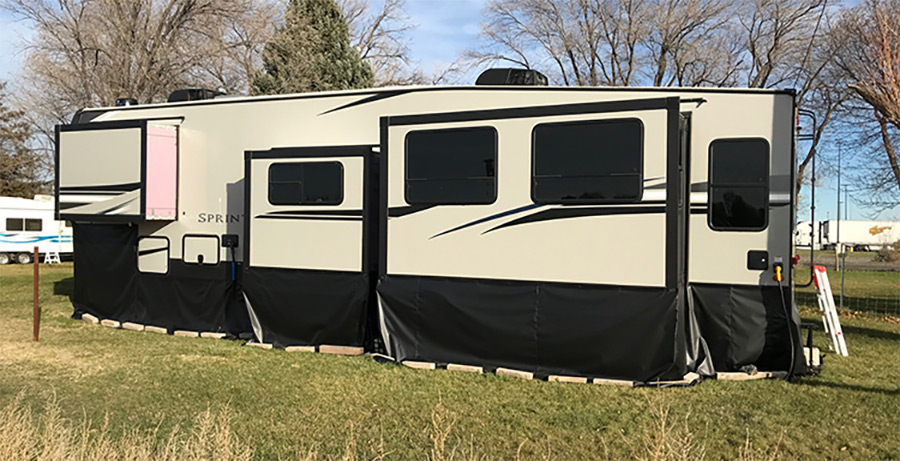
One advantage to having a custom vinyl/canvas skirting installed is the skirts can be tailored to accommodate all types of contours and special needs, like having an opening for the hitch receiver and MORryde rear stabilizer setup on this fifth wheel.
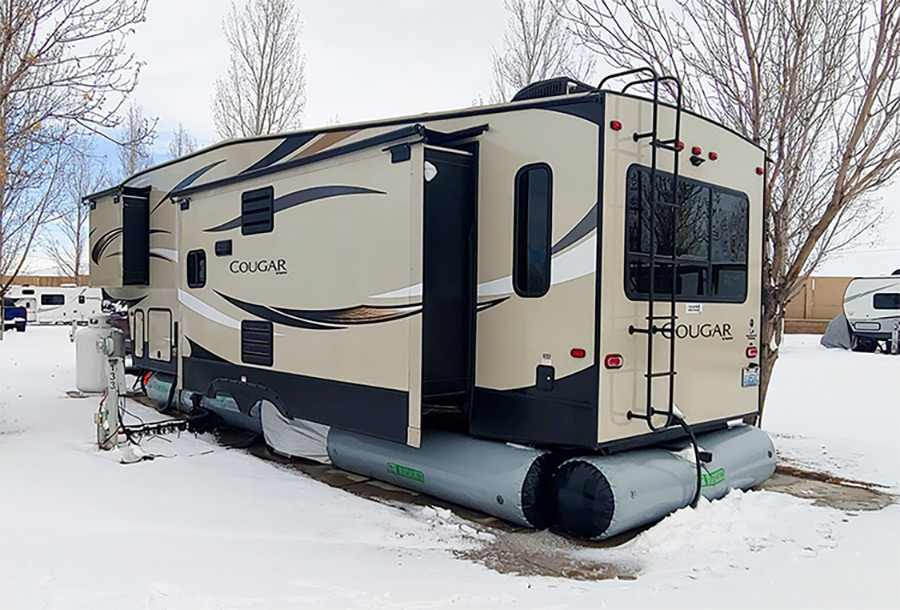
Airskirts are new to the RV world. These inflatable bags come in a variety of sizes and kits specifically designed for different trailers from Airstreams to fifth wheels. Airskirts can be installed under trailer in less than 15 minutes, according the manufacturer. (Photo courtesy of Airskirts)
The trapped air space adds to the insulating value, whereas vinyl just stops the wind. The prices for these inflatable skirting kits range between $1,900-$3,500 depending on the size of the trailer, which is about what you’d pay for having vinyl skirting installed by a pro — but you will have to set up and install them yourself.
Time and patience, however, are not my strong points. I also want the skirting to complement my trailer while doing its job, fit nicely and be functional for necessary access points. To that end, this is why many full-time RVers like me believe it’s worth the extra cost to have a pro do a skirting installation.
There are probably professional installers within easy driving range of where you live; you just have to know how to find them. A call to your nearest RV dealer is a good starting point because it typically works with someone that installs RV skirting. A search on the internet will also bring up RV skirting suppliers and installers, which can sometimes be associated with companies that do custom boat covers and awnings.
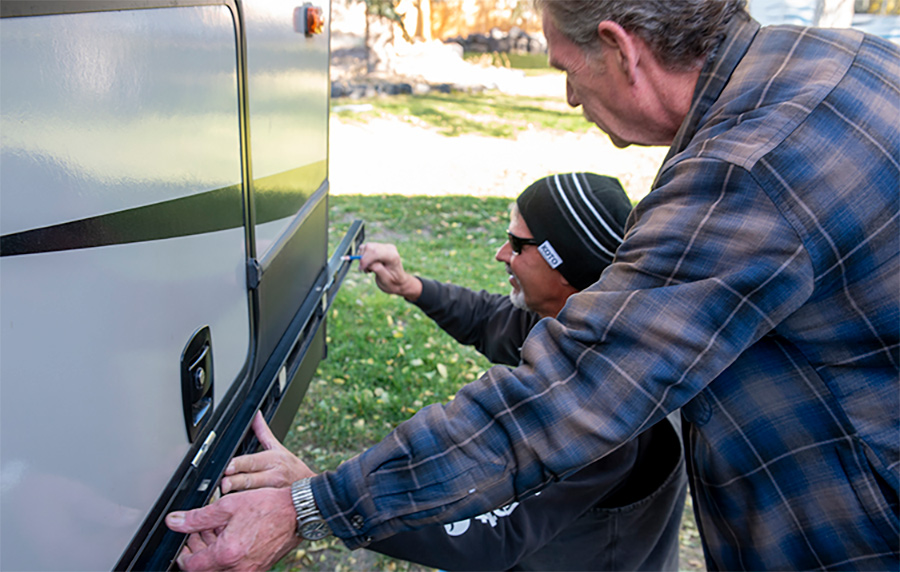
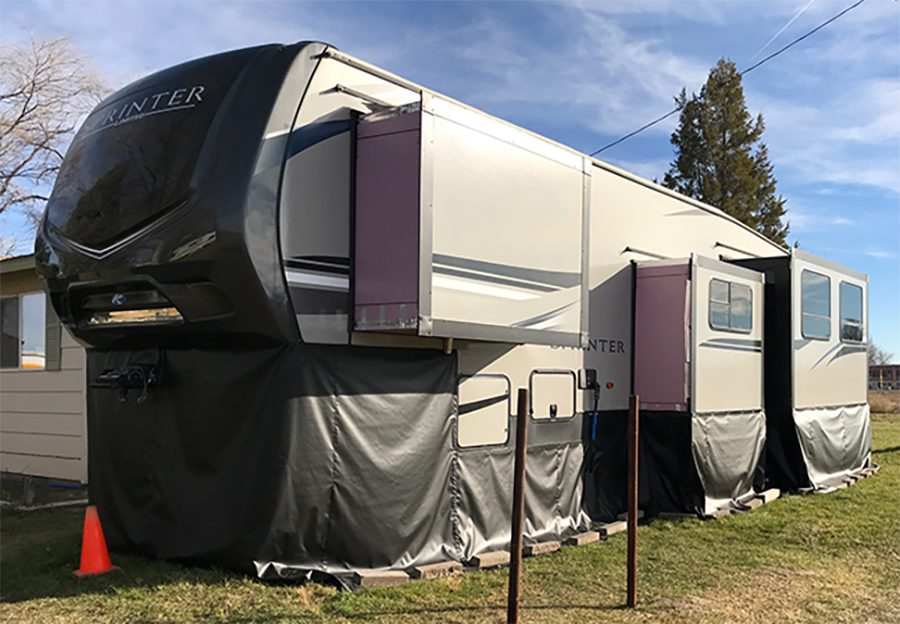
Kevin Jorgensen (kneeling) has been making and installing RV skirting in southwestern Idaho for 20 years. Larry Jones helped install the skirting on my 39-foot Sprinter fifth wheel. It was a three-day job, with a third of that spent taking precise measurements.
Since my fifth wheel is set up in southwestern Idaho, a quick internet search brought up multiple choices from a number of suppliers of generic skirting sections and fasteners. I also found a local RV skirting supplier in Twin Falls, Idaho, called Jorgensen Fabric Products. Owner Kevinn Jorgensen has been making custom 18-ounce vinyl RV skirting for nearly 20 years. He and his wife incorporate the same heavy-duty vinyl, thread, zippers, stake loops and snaps used for boat covers, trucking tarps and business awning applications into the RV skirts.
“Whether you are installing RV skirting as a do-it-yourselfer or having us do the install,” said Jorgensen as he and helper Larry Jones installed the snaps along my 39-foot fifth wheel, “there’s a normal routine that should be followed when installing vinyl skirting: Mark and install the snaps, measure every inch of the trailer, and make a detailed sketch of how the skirting will layout in sections.”
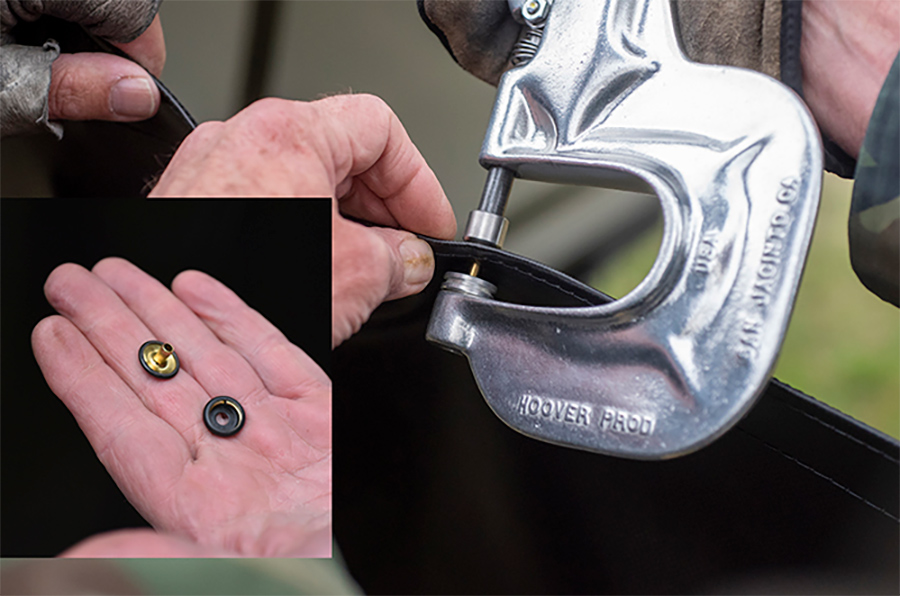
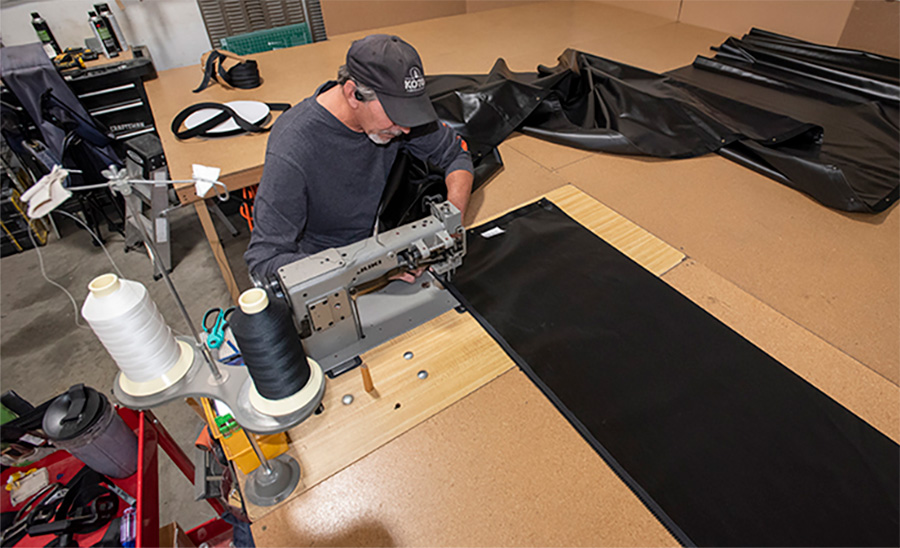
That seems easy — but it’s a tedious process. It took a couple hours for the two experienced installers to get the needed measurements and install the first round of black snaps that were riveted in place around the perimeter. A couple days later they returned with the black vinyl fabric, now stitched and cut into multiple panels that were easily handled around the trailer’s four slides and curved front cap. This day was spent installing the female part of each snap on the vinyl as it was stretched taut until the piece was in place. Then the first snap on the adjoining panel was clicked into place and every snap on the trailer side marked and the remaining snaps installed. This time-consuming process was repeated about 10 times on my rig.
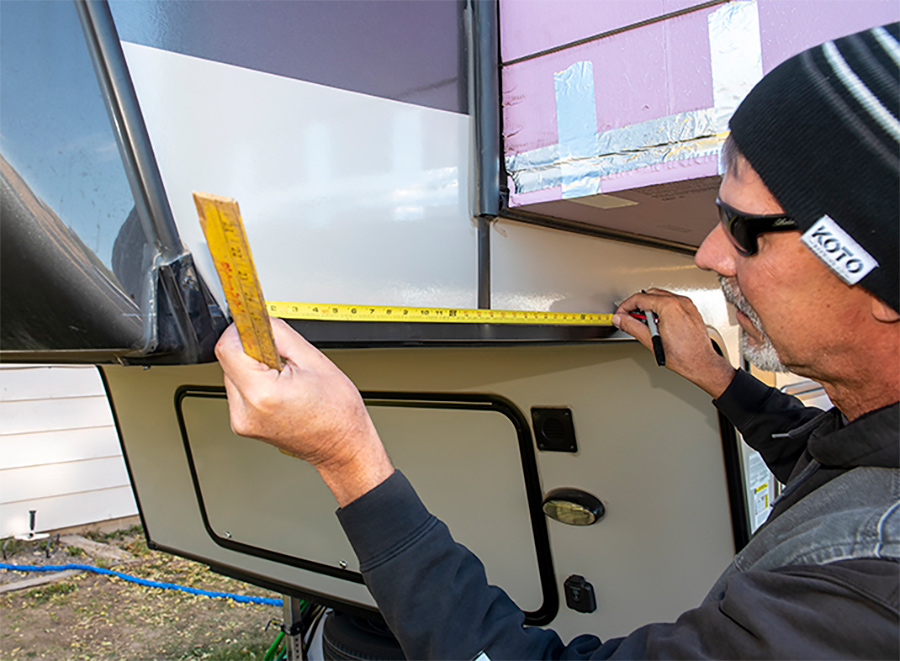
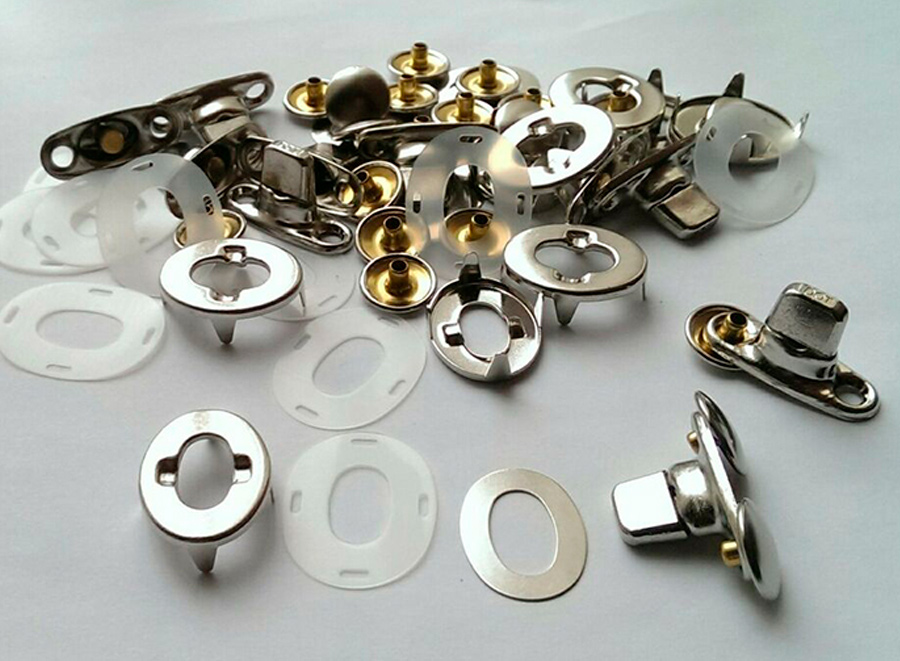
Attaching vinyl skirting to your RV can be done using a variety of methods from hook-and-loop fasteners to twist locks to snaps. The latter is the preferred method by many pro installers like Jorgensen because they are easier to install — and less expensive — than twist locks. Installing the vinyl skirting properly requires laying out the places for the fasteners to attach. He likes to place them about 16 inches apart, and just inches apart around the cargo doors and other corners.
During this part of the installation, Jorgensen also was marking and measuring each vinyl panel for where it had to be cut to curve around cargo doors, have an opening for the hitch receiver and create convenient access points like those to the tank valves and self-leveling control panel. Then all the panels were removed once again and taken back to the shop for final cutting and sewing.
Jorgensen and Jones spent a third day on the final installation. In places where an extra snap was needed (like tight curves around hatches or the tight corners between adjoining slides), the spot was marked, snaps were installed and they made sure the fit was clean and tight.
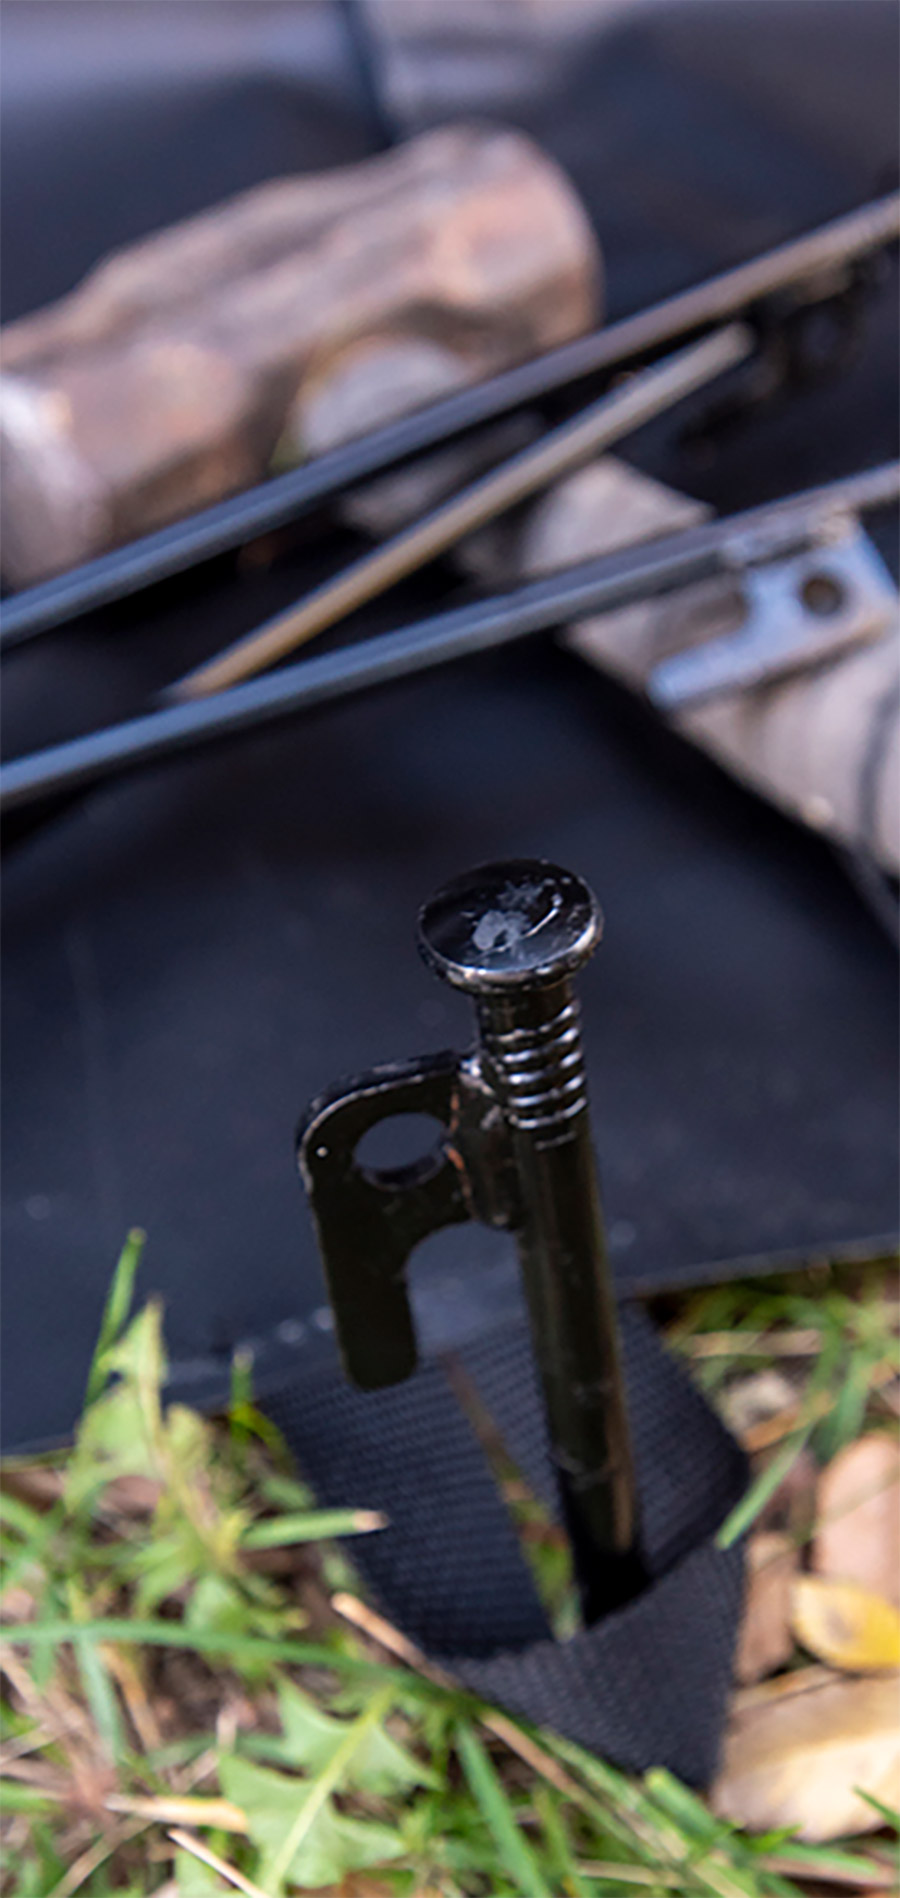
They then usually smooth out the skirting and tuck-and-roll the excess vinyl under the trailer. However, because my trailer sits on slightly uneven ground and the street side faces a prevailing westerly wind that can get it’s speed up when storms roll across the high desert mesas, I wanted the bottom edges of the panels anchored to prevent the wind from pushing the panels deeper under the trailer. I used 16-inch, powder-coated Bimiti metal tent stakes to hold the panels secure. That way the winter winds would keep the skirts tight. If I were parked on a slab in an RV park with less direct wind, the having the vinyl panel ends tucked under the rig would proffer a nice, clean look.
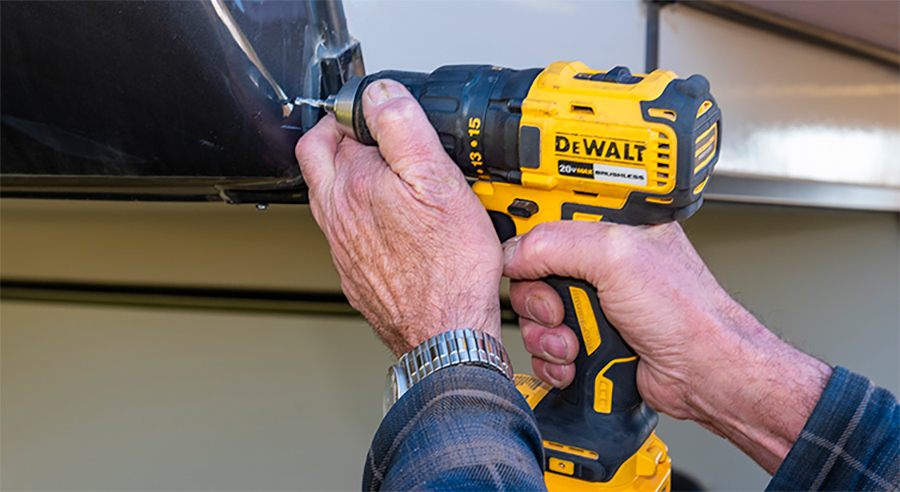
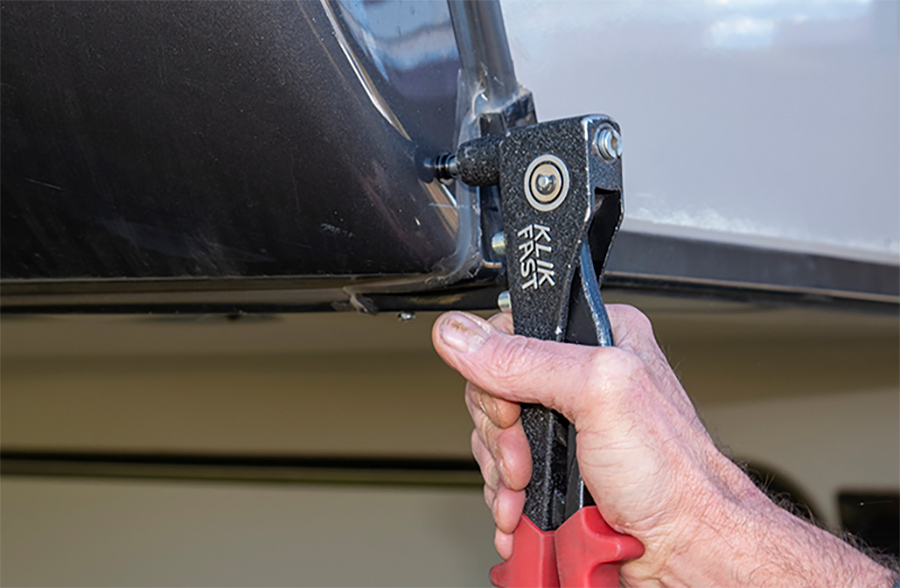
Even though winter hadn’t fully arrived where I live as of late October, it was cold. I immediately noticed the difference the custom skirting made: The floor is notably warmer with the skirting than without, and the propane usage has decreased although outside temperatures were 10-15 degrees cooler at night than they were before the installation.
I also noticed the pass-through storage compartment and open space under the fifth wheel stays warmer. So it’s obvious some of my trailer’s radiant heat from the ducting is staying put rather than being blown away by freely flowing wind.

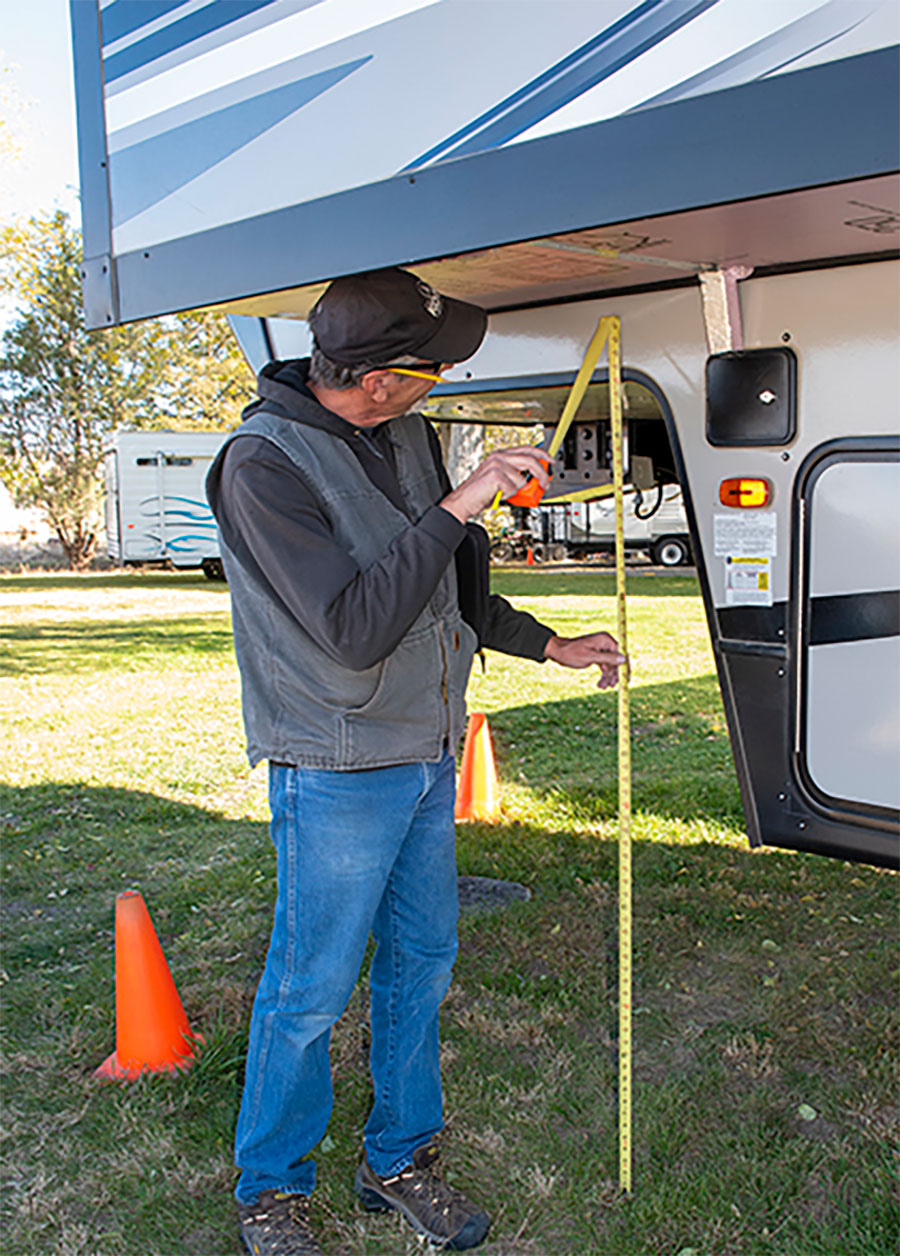
Length isn’t the only critical measurements when installing vinyl skirting. Height is also important. Jorgensen likes to leave at least a foot of material on the ground so the bottom of skirting can be secured with weighted material (sand bags, pavers, 2x4s, etc.) or staked into the ground.
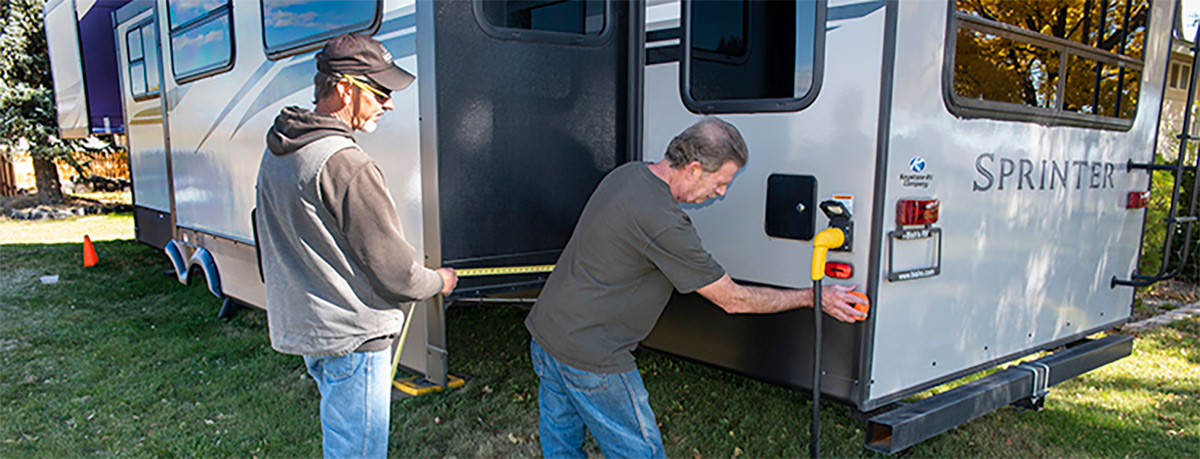
Jorgensen and Jones measured every inch of the trailer and transferred those measurements to a floorplan he made of my rig so they knew exactly how long to make each vinyl panel and the location of doors, hatches and power cables are taken into account.
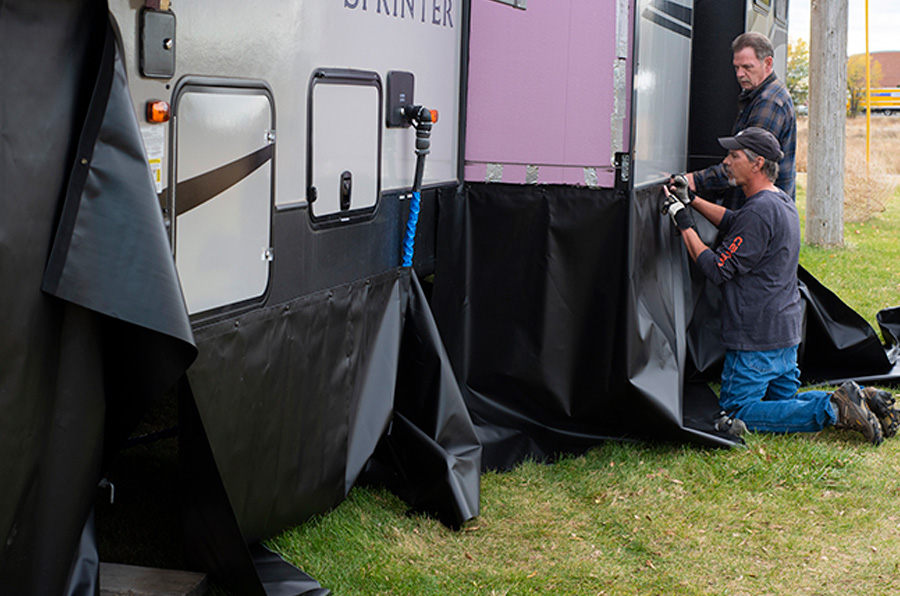
Jorgensen brings out the “pre-finish” vinyl panels and fits them around the fifth wheel, one section at a time to ensure the length, height, snaps, and fit around the compartments and slides are exactly where he wants them. Any place adjustments or customizing are needed is noted.
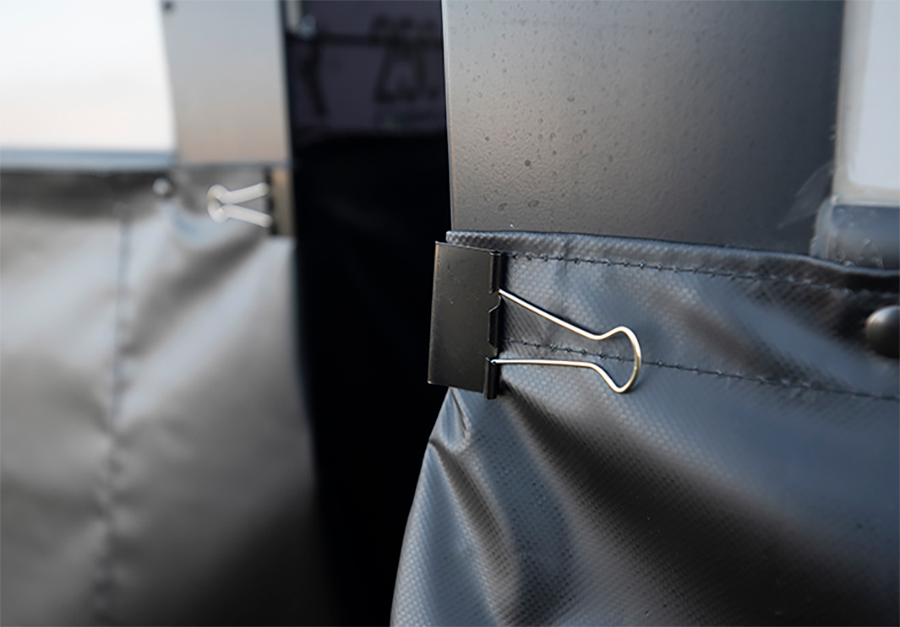
Another cool trick when installing vinyl skirting is using large binder clips to hold the vinyl tight against the sharp corners of the slides.
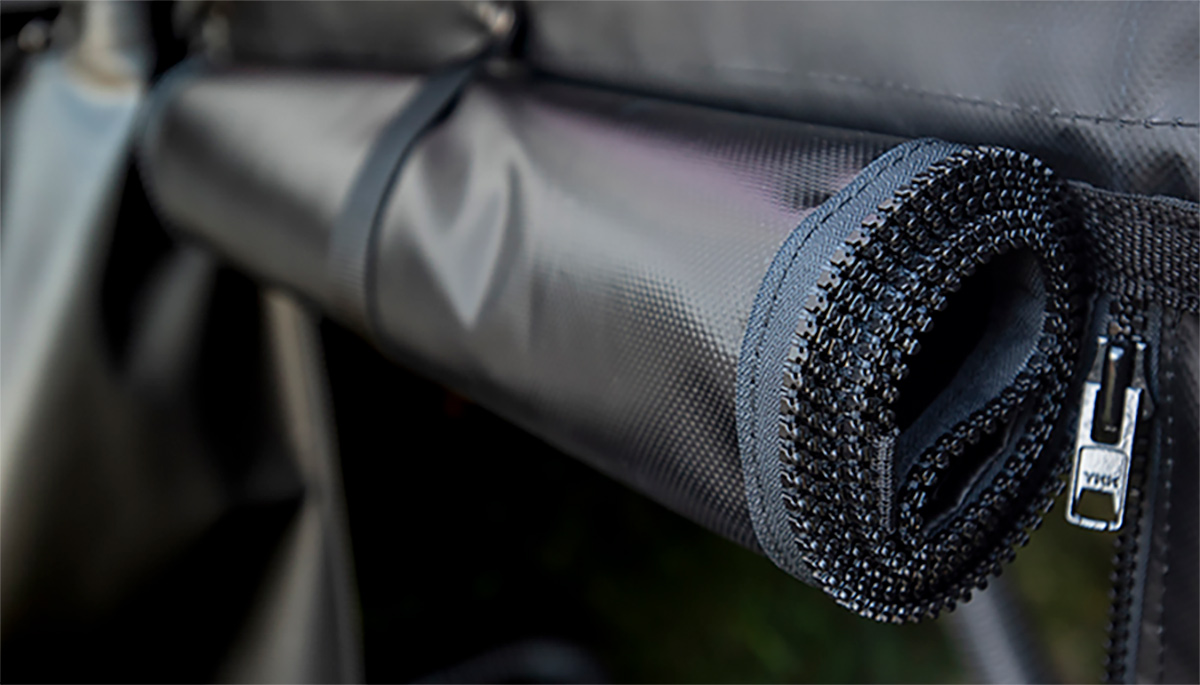
When you start researching or buying custom skirting, make sure any doors or other openings that require zippers use “molded-tooth” and not “coil-style” zippers. Molded-tooth zippers are far more durable and up to the job in RV skirting applications.
(208) 293-7370
jorgensenfabricproducts.business.site
Airskirts
(860) 485-7283
airskirts.com
Extreme Covers
(208) 695-1740
extremecoversidaho.com/
Custom Canvas Unlimited
(801) 671-7775
customcanvasunlimited.com/rv-canvas-skirting.php
Idaho Canvas Products
(888) 395-7999
idahocanvas.com/id267.htm