Keeping Your Rear Gears Turning
[maghub_sidebar]
Keeping Your Rear Gears Turning Gears
Motorhome
Servicing your motorhome or tow vehicle differential isn’t usually high on anyone’s maintenance list — but ignoring it can have catastrophic consequences. Fortunately, it’s an easy task
By E. Don Smith
P

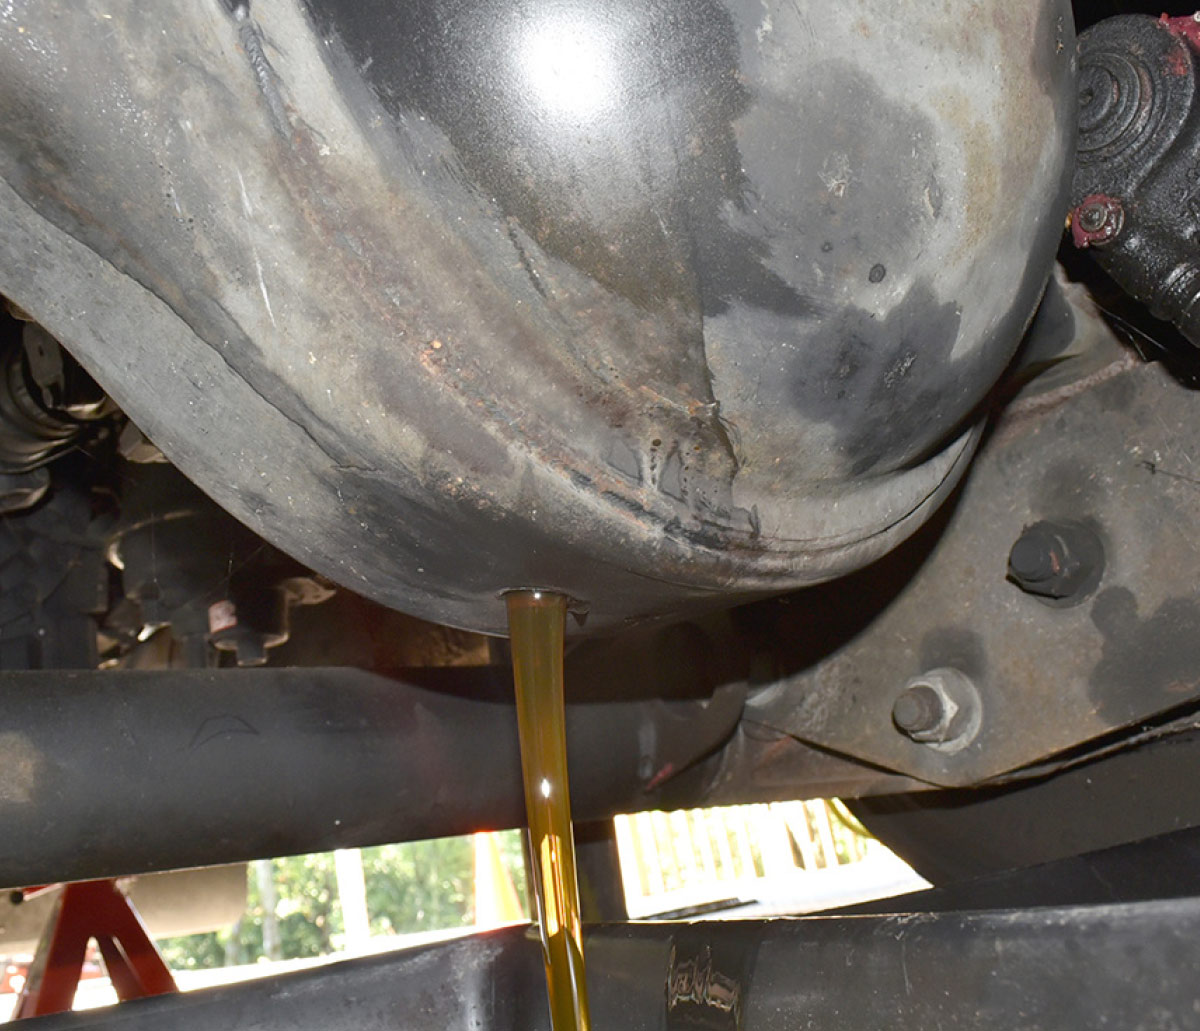
erhaps one of the most overlooked maintenance items in a RV or a tow vehicle is the rear differential. In any rear-wheel-drive vehicle, it is the rear differential that accepts the engine output and converts it to rotational force sufficient to propel the motorhome/tow vehicle forward. Not surprisingly, transferring this force can build up a lot of heat, which is why the large ring-and-pinion gear inside the differential is partially submerged in gear oil — that oil is there to not only lubricate the gears but also to cool them and prevent corrosion. And much like an engine, that oil will eventually break down and need to be replaced.

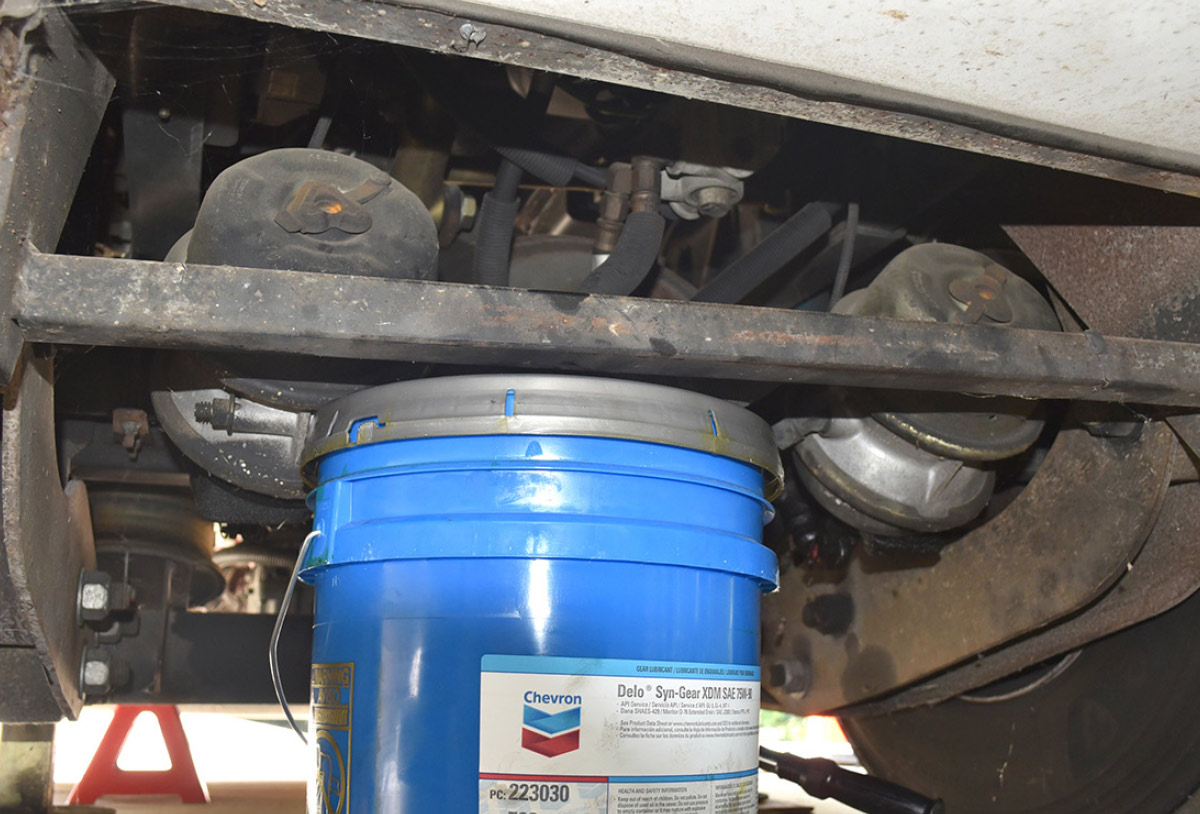
The process of changing gear oil is one of the simplest of all the maintenance items on a motorhome or a tow vehicle, yet many people are afraid to perform it themselves. Granted, simple doesn’t always mean easy — but with only two wrenches required and two oil plugs, there really isn’t much to this chore in terms of complexity. The only real challenge to doing this yourself is the volume of fluid that has to be handled. In the case of this Freightliner Class A motorhome, the rear differential holds 17 quarts. That’s almost five gallons, and capturing and refilling the oil is the only difficult part of the entire operation. Fortunately, most trucks and SUVs have a much smaller differential; therefore, it’s a lot easier project to undertake.

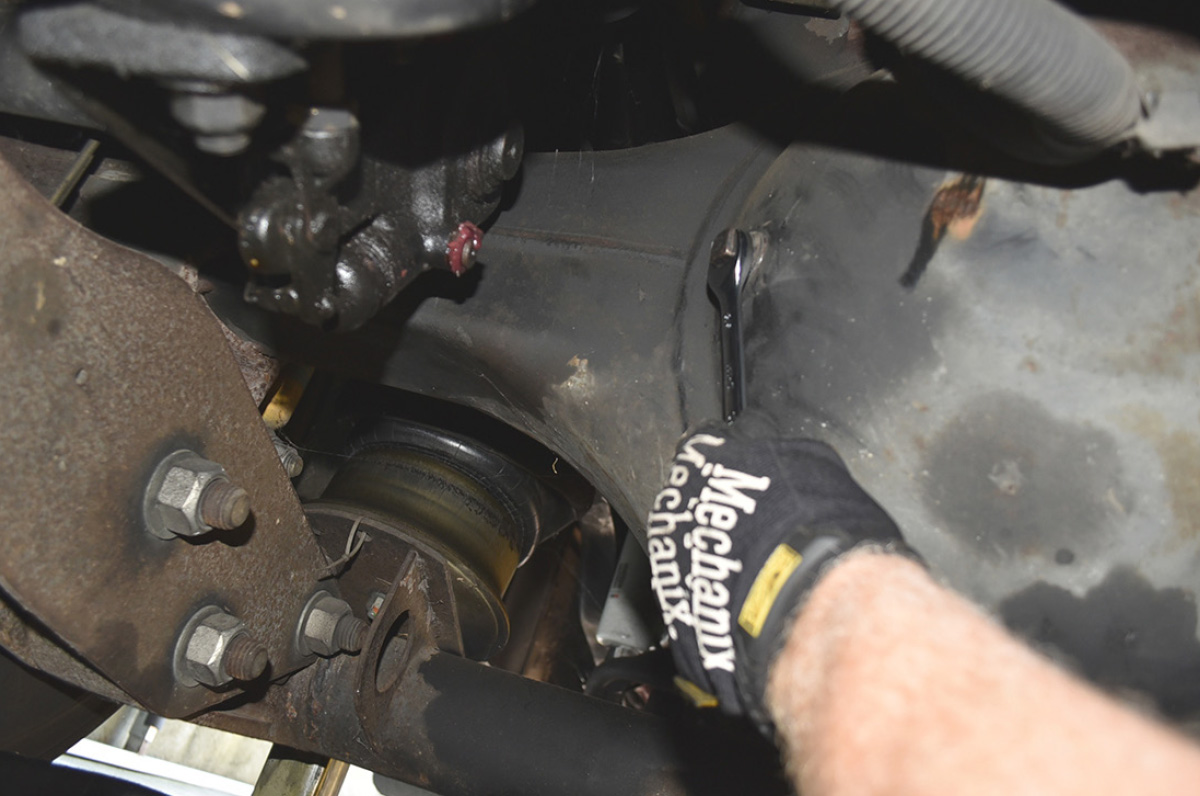
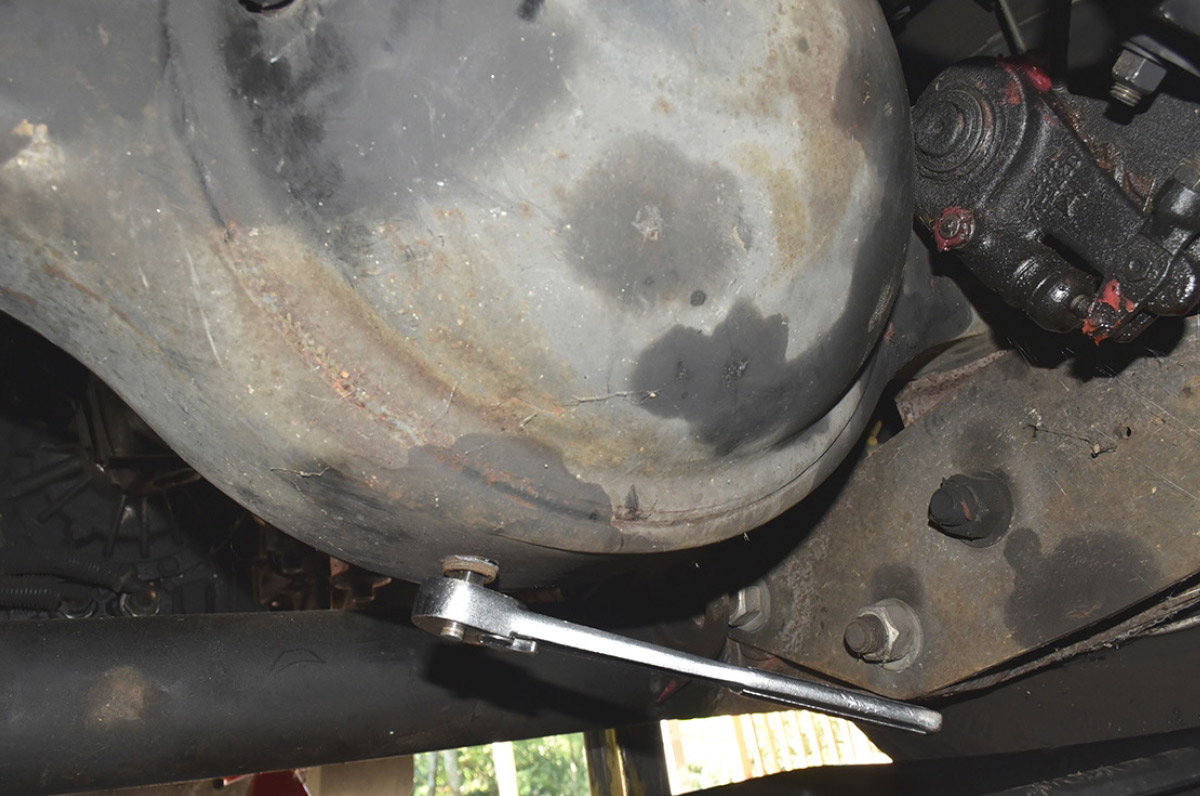
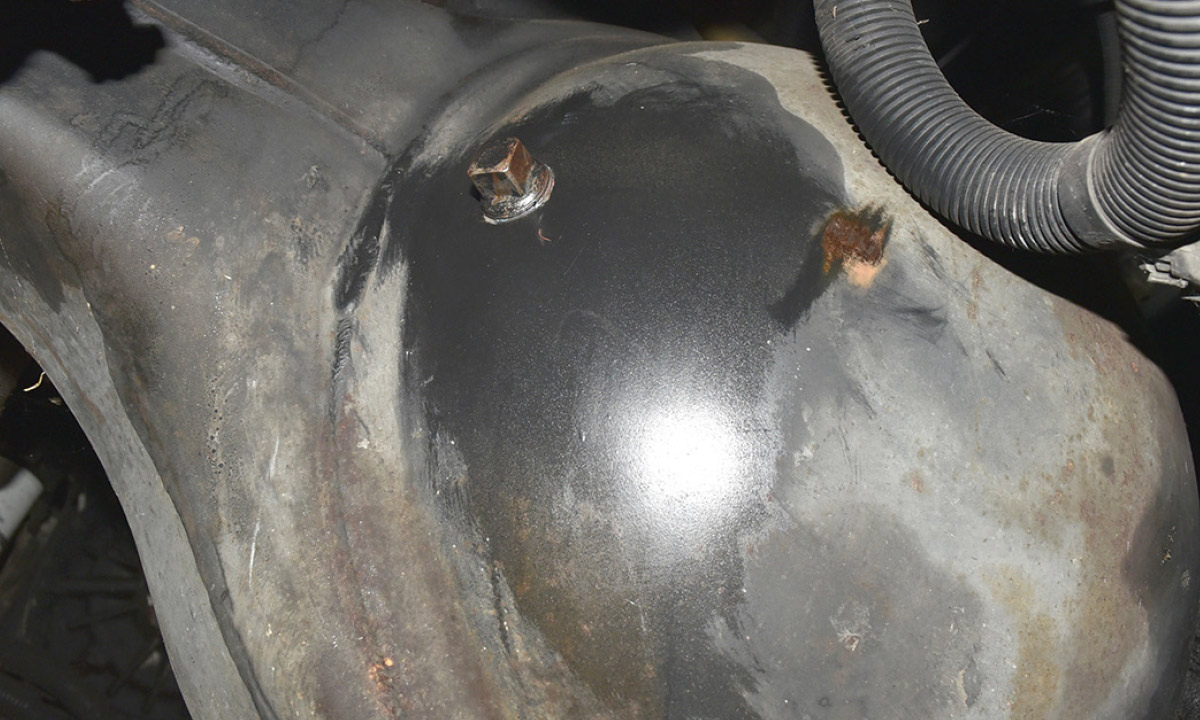
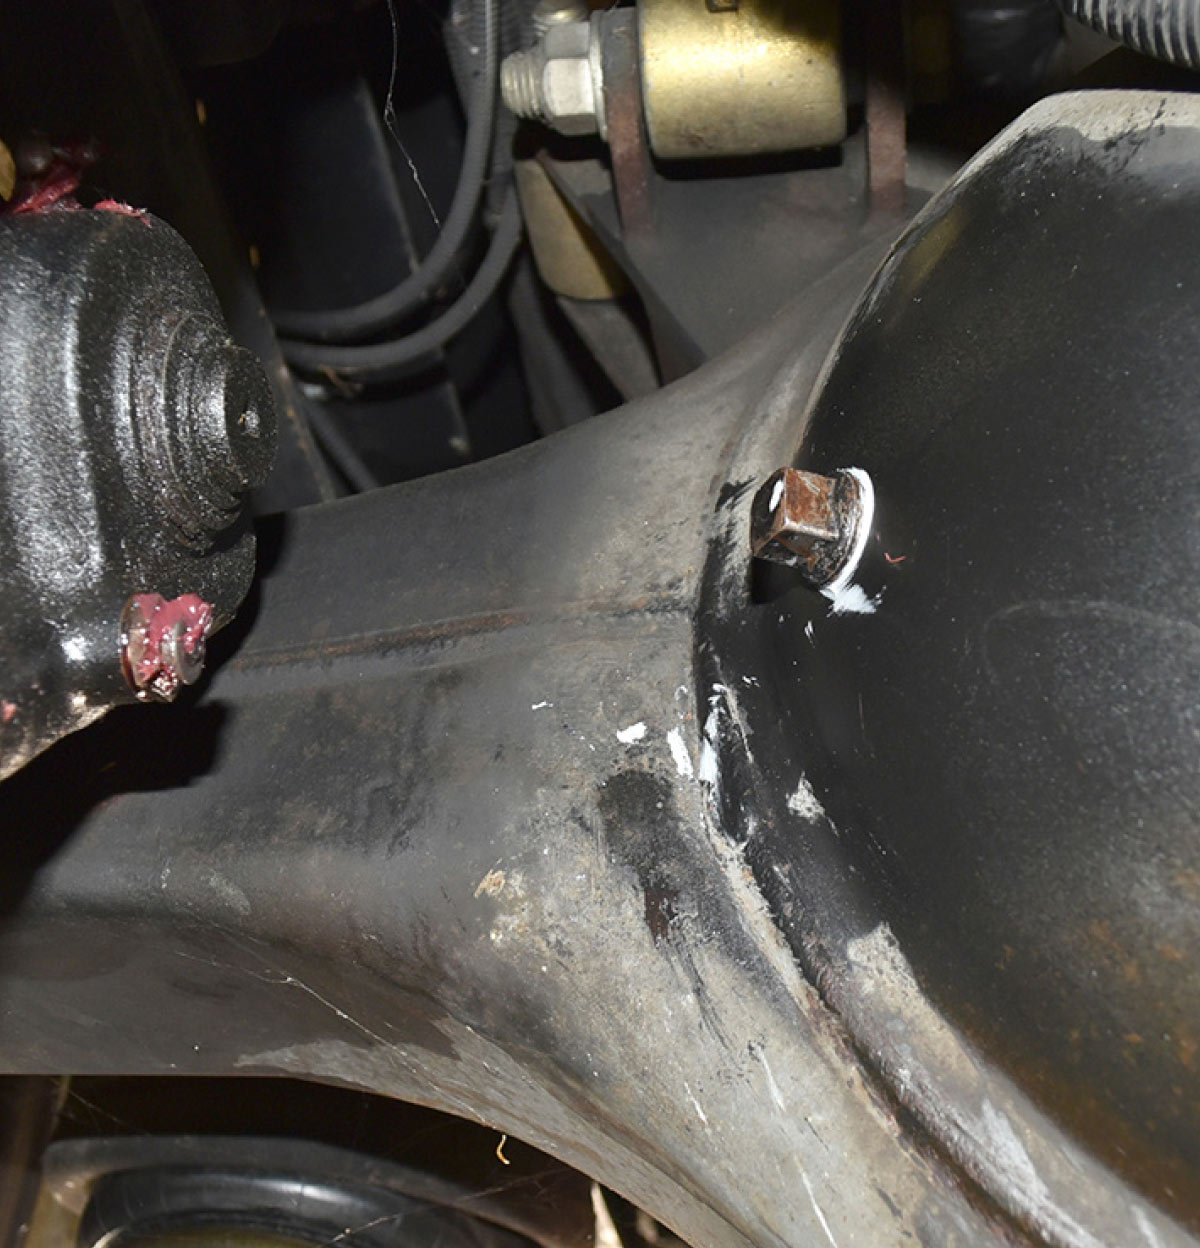
On this chassis, the Meritor 19-145 rear axle used here has a drain plug and a separate fill plug, so there are only two plugs that must be removed, cleaned and reinstalled. If you have a typical pick-up truck or SUV, your model may or may not have a drain plug. Some models do, some don’t. In the case of those that don’t have a drain plug, you may have to remove the differential cover to drain it and then refill it through a fill plug located on the upper part of the differential. If your vehicle requires the differential cover to be removed, it’s a good idea to replace that gasket as well after opening it. Otherwise, the basic process here is the same for most rear-wheel-drive differentials (four-wheel-drive vehicles have both a front and rear differential).

The service interval on differential oil changes varies widely depending on the manufacturer, type of differential and its service usage. A typical automobile not used for towing may have very long service intervals. However, if you are towing a trailer then you likely fall under the “severe use” category, and the manual will have much more frequent drain intervals. Check the manual on your vehicle and follow it closely regarding the service interval.

Dumping the holding tanks requires use of one or more sewer hoses designed to move waste
Here are the tools that we used for this project. Depending on your vehicle, you may have to modify this accordingly
The manual will also specify the type and viscosity of the gear oil that your model needs. Many differentials are similar and the two most common specified viscosity is 75W-90 (or 80W-90, which is usually interchangeable) and 75W-140. There will also be a specification for the type of gear oil in your manual as well. Common classifications include GL-5, but that is not the only type available. In this motorhome, the manufacturer of the rear axle specifies that the oil should be SAE 75W-90 viscosity (or 80W-90) and must meet the following specifications: GL-5 and MIL L-2015-D. This MIL spec has since been replaced by SAE J2360. Meritor also publishes a list of approved fluids that meet its own spec, which is O76-N for extended-drain intervals. Again, check the owner’s manual or online for your specific rear axle in your motorhome or tow vehicle.

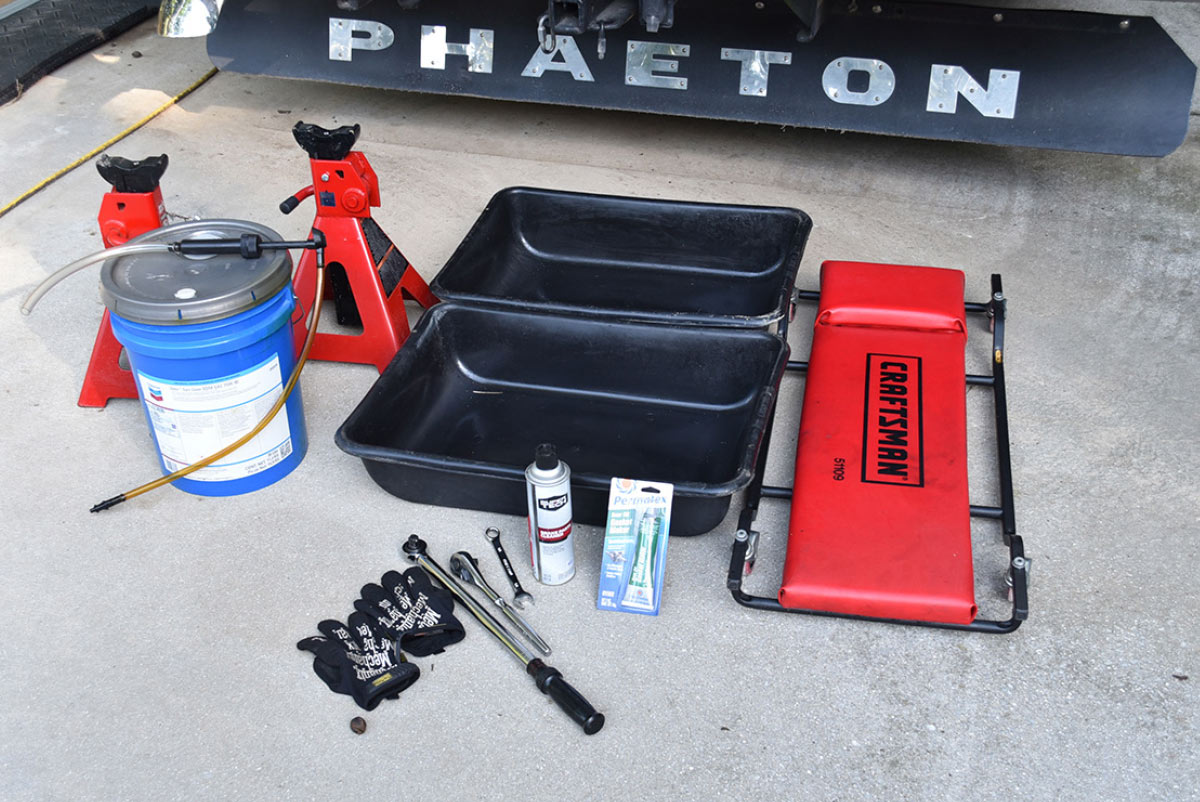
For this motorhome’s rear differential, the suggested drain interval is a maximum mileage of 50,000 miles or annually if you use a conventional petroleum-based oil, or a maximum of three years or 250,000 miles if you use one of the O76-N approved extended-drain-interval synthetic oils. The latter is the approach we took, and we purchased Chevron Delo 75W-90 XDM full synthetic oil. Chevron makes a wide range of heavy-duty lubricants for construction and commercial vehicles, and we know buying a major brand like this ensures that the oil is high quality and does in-fact meet all the specs advertised. We purchased it at a local petroleum supplier in a 5-gallon tub for just over $200. If you have a large differential, buying a 5-gallon tub is a much more economical option as opposed to buying quarts or gallon jugs — just know transferring the large volume of oil from the tub to the rear axle is a bit of a challenge and it is more difficult than squirting multiple bottles or one-quart easy-dispensing bags of oil. Using a hand transfer pump, it took us approximately 30 minutes to transfer the 17 quarts from the tub to the rear axle. To make this even more difficult, it is a tight area under the coach so there is very little room to operate the pump while lying on your back.

This is the proper way to raise the coach
Wheel chocks to further stabilize the coach and prevent rolling.
This is the proper way to raise the coach. Use the built-in jacks, then place heavy duty stationary jacks under each frame rail. We also placed wheel chocks to further stabilize the coach and prevent rolling.
The tools required to do this job are simple. I needed a ½-inch drive ratchet to remove the drain plug (the plug has a ½-inch square hole made to accept the male end of the ratchet) and a 5/8-inch open end wrench to remove the fill plug. You will also need a torque wrench to tighten them back up, as well as brake cleaner spray to clean the iron debris off the magnet drain and fill plugs. If the drain plug is very tight, you may need a breaker bar to get it moving. A mechanic creeper can also help as you move around under the RV. Lastly you need a drain pan(s) capable of holding well more than the capacity of the differential — you don’t want to be faced with handling and draining a pan that is completely full and risk spilling it. We used two large concrete mixing pans from Home Depot, which made catching the oil and pouring it back in the tub for recycling very easy.

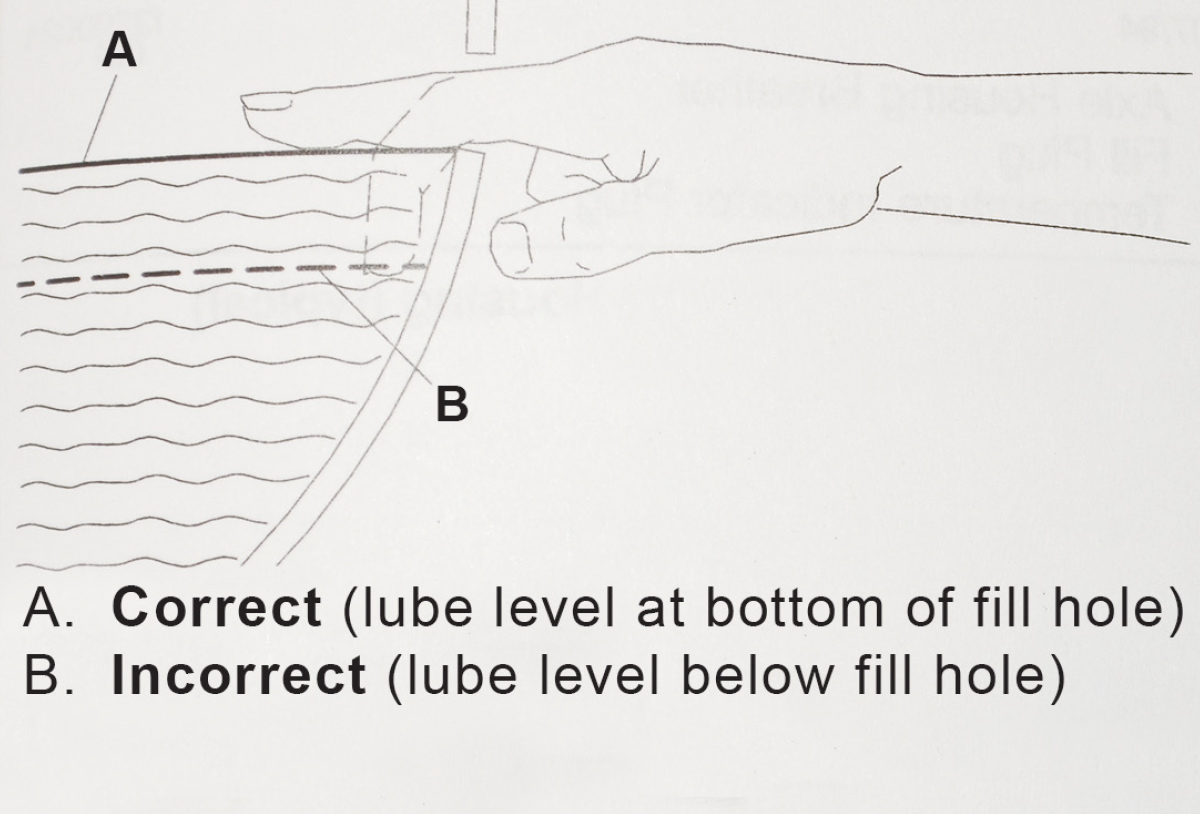
If you have ever serviced a rear differential before and experienced a weeping drain plug, you know what a bother that can be because there is no way to fix it other than to remove it (all the fluid comes out), apply some thread sealant and reinstall it. To avoid this potential problem, we purchased a Permatex sealant called Gear Oil RTV (Room Temperature Vulcanizing) Gasket Maker made specifically for use on differential covers, etc. In our application we didn’t have to remove a cover, but we used a small amount of this RTV on the drain and fill plug threads to prevent weeping later. If you must remove the differential cover to drain the fluid in your application, you can use this same product to reinstall the cover and prevent leaks there as well.

If you are working on the differential of a diesel-pusher motorhome there is one big difference from every other vehicle: the location of the fill plug. Since a diesel-pusher engine is located behind the rear axle, the differential fill plug will most likely be on the front side of the axle — meaning it is facing the front of the motorhome, not the back. On most all other vehicles — including gas Class A, B and C motorhomes as well as trucks and SUVs — the removable cover and/or the drain and fill plugs will be accessible from the rear of the vehicle.

Side of RV
Because the differential has a fill hole that doubles as the level check, it is imperative that the coach be level. This will ensure that you can check the level of the gear oil properly after filling. On this axle, the instructions are to insert your finger in the fill hole and the oil level should be at that height. If you attempt to add too much, it will run out of the fill hole.
Two large pans under the rear axle to capture the old oil
Next, we placed the two large pans under the rear axle to capture the old oil.
Another important part of a project like this is safety. If you are not capable of crawling around under your vehicle and practicing good safety, this project should be left to professionals. There are many aspects to safety and we will cover a few points — but there are too many to cover everything, and every situation and vehicle is different. With that in mind here are the most important things that we did for this project.

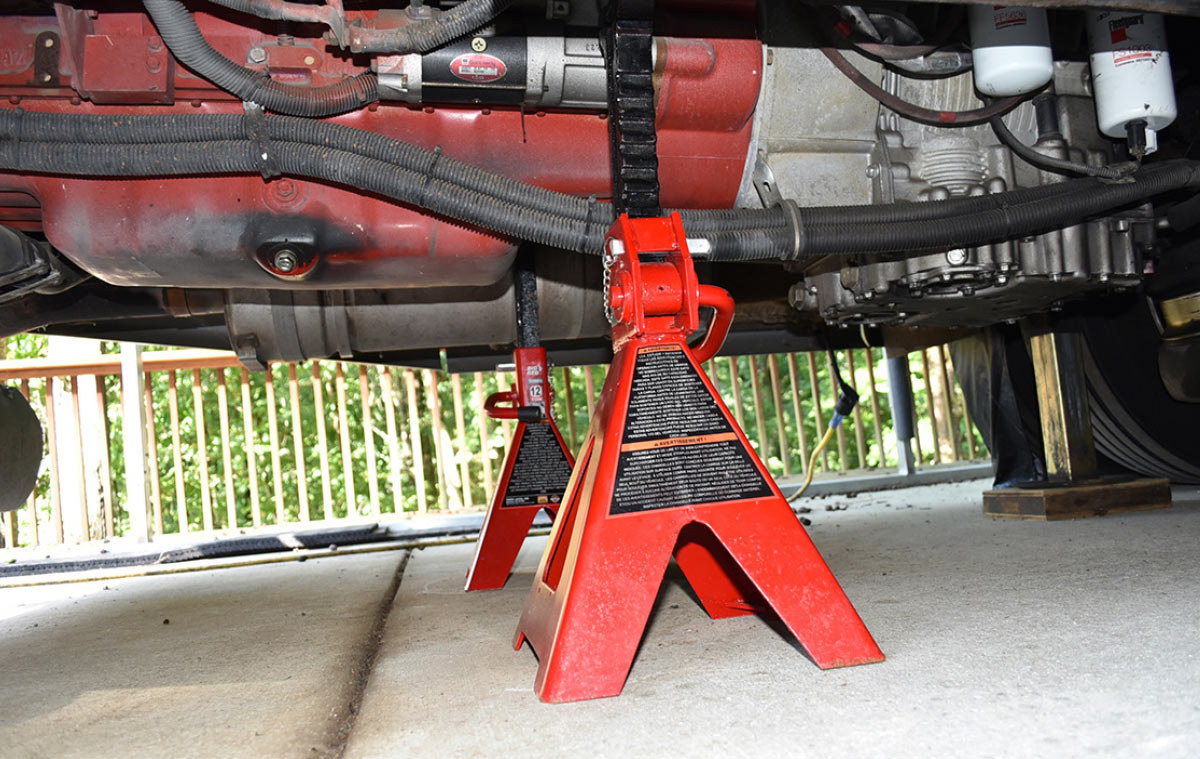
The first is safety jacks. Do not get under any vehicle that is supported only by the motorhome leveling jacks. In our case we raised the coach with the built-in jacks, then placed a pair of large stationary jacks under the frame of the motorhome. The frame is the only place that you should use for this. These jacks have a capacity more than the total weight of the rear axle of the coach, so we were safe should the coach jacks fail.

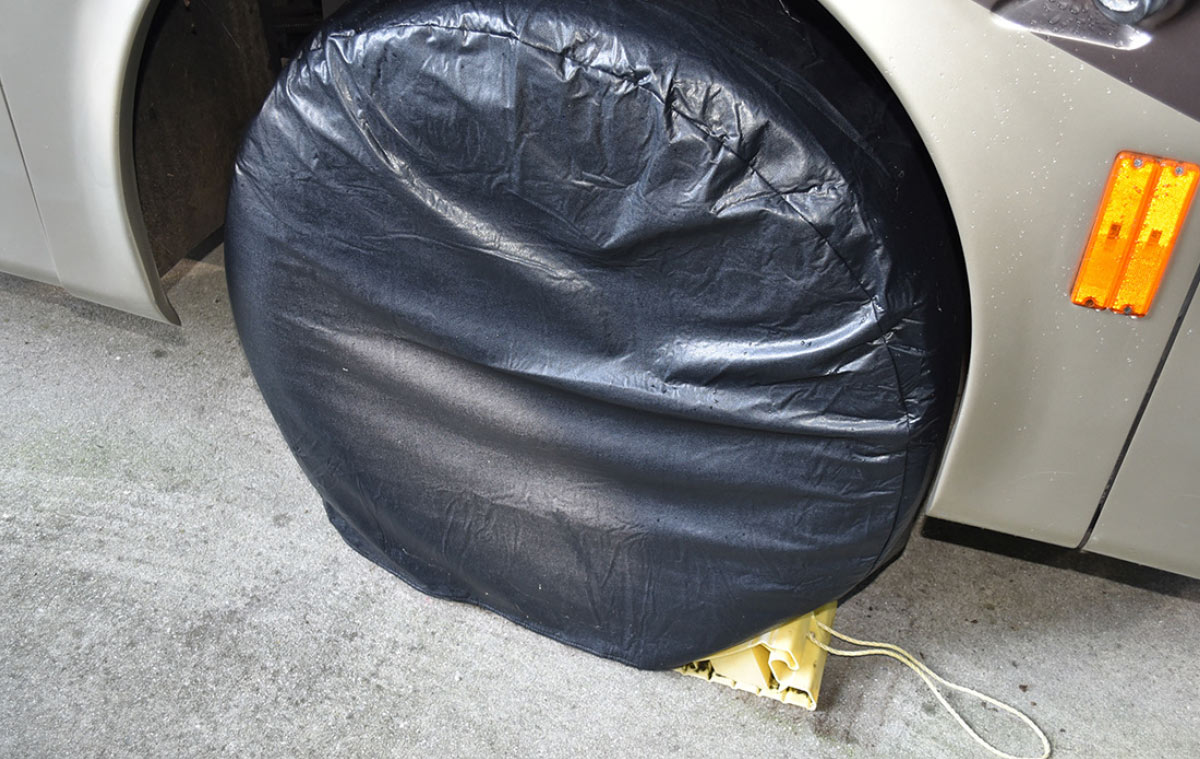
The next important item is wheel chocks. Ideally the vehicle should be parked on a level surface, but that is not always possible. To prevent the vehicle from rolling once raised, we also chocked the rear tires on both sides, and we are careful not to raise the rear tires off the ground and we set the emergency brakes. If you are working on a SUV or truck, you may be able to access the rear differential without raising the vehicle. If you do have to raise it, however, make sure it is safe and that there is no chance of it rolling. Other personal protective items you should use are safety goggles and we like to wear gloves to keep the oil and dirt off our skin. Your safety is your personal responsibility, so make sure you work in a safe manner for your situation.

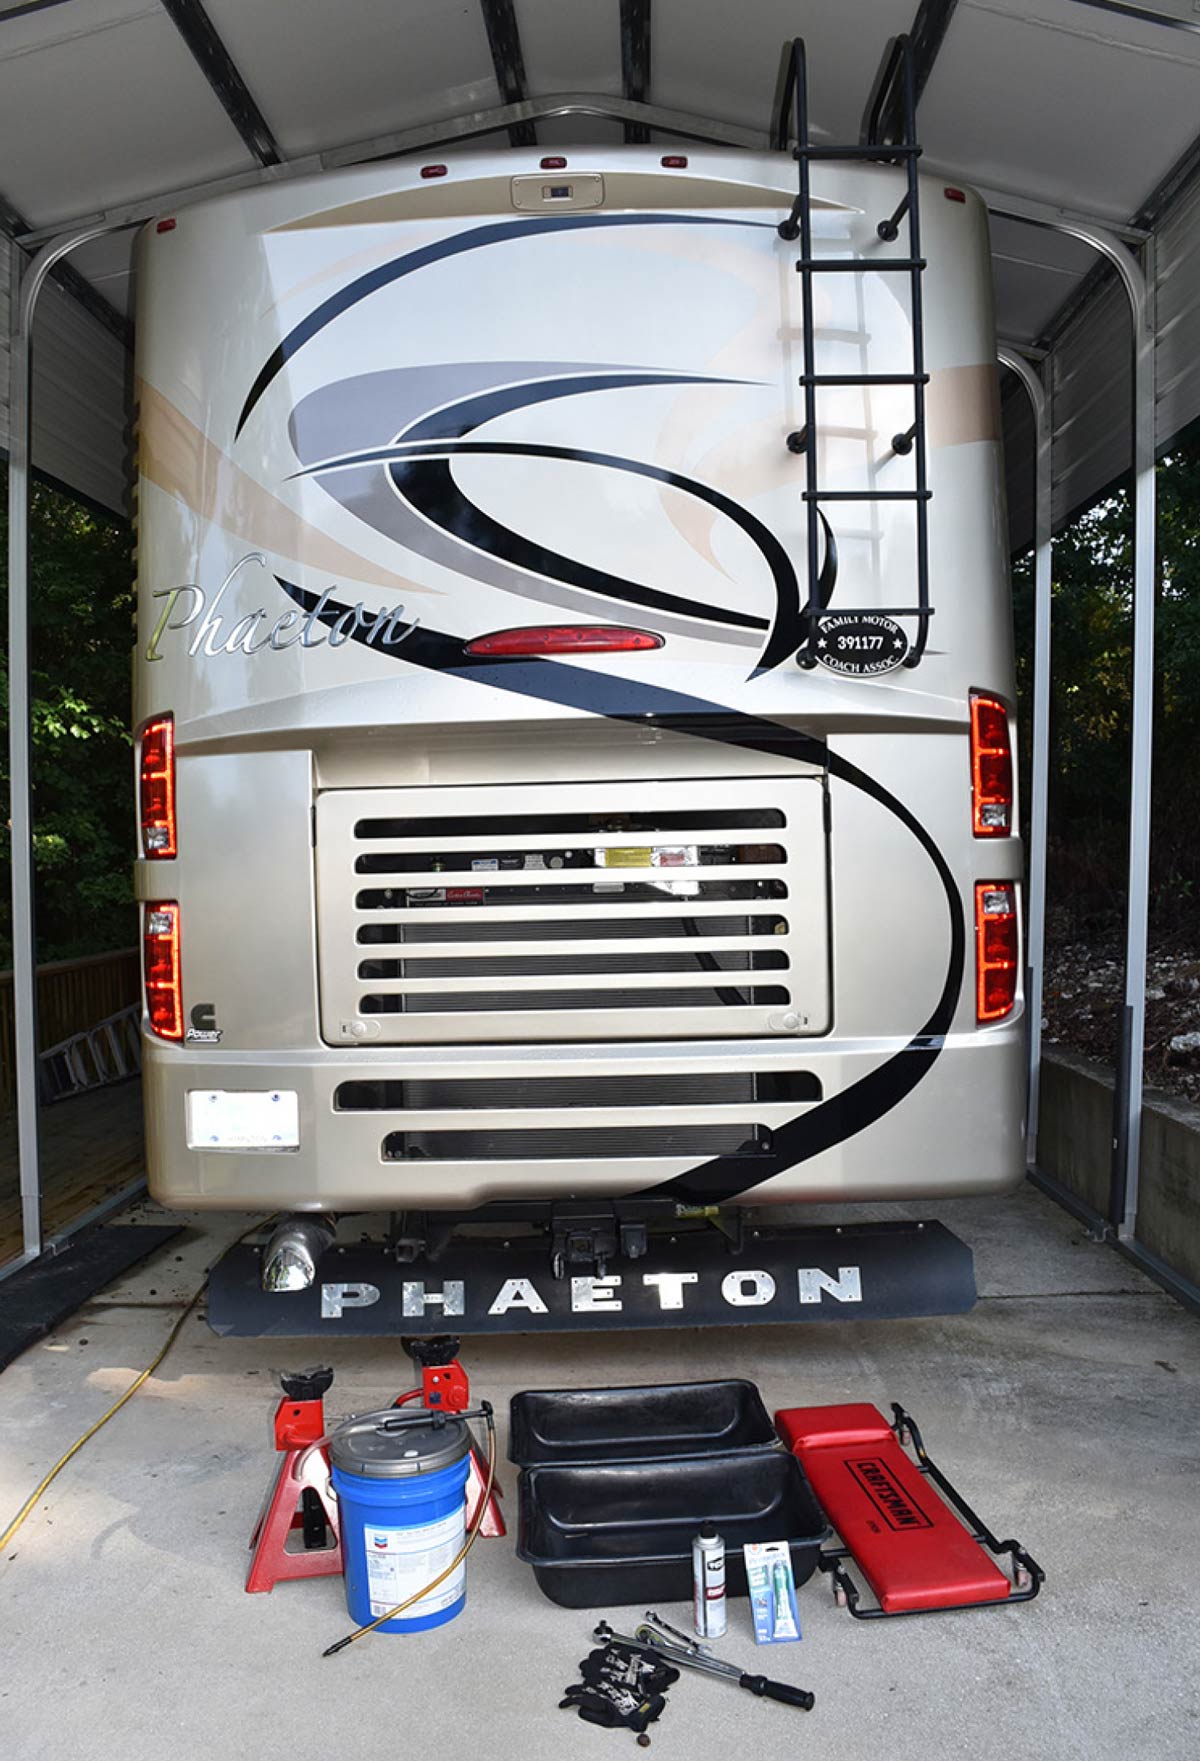
Now, let’s take a step-by-step look at servicing the rear differential on this Tiffin Phaeton with a Freightliner chassis.

Removing the drain plug
Half the oil in each of the two pans, making it very easy to handle them later
Before removing the drain plug it’s always a good idea to slightly loosen the fill plug first. This prevents you from draining the unit then not being able to refill it in the event of a stuck fill plug. We then used a large ratchet and inserted the ½-inch drive directly into the drain plug and removed it completely. Make sure the drain pans are ready. We put half the oil in each of the two pans, making it very easy to handle them later.
Removing the drain plug
After removing the drain plug, we allowed the oil to drain until it completely stopped dripping. Before you move to the next steps make sure you remove the drain pans out of the way, so you don’t tip them over and spill gear oil on the ground or your driveway — gear oil is very thick and hard to clean up.
The magnetic drain plug
As you can see here, the magnetic drain plug is covered with small iron particles from the gear set. A differential doesn’t have a filter, so the magnet is the only way keep magnetic contaminants from circulating inside the differential until it can be drained.
RTV sealant to the threads
After cleaning the drain plug with brake cleaner, we then applied a small portion of the RTV sealant to the threads. This step isn’t required but it does offer some protection against gear oil weeping, so we usually use it when possible.
Reinstalled the drain plug and torqued
We reinstalled the drain plug and torqued it to the factory spec of 35 ft.-lb. If using a RTV thread sealant, there will be a specified cure time on the sealant before you refill it with gear oil.
Completely removing the already loose fill hole plug
Before completely removing the already loose fill hole plug, clean the area thoroughly with brake cleaner. This will prevent contamination from falling into the fill hole.
5-gallon tub of gear oil
We pumped the new oil in until it started running from the fill hole
Next, we rolled the 5-gallon tub of gear oil on its side and then stood it up in the best location we could find that allowed the hose from the hand pump to reach the oil tub and the fill hole. We then pumped by hand for the next 30 minutes to fill the differential with the new oil. This is the most difficult part of the entire process if you are using a hand pump as we did. We pumped the new oil in until it started running from the fill hole and used our fingertip to confirm it was indeed full (as seen in Freightliner manual).
After cleaning the magnetic fill hole plug
After cleaning the magnetic fill hole plug, we also added some RTV sealant to the threads as before and torqued it to the factory spec of 35 ft.-lb. At this point the axle has been drained, refilled and all the plugs reinstalled. Before leaving under the coach take a moment and wipe the entire differential cover and make sure you don’t leave any oil on the covers or plugs. This makes it so much easier to make sure there is no dripping oil. Of course, it shouldn’t be leaking with all the precautions taken, but if you are working on a SUV or truck and had to remove the entire cover then there is an even greater need to check behind yourself and make sure it’s not leaking.
Used oil needs to be recycled
The used oil needs to be recycled, so we took the top off the tub and transferred the old oil in it for proper disposal then reinstalled the top and capped it off. Although this photo makes the oil look dark and dirty, it actually looked similar to the new oil going in.