RV Slideout Floor Replacement
[maghub_sidebar]
RV Slideout Floor Replacement typographic uppercase letters form title in black on top of a rectangular gold color shape background while there is also a bigger dark grey rectangular shape background behind that as well
Landscape close-up indoor photograph of a man in a faded dark black/grey hat, dark faded navy blue long sleeve t-shirt, light blue denim jeans, and black Under Armour fitness shoes kneeling down on the ground skillfully crafting wood in a workshop environment area using a power drill tool
Slideouts damaged by water intrusion are one of the most common — and most expensive — repairs that face RV owners.
By Bruce W. Smith / photos by author
F

ew RV problems cause owners more distress than wood rot. Given the amount of wood products used in the construction of a typical RV, rotting wood — and its attendant traveling buddy, mold — is like a cancer that needs to be addressed quickly and decisively to prevent doing more damage to the motorhome, fifth wheel or travel trailer.

That’s especially true when you discover soft spots in your RV’s flooring. While wood rot — caused by water incursion — in any area of an RV is cause for concern and immediate action, rotting floors truly compromise the structural integrity of the unit.

Slideout rooms are susceptible to this dilemma. Floor rot in a slideout is usually traced to water accumulating on the sub-floor material through a small tear in the vapor barrier and/or a bad seal between the slide and the body of the RV. This can be a real problem if the RV slideout uses OSB (Oriented strand board), layers that are compressed and bonded with resin into a sheet.

OSB is common in construction applications, including the building of RVs (where it’s also used in the construction of slideout sub-floors). The problem with OSB is it doesn’t tolerate moisture. Once OSB gets wet, it begins to rot and come apart. This is a common issue with RV slides that are not well maintained.
Portrait close-up indoor photograph of a man in a faded dark black/grey hat, dark faded navy blue long sleeve t-shirt, light blue denim jeans, and black Under Armour fitness shoes kneeling down on the ground glancing at wood in a workshop environment area as the OSB flooring used in most of the slides in today’s RVs is very susceptible to rot when it comes into prolonged contact with water

The OSB flooring used in most of the slides in today’s RVs is very susceptible to rot when it comes into prolonged contact with water.

Landscape close-up photo view of this small tear in the vapor barrier that protects the bottom of the slide floor, and a little tear in a top seal, as it allowed water to penetrate into the OSB sub-floor; The result was severe rot in less than a year.
This small tear in the vapor barrier that protects the bottom of the slide floor, and a little tear in a top seal, allowed water to penetrate into the OSB sub-floor. The result was severe rot in less than a year.

Slideouts damaged by water intrusion are one of the most common — and most expensive — repairs that face RV owners, whether it’s a motorhome, travel trailer or pickup camper. RV repair centers typically charge anywhere from $2,000 to more than $30,000 to remove and replace slideout floors, depending on the size of the slide and the type of RV.

If regular slide maintenance is neglected, the end result is going to be an expensive lesson, as it was for the owners of this 31-foot Volante travel trailer that was recently brought in to Carrier RV Services in Eugene, Oregon.

A small tear in the slideout room’s vapor barrier, along with a torn lip of a seal, had allowed water to penetrate the OSB floor. The portion of the floor that started absorbing water saturated the OSB – which, in turn, started rotting along one end of the room. The rot went unnoticed until the slide started hanging up while being retracted.

Landscape indoor close-up photo view of two men holding onto an RV slide in a workshop environment area; RV slides are both heavy and off-balance, so it’s important to have helpers and a forklift to remove them from the coach or trailer.

RV slides are both heavy and off-balance, so it’s important to have helpers and a forklift to remove them from the coach or trailer.

Unfortunately, when the carpet was pulled up, the extent of the damage was clearly visible. The OSB had completely disintegrated, allowing the front wall of the 14-foot long slideout to droop because it was no longer being supported by the floor in that area. The repair — which we followed — required removing the slide from the trailer, then laying it down so the rotted floor could be removed and replaced with marine-grade plywood.

One-inch-thick marine-grade plywood, which Carrier RV uses when replacing slide floors, will not come apart when exposed to water. Plywood is also much stiffer structurally than OSB, so it makes the slide room stronger overall. Carrier RV Services recommends customers use marine-grade plywood rather than buying the floor from the RV manufacturer, which is usually made from OSB and covered with the vapor barrier fabric. According to Carrier’s shop manager, Tony Salazar, it’s not unusual for the factory replacement floor to cost $600-$3,500 not counting the freight truck shipping costs, which can cost as much as the floor depending on how far it needs to be shipped.

Caution When Removing RV Slides
Slides are heavy and off-balance, which pose a safety issue when they are being removed. Expert RV repair techs such as Salazar point out that DIYers need to take that into consideration when deciding if/how to proceed with any floor R&R. Having a few stout friends around to lend a hand is highly recommended when dealing with a small slideout room, but this task isn’t one that most hands-on RV owners should even contemplate.

For those willing to tackle the job, Salazar offered up a few experienced observations.

Landscape indoor close-up photo view of a man's fingers holding a one-inch-thick marine-grade plywood near a layer of wood, which plywood is ideal for use as a replacement sub-floor in RV slides; This type of plywood is highly resistant to water intrusion, and provides a stronger, more rigid floor.
One-inch-thick marine-grade plywood is ideal for use as a replacement sub-floor in RV slides. This type of plywood is highly resistant to water intrusion, and provides a stronger, more rigid floor.
“Most slideouts are built with the sidewalls sitting on top of the subfloor, and slides are built from the inside out,” he told us. “With those types of slides it’s easiest to remove the unit from the RV so you can lay it on the floor to take the pressure off the sidewalls, making removal of the damaged floor a lot easier than trying to work around the slide while it’s sitting in the trailer.

“Smaller slides, those less than eight feet long, can be done by a DIYer with helpers and a strong setup to lay the slide down so the floor can be accessed,” Salazar added. “But larger slides really need to be done by a professional shop using a forklift to move them in and out of the RV because they can weigh between 800-1,200 pounds, depending on size.”

Regardless of the size of the slide, the methodology in replacing a rotted floor is very similar across all RVs. We followed Salazar as he fixed the bad floor on this six-year-old travel trailer. Along the way he shared a few tips for DIYers that tackle rotted RV slide floor repair themselves.

Landscape close-up photo interior view of a space with damaged wooden floor and a damaged wall from a RV slide, creating a distressed look; Poor or ineffective maintenance cost this RV owner dearly. Water incursion led to the slideout floor drooping considerably. Left unaddressed, it would have eventually failed altogether.
Poor or ineffective maintenance cost this RV owner dearly. Water incursion led to the slideout floor drooping considerably. Left unaddressed, it would have eventually failed altogether.
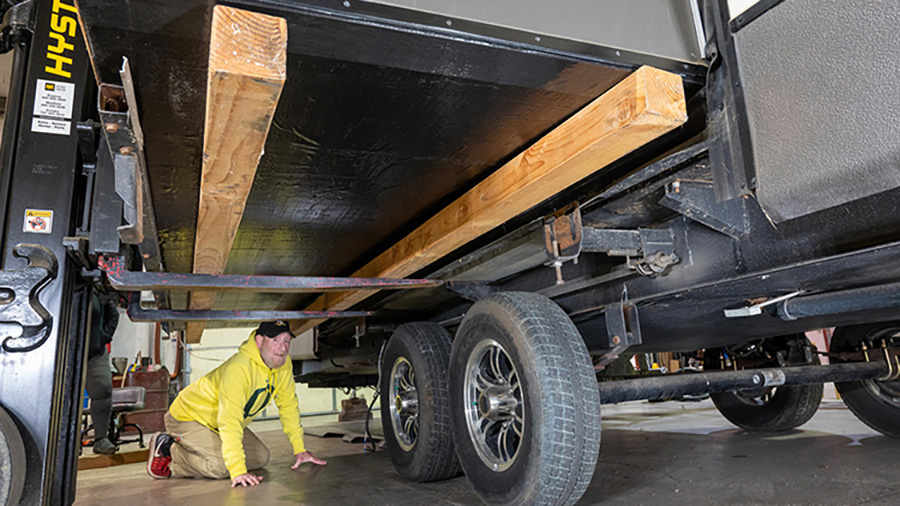
Landscape close-up photo view of a man in a yellow sweater, black hat, light beige khaki pants, and red/black Nike fitness shoes glancing across a particular RV sub-floor replacement, which was installed with 10-foot-long 4x4s under the slide so it can be lifted by a forklift; Once the weight of the slide is on the forks, it’s unbolted from the two rams and carefully pulled out of the trailer.
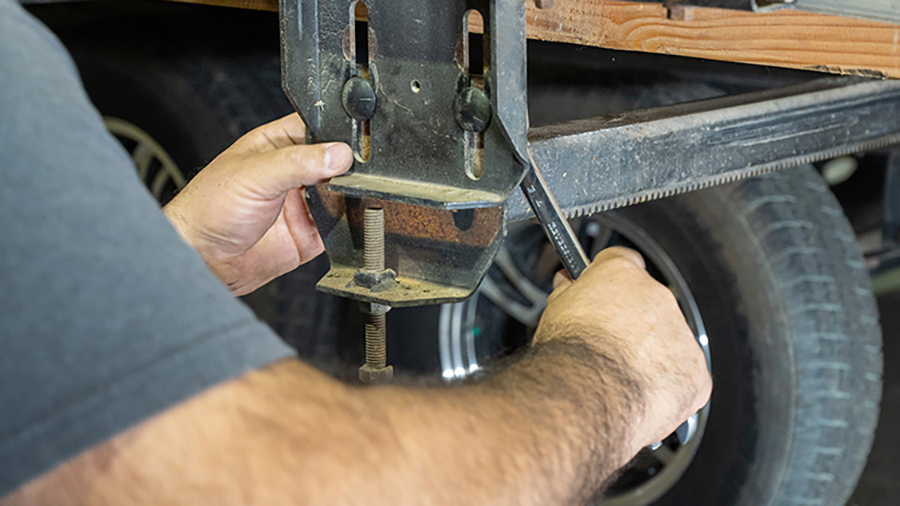
Landscape close-up photo view of a man's arms/hands using a wrench to adjust a particular RV sub-floor replacement area, which was installed by 10-foot-long 4x4s under the slide so it can be lifted by a forklift; Once the weight of the slide is on the forks, it’s unbolted from the two rams and carefully pulled out of the trailer.
In this particular RV sub-floor replacement, Salazar placed 10-foot-long 4x4s under the slide so it can be lifted by a forklift. Once the weight of the slide is on the forks, it’s unbolted from the two rams and carefully pulled out of the trailer.
Landscape close-up photo view of this RV trailer’s 14-foot-wide slideout room being easily removed using a forklift, and a couple extra hands to keep it stabilized from three individuals; Once clear of the trailer, the slide is set on the floor, then flipped over by hand so the floor is facing outward for easy access.
This trailer’s 14-foot-wide slideout room was easily removed using a forklift, and a couple extra hands to keep it stabilized. Once clear of the trailer, the slide is set on the floor, then flipped over by hand so the floor is facing outward for easy access.
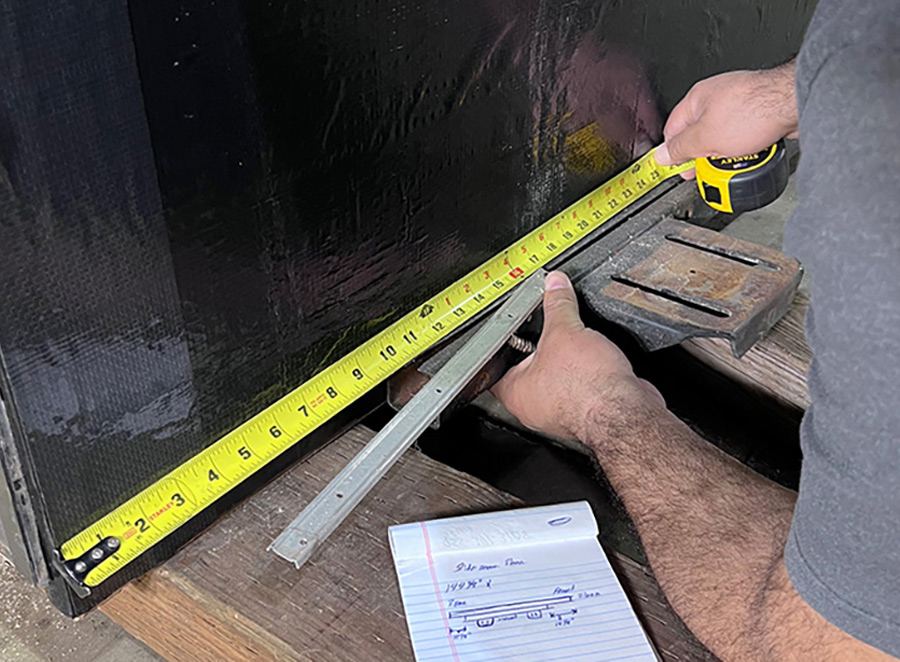
Landscape close-up photo view of a man's hands/arms measuring a piece of wood with a measuring tape; Before anything is removed from the slide, one thing of note is the exact measurements of the slide ram mounting bracket that runs the width of the room so it can be bolted back in the same location as it came from the factory. This eases repositioning of the slideout so it fits properly in the cutout.
Before anything is removed from the slide, Salazar notes the exact measurements of the slide ram mounting bracket that runs the width of the room so it can be bolted back in the same location as it came from the factory. This eases repositioning of the slideout so it fits properly in the cutout.
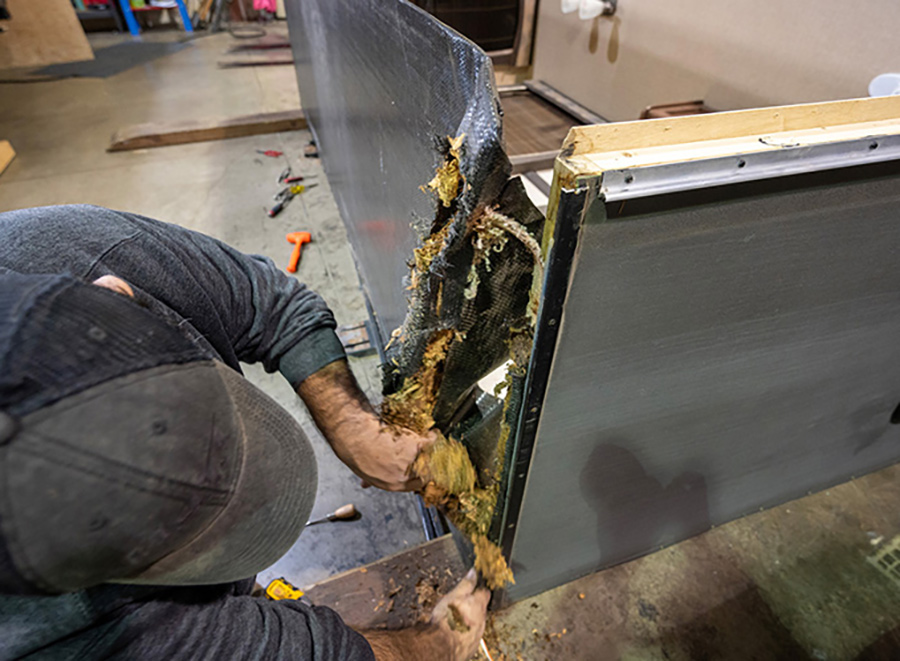
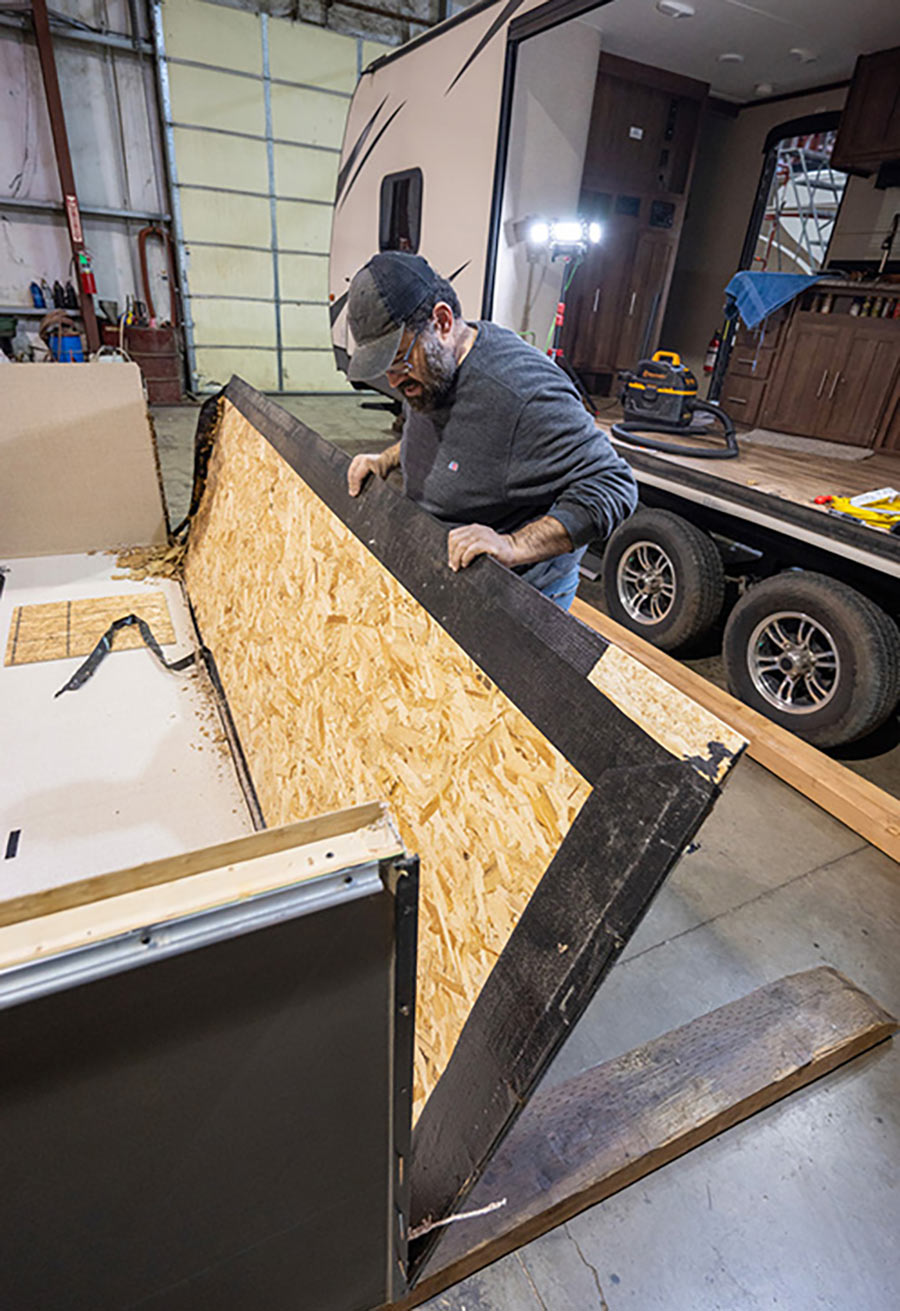
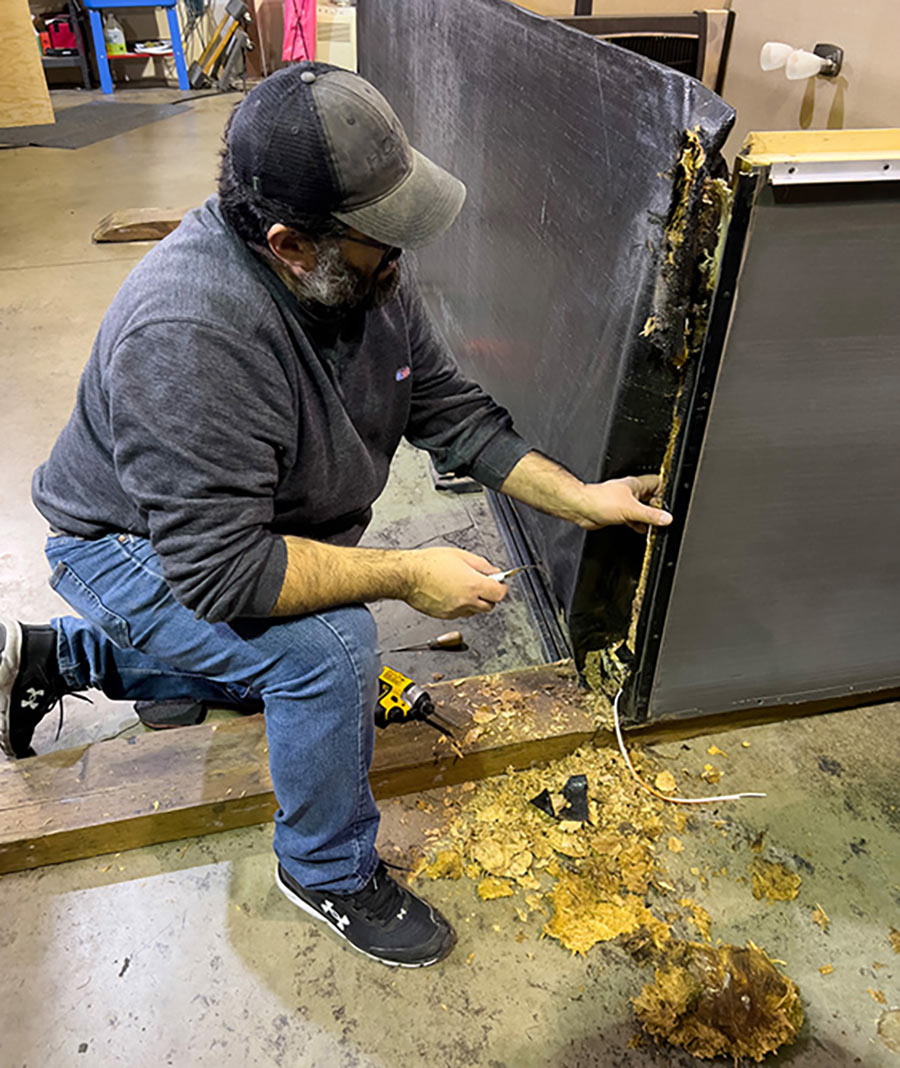
Close-up landscape photo view of a man in a faded dark black/grey hat and a faded dark navy blue long-sleeve t-shirt using a tool of some sort to fix a door area with the guidance of a broken piece of wood; The results of OSB getting wet is complete disintegration, which means the sidewall it supports droops. Rot in OSB migrates, so the best fix is to remove the OSB floor and replace it with exterior or marine-grade plywood.
The results of OSB getting wet is complete disintegration, which means the sidewall it supports droops. Rot in OSB migrates, so the best fix is to remove the OSB floor and replace it with exterior or marine-grade plywood.
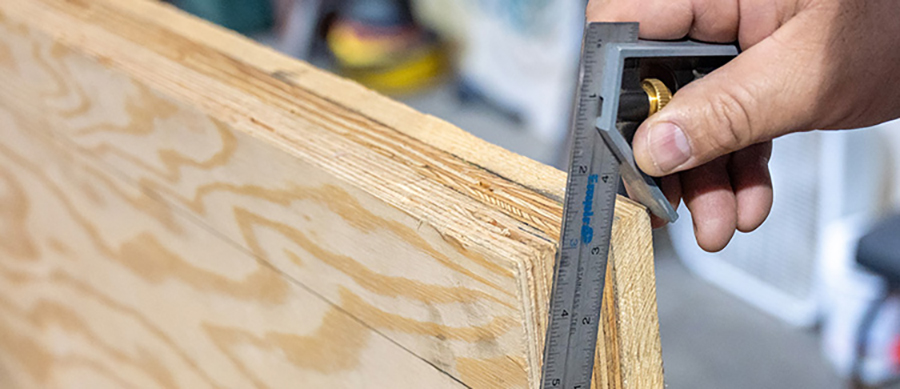
Close-up portrait photo view of a man's fingers using a tool/measuring ruler for guidance to cut wood; Slide floors are tapered so you don’t stub your toes entering the room. It’s important to measure the angle and thickness so the new floor material can be cut/routed in the same fashion. The thin leading edge of the taper is usually 1/4- to 3/8-inch.
Slide floors are tapered so you don’t stub your toes entering the room. It’s important to measure the angle and thickness so the new floor material can be cut/routed in the same fashion. The thin leading edge of the taper is usually 1/4- to 3/8-inch.
Landscape indoor close-up photo view of a man's fingers holding a one-inch-thick marine-grade plywood near a layer of wood, which plywood is ideal for use as a replacement sub-floor in RV slides; This type of plywood is highly resistant to water intrusion, and provides a stronger, more rigid floor. Transfer the taper measurements to the replacement floor. The extra ½-inch wood pieces shown here serve as a guide for the router that will be used to cut the angle on this 14-foot-long sheet of 1-inch marine-grade plywood.
Transfer the taper measurements to the replacement floor. The extra ½-inch wood pieces shown here serve as a guide for the router that will be used to cut the angle on this 14-foot-long sheet of 1-inch marine-grade plywood.
Landscape close-up photo view of a man in a dark black/grey hat and faded dark navy blue long-sleeve t-shirt glancing down at a partial rotted wooden floor board as it is lifted upwards halfways in the air
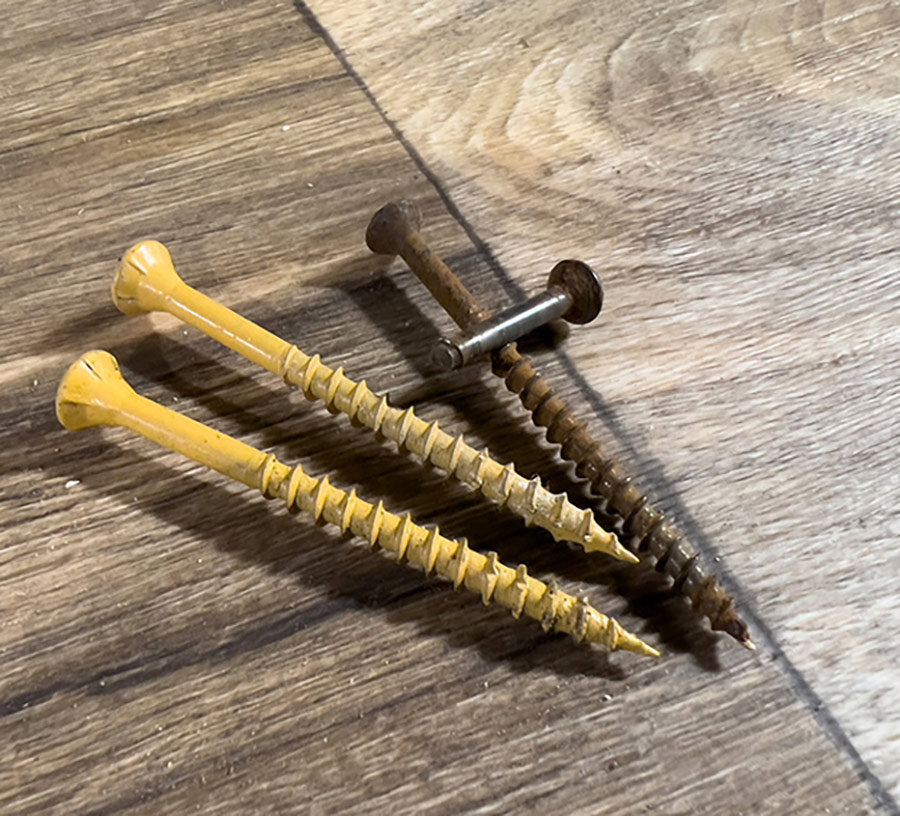
Portrait close-up photograph view of three big wooden screws displayed on a table; two in yellow and one in dark brown with a tinier little dark brown metal screw resting on top of the bigger dark brown wooden screw
Removing the rotted slide floor is straightforward. Remove all the factory screws, including any that break off during removal (a common occurrence), and pull the floor away from the walls. The screws originally used in this slide were a mixed bag of #6 and #8 wood and metal screws. Many were rusted — and several broke off as they were being removed.
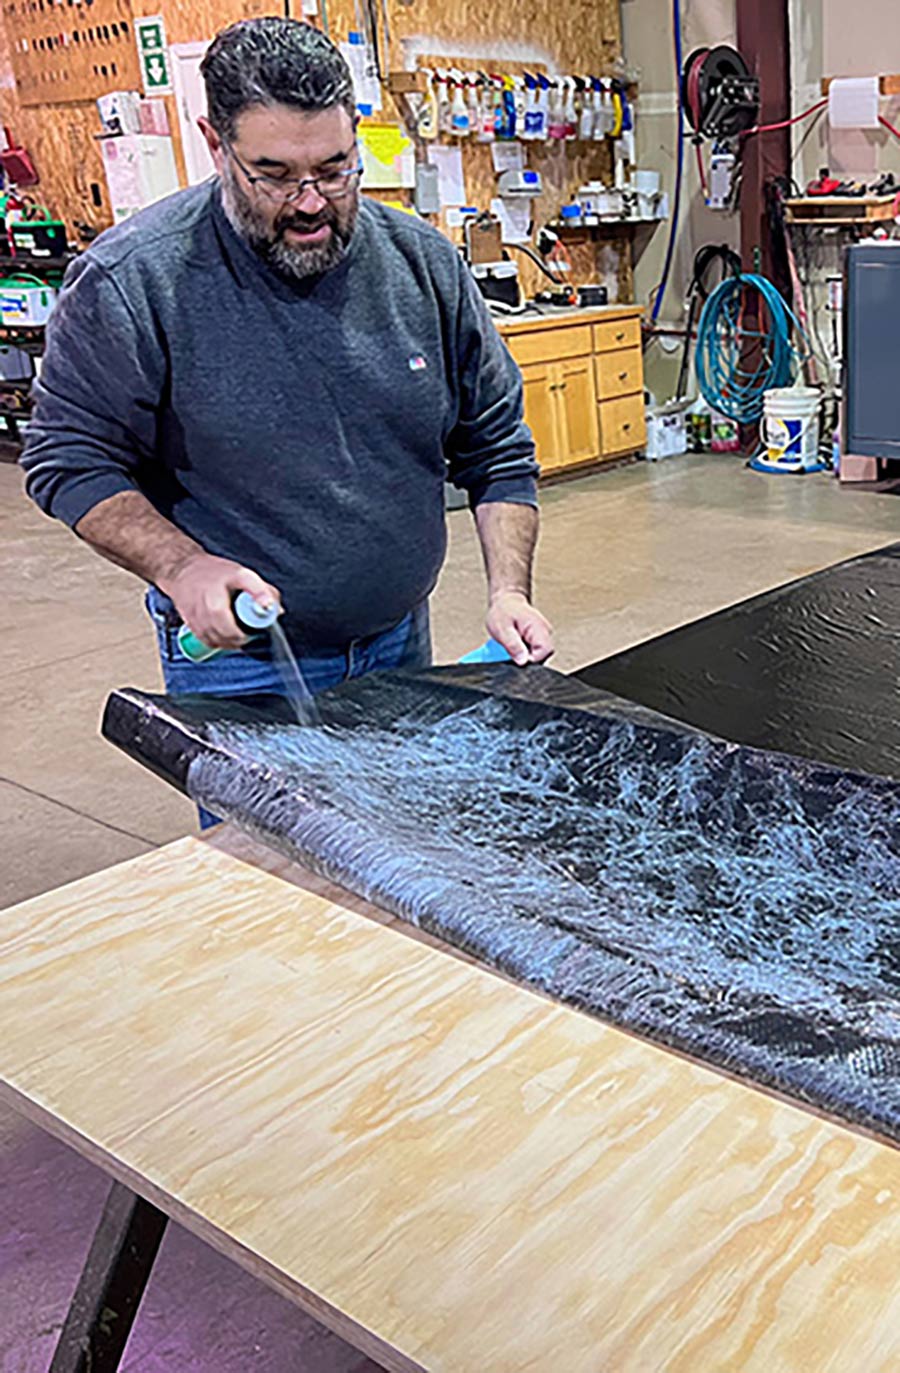
Close-up indoor portrait photo view of a man in a dark faded navy blue long-sleeve t-shirt and light blue denim jeans using a 3M 90 Hi-Strength Spray Adhesive onto a sheet of custom-made inch-thick marine-grade plywood acting as a quality vapor barrier material being laid out onto the new wooden RV slide floor board; This job required two cans of the adhesive.

The new slide floor, a sheet of custom-made inch-thick marine-grade plywood, is covered with a quality vapor barrier using 3M 90 Hi-Strength Spray Adhesive sprayed on both the wood and water barrier material. This job required two cans of the adhesive.
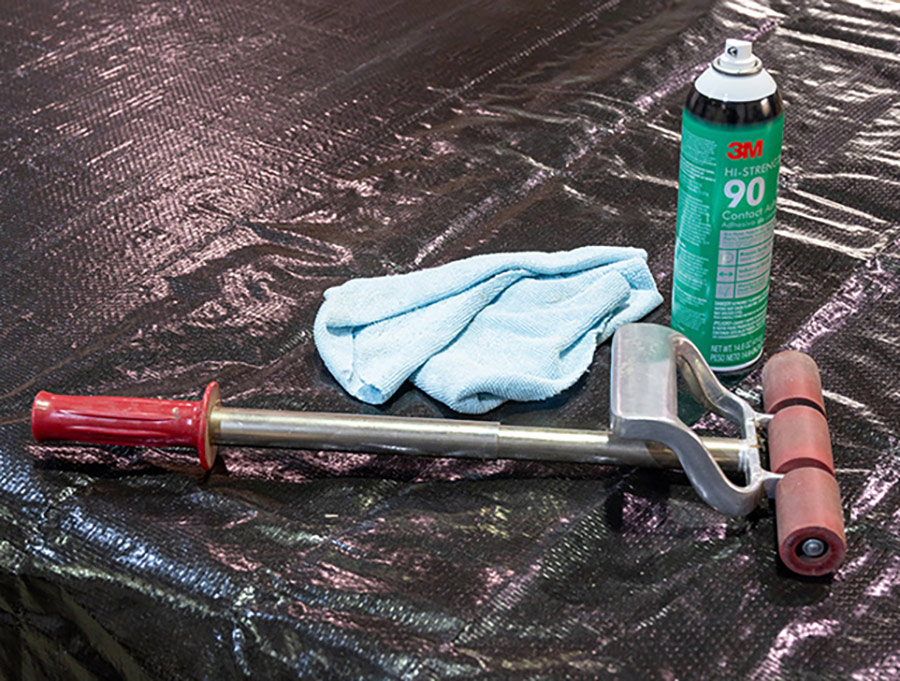
Close-up landscape photo view of a 3M 90 Hi-Strength Spray Adhesive canister, a light sky blue rag towel, and a heavy duty roller object displayed on top of a black cover material

The most important part of applying the vapor barrier is to make sure it’s as smooth as possible so it glides smoothly over the seal when the slide is extended or retracted. A good heavy-duty roller helps minimize the air bubbles. Make sure the material is pulled tight over the tapered edge during installation.
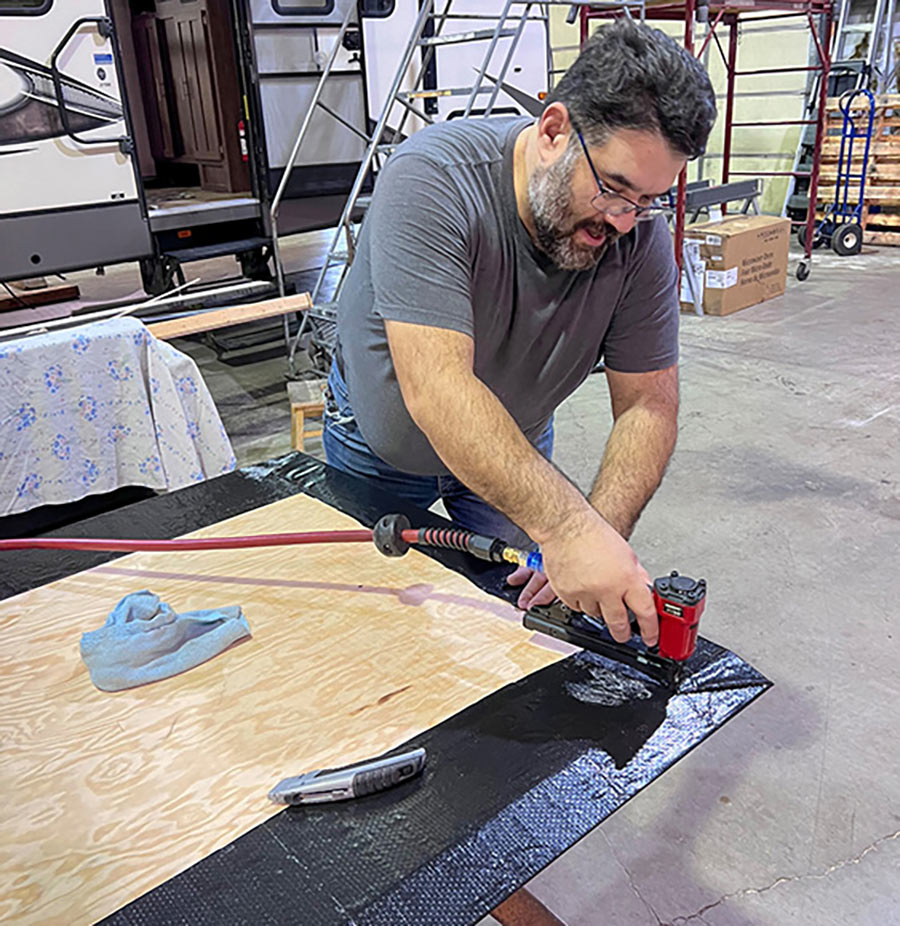
Portrait close-up photo view of a man in a dark grey t-shirt and light blue denim jeans using a tool to glue and staple all the edges and folds around the top of the new wooden RV slide board floor as it doesn’t require full vapor barrier coverage because it is inside and will be covered by carpet or other flooring material; However, it still needs to be very secure to keep the vapor wrap tight.

The top of the new floor doesn’t require full vapor barrier coverage because it is inside and will be covered by carpet or other flooring material. However, it still needs to be very secure to keep the vapor wrap tight, so Salazar glues and staples it along all the edges and folds.
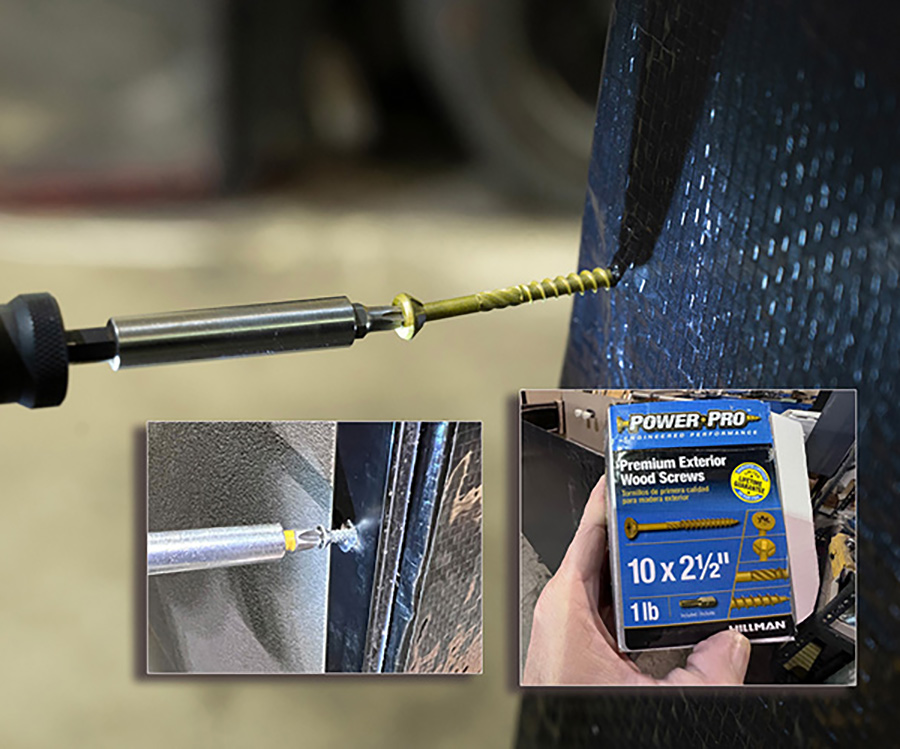
Close-up portrait photograph demo view of Power Pro 2 ½” #10 decking premium exterior wood screws being used in action; The larger screws hold the plywood securely to the walls, while the epoxy coating prevents them from rusting out over the years.

Salazar upgrades the factory #8 wood screws with 2 ½” #10 decking wood screws. The larger screws hold the plywood securely to the walls, while the epoxy coating prevents them from rusting out over the years.

Landscape close-up photo view of a man's hands/arms measuring a piece of wood with a measuring tape; Before anything is removed from the slide, one thing of note is the exact measurements of the slide ram mounting bracket that runs the width of the room so it can be bolted back in the same location as it came from the factory. This eases repositioning of the slideout so it fits properly in the cutout.

Salazar covers all the screws along the bottom of the slide with a heavy-duty polyethylene vapor barrier sealing tape to prevent water penetration. He also applies silicone sealant to the screws along the bottom of each side wall for the same reason.

Portrait close-up photo view of a man's hand/arm using a power tool to replace/unscrew the RV slide bracket, which is just a matter of positioning it according to the measurements taken earlier and re-installing the OEM hex head lag screws; Be sure the screws go in straight or else they will break through the walls.

Replacing the slide bracket is just a matter of positioning it according to the measurements taken earlier and re-installing the OEM hex head lag screws. Be sure the screws go in straight or else they will break through the walls.

Close-up portrait photo view of a see through glimpse display of a RV interior area with a kitchen as the beautiful finished completed RV slide floor is nearby
Slide floor replaced. “We use the best plywood possible so the repaired flooring will not suffer the same fate as the OEM OSB,” said Teresa Carrier, who owns Carrier with her husband, Tom. “We cover the bottom with a moisture barrier exactly like it came from the RV manufacturer.”
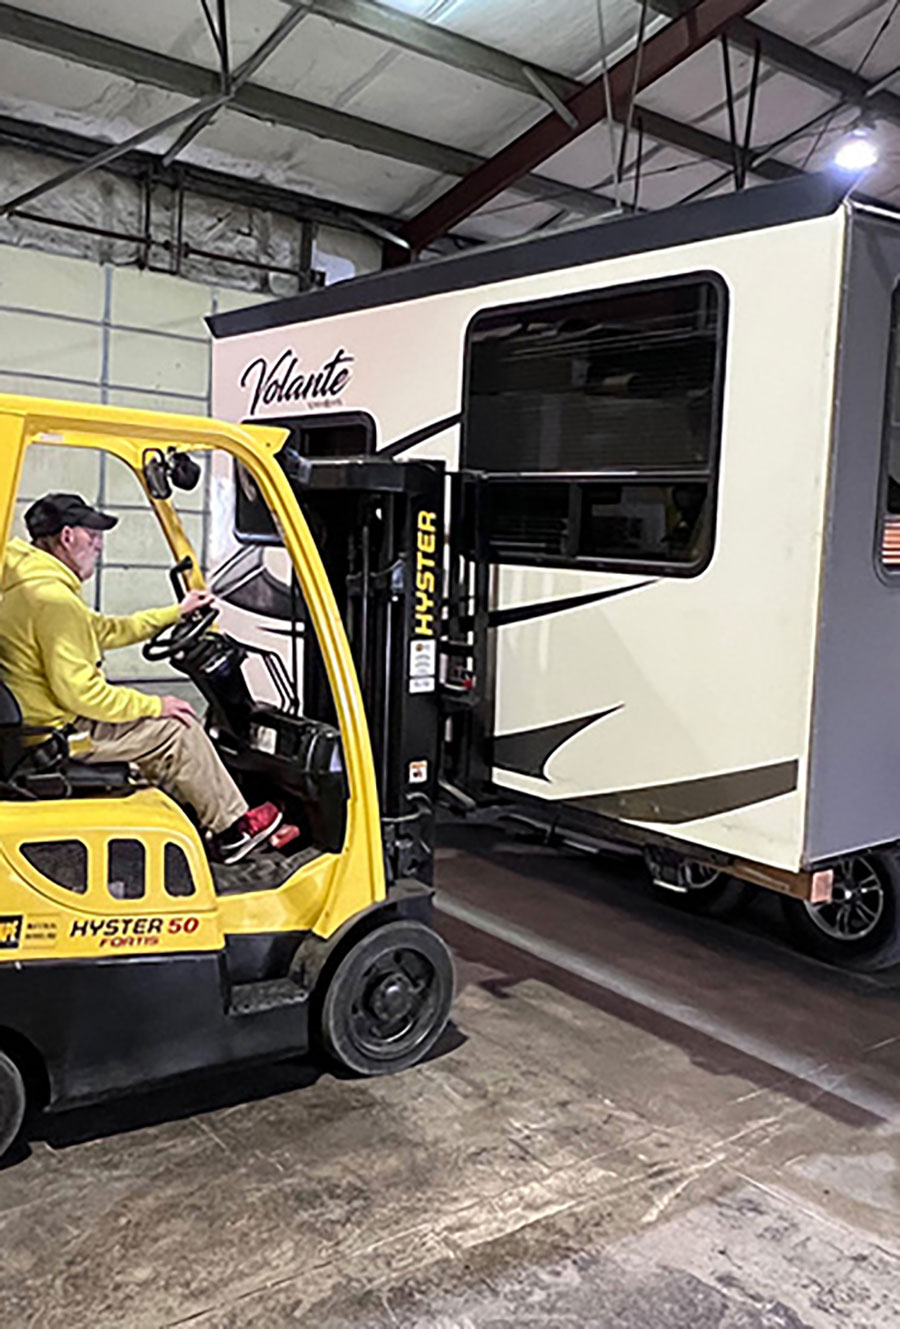
Portrait close-up photo view of a man in a yellow sweater, black hat, light beige pants, and red/black Nike fitness shoes driving a forklift as it latches onto the RV trailer; Having a forklift makes the job of removing and re-installing a slide less complicated. Take reinstallation very slow so the seals aren’t damaged.
Having a forklift makes the job of removing and re-installing a slide less complicated. Take reinstallation very slow so the seals aren’t damaged.
Close-up portrait photo view of a man's fingers using a wrench to adjust the RV slide; Once the slide is positioned correctly into the trailer, the rails can be extended and bolted to the bracket attached to the bottom of the slide.
Once the slide is positioned correctly into the trailer, the rails can be extended and bolted to the bracket attached to the bottom of the slide.
RV Slideout Floor Inspection
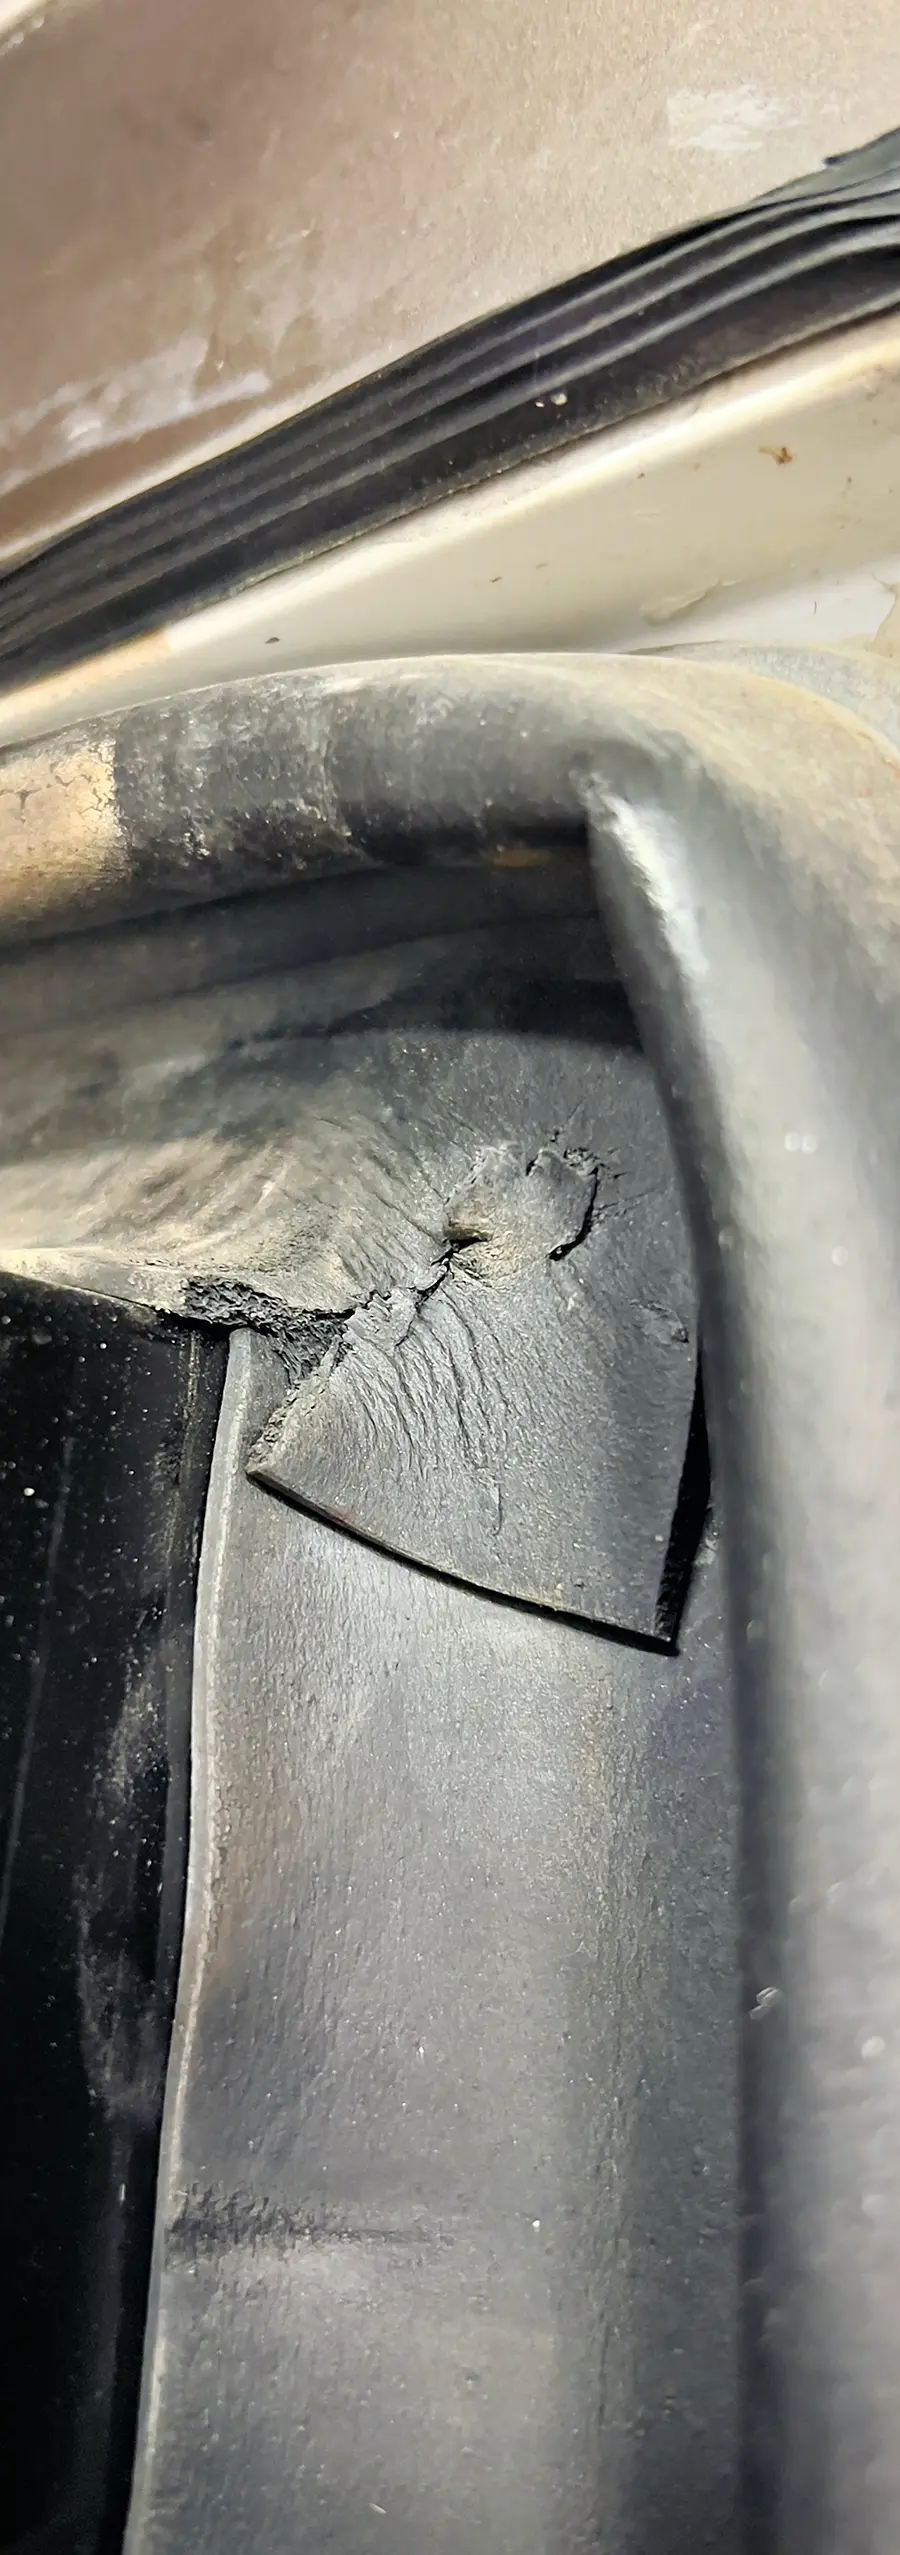
Portrait close-up photo view of a RV slide room wiper seal, which need to be inspected frequently because they can crack, tear and the corners come unglued, allowing an easy path for water to get inside the RV; They will last longer with frequent cleaning and treatment with a conditioner such as 303 Aerospace Protectant.
Slide room wiper seals need to be inspected frequently because they can crack, tear and the corners come unglued, allowing an easy path for water to get inside the RV. They will last longer with frequent cleaning and treatment with a conditioner such as 303 Aerospace Protectant.

To prevent water damage in a slide and a hefty repair bill, perform (at minimum) a bi-annual inspection of the slide’s seals, trim moldings, corner trim, screws and vapor barrier. Replace any seals that are torn or not sealing properly. Use vapor barrier sealing tape to cover tears, holes or worn areas. Re-seal along the top and side trim pieces, and around windows. This type of regular maintenance is critical to preventing slide floor rot.

Finding A Replacement Slideout Floor
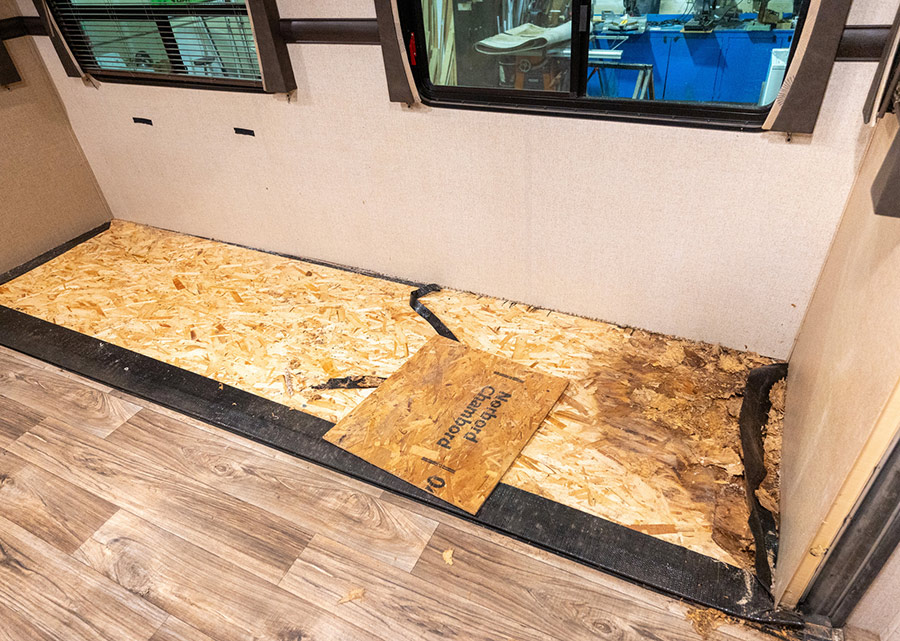
Landscape close-up photo view of a wooden floor board of a small RV interior area being covered with plywood, providing a sturdy and durable surface for the interior

Finding plywood to replace the OSB sheeting used in an RV sub-floor is easy if the width of the floor is 4 x 10 feet or smaller because most home improvement centers carry exterior plywood up to 10-foot lengths. Finding plywood longer than that is much more difficult, forcing RVers to order a replacement floor from the RV manufacturer, or from a custom plywood supplier.

“A 14-foot floor from an RV manufacturer may cost as much as $3,000 depending on freight truck costs,” said Teresa Carrier, co-owner of Carrier RV. “An OEM floor will probably be OSB, which we avoid using. That’s why we get our floor material from Plywood Solutions in Albany, Oregon. They custom fabricate slideout floors longer than 10-feet using marine-grade plywood.”