

Fun from the Sun
[maghub_sidebar]
Sun and cloud illustration
Fun from the Sun title
Installing a Bluetooth-monitored  320-watt solar array on a  towable camper/garage
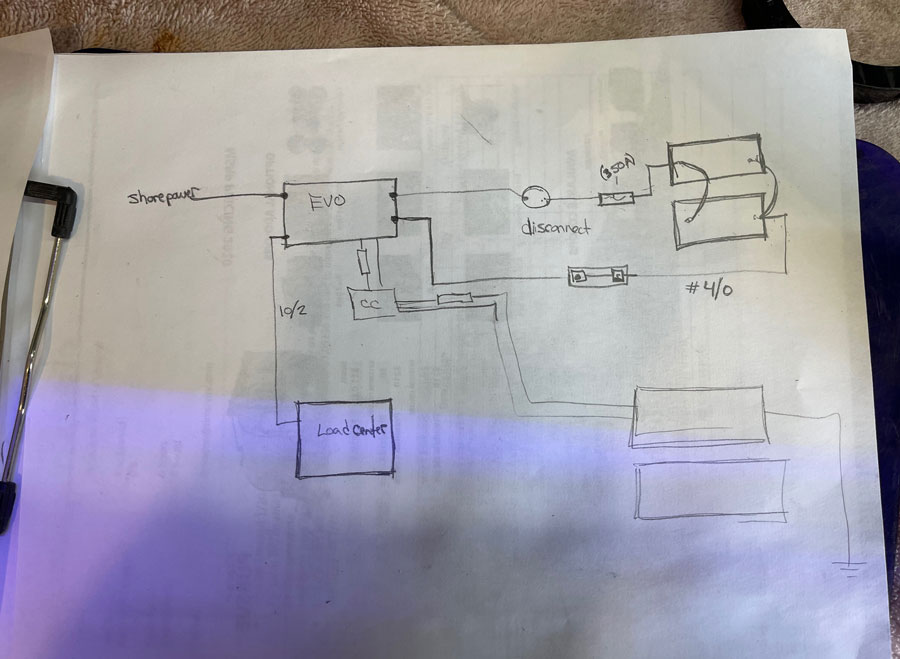
Always carefully plan your system first by reviewing all the documentation, the NEC551 for RVs, drawing diagrams and schematics of how you’ll put the system together
Always carefully plan your system first by reviewing all the documentation, the NEC551 for RVs, drawing diagrams and schematics of how you’ll put the system together. Make sure you have everything needed before starting the project.
Off-grid Camping Upgrades logo
Installing a Bluetooth-monitored 320-watt solar array on a towable camper/garage
By Chris Dougherty / Photos by the author
Off-grid Camping Upgrades logo
R

enewable energy is a huge topic in the RV space, and for good reason. Not only are RVers, as a community, environmentally adept, but solar systems — especially when combined with the latest power inverter and battery technology — allow electrical independence for off-grid camping. Renewable energy systems in RVs are nothing new, but technology is advancing, prices are dropping and RVers’ interest in off-grid travel is off the charts.

That’s not surprising to anyone who has been RVing for any length of time. In fact, the popularity of harnessing “free” power — to say nothing of the various systems available — is such that you will see this technology covered in the pages of RV Enthusiast regularly as power from the sun, wind and other sources become more widely available.

We recently worked on a project with our friends at Tim’s RV in Erving, Massachusetts, installing a hefty solar, inverter and lithium battery system in a new 2021 In-Tech Flyer Discover “next generation” toy hauler. Tim’s RV is well suited for this work because the service manager, Brandon Turner, besides being an accomplished RV tech, owned a solar power company previously. As the word has gotten out, more and more RVers in the northeast have turned to Tim’s RV for solar installations and upgrades.

The Flyer Discover is interesting in that it has a small galley, no bathroom and minimal storage. The sleeping arrangements in this off-road toy hauler are tip-out beds, one on each side, which sit flat on the wall when not in use. For the right adventurer, this does the trick.

What the buyer of this rig is doing, however, is turning it into a garage to tow behind his motorhome. Not only will this trailer garage his motorcycles, but it will be both a solar- and lithium-powered workshop plus guest quarters, all wrapped into one neat package.

In this article, we’ll focus solely on the solar aspect of the installation, as other articles in this issue provide detailed information on batteries and inverters.

The Project
The buyer of this trailer wanted to have a self-sustaining power system on board the trailer that could handle power tools, lighting, the refrigerator and limited air conditioning while off the grid. When the sizing calculations were being performed, the customer decided to install 320 watts of solar panels with a 30-amp MPPT charge controller, a 2.2kW inverter system and a 210-amp-hour lithium battery bank. For a towable that is more utility trailer than RV, this system would seem like overkill but, again, the owner has different plans.
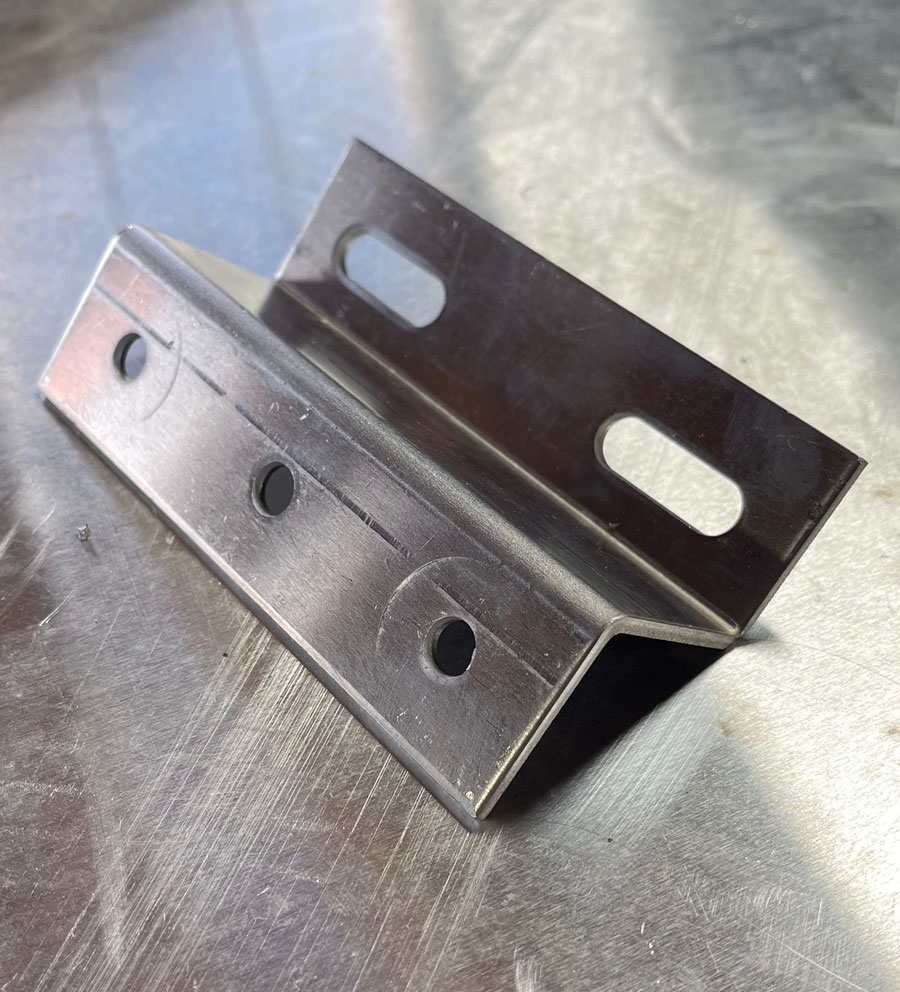
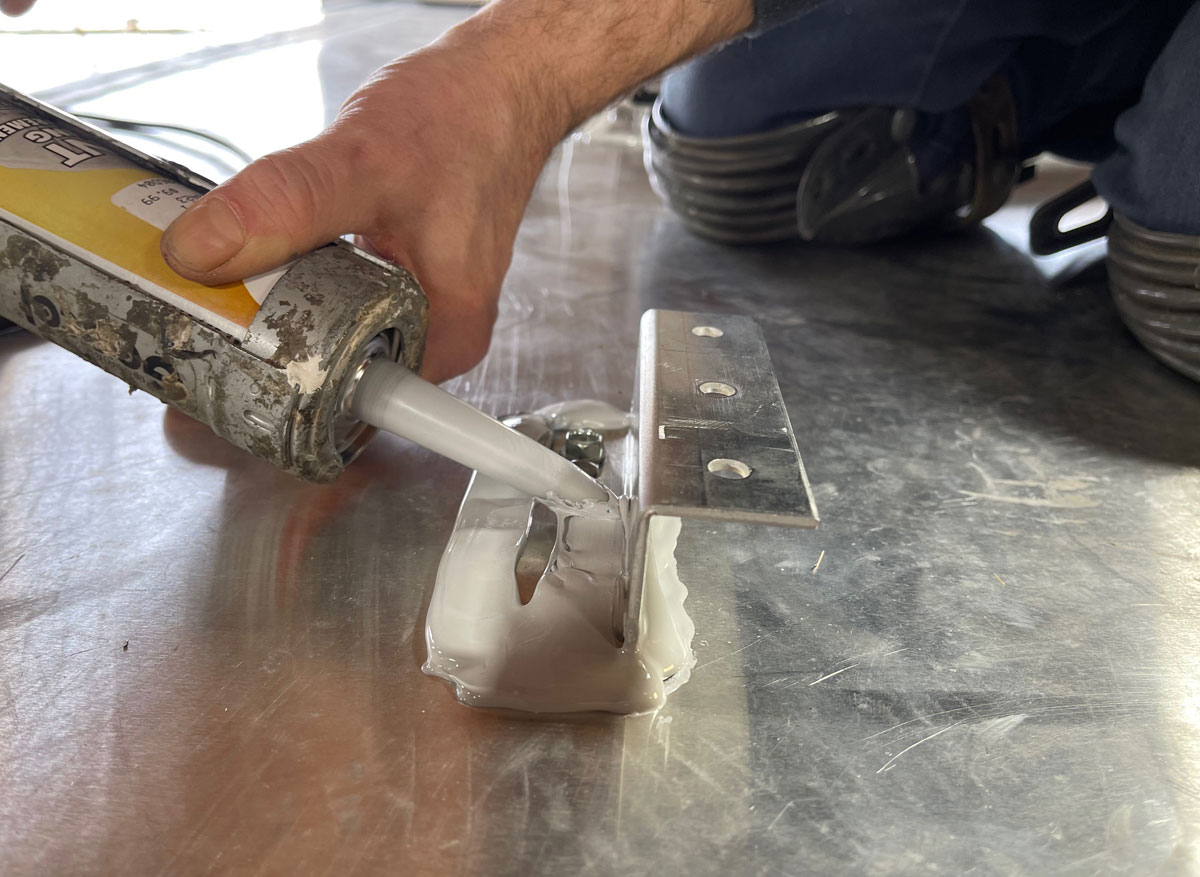
Z-brackets were purchased to mount the solar panels. The brackets and hardware were modified to make them easier to install.
Be sure to use plenty of sealer that’s appropriate for the particular type of roof. Do it right the first time, because the panels are a chore to remove and reinstall, as is resealing the brackets.

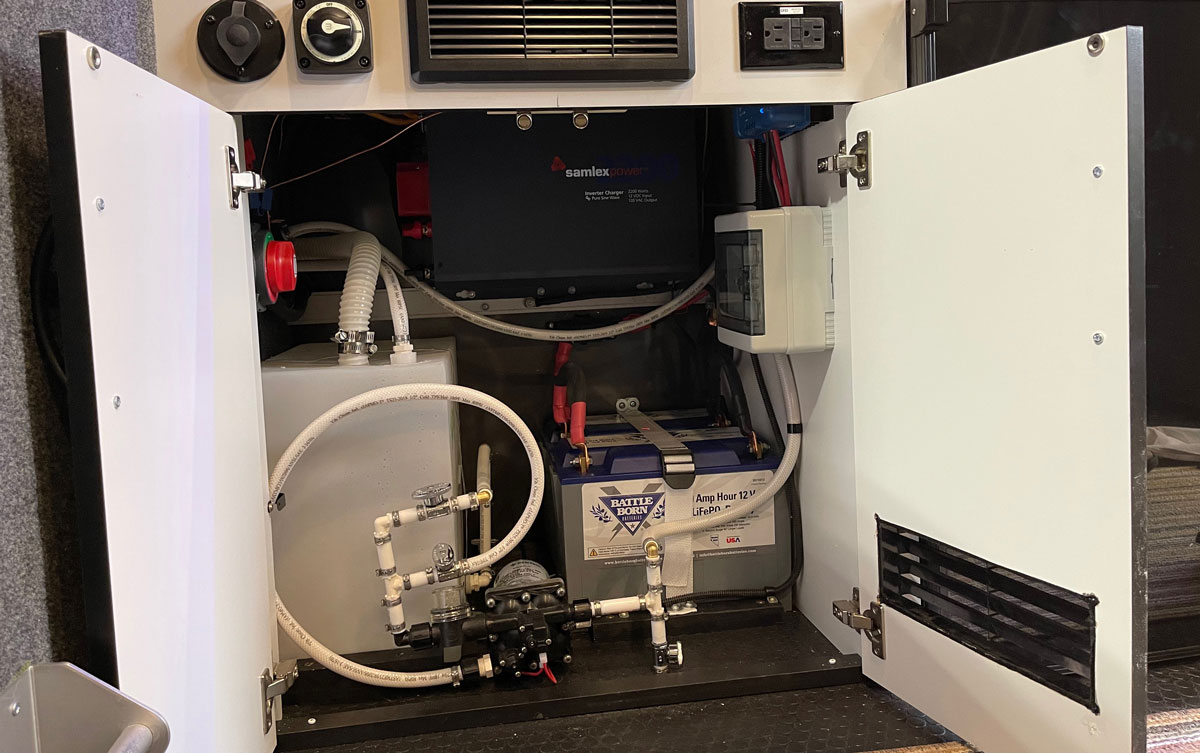
Because of the limited cabinet space, which is all located in the nose of the trailer, Turner needed to do some clever planning and fabrication to install the system. The plumbing and water system were removed and relocated so that the batteries, inverter and components could be installed in this space. Running the wiring was quite simple because most of the system was in one location, with a straight run to the roof — even the AC breaker panel was in this location.

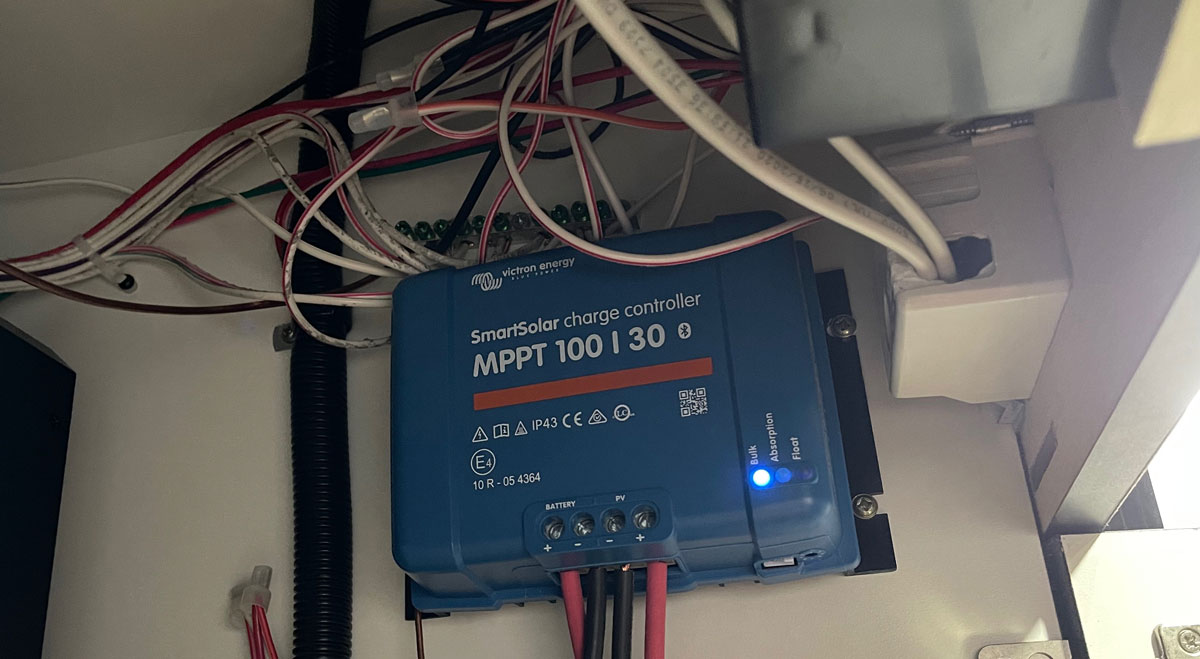
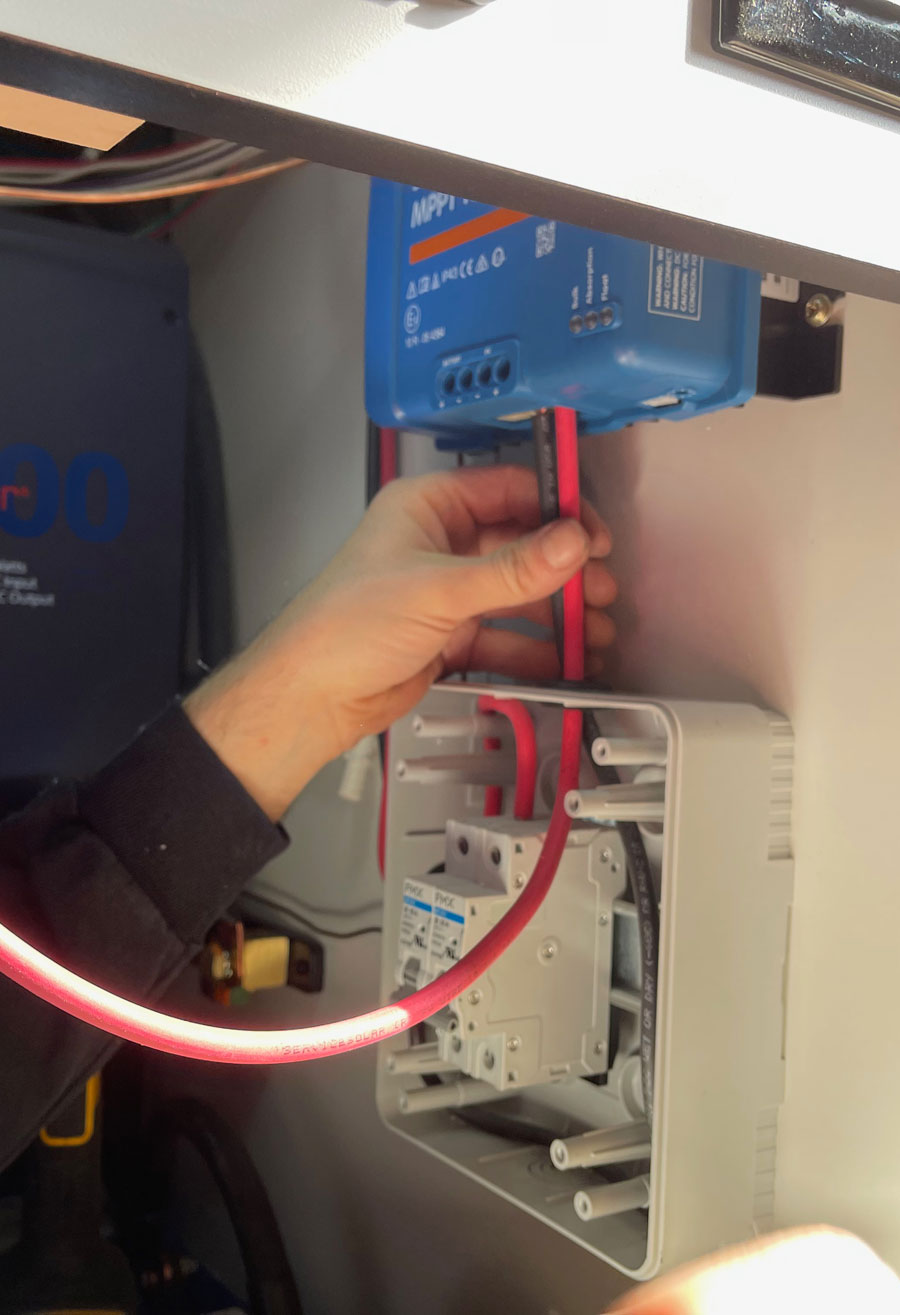
For this project, two 160-watt Newpowa rigid monocrystalline solar arrays were used. These 12-volt DC panels are designed for mobile applications and high wind/snow loads, according to the company. The panels are mounted using Z-brackets, which Turner modified slightly for ease of installation. The panels were connected to a Victron Energy Smart 30-amp MPPT solar charger with Bluetooth interface for monitoring the system. This is fed through a FMX brand solar circuit breaker setup.

There are many choices when it comes to solar panels, and while these were a legacy type of panel, Turner believed they would work well. “I often prefer to use the newer flat panels that adhere to the roof” Turner told RV Enthusiast, but noted that for this installation there wasn’t room.

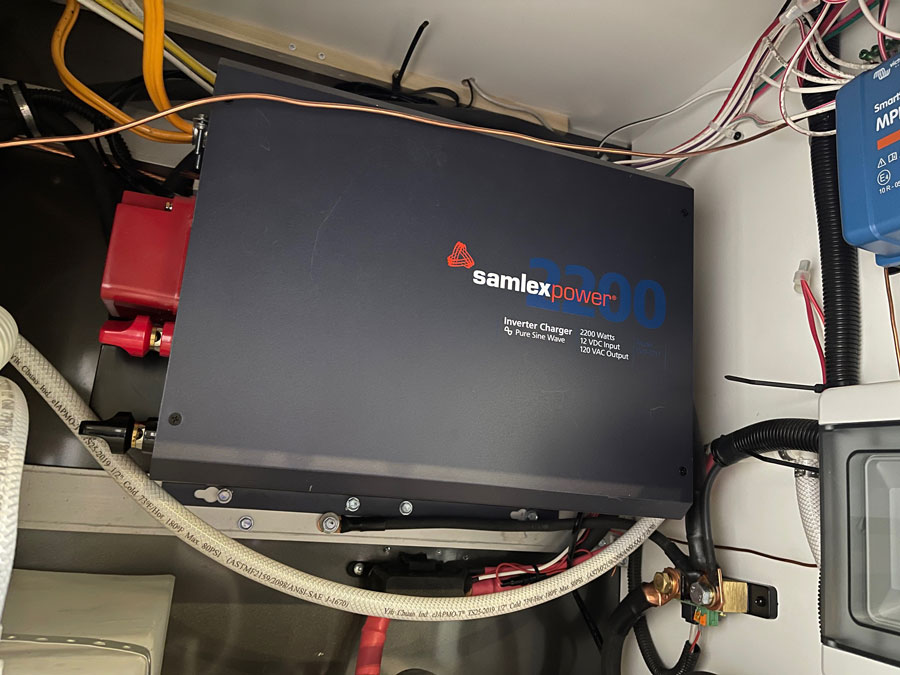
Completing the package for the new owner’s trailer were a Samlex Power EVO-2212 pure sine inverter charger, dual Battle Born BB10012 100-amp-hour lithium iron phosphate (LiFePO4) battery units, cabling and circuit protection and a Victron BMV-712 smart battery monitor with Bluetooth remote interface.

The Install
Turner is a conscientious technician who thinks out and plans his systems carefully before beginning the install, as evidenced during this particular project. As noted earlier, the installation of this system required removal and reconfiguration of the freshwater system and building out a wall mount for the large, heavy inverter/charger. So, a cabinet designed to simply house a battery box, water tank, pump and plumbing now also holds two batteries and the rest of the components.
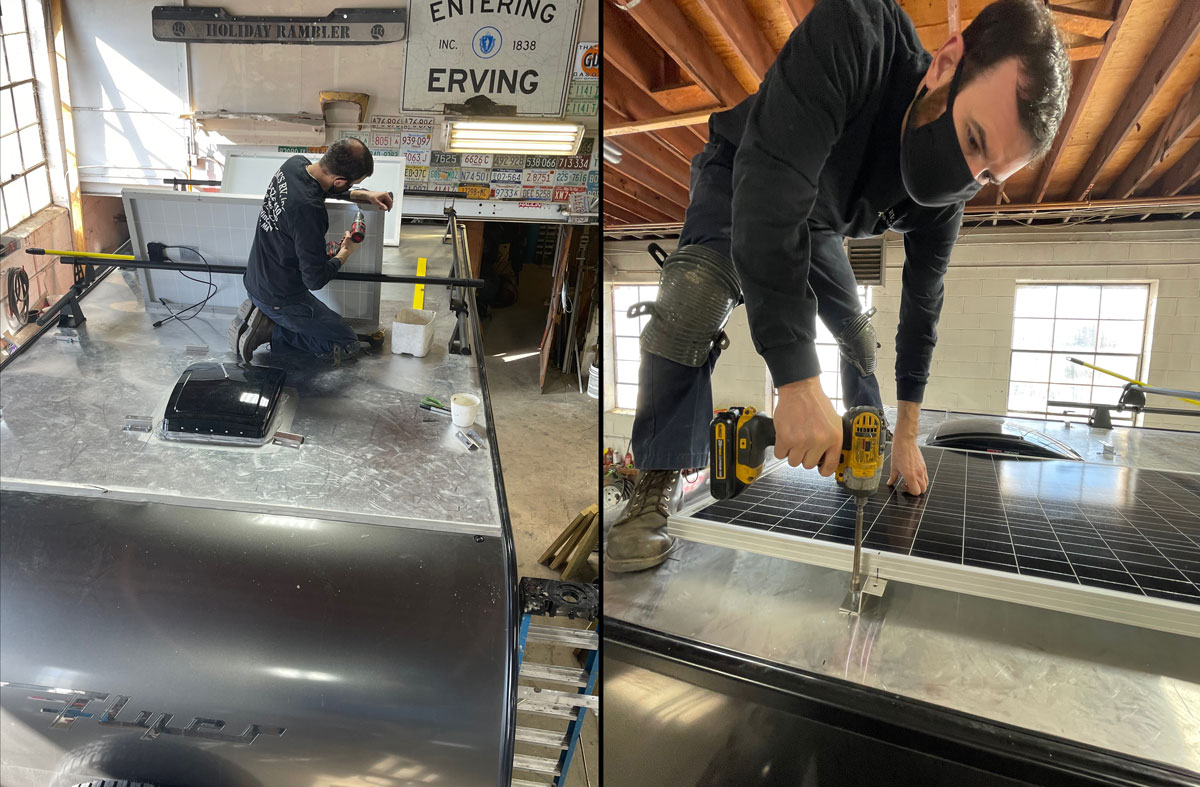

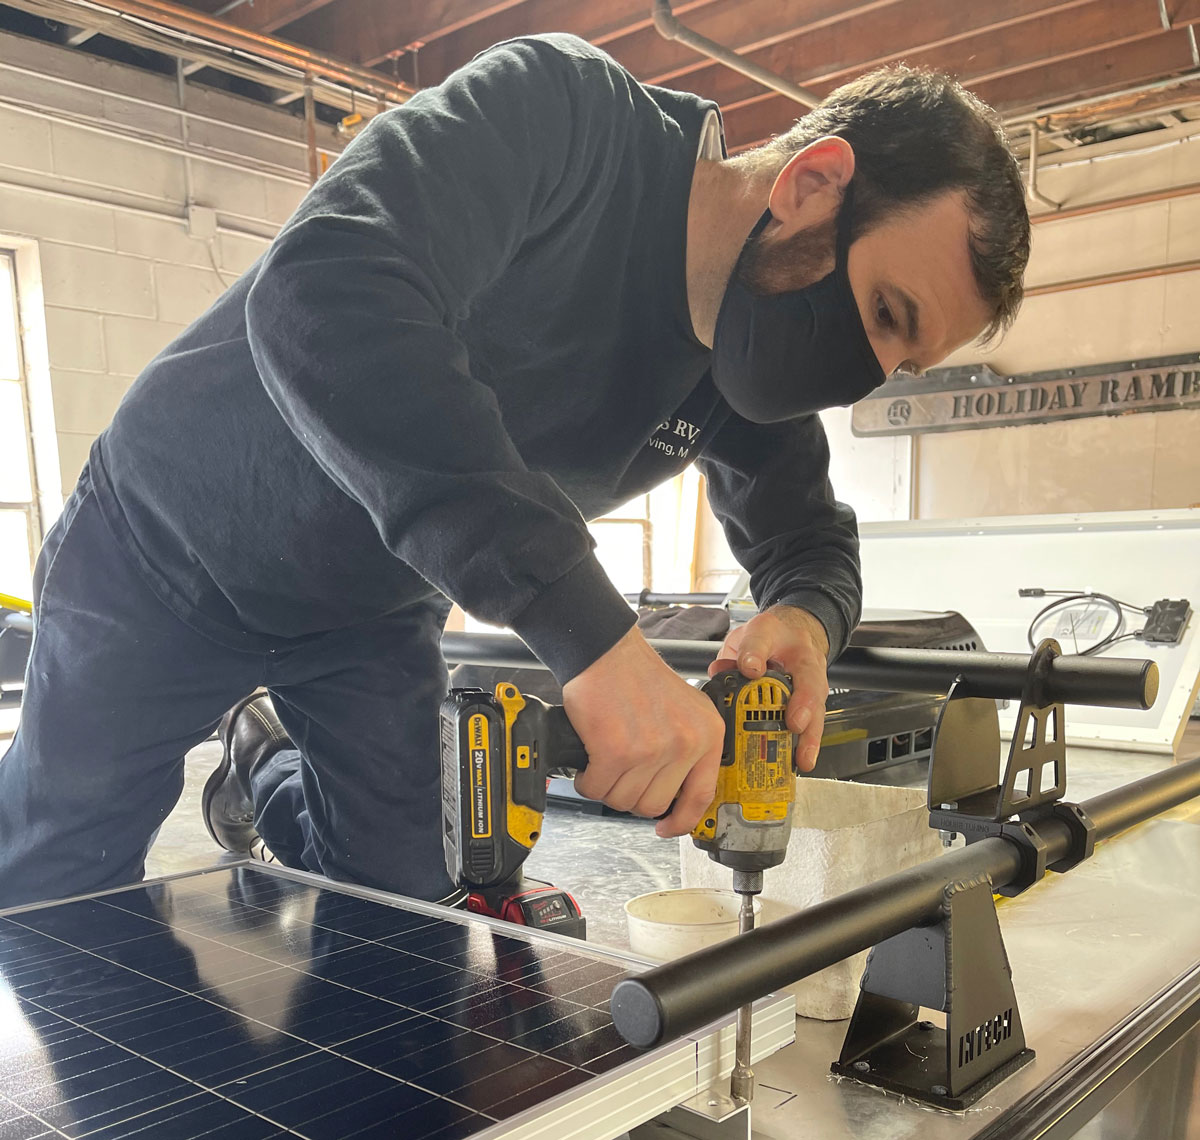
It’s important to find structure in the roof to screw down the panels. Turner marked and measured the location of the roof structure, figured out the best alignment of the panels, lined up the brackets, marked and drilled the panels, test fit them to the panels, removed the brackets, screwed them to the roof using putty tape and sealer, then mounted the panels to the brackets with modified hardware to make them easier to attach.
A hole will need to be drilled in the roof to route cables for the solar array. This needs to be planned carefully.
A hole will need to be drilled in the roof to route cables for the solar array. This needs to be planned carefully. In this instance, because of the trailer design, there was one spot to cleanly run the cables, and we still hit structure underneath — but just slightly.

A green energy system for most RVers should be designed for eventual expansion from the bottom up. A house is only as good as its foundation, and the same goes for a solar system. Turner built this one with the possibility of minimal expansion, slightly upping cable sizes — but because of the space restrictions and trailer design, there wasn’t much more that could be squeezed in. That said, because of the physical size of the inverter, a more robust model could be swapped out and batteries added on the trailer A-frame, theoretically, if needed. Additional solar panels could also be added.

How Does It Work?
As expected, the system is able to power the air-conditioner on battery power, but for only a limited time based on the 200-amp-hour battery capacity. The heating element in the trailer, which is the only source of heat, is too much for the system. As this Flyer Discover is to be used primarily as a garage and workspace, this is fine and within the owner’s expectations.
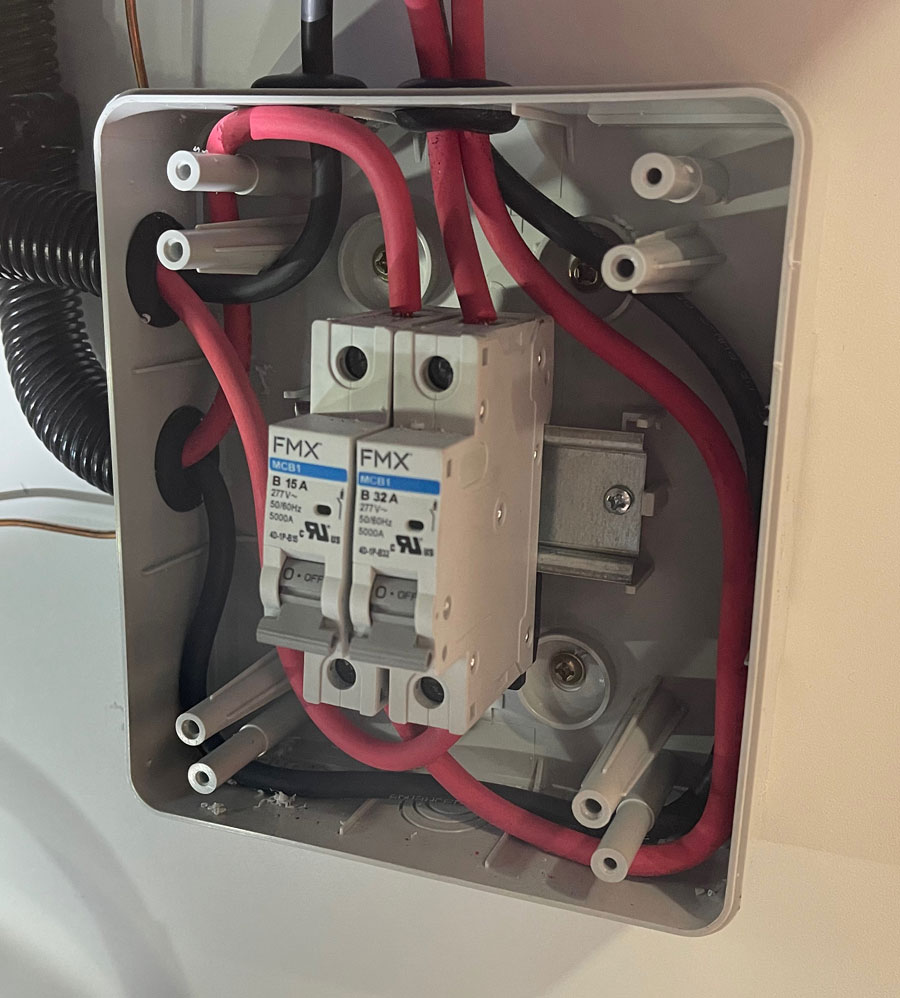
The solar cables were run down from the roof inside the wardrobe and into the utility cabinet. They were then fed into the solar circuit breaker box, then back up to the solar charge controller.

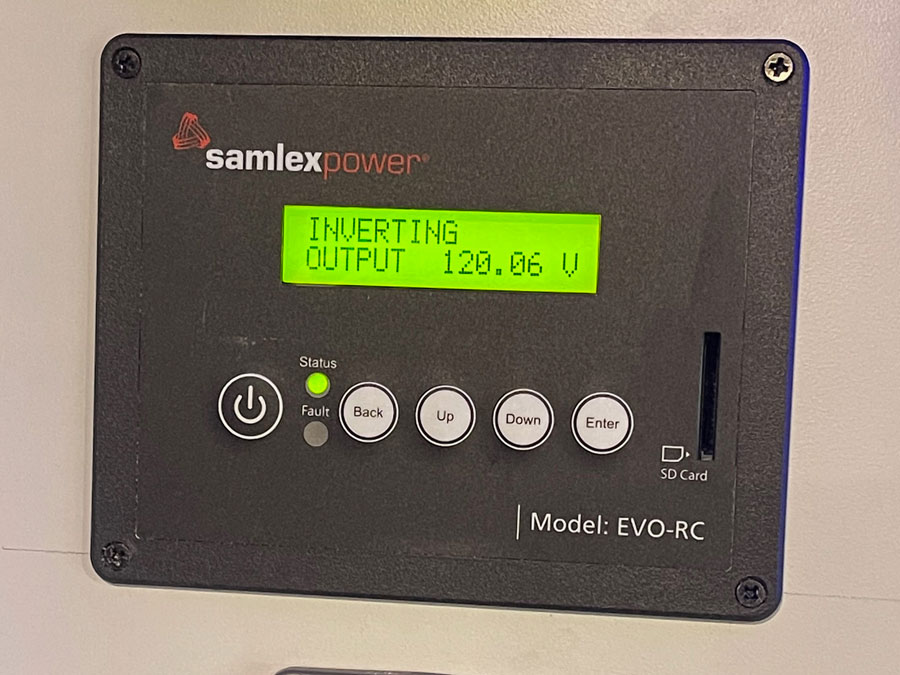
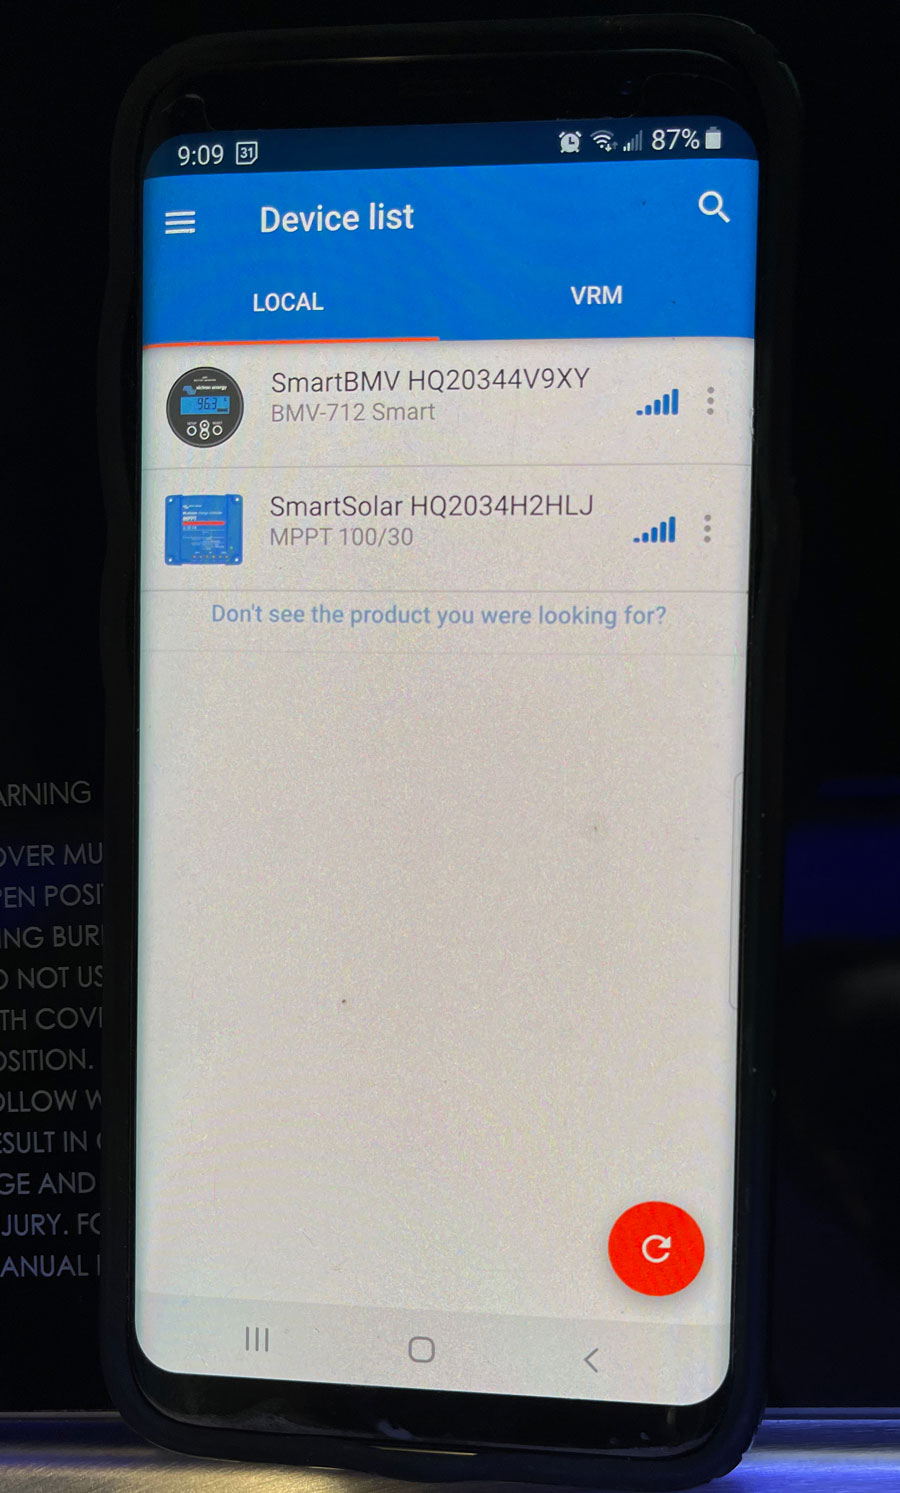
The Victron smart solar controller and battery monitor are accessible via a smartphone app. In addition, the battery monitor has a remote display and controller mounted in the galley overhead structure along with the remote controller for the Samlex inverter charger. This assures all parts of the system can be monitored via smart device or remote panel. And, since the LiFePO4 batteries are non-vented and maintenance-free, they can be installed and largely left alone.
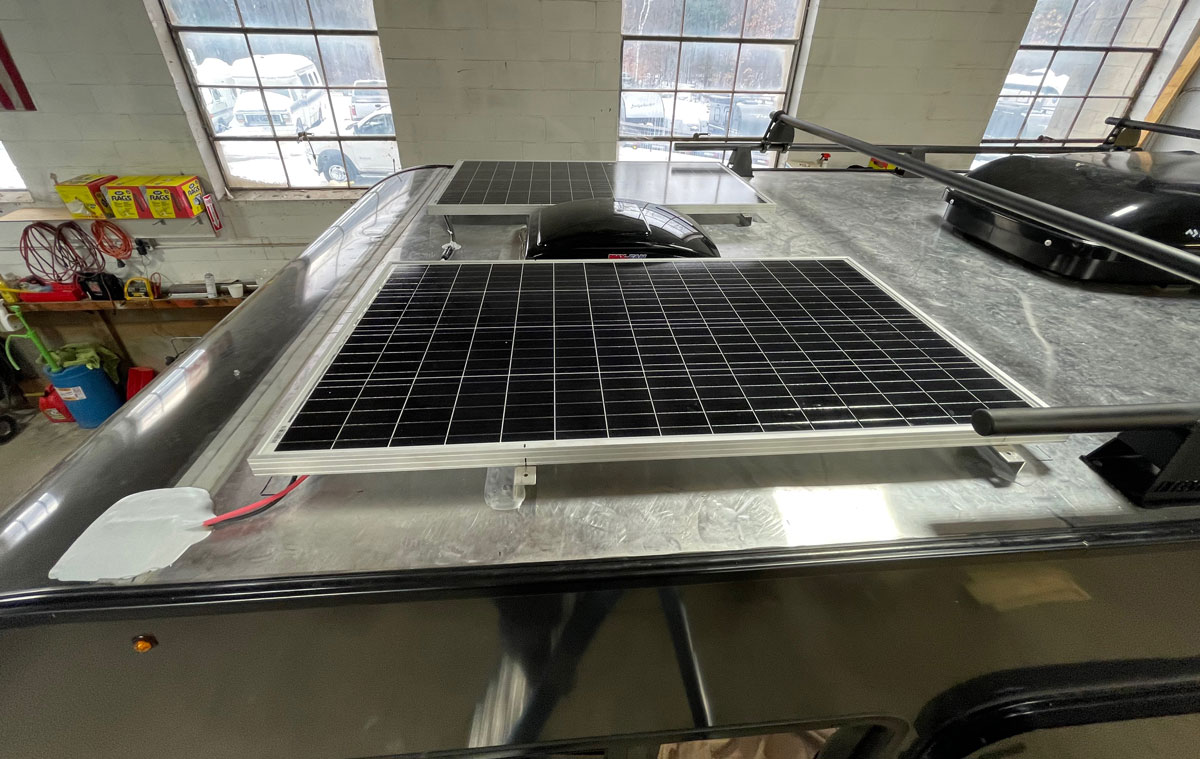
The finished panels are strong and out of the way of anything on the roof, and the roof rack is still usable. The cables have been tied together and routed down to the charge controller.
The finished panels are strong and out of the way of anything on the roof, and the roof rack is still usable. The cables have been tied together and routed down to the charge controller. A Winegard cable cover was used with putty tape below and plenty of roof sealer on top. Cables, fuses and connectors must be secured to the roof, and the attachment points sealed.
The equipment was tough to mount in such a tight space and required Turner to become a ninja to get in there and do all the work.
Once completed, the Victron SmartSolar charge controller is tucked up out of the way and fully functional.
The finished project gives a glimpse into the complexity of the system. The entire water system was removed and re-engineered for the space.
The finished project gives a glimpse into the complexity of the system. The entire water system was removed and re-engineered for the space. The Battle Born LiFePO4 batteries were secured to the floor with a custom mounting system and strap. The rest of the components were mounted above and behind the batteries. The original battery switch was too small to handle the loads, so a new, larger switch was installed. The original converter was removed, turning the bottom of the fuse and breaker panel into an air vent. An additional air vent was cut into the cabinet door.
The inverter/charger is a sizable unit, which required building a mounting frame from the wall stout enough to secure the unit.
The Victron battery monitor is also viewable and controllable via a remote panel, which was installed along with the Samlex inverter/charger remote panel in the galley.
The Victron SmartSolar charge controller and battery monitor can be controlled via the company’s smart device app, which combines displays for each device in the system.
Topside, the clean installation will provide 320 watts of solar power. Along with the 30-amp MPPT charge controller, 2.2kW inverter system and 210-amp-hour lithium battery bank, the panels will deliver more than enough power for the trailer’s intended part-time use as a mobile workshop and sometime guest quarters.
Sources:
Battle Born Battery
(855) 292-2831
battlebornbatteries.com

Samlex
(800) 561-5885
samlexamerica.com

Tim’s RV Inc.
(413) 522-3410
timsrvinc.com

Victron
victronenergy.com